This guide walks you through building a simple Spring Boot application using Spring’s Cache Abstraction backed by Apache Geode as the caching provider for Near Caching.
It is assumed that the reader is familiar with the Spring programming model. No prior knowledge of Spring’s Cache Abstraction nor Apache Geode is required to utilize caching in your Spring Boot applications.
Additionally, this Sample builds on the concepts introduced in both Look-Aside Caching as well as Inline Caching with Spring. It would be helpful to start by reading the guide on Look-Aside Caching followed by the guide on Inline Caching, first, before continuing with this guide.
Let’s begin.
| Refer to the Near Caching section in the Caching with Apache Geode chapter in the reference documentation for more information. |
1. Background
In the first sample on Look-Aside Caching, we paved the foundation for using caching in your Spring Boot applications. Look-Aside Caching makes efficient use of resources (e.g. by reducing contention on the database, or by reducing the number of network calls between Microservices in a distributed system) simply by keeping frequently accessed data in-memory for quick retrieval (reads), which can improve throughput and reduce latency.
In the second sample, we expanded on Look-Aside Caching with Inline Caching and extended the Look-Aside Caching pattern to "read/write-through" to a backend data source (e.g. database). The backend data source is likely the application’s System or Record (SOR), or "source of truth". The write-through operation to the backend data source is synchronous. If the write fails, the cache will not be modified. This ensures a consistent view between the cache and the backend data source, which is an important characteristic of Inline Caching.
It is likely that you will be using a client/server topology when applying either the Look-Aside or the Inline Caching pattern to your Spring Boot application(s). This is especially true when scaling up multiple instances of the same application in a Microservices architecture.
Multiple, Microservice, application instances will need a consistent view of the data, especially in a load-balanced, cloud-native environment where separate client requests, that are part of the same session, could be routed to different application instances. Therefore, application state needs to be maintained independent of the application instances.
| Sticky Sessions can be used to keep conversational state associated with a user’s Session tied to a single application instance. However, use of Sticky Sessions is not resilient to failures, and as such, essentially become an anti-pattern in a cloud context. You should avoid using Stick Sessions in a cloud environment whenever possible. |
To keep up with demand and not overload backend systems, like a database, you would have to scale-up with more Memory, more CPU, more Disk, more Network bandwidth, basically, more of everything, which can be a very costly endeavor as you try to keep up with the every growing demand (which is a good problem to have, but…):
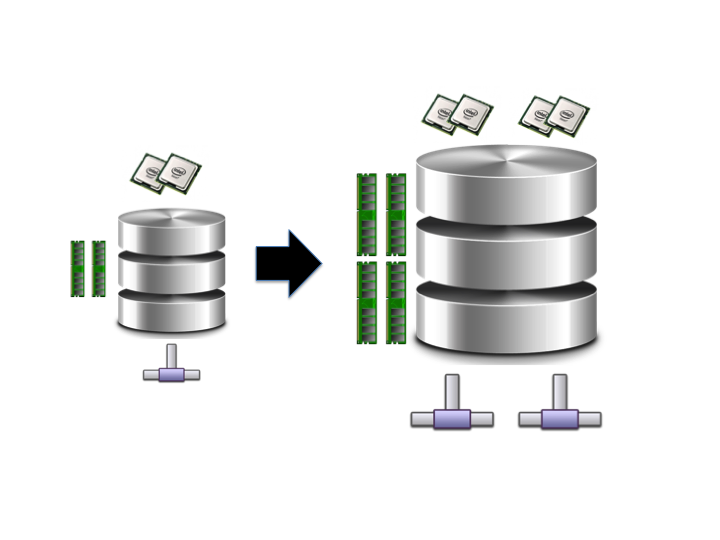
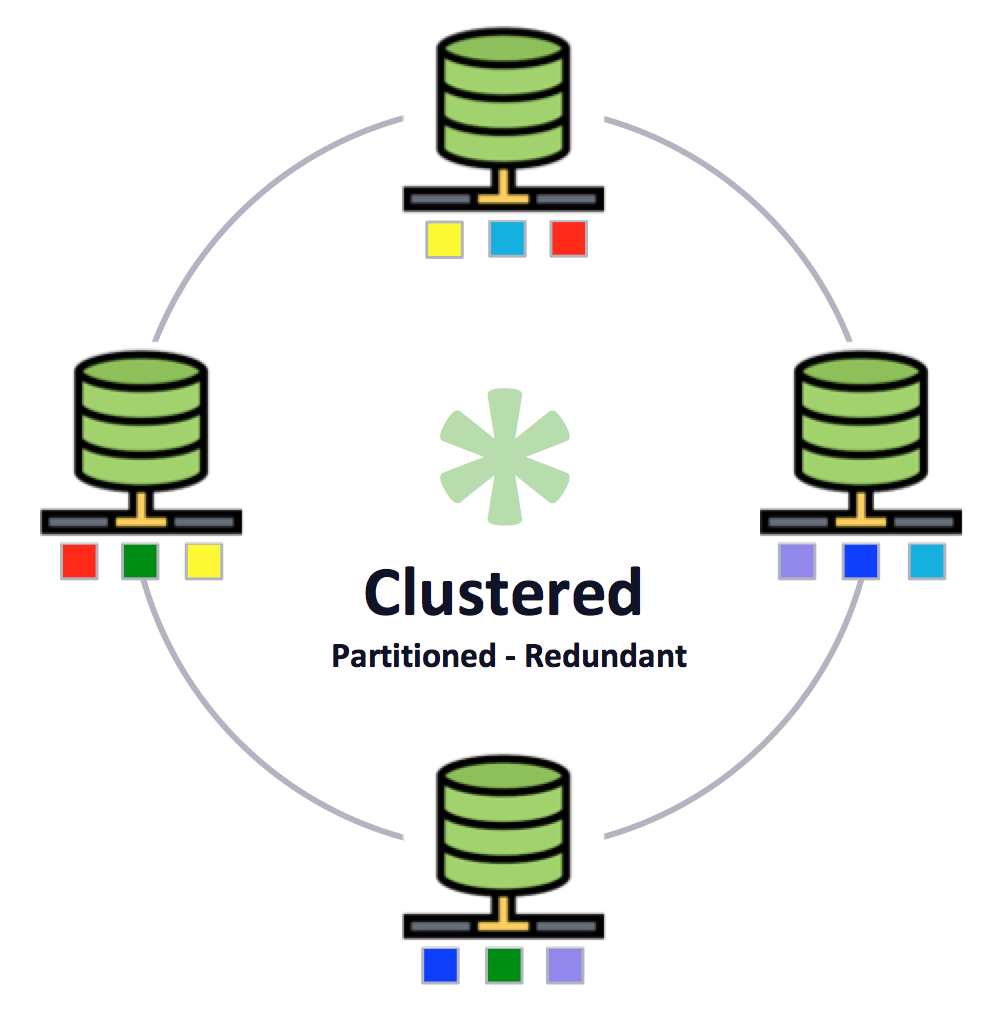
Rather than scale-up, you could scale-out by using a sophisticated caching technology that uniformly partitions data across a cluster of data nodes thereby enabling data access operations to be intelligently routed and evenly distributed across the cluster. In addition, data can be replicated for redundancy and high-availability (HA) purposes making the cluster more resilient to failure. Such a data management technology is ideal in a cloud environment. The cluster acts as a single, logical unit of pooled resources (Memory, CPU, Disk, and Network) but uses a shared-nothing architecture. That is, no node in the cluster can be a single point of failure.
From a Spring Boot application’s point-of-view, it is the client in this application architecture, and multiple application instances can access and share the same data. Indeed, in a Microservices architecture, another application instance must be prepared to take over in a moments notice if any application instance goes down in order to avoid any perceived disruption in the users' service.
However, even in a sophisticated, scale-out, client/server architecture such as the one we described above, it still involves network access, even if only a "single-hop".
So, how might we use caching to further reduce resource consumption (e.g. Network) in our application architecture?
The key lies in keeping data closer to the point of access, i.e. on the client, in our Spring Boot application. In essence, we put more responsibility on our Spring Boot application by increasing the participation of our application in this slightly modified architecture, in a "pro-active" way.
Enter Near Caching.
Basically, in addition to our server-side, peer node, cache topology, the client additionally caches data, but only the data it is "interested" in.
Additionally, rather than the client having to pull for data changes, the data can be pushed to the client when the data changes, based on its "registered interests". Therefore, the client only receives the data it subscribed to, in the first place.
Furthermore, the data change events can be conflated so our client application only sees the latest updates, not every single change that may have occurred due to other application instances modifying the same data, possibly concurrently.
These 3 things in conjunction with each other should have a net effect of reducing noise and network saturation.
Effectively, an applied "Near Caching" software design pattern looks like the following in our application/system architecture:
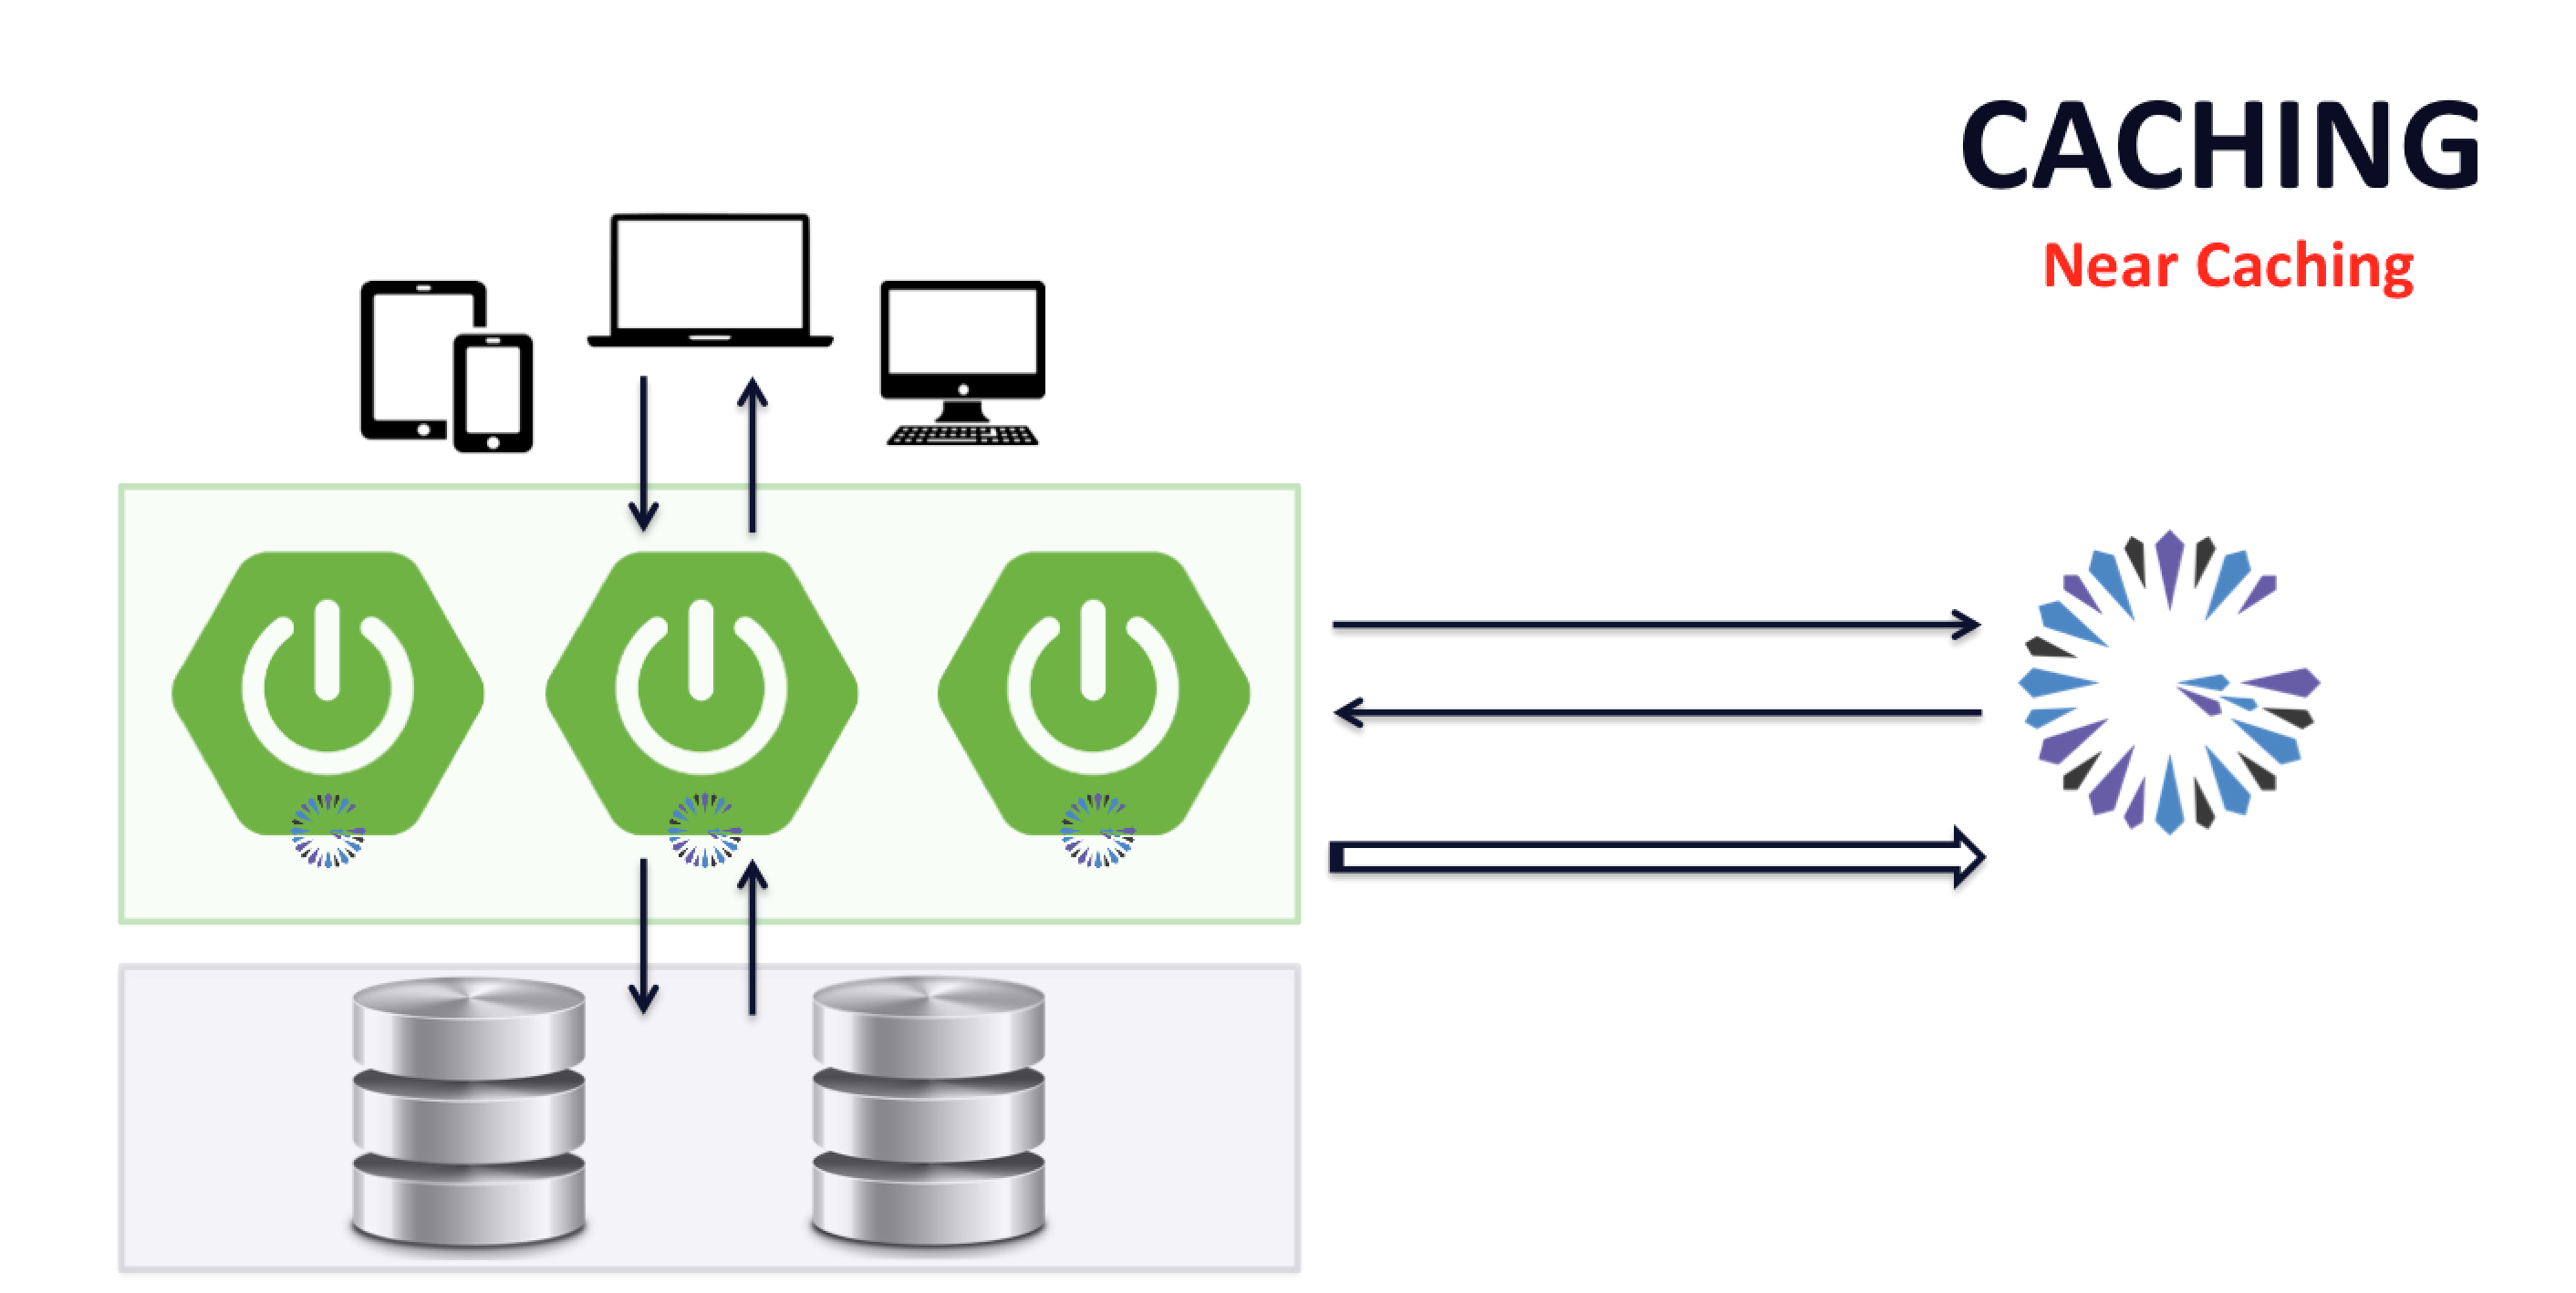
It is now time to see the Near Caching pattern in action.
2. Example
For our example, we develop a Yellow Pages application with the ability to lookup a person by name and retrieve the person’s contact information, such as an email address and phone number.
2.1. Server-side Configuration
First, we will configure and bootstrap an Apache Geode, peer CacheServer node using Spring Boot:
CacheServer@SpringBootApplication
@CacheServerApplication
@SuppressWarnings("unused")
public class BootGeodeNearCachingCacheServerApplication {
public static void main(String[] args) {
new SpringApplicationBuilder(BootGeodeNearCachingCacheServerApplication.class)
.web(WebApplicationType.NONE)
.build()
.run(args);
}
@Bean
ApplicationRunner runner(@Qualifier("YellowPages") Region<String, Person> yellowPages) {
return args -> {
assertThat(yellowPages).isNotNull();
assertThat(yellowPages.getName()).isEqualTo("YellowPages");
assertThat(yellowPages.getAttributes()).isNotNull();
assertThat(yellowPages.getAttributes().getDataPolicy()).isEqualTo(DataPolicy.REPLICATE);
assertThat(yellowPages.getAttributes().getEnableSubscriptionConflation()).isTrue();
};
}
	@Configuration
	static class GeodeConfiguration {

		@Bean("YellowPages")
		public ReplicatedRegionFactoryBean<String, Person> yellowPagesRegion(GemFireCache gemfireCache,
				@Qualifier("YellowPagesAttributes") RegionAttributes<String, Person> exampleAttributes) {

			ReplicatedRegionFactoryBean<String, Person> yellowPagesRegion =
				new ReplicatedRegionFactoryBean<>();

			yellowPagesRegion.setAttributes(exampleAttributes);
			yellowPagesRegion.setCache(gemfireCache);
			yellowPagesRegion.setClose(false);
			yellowPagesRegion.setPersistent(false);

			return yellowPagesRegion;
		}

		@Bean("YellowPagesAttributes")
		public RegionAttributesFactoryBean<String, Person> exampleRegionAttributes() {

			RegionAttributesFactoryBean<String, Person> yellowPagesRegionAttributes =
				new RegionAttributesFactoryBean<>();

			yellowPagesRegionAttributes.setEnableSubscriptionConflation(true);

			return yellowPagesRegionAttributes;
		}
	}
@Configuration
@EnableLocator
@EnableManager(start = true)
@Profile("locator-manager")
static class LocatorManagerConfiguration { }
}This class consists of a Spring @Configuration class to configure the necessary server-side Region
(i.e "YellowPages") used to store a person’s contact information:
@Configuration
static class GeodeConfiguration {
@Bean("YellowPages")
public ReplicatedRegionFactoryBean<String, Person> yellowPagesRegion(GemFireCache gemfireCache,
@Qualifier("YellowPagesAttributes") RegionAttributes<String, Person> exampleAttributes) {
ReplicatedRegionFactoryBean<String, Person> yellowPagesRegion =
new ReplicatedRegionFactoryBean<>();
yellowPagesRegion.setAttributes(exampleAttributes);
yellowPagesRegion.setCache(gemfireCache);
yellowPagesRegion.setClose(false);
yellowPagesRegion.setPersistent(false);
return yellowPagesRegion;
}
@Bean("YellowPagesAttributes")
public RegionAttributesFactoryBean<String, Person> exampleRegionAttributes() {
RegionAttributesFactoryBean<String, Person> yellowPagesRegionAttributes =
new RegionAttributesFactoryBean<>();
yellowPagesRegionAttributes.setEnableSubscriptionConflation(true);
return yellowPagesRegionAttributes;
}
}The pertinent bit of this configuration is the subscription conflation on the "YellowPages" Region. This setting ensures that only the latest information is sent to the clients. It is possible that multiple clients maybe accessing and updating a person’s contact information. Therefore, we want to make sure all the clients have, and are only sent, the latest information, which therefore reduces traffic across our network.
We include a Spring Boot ApplicationRunner with a few assertions to make sure the server is configured properly
on startup:
	@Bean
	ApplicationRunner runner(@Qualifier("YellowPages") Region<String, Person> yellowPages) {

		return args -> {

			assertThat(yellowPages).isNotNull();
			assertThat(yellowPages.getName()).isEqualTo("YellowPages");
			assertThat(yellowPages.getAttributes()).isNotNull();
			assertThat(yellowPages.getAttributes().getDataPolicy()).isEqualTo(DataPolicy.REPLICATE);
			assertThat(yellowPages.getAttributes().getEnableSubscriptionConflation()).isTrue();

		};
	}
And finally, we include a Spring @Profile to enable an embedded Locator and Manager, allowing us to connect to our
Spring Boot, Apache Geode CacheServer application using Gfsh (Geode Shell). Enabling the embedded Locator
and Manager are not necessary when starting the server or to run our application, but can be useful when debugging.
	@Configuration
	@EnableLocator
	@EnableManager(start = true)
	@Profile("locator-manager")
static class LocatorManagerConfiguration { }| For more information on configurating and bootstrapping a small cluster of Apache Geode servers using Spring Boot, see Running an Apache Geode cluster using Spring Boot. |
2.2. Client-side Configuration
Next, we will create and start 2 instances of our Spring Boot, Apache Geode ClientCache application, which will use
the Look-Aside Caching pattern enhanced with_Near Caching_.
We start with the @SpringBootApplication main class:
ClientCache@SpringBootApplication
public class BootGeodeNearCachingClientCacheApplication {
public static void main(String[] args) {
SpringApplication.run(BootGeodeNearCachingClientCacheApplication.class, args);
}
@Bean
public ApplicationRunner runner(@Qualifier("YellowPages") Region<String, Person> yellowPages) {
return args -> {
assertThat(yellowPages).isNotNull();
assertThat(yellowPages.getName()).isEqualTo("YellowPages");
assertThat(yellowPages.getInterestListRegex()).containsAnyOf(".*");
assertThat(yellowPages.getAttributes()).isNotNull();
assertThat(yellowPages.getAttributes().getDataPolicy()).isEqualTo(DataPolicy.NORMAL);
assertThat(yellowPages.getAttributes().getPoolName()).isEqualTo("DEFAULT");
Pool defaultPool = PoolManager.find("DEFAULT");
assertThat(defaultPool).isNotNull();
assertThat(defaultPool.getSubscriptionEnabled()).isTrue();
};
}
}Essentially, the main class just serves to bootstrap our application configuration and components. Additionally, we
include some assertions in a Spring Boot ApplicationRunner bean to ensure our client configuration is correct.
Our configuration appears as follows:
@Configuration
//@EnableCachingDefinedRegions(clientRegionShortcut = ClientRegionShortcut.CACHING_PROXY)
public class GeodeConfiguration {

	// TODO: Replace with the SDG `@EnableCachingDefineRegions annotation declared above (and currently commented out,
	//  because...) once DATAGEODE-219 is resolved. :(
	@Bean("YellowPages")
	public ClientRegionFactoryBean<Object, Object> yellowPagesRegion(GemFireCache gemfireCache) {

		ClientRegionFactoryBean<Object, Object> clientRegion = new ClientRegionFactoryBean<>();

		clientRegion.setCache(gemfireCache);
		clientRegion.setClose(false);
		clientRegion.setShortcut(ClientRegionShortcut.CACHING_PROXY);

		clientRegion.setRegionConfigurers(
			interestRegisteringRegionConfigurer(),
			subscriptionCacheListenerRegionConfigurer()
		);

		return clientRegion;
	}

	@Bean
	RegionConfigurer interestRegisteringRegionConfigurer() {

		return new RegionConfigurer() {

			@Override
			@SuppressWarnings("unchecked")
			public void configure(String beanName, ClientRegionFactoryBean<?, ?> clientRegion) {

				Interest interest = new RegexInterest(".*", InterestResultPolicy.NONE,
					false, true);

				clientRegion.setInterests(ArrayUtils.asArray(interest));
			}
		};
	}

	@Bean
	RegionConfigurer subscriptionCacheListenerRegionConfigurer() {

		return new RegionConfigurer() {

			@Override
			@SuppressWarnings("unchecked")
			public void configure(String beanName, ClientRegionFactoryBean<?, ?> clientRegion) {

				CacheListener subscriptionCacheListener =
						new AbstractCommonEventProcessingCacheListener() {

					@Override
					protected void processEntryEvent(EntryEvent event, EntryEventType eventType) {

						if (event.isOriginRemote()) {
							System.err.printf("[%1$s] EntryEvent for [%2$s] with value [%3$s]%n",
								event.getKey(), event.getOperation(), event.getNewValue());
						}
					}
				};

				clientRegion.setCacheListeners(ArrayUtils.asArray(subscriptionCacheListener));
			}
		};
	}
}
First, we note the "YellowPages" client Region, which must match the server-side Region by name:
CACHING_PROXY Region @Bean("YellowPages")
public ClientRegionFactoryBean<Object, Object> yellowPagesRegion(GemFireCache gemfireCache) {
ClientRegionFactoryBean<Object, Object> clientRegion = new ClientRegionFactoryBean<>();
clientRegion.setCache(gemfireCache);
clientRegion.setClose(false);
clientRegion.setShortcut(ClientRegionShortcut.CACHING_PROXY);
clientRegion.setRegionConfigurers(
interestRegisteringRegionConfigurer(),
subscriptionCacheListenerRegionConfigurer()
);
return clientRegion;
}Most importantly, the client Region’s data policy is set to ClientRegionShortcut.CACHING_PROXY:
clientRegion.setShortcut(ClientRegionShortcut.CACHING_PROXY);This enables a local cache (a.k.a. "Near Cache") on the client in our Spring Boot application.
The default ClientRegionShortcut is PROXY, which means there is no local cache. With a client PROXY Region,
all cache operations are forwarded to the server.
|
Equally important is the "interest registration" for all KEYS:
	@Bean
	RegionConfigurer interestRegisteringRegionConfigurer() {

		return new RegionConfigurer() {

			@Override
			@SuppressWarnings("unchecked")
			public void configure(String beanName, ClientRegionFactoryBean<?, ?> clientRegion) {

				Interest interest = new RegexInterest(".*", InterestResultPolicy.NONE,
					false, true);

				clientRegion.setInterests(ArrayUtils.asArray(interest));
			}
		};
	}
The first parameter is a Regular Expression (i.e. .*) matching the KEYS this client is interested in
receiving updates for, which in this case, is all KEYS.
The other parameters to the RegexInterest constructor includes the InterestResultPolicy, which determines whether
the client should get an initial push of the data (KEYS/VALUES) matching the regex when the client registers interest.
The durable boolean parameter sets whether the client subscription queue on the server should be "durable",
i.e. maintained when the client is not present. If the client goes down, for whatever reason, the server will continue
to maintain the client’s subscription queue with events matching the regex up to a specified timeout (configurable on
the server). If the client comes back online before the configured timeout, the events in the queue will be replayed
back to the client. If the client does not reconnect before the configured timeout, the queue is discarded.
Durability can be useful for clients that need to receive events for data it missed while the client was offline in the order the events occurred. Of course, keep in mind that durable clients use up system resources on the server (e.g. memory).
| To learn more about durable subscriptions, see the Apache Geode documentation |
The receiveValues boolean parameter determines whether the client will receive both KEYS and VALUES when an event
matching the regex occurs, or whether the client will only receive the KEYS for the VALUES that changed.
Configuring the client to only receive KEYS minimizes the amount of data sent over the network when the client only
wants to (perhaps) "invalidate" the keyed entriess, e.g. by using
Region.localInvalidate(key:Object).
In that way, the memory footprint of the clients can also be maintained and the client will only lazily fetch the value when needed again.
The RegexInterest constructor corresponds to
Region.registerInterestRegex(:String, :InterestResultPolicy, :boolean, :boolean)
|
There is one final bit of configuration on the client-side that we need, and that is to enable subscriptions. We do so
by setting the appropriate Spring Data for Apache Geode (SDG) property
(e.g. spring.data.gemfire.pool.subscriptions-enabled) in application.properties, like so:
application.properties# Spring Boot application.properties for the Apache Geode ClientCache application
spring.application.name=ClientApplication
spring.data.gemfire.pool.subscription-enabled=trueAdditionally, each client (i.e. "one", "two" and so on, for however many clients we want to start) each have their own
client specific application.properties, for example:
application.properties# Spring Boot application.properties for the Apache Geode ClientCache One application.
server.port=8181
spring.application.name=ClientApplicationOneWe set the spring.application.name property to help identify the client and additionally set the server.port
property to a unique value since our Spring Boot application is a Web application.
Now we can discuss the components of the application.
2.3. Application Model
We start by modeling our Person and a person’s contact information, an email address and phone number:
Person class@Getter
@EqualsAndHashCode(of = "name")
@ToString(of = { "name", "email", "phoneNumber" })
@RequiredArgsConstructor(staticName = "newPerson")
public class Person {
@NonNull
private String name;
private String email;
private String phoneNumber;
public Person withEmail(String email) {
this.email = email;
return this;
}
public Person withPhoneNumber(String phoneNumber) {
this.phoneNumber = phoneNumber;
return this;
}
}The class uses Project Lombok to simplify the implementation. Otherwise, the Person class
is pretty self-explanatory and there is nothing else special about the class.
2.4. Application Service
Next, we have our YellowPagesService class that implements our Yellow Pages application logic. This class also uses
Spring’s Caching annotations to demarcate service methods that will apply "Look-Aside" with "Near Caching"
semantics:
YellowPagesService class@Service
public class YellowPagesService extends AbstractCacheableService {
@Cacheable("YellowPages")
public Person find(String name) {
this.cacheMiss.set(true);
Person person = Person.newPerson(name)
.withEmail(EmailGenerator.generate(name, null))
.withPhoneNumber(PhoneNumberGenerator.generate(null));
simulateLatency();
return person;
}
@CachePut(cacheNames = "YellowPages", key = "#person.name")
public Person save(Person person, String email, String phoneNumber) {
if (StringUtils.hasText(email)) {
person.withEmail(email);
}
if (StringUtils.hasText(phoneNumber)) {
person.withPhoneNumber(phoneNumber);
}
return person;
}
@CacheEvict(cacheNames = "YellowPages")
public boolean evict(String name) {
return true;
}
}Essentially, we have a @Cacheable, find(:String) service method that tries to lookup a Person by name
from the cache. If a Person by name is found, then the Person is simply returned, otherwise, the find(:String)
service method is invoked and a Person with the given name and generated contact information is created and cached.
Technically, our find(:String) service method should "idempotent", but for example purposes,
we combine READ with CREATE.
Our service class additionally contains operations to update (i.e. @CachePut) a Person’s contact information
as well as evict (i.e. @CacheEvict) the Person’s contact information from the cache.
2.5. Application Controller
To make the operations of our Yellow Pages application accessible, we expose REST-ful Web service endpoints using a
Spring Web MVC @RestController class:
YellowPagesController class@RestController
public class YellowPagesController {
private static final String HTML =
"<html><title>Yellow Pages</title><body bgcolor=\"#F5FC1D\" text=\"black\"><h1>%s</h1><body><html>";
@Autowired
private YellowPagesService yellowPages;
@GetMapping("/")
public String home() {
return format("Near Caching Example");
}
@GetMapping("/ping")
public String ping() {
return format("PONG");
}
@GetMapping("/yellow-pages/{name}")
public String find(@PathVariable("name") String name) {
long t0 = System.currentTimeMillis();
Person person = this.yellowPages.find(name);
return format(String.format("{ person: %s, cacheMiss: %s, latency: %d ms }",
person, this.yellowPages.isCacheMiss(), (System.currentTimeMillis() - t0)));
}
@GetMapping("/yellow-pages/{name}/update")
public String update(@PathVariable("name") String name,
@RequestParam(name = "email", required = false) String email,
@RequestParam(name = "phoneNumber", required = false) String phoneNumber) {
Person person = this.yellowPages.save(this.yellowPages.find(name), email, phoneNumber);
return format(String.format("{ person: %s }", person));
}
@GetMapping("/yellow-pages/{name}/evict")
public String evict(@PathVariable("name") String name) {
this.yellowPages.evict(name);
return format(String.format("Evicted %s", name));
}
private String format(String value) {
return String.format(HTML, value);
}
}Basically, we have REST-based Web service endpoints matching our YellowPagesService class service methods.
Unless you install a Web browser plugin, a Web browser will only allow HTTP GET requests. Therefore, for
convenience purposes only, our application provides REST API endpoints (e.g. /yellow-pages/JonDoe/update?email=[email protected])
that allows the user to modify the data. No properly constructed REST-ful application should do this.
|
Now we are ready to run our example application and observe the effects of Near Caching.
3. Run the Example
3.1. Run the Server
First, we must start our Spring Boot application that configures and bootstraps the Apache Geode CacheServer.
If you want to connect to the server with Gfsh, you must have a distribution of Apache Geode installed on your
system and you must enable the "locator-manager" profile. The "locator-manager" profile can be enabled using the
-Dspring.profiles.active=server,locator-manager Java System property. Additionally, the server profile has been
enabled as well.
|
When running the BootGeodeNearCachingCacheServerApplication class, you should see output similar to the following:
  .   ____          _            __ _ _
 /\\ / ___'_ __ _ _(_)_ __  __ _ \ \ \ \
( ( )\___ | '_ | '_| | '_ \/ _` | \ \ \ \
 \\/  ___)| |_)| | | | | || (_| |  ) ) ) )
  '  |____| .__|_| |_|_| |_\__, | / / / /
 =========|_|==============|___/=/_/_/_/
 :: Spring Boot ::  (v2.1.7.BUILD-SNAPSHOT)

[info 2019/08/12 13:02:17.328 PDT <main> tid=0x1] Starting BootGeodeNearCachingCacheServerApplication on jblum-mbpro-2.local with PID 13725...

[info 2019/08/12 13:02:17.329 PDT <main> tid=0x1] The following profiles are active: locator-manager,server

...

// Then you should see a bunch of {apache-geode-name} log output, ending with something like...

...

[info 2019/08/12 13:02:20.975 PDT <main> tid=0x1] CacheServer Configuration:   port=40404 max-connections=800 max-threads=0 notify-by-subscription=true socket-buffer-size=32768 maximum-time-between-pings=60000 maximum-message-count=230000 message-time-to-live=180 eviction-policy=none capacity=1 overflow directory=. groups=[] loadProbe=ConnectionCountProbe loadPollInterval=5000 tcpNoDelay=true

[info 2019/08/12 13:02:20.996 PDT <main> tid=0x1] Started BootGeodeNearCachingCacheServerApplication in 4.216 seconds (JVM running for 5.49)
The Spring Boot Gradle plugin has been configured to run the BootGeodeNearCachingClientCacheApplication class,
not the server.
|
Now that the server is running, if you installed Apache Geode on your system and set the $PATH to include $GEODE/bin,
then you can run Gfsh and connect to the server:
$ echo $GEODE
/Users/jblum/pivdev/apache-geode-1.6.0

$ gfsh
    _________________________     __
   / _____/ ______/ ______/ /____/ /
  / /  __/ /___  /_____  / _____  /
 / /__/ / ____/  _____/ / /    / /
/______/_/      /______/_/    /_/    1.6.0

Monitor and Manage Apache Geode

gfsh>connect
Connecting to Locator at [host=localhost, port=10334] ..
Connecting to Manager at [host=10.99.199.24, port=1099] ..
Successfully connected to: [host=10.99.199.24, port=1099]


gfsh>list members
      Name        | Id
----------------- | ----------------------------------------------------------------
YellowPagesServer | 10.99.199.24(YellowPagesServer:13725)<ec><v0>:1024 [Coordinator]


gfsh>describe member --name=YellowPagesServer
Name        : YellowPagesServer
Id          : 10.99.199.24(YellowPagesServer:13725)<ec><v0>:1024
Host        : 10.99.199.24
Regions     : YellowPages
PID         : 13725
Groups      :
Used Heap   : 75M
Max Heap    : 3641M
Working Dir : /Users/jblum/pivdev/spring-boot-data-geode
Log file    : /Users/jblum/pivdev/spring-boot-data-geode
Locators    : localhost[10334]

Cache Server Information
Server Bind              :
Server Port              : 40404
Running                  : true
Client Connections       : 0


gfsh>list regions
List of regions
---------------
YellowPages


gfsh>describe region --name=/YellowPages
..........................................................
Name            : YellowPages
Data Policy     : replicate
Hosting Members : YellowPagesServer

Non-Default Attributes Shared By Hosting Members

 Type  |              Name              | Value
------ | ------------------------------ | ---------
Region | data-policy                    | REPLICATE
       | enable-subscription-conflation | true
       | size                           | 0


gfsh>
3.2. Run the Client Application
Now it is time to start 2 instances of the Spring Boot, Apache Geode ClientCache application hosting
our Yellow Pages service.
Make sure to enable the client generic profile in addition to 1 of the client-specific profiles,
e.g. "client-one", like so: -Dspring.profiles.active=client,client-one. To run a second application instance,
change the profile from client-one to client-two.
|
Alternatively, rather than using client instance specific application.properties, you could set the
spring.application.name and server.port properties using JVM System properties on the command-line, or in your IDE
run profile as so: -Dspring.application.name=ClientApplicationTwo -Dserver.port=8282. Furthermore, you could set the
server.port property to the ephemeral port and let the system determine an available port for the embedded Web Server
(i.e. Jetty). You must make note of the port number when the application starts up so that you can access the Webapp
from your Web browser. Look for a line containing: [info 2019/08/12 13:14:19.755 PDT <main> tid=0x1] Tomcat initialized with port(s): 8181 (http).
|
Once both application instances are running, you can access the Webapp from your Web browser at the following URL:
http::/localhost:8181/.

To switch between the 2 client app instances, it is useful to have 2 Web browser tabs or windows open
accessing each Web Server port (e.g. 8181 and 8282).
|
Next, let’s create some data using client app instance one.

This operation takes a bit of (simulated) time (2167 milliseconds (ms), or ~2 seconds (s)) since "Jon Doe"
did not previously exist in the cache, which can be noted by the cacheMiss value of true. "JonDoe’s"
email address and phone number were randomly generated.
If you hit the refresh button in your Web browser, the latency significantly drops (~0-1|2 ms) because the value
is being pulled from the "local" cache (i.e. "Near Cache) on the client.
Now, in our second client app instance, if we access the same person, "JonDoe", then we see the following:

Notice that cacheMiss is false and the latency is only 1 ms. That is because the 2nd client app instance
was already pushed the data from the server based on the client’s interest registration. This is also apparent
in the log output for the client application instances:
[CREATE] EntryEvent for [JonDoe] with value [Person(name=JonDoe, [email protected], phoneNumber=319-468-4802)]To see the effects of updating a cache entry from a client app instance, let’s update "JonDoe" from the 2nd client app instance by changing his email address and phone number:

Before we refresh the Web browser tab or window pointing to our 1st client app instance, if you look at the log output for the 1st client app instance, you will see:
[UPDATE] EntryEvent for [JonDoe] with value [Person(name=JonDoe, [email protected], phoneNumber=206-555-1234)]Then, switch back to the 1st client app instance Web browser tab or window and hit the refresh button, or navigate
to the URL, http://localhost:8181/yellow-pages/JonDoe, and you should see the updated contact information:

You can repeat this exercise as often as you like.
Now, if you describe the "YellowPages" Region in Gfsh, you will see that there are cache entries:
describe regiongfsh>describe region --name=/YellowPages
..........................................................
Name : YellowPages
Data Policy : replicate
Hosting Members : YellowPagesServer
Non-Default Attributes Shared By Hosting Members
Type | Name | Value
------ | ------------------------------ | ---------
Region | data-policy | REPLICATE
| enable-subscription-conflation | true
| size | 3You can even query the data using OQL:
gfsh>query --query="SELECT person.name, person.email, person.phoneNumber FROM /YellowPages person"
Result : true
Limit  : 100
Rows   : 3

 name   |       email        | phoneNumber
------- | ------------------ | ------------
JaneDoe | [email protected] | 608-826-7621
JonDoe  | [email protected]  | 206-555-1234
PieDoe  | [email protected] | 406-413-6170
Presto! You have now just created a Spring Boot application using the Look-Aside Caching pattern enhanced with Near Caching.
4. Summary
In this guide, we learned how to create a Spring Boot application using Spring’s Cache Abstraction backed by Apache Geode using the Look-Aside Caching pattern in our application service methods. We further enhanced the caching ability of our application with Near Caching.
With Near Caching, we have the added ability to further improve on the throughput and latency of our application as well as make even more efficient use of system resources. Near Caching gives us:
-
A local, client-side cache for quick lookup, transforming our client into an efficient, light-weight data container for data that is relevant to the client, thereby reducing the load on our servers.
-
By enabling subscriptions and registering interests, we can have data intelligently pushed to us (rather than simply pulled when needed) based on the data the client is specifically interested in, or "subscribed" to.
-
Then, we saw that we can conflate subscription events on the server-side so clients only receive the latest updates to the data that will be sent to the client based on the registered interests.
-
With 1 more step, it is simple to make the subscription queues maintained on the servers for each client "durable" so if the client is offline, it does not miss any events, if necessary.
-
Furthermore, the client subscriptions queues on the servers can be made both redundant and persistent for high-availability (HA) and resiliency purposes.
There is a much more that can be achieved with a Near Cache, so we leave it as an exercise for the reader to explore and experiment more. Hopefully this has peaked your curiosity and shown you a few of the benefits of applying the Near Caching pattern to your Spring Boot applications.