© 2008-2019 The original authors.
| Copies of this document may be made for your own use and for distribution to others, provided that you do not charge any fee for such copies and further provided that each copy contains this Copyright Notice, whether distributed in print or electronically. |
- Preface
- 1. Learning Spring
- 2. Learning NoSQL and Document databases
- 3. Requirements
- 4. Additional Help Resources
- 5. Following Development
- 6. New & Noteworthy
- 7. Dependencies
- 8. Working with Spring Data Repositories
- Reference Documentation
- 9. Introduction
- 10. MongoDB support
- 10.1. Getting Started
- 10.2. Examples Repository
- 10.3. Connecting to MongoDB with Spring
- 10.3.1. Registering a Mongo Instance by using Java-based Metadata
- 10.3.2. Registering a Mongo Instance by Using XML-based Metadata
- 10.3.3. The MongoDbFactory Interface
- 10.3.4. Registering a
MongoDbFactoryInstance by Using Java-based Metadata - 10.3.5. Registering a
MongoDbFactoryInstance by Using XML-based Metadata
- 10.4. Introduction to
MongoTemplate - 10.5. Saving, Updating, and Removing Documents
- 10.5.1. How the
_idField is Handled in the Mapping Layer - 10.5.2. Type Mapping
- 10.5.3. Methods for Saving and Inserting Documents
- 10.5.4. Updating Documents in a Collection
- 10.5.5. “Upserting” Documents in a Collection
- 10.5.6. Finding and Upserting Documents in a Collection
- 10.5.7. Finding and Replacing Documents
- 10.5.8. Methods for Removing Documents
- 10.5.9. Optimistic Locking
- 10.5.1. How the
- 10.6. Querying Documents
- 10.7. Query by Example
- 10.8. Map-Reduce Operations
- 10.9. Script Operations
- 10.10. Group Operations
- 10.11. Aggregation Framework Support
- 10.12. Overriding Default Mapping with Custom Converters
- 10.13. Index and Collection Management
- 10.14. Executing Commands
- 10.15. Lifecycle Events
- 10.16. Exception Translation
- 10.17. Execution Callbacks
- 10.18. GridFS Support
- 10.19. Infinite Streams with Tailable Cursors
- 10.20. Change Streams
- 11. MongoDB Sessions
- 12. MongoDB Transactions
- 13. Reactive MongoDB support
- 14. MongoDB Repositories
- 14.1. Introduction
- 14.2. Usage
- 14.3. Query Methods
- 14.3.1. Repository Delete Queries
- 14.3.2. Geo-spatial Repository Queries
- 14.3.3. MongoDB JSON-based Query Methods and Field Restriction
- 14.3.4. Sorting Query Method results
- 14.3.5. JSON-based Queries with SpEL Expressions
- 14.3.6. Type-safe Query Methods
- 14.3.7. Full-text Search Queries
- 14.3.8. Projections
- 14.4. CDI Integration
- 15. Reactive MongoDB repositories
- 16. Auditing
- 17. Mapping
- 18. Cross Store Support
- 19. JMX support
- 20. MongoDB 3.0 Support
- Appendix
Preface
The Spring Data MongoDB project applies core Spring concepts to the development of solutions that use the MongoDB document style data store. We provide a “template” as a high-level abstraction for storing and querying documents. You may notice similarities to the JDBC support provided by the Spring Framework.
This document is the reference guide for Spring Data - MongoDB Support. It explains MongoDB module concepts and semantics and syntax for various store namespaces.
This section provides some basic introduction to Spring and Document databases. The rest of the document refers only to Spring Data MongoDB features and assumes the user is familiar with MongoDB and Spring concepts.
1. Learning Spring
Spring Data uses Spring framework’s core functionality, including:
While you need not know the Spring APIs, understanding the concepts behind them is important. At a minimum, the idea behind Inversion of Control (IoC) should be familiar, and you should be familiar with whatever IoC container you choose to use.
The core functionality of the MongoDB support can be used directly, with no need to invoke the IoC services of the Spring Container. This is much like JdbcTemplate, which can be used "'standalone'" without any other services of the Spring container. To leverage all the features of Spring Data MongoDB, such as the repository support, you need to configure some parts of the library to use Spring.
To learn more about Spring, you can refer to the comprehensive documentation that explains the Spring Framework in detail. There are a lot of articles, blog entries, and books on the subject. See the Spring framework home page for more information.
2. Learning NoSQL and Document databases
NoSQL stores have taken the storage world by storm. It is a vast domain with a plethora of solutions, terms, and patterns (to make things worse, even the term itself has multiple meanings). While some of the principles are common, you must be familiar with MongoDB to some degree. The best way to get acquainted is to read the documentation and follow the examples. It usually does not take more then 5-10 minutes to go through them and, especially if you are coming from an RDMBS-only background, these exercises can be an eye opener.
The starting point for learning about MongoDB is www.mongodb.org. Here is a list of other useful resources:
-
The manual introduces MongoDB and contains links to getting started guides, reference documentation, and tutorials.
-
The online shell provides a convenient way to interact with a MongoDB instance in combination with the online tutorial.
-
MongoDB Java Language Center.
-
Several books you can purchase.
-
Karl Seguin’s online book: The Little MongoDB Book.
3. Requirements
The Spring Data MongoDB 2.x binaries require JDK level 8.0 and above and Spring Framework 5.1.16.RELEASE and above.
In terms of document stores, you need at least version 2.6 of MongoDB.
4. Additional Help Resources
Learning a new framework is not always straightforward. In this section, we try to provide what we think is an easy-to-follow guide for starting with the Spring Data MongoDB module. However, if you encounter issues or you need advice, feel free to use one of the following links:
- Community Forum
-
Spring Data on Stack Overflow is a tag for all Spring Data (not just Document) users to share information and help each other. Note that registration is needed only for posting.
- Professional Support
-
Professional, from-the-source support, with guaranteed response time, is available from Pivotal Sofware, Inc., the company behind Spring Data and Spring.
5. Following Development
For information on the Spring Data Mongo source code repository, nightly builds, and snapshot artifacts, see the Spring Data Mongo homepage. You can help make Spring Data best serve the needs of the Spring community by interacting with developers through the Community on Stack Overflow. To follow developer activity, look for the mailing list information on the Spring Data Mongo homepage. If you encounter a bug or want to suggest an improvement, please create a ticket on the Spring Data issue tracker. To stay up to date with the latest news and announcements in the Spring eco system, subscribe to the Spring Community Portal. You can also follow the Spring blog or the project team on Twitter (SpringData).
6. New & Noteworthy
6.1. What’s New in Spring Data MongoDB 2.1
-
Cursor-based aggregation execution.
-
Distinct queries for imperative and reactive Template APIs.
-
Support for Map/Reduce through the reactive Template API.
-
$jsonSchemasupport for queries and collection creation. -
Change Stream support for imperative and reactive drivers.
-
Tailable cursors for imperative driver.
-
MongoDB 3.6 Session support for the imperative and reactive Template APIs.
-
MongoDB 4.0 Transaction support and a MongoDB-specific transaction manager implementation.
-
Default sort specifications for repository query methods using
@Query(sort=…). -
findAndReplace support through imperative and reactive Template APIs.
-
Deprecation of
dropDupsin@Indexedand@CompoundIndexas MongoDB server 3.0 and newer do not supportdropDupsanymore.
6.2. What’s New in Spring Data MongoDB 2.0
-
Upgrade to Java 8.
-
Usage of the
DocumentAPI, instead ofDBObject. -
Tailable Cursor queries.
-
Support for aggregation result streaming by using Java 8
Stream. -
Fluent Collection API for CRUD and aggregation operations.
-
Kotlin extensions for Template and Collection APIs.
-
Integration of collations for collection and index creation and query operations.
-
Query-by-Example support without type matching.
-
Support for isolation
Updateoperations. -
Tooling support for null-safety by using Spring’s
@NonNullApiand@Nullableannotations. -
Deprecated cross-store support and removed Log4j appender.
6.3. What’s New in Spring Data MongoDB 1.10
-
Compatible with MongoDB Server 3.4 and the MongoDB Java Driver 3.4.
-
New annotations for
@CountQuery,@DeleteQuery, and@ExistsQuery. -
Extended support for MongoDB 3.2 and MongoDB 3.4 aggregation operators (see Supported Aggregation Operations).
-
Support for partial filter expression when creating indexes.
-
Publishing lifecycle events when loading or converting
DBRefinstances. -
Added any-match mode for Query By Example.
-
Support for
$caseSensitiveand$diacriticSensitivetext search. -
Support for GeoJSON Polygon with hole.
-
Performance improvements by bulk-fetching
DBRefinstances. -
Multi-faceted aggregations using
$facet,$bucket, and$bucketAutowithAggregation.
6.4. What’s New in Spring Data MongoDB 1.9
-
The following annotations have been enabled to build your own composed annotations:
@Document,@Id,@Field,@Indexed,@CompoundIndex,@GeoSpatialIndexed,@TextIndexed,@Query, and@Meta. -
Support for Projections in repository query methods.
-
Support for Query by Example.
-
Out-of-the-box support for
java.util.Currencyin object mapping. -
Support for the bulk operations introduced in MongoDB 2.6.
-
Upgrade to Querydsl 4.
-
Assert compatibility with MongoDB 3.0 and MongoDB Java Driver 3.2 (see: MongoDB 3.0 Support).
6.5. What’s New in Spring Data MongoDB 1.8
-
Criteriaoffers support for creating$geoIntersects. -
Support for SpEL expressions in
@Query. -
MongoMappingEventsexpose the collection name for which they are issued. -
Improved support for
<mongo:mongo-client credentials="…" />. -
Improved index creation failure error message.
6.6. What’s New in Spring Data MongoDB 1.7
-
Assert compatibility with MongoDB 3.0 and MongoDB Java Driver 3-beta3 (see: MongoDB 3.0 Support).
-
Support JSR-310 and ThreeTen back-port date/time types.
-
Allow
Streamas a query method return type (see: Query Methods). -
GeoJSON support in both domain types and queries (see: GeoJSON Support).
-
QueryDslPredicateExcecutornow supportsfindAll(OrderSpecifier<?>… orders). -
Support calling JavaScript functions with Script Operations.
-
Improve support for
CONTAINSkeyword on collection-like properties. -
Support for
$bit,$mul, and$positionoperators toUpdate.
7. Dependencies
Due to the different inception dates of individual Spring Data modules, most of them carry different major and minor version numbers. The easiest way to find compatible ones is to rely on the Spring Data Release Train BOM that we ship with the compatible versions defined. In a Maven project, you would declare this dependency in the <dependencyManagement /> section of your POM, as follows:
<dependencyManagement>
  <dependencies>
    <dependency>
      <groupId>org.springframework.data</groupId>
      <artifactId>spring-data-releasetrain</artifactId>
      <version>Lovelace-SR18</version>
      <scope>import</scope>
      <type>pom</type>
    </dependency>
  </dependencies>
</dependencyManagement>
The current release train version is Lovelace-SR18. The train names ascend alphabetically and the currently available trains are listed here. The version name follows the following pattern: ${name}-${release}, where release can be one of the following:
-
BUILD-SNAPSHOT: Current snapshots -
M1,M2, and so on: Milestones -
RC1,RC2, and so on: Release candidates -
RELEASE: GA release -
SR1,SR2, and so on: Service releases
A working example of using the BOMs can be found in our Spring Data examples repository. With that in place, you can declare the Spring Data modules you would like to use without a version in the <dependencies /> block, as follows:
<dependencies>
  <dependency>
    <groupId>org.springframework.data</groupId>
    <artifactId>spring-data-jpa</artifactId>
  </dependency>
<dependencies>
7.1. Dependency Management with Spring Boot
Spring Boot selects a recent version of Spring Data modules for you. If you still want to upgrade to a newer version, configure the property spring-data-releasetrain.version to the train name and iteration you would like to use.
8. Working with Spring Data Repositories
The goal of the Spring Data repository abstraction is to significantly reduce the amount of boilerplate code required to implement data access layers for various persistence stores.
|
Spring Data repository documentation and your module This chapter explains the core concepts and interfaces of Spring Data repositories. The information in this chapter is pulled from the Spring Data Commons module. It uses the configuration and code samples for the Java Persistence API (JPA) module. You should adapt the XML namespace declaration and the types to be extended to the equivalents of the particular module that you use. “Namespace reference” covers XML configuration, which is supported across all Spring Data modules supporting the repository API. “Repository query keywords” covers the query method keywords supported by the repository abstraction in general. For detailed information on the specific features of your module, see the chapter on that module of this document. |
8.1. Core concepts
The central interface in the Spring Data repository abstraction is Repository. It takes the domain class to manage as well as the ID type of the domain class as type arguments. This interface acts primarily as a marker interface to capture the types to work with and to help you to discover interfaces that extend this one. The CrudRepository provides sophisticated CRUD functionality for the entity class that is being managed.
CrudRepository interfacepublic interface CrudRepository<T, ID extends Serializable>
extends Repository<T, ID> {
<S extends T> S save(S entity); (1)
Optional<T> findById(ID primaryKey); (2)
Iterable<T> findAll(); (3)
long count(); (4)
void delete(T entity); (5)
boolean existsById(ID primaryKey); (6)
// … more functionality omitted.
}| 1 | Saves the given entity. |
| 2 | Returns the entity identified by the given ID. |
| 3 | Returns all entities. |
| 4 | Returns the number of entities. |
| 5 | Deletes the given entity. |
| 6 | Indicates whether an entity with the given ID exists. |
We also provide persistence technology-specific abstractions, such as JpaRepository or MongoRepository. Those interfaces extend CrudRepository and expose the capabilities of the underlying persistence technology in addition to the rather generic persistence technology-agnostic interfaces such as CrudRepository.
|
On top of the CrudRepository, there is a PagingAndSortingRepository abstraction that adds additional methods to ease paginated access to entities:
PagingAndSortingRepository interfacepublic interface PagingAndSortingRepository<T, ID extends Serializable>
extends CrudRepository<T, ID> {
Iterable<T> findAll(Sort sort);
Page<T> findAll(Pageable pageable);
}To access the second page of User by a page size of 20, you could do something like the following:
PagingAndSortingRepository<User, Long> repository = // … get access to a bean
Page<User> users = repository.findAll(PageRequest.of(1, 20));
In addition to query methods, query derivation for both count and delete queries is available. The following list shows the interface definition for a derived count query:
interface UserRepository extends CrudRepository<User, Long> {

  long countByLastname(String lastname);
}
The following list shows the interface definition for a derived delete query:
interface UserRepository extends CrudRepository<User, Long> {

  long deleteByLastname(String lastname);

  List<User> removeByLastname(String lastname);
}
8.2. Query methods
Standard CRUD functionality repositories usually have queries on the underlying datastore. With Spring Data, declaring those queries becomes a four-step process:
-
Declare an interface extending Repository or one of its subinterfaces and type it to the domain class and ID type that it should handle, as shown in the following example:
interface PersonRepository extends Repository<Person, Long> { … } -
Declare query methods on the interface.
interface PersonRepository extends Repository<Person, Long> { List<Person> findByLastname(String lastname); } -
Set up Spring to create proxy instances for those interfaces, either with JavaConfig or with XML configuration.
-
To use Java configuration, create a class similar to the following:
import org.springframework.data.jpa.repository.config.EnableJpaRepositories; @EnableJpaRepositories class Config {} -
To use XML configuration, define a bean similar to the following:
<?xml version="1.0" encoding="UTF-8"?>
<beans xmlns="http://www.springframework.org/schema/beans"
   xmlns:xsi="http://www.w3.org/2001/XMLSchema-instance"
   xmlns:jpa="http://www.springframework.org/schema/data/jpa"
   xsi:schemaLocation="http://www.springframework.org/schema/beans
     https://www.springframework.org/schema/beans/spring-beans.xsd
     http://www.springframework.org/schema/data/jpa
     https://www.springframework.org/schema/data/jpa/spring-jpa.xsd">

   <jpa:repositories base-package="com.acme.repositories"/>

</beans>
The JPA namespace is used in this example. If you use the repository abstraction for any other store, you need to change this to the appropriate namespace declaration of your store module. In other words, you should exchange
jpain favor of, for example,mongodb.+ Also, note that the JavaConfig variant does not configure a package explicitly, because the package of the annotated class is used by default. To customize the package to scan, use one of the
basePackage…attributes of the data-store-specific repository’s@Enable${store}Repositories-annotation. -
-
Inject the repository instance and use it, as shown in the following example:
class SomeClient {

  private final PersonRepository repository;

  SomeClient(PersonRepository repository) {
    this.repository = repository;
  }

  void doSomething() {
    List<Person> persons = repository.findByLastname("Matthews");
  }
}
The sections that follow explain each step in detail:
8.3. Defining Repository Interfaces
First, define a domain class-specific repository interface. The interface must extend Repository and be typed to the domain class and an ID type. If you want to expose CRUD methods for that domain type, extend CrudRepository instead of Repository.
8.3.1. Fine-tuning Repository Definition
Typically, your repository interface extends Repository, CrudRepository, or PagingAndSortingRepository. Alternatively, if you do not want to extend Spring Data interfaces, you can also annotate your repository interface with @RepositoryDefinition. Extending CrudRepository exposes a complete set of methods to manipulate your entities. If you prefer to be selective about the methods being exposed, copy the methods you want to expose from CrudRepository into your domain repository.
| Doing so lets you define your own abstractions on top of the provided Spring Data Repositories functionality. |
The following example shows how to selectively expose CRUD methods (findById and save, in this case):
@NoRepositoryBean
interface MyBaseRepository<T, ID extends Serializable> extends Repository<T, ID> {

  Optional<T> findById(ID id);

  <S extends T> S save(S entity);
}

interface UserRepository extends MyBaseRepository<User, Long> {
  User findByEmailAddress(EmailAddress emailAddress);
}
In the prior example, you defined a common base interface for all your domain repositories and exposed findById(…) as well as save(…).These methods are routed into the base repository implementation of the store of your choice provided by Spring Data (for example, if you use JPA, the implementation is SimpleJpaRepository), because they match the method signatures in CrudRepository. So the UserRepository can now save users, find individual users by ID, and trigger a query to find Users by email address.
The intermediate repository interface is annotated with @NoRepositoryBean. Make sure you add that annotation to all repository interfaces for which Spring Data should not create instances at runtime.
|
8.3.2. Null Handling of Repository Methods
As of Spring Data 2.0, repository CRUD methods that return an individual aggregate instance use Java 8’s Optional to indicate the potential absence of a value.
Besides that, Spring Data supports returning the following wrapper types on query methods:
-
com.google.common.base.Optional -
scala.Option -
io.vavr.control.Option -
javaslang.control.Option(deprecated as Javaslang is deprecated)
Alternatively, query methods can choose not to use a wrapper type at all.
The absence of a query result is then indicated by returning null.
Repository methods returning collections, collection alternatives, wrappers, and streams are guaranteed never to return null but rather the corresponding empty representation.
See “Repository query return types” for details.
Nullability Annotations
You can express nullability constraints for repository methods by using Spring Framework’s nullability annotations.
They provide a tooling-friendly approach and opt-in null checks during runtime, as follows:
-
@NonNullApi: Used on the package level to declare that the default behavior for parameters and return values is to not accept or producenullvalues. -
@NonNull: Used on a parameter or return value that must not benull(not needed on a parameter and return value where@NonNullApiapplies). -
@Nullable: Used on a parameter or return value that can benull.
Spring annotations are meta-annotated with JSR 305 annotations (a dormant but widely spread JSR). JSR 305 meta-annotations let tooling vendors such as IDEA, Eclipse, and Kotlin provide null-safety support in a generic way, without having to hard-code support for Spring annotations.
To enable runtime checking of nullability constraints for query methods, you need to activate non-nullability on the package level by using Spring’s @NonNullApi in package-info.java, as shown in the following example:
package-info.java@org.springframework.lang.NonNullApi
package com.acme;Once non-null defaulting is in place, repository query method invocations get validated at runtime for nullability constraints.
If a query execution result violates the defined constraint, an exception is thrown. This happens when the method would return null but is declared as non-nullable (the default with the annotation defined on the package the repository resides in).
If you want to opt-in to nullable results again, selectively use @Nullable on individual methods.
Using the result wrapper types mentioned at the start of this section continues to work as expected: An empty result is translated into the value that represents absence.
The following example shows a number of the techniques just described:
package com.acme;                                                       (1)

import org.springframework.lang.Nullable;

interface UserRepository extends Repository<User, Long> {

  User getByEmailAddress(EmailAddress emailAddress);                    (2)

  @Nullable
  User findByEmailAddress(@Nullable EmailAddress emailAdress);          (3)

  Optional<User> findOptionalByEmailAddress(EmailAddress emailAddress); (4)
}| 1 | The repository resides in a package (or sub-package) for which we have defined non-null behavior. |
| 2 | Throws an EmptyResultDataAccessException when the query executed does not produce a result. Throws an IllegalArgumentException when the emailAddress handed to the method is null. |
| 3 | Returns null when the query executed does not produce a result. Also accepts null as the value for emailAddress. |
| 4 | Returns Optional.empty() when the query executed does not produce a result. Throws an IllegalArgumentException when the emailAddress handed to the method is null. |
Nullability in Kotlin-based Repositories
Kotlin has the definition of nullability constraints baked into the language.
Kotlin code compiles to bytecode, which does not express nullability constraints through method signatures but rather through compiled-in metadata. Make sure to include the kotlin-reflect JAR in your project to enable introspection of Kotlin’s nullability constraints.
Spring Data repositories use the language mechanism to define those constraints to apply the same runtime checks, as follows:
interface UserRepository : Repository<User, String> {

  fun findByUsername(username: String): User     (1)

  fun findByFirstname(firstname: String?): User? (2)
}| 1 | The method defines both the parameter and the result as non-nullable (the Kotlin default). The Kotlin compiler rejects method invocations that pass null to the method. If the query execution yields an empty result, an EmptyResultDataAccessException is thrown. |
| 2 | This method accepts null for the firstname parameter and returns null if the query execution does not produce a result. |
8.3.3. Using Repositories with Multiple Spring Data Modules
Using a unique Spring Data module in your application makes things simple, because all repository interfaces in the defined scope are bound to the Spring Data module. Sometimes, applications require using more than one Spring Data module. In such cases, a repository definition must distinguish between persistence technologies. When it detects multiple repository factories on the class path, Spring Data enters strict repository configuration mode. Strict configuration uses details on the repository or the domain class to decide about Spring Data module binding for a repository definition:
-
If the repository definition extends the module-specific repository, then it is a valid candidate for the particular Spring Data module.
-
If the domain class is annotated with the module-specific type annotation, then it is a valid candidate for the particular Spring Data module. Spring Data modules accept either third-party annotations (such as JPA’s
@Entity) or provide their own annotations (such as@Documentfor Spring Data MongoDB and Spring Data Elasticsearch).
The following example shows a repository that uses module-specific interfaces (JPA in this case):
interface MyRepository extends JpaRepository<User, Long> { }

@NoRepositoryBean
interface MyBaseRepository<T, ID extends Serializable> extends JpaRepository<T, ID> {
  …
}

interface UserRepository extends MyBaseRepository<User, Long> {
  …
}
MyRepository and UserRepository extend JpaRepository in their type hierarchy. They are valid candidates for the Spring Data JPA module.
The following example shows a repository that uses generic interfaces:
interface AmbiguousRepository extends Repository<User, Long> {
 …
}

@NoRepositoryBean
interface MyBaseRepository<T, ID extends Serializable> extends CrudRepository<T, ID> {
  …
}

interface AmbiguousUserRepository extends MyBaseRepository<User, Long> {
  …
}
AmbiguousRepository and AmbiguousUserRepository extend only Repository and CrudRepository in their type hierarchy. While this is perfectly fine when using a unique Spring Data module, multiple modules cannot distinguish to which particular Spring Data these repositories should be bound.
The following example shows a repository that uses domain classes with annotations:
interface PersonRepository extends Repository<Person, Long> {
 …
}

@Entity
class Person {
  …
}

interface UserRepository extends Repository<User, Long> {
 …
}

@Document
class User {
  …
}
PersonRepository references Person, which is annotated with the JPA @Entity annotation, so this repository clearly belongs to Spring Data JPA. UserRepository references User, which is annotated with Spring Data MongoDB’s @Document annotation.
The following bad example shows a repository that uses domain classes with mixed annotations:
interface JpaPersonRepository extends Repository<Person, Long> {
 …
}

interface MongoDBPersonRepository extends Repository<Person, Long> {
 …
}

@Entity
@Document
class Person {
  …
}
This example shows a domain class using both JPA and Spring Data MongoDB annotations. It defines two repositories, JpaPersonRepository and MongoDBPersonRepository. One is intended for JPA and the other for MongoDB usage. Spring Data is no longer able to tell the repositories apart, which leads to undefined behavior.
Repository type details and distinguishing domain class annotations are used for strict repository configuration to identify repository candidates for a particular Spring Data module. Using multiple persistence technology-specific annotations on the same domain type is possible and enables reuse of domain types across multiple persistence technologies. However, Spring Data can then no longer determine a unique module with which to bind the repository.
The last way to distinguish repositories is by scoping repository base packages. Base packages define the starting points for scanning for repository interface definitions, which implies having repository definitions located in the appropriate packages. By default, annotation-driven configuration uses the package of the configuration class. The base package in XML-based configuration is mandatory.
The following example shows annotation-driven configuration of base packages:
@EnableJpaRepositories(basePackages = "com.acme.repositories.jpa")
@EnableMongoRepositories(basePackages = "com.acme.repositories.mongo")
interface Configuration { }
8.4. Defining Query Methods
The repository proxy has two ways to derive a store-specific query from the method name:
-
By deriving the query from the method name directly.
-
By using a manually defined query.
Available options depend on the actual store. However, there must be a strategy that decides what actual query is created. The next section describes the available options.
8.4.1. Query Lookup Strategies
The following strategies are available for the repository infrastructure to resolve the query. With XML configuration, you can configure the strategy at the namespace through the query-lookup-strategy attribute. For Java configuration, you can use the queryLookupStrategy attribute of the Enable${store}Repositories annotation. Some strategies may not be supported for particular datastores.
-
CREATEattempts to construct a store-specific query from the query method name. The general approach is to remove a given set of well known prefixes from the method name and parse the rest of the method. You can read more about query construction in “Query Creation”. -
USE_DECLARED_QUERYtries to find a declared query and throws an exception if cannot find one. The query can be defined by an annotation somewhere or declared by other means. Consult the documentation of the specific store to find available options for that store. If the repository infrastructure does not find a declared query for the method at bootstrap time, it fails. -
CREATE_IF_NOT_FOUND(default) combinesCREATEandUSE_DECLARED_QUERY. It looks up a declared query first, and, if no declared query is found, it creates a custom method name-based query. This is the default lookup strategy and, thus, is used if you do not configure anything explicitly. It allows quick query definition by method names but also custom-tuning of these queries by introducing declared queries as needed.
8.4.2. Query Creation
The query builder mechanism built into Spring Data repository infrastructure is useful for building constraining queries over entities of the repository. The mechanism strips the prefixes find…By, read…By, query…By, count…By, and get…By from the method and starts parsing the rest of it. The introducing clause can contain further expressions, such as a Distinct to set a distinct flag on the query to be created. However, the first By acts as delimiter to indicate the start of the actual criteria. At a very basic level, you can define conditions on entity properties and concatenate them with And and Or. The following example shows how to create a number of queries:
interface PersonRepository extends Repository<Person, Long> {

  List<Person> findByEmailAddressAndLastname(EmailAddress emailAddress, String lastname);

  // Enables the distinct flag for the query
  List<Person> findDistinctPeopleByLastnameOrFirstname(String lastname, String firstname);
  List<Person> findPeopleDistinctByLastnameOrFirstname(String lastname, String firstname);

  // Enabling ignoring case for an individual property
  List<Person> findByLastnameIgnoreCase(String lastname);
  // Enabling ignoring case for all suitable properties
  List<Person> findByLastnameAndFirstnameAllIgnoreCase(String lastname, String firstname);

  // Enabling static ORDER BY for a query
  List<Person> findByLastnameOrderByFirstnameAsc(String lastname);
  List<Person> findByLastnameOrderByFirstnameDesc(String lastname);
}
The actual result of parsing the method depends on the persistence store for which you create the query. However, there are some general things to notice:
-
The expressions are usually property traversals combined with operators that can be concatenated. You can combine property expressions with
ANDandOR. You also get support for operators such asBetween,LessThan,GreaterThan, andLikefor the property expressions. The supported operators can vary by datastore, so consult the appropriate part of your reference documentation. -
The method parser supports setting an
IgnoreCaseflag for individual properties (for example,findByLastnameIgnoreCase(…)) or for all properties of a type that supports ignoring case (usuallyStringinstances — for example,findByLastnameAndFirstnameAllIgnoreCase(…)). Whether ignoring cases is supported may vary by store, so consult the relevant sections in the reference documentation for the store-specific query method. -
You can apply static ordering by appending an
OrderByclause to the query method that references a property and by providing a sorting direction (AscorDesc). To create a query method that supports dynamic sorting, see “Special parameter handling”.
8.4.3. Property Expressions
Property expressions can refer only to a direct property of the managed entity, as shown in the preceding example. At query creation time, you already make sure that the parsed property is a property of the managed domain class. However, you can also define constraints by traversing nested properties. Consider the following method signature:
List<Person> findByAddressZipCode(ZipCode zipCode);Assume a Person has an Address with a ZipCode. In that case, the method creates the property traversal x.address.zipCode. The resolution algorithm starts by interpreting the entire part (AddressZipCode) as the property and checks the domain class for a property with that name (uncapitalized). If the algorithm succeeds, it uses that property. If not, the algorithm splits up the source at the camel case parts from the right side into a head and a tail and tries to find the corresponding property — in our example, AddressZip and Code. If the algorithm finds a property with that head, it takes the tail and continues building the tree down from there, splitting the tail up in the way just described. If the first split does not match, the algorithm moves the split point to the left (Address, ZipCode) and continues.
Although this should work for most cases, it is possible for the algorithm to select the wrong property. Suppose the Person class has an addressZip property as well. The algorithm would match in the first split round already, choose the wrong property, and fail (as the type of addressZip probably has no code property).
To resolve this ambiguity you can use _ inside your method name to manually define traversal points. So our method name would be as follows:
List<Person> findByAddress_ZipCode(ZipCode zipCode);Because we treat the underscore character as a reserved character, we strongly advise following standard Java naming conventions (that is, not using underscores in property names but using camel case instead).
8.4.4. Special parameter handling
To handle parameters in your query, define method parameters as already seen in the preceding examples. Besides that, the infrastructure recognizes certain specific types like Pageable and Sort, to apply pagination and sorting to your queries dynamically. The following example demonstrates these features:
Pageable, Slice, and Sort in query methodsPage<User> findByLastname(String lastname, Pageable pageable);
Slice<User> findByLastname(String lastname, Pageable pageable);
List<User> findByLastname(String lastname, Sort sort);
List<User> findByLastname(String lastname, Pageable pageable);
APIs taking Sort and Pageable expect non-null values to be handed into methods.
If you don’t want to apply any sorting or pagination use Sort.unsorted() and Pageable.unpaged().
|
The first method lets you pass an org.springframework.data.domain.Pageable instance to the query method to dynamically add paging to your statically defined query. A Page knows about the total number of elements and pages available. It does so by the infrastructure triggering a count query to calculate the overall number. As this might be expensive (depending on the store used), you can instead return a Slice. A Slice only knows about whether a next Slice is available, which might be sufficient when walking through a larger result set.
Sorting options are handled through the Pageable instance, too. If you only need sorting, add an org.springframework.data.domain.Sort parameter to your method. As you can see, returning a List is also possible. In this case, the additional metadata required to build the actual Page instance is not created (which, in turn, means that the additional count query that would have been necessary is not issued). Rather, it restricts the query to look up only the given range of entities.
| To find out how many pages you get for an entire query, you have to trigger an additional count query. By default, this query is derived from the query you actually trigger. |
Paging and Sorting
Simple sorting expressions can be defined by using property names. Expressions can be concatenated to collect multiple criterias into one expression.
Sort sort = Sort.by("firstname").ascending()
  .and(Sort.by("lastname").descending());
For a more type-safe way of defining sort expressions, start with the type to define the sort expression for and use method references to define the properties to sort on.
TypedSort<Person> person = Sort.sort(Person.class);

TypedSort<Person> sort = person.by(Person::getFirstname).ascending()
  .and(person.by(Person::getLastname).descending());
If your store implementation supports Querydsl, you can also use the metamodel types generated to define sort expressions:
QSort sort = QSort.by(QPerson.firstname.asc())
  .and(QSort.by(QPerson.lastname.desc()));
8.4.5. Limiting Query Results
The results of query methods can be limited by using the first or top keywords, which can be used interchangeably. An optional numeric value can be appended to top or first to specify the maximum result size to be returned.
If the number is left out, a result size of 1 is assumed. The following example shows how to limit the query size:
Top and FirstUser findFirstByOrderByLastnameAsc();
User findTopByOrderByAgeDesc();
Page<User> queryFirst10ByLastname(String lastname, Pageable pageable);
Slice<User> findTop3ByLastname(String lastname, Pageable pageable);
List<User> findFirst10ByLastname(String lastname, Sort sort);
List<User> findTop10ByLastname(String lastname, Pageable pageable);The limiting expressions also support the Distinct keyword. Also, for the queries limiting the result set to one instance, wrapping the result into with the Optional keyword is supported.
If pagination or slicing is applied to a limiting query pagination (and the calculation of the number of pages available), it is applied within the limited result.
Limiting the results in combination with dynamic sorting by using a Sort parameter lets you express query methods for the 'K' smallest as well as for the 'K' biggest elements.
|
8.4.6. Streaming query results
The results of query methods can be processed incrementally by using a Java 8 Stream<T> as return type. Instead of wrapping the query results in a Stream data store-specific methods are used to perform the streaming, as shown in the following example:
Stream<T>@Query("select u from User u")
Stream<User> findAllByCustomQueryAndStream();
Stream<User> readAllByFirstnameNotNull();
@Query("select u from User u")
Stream<User> streamAllPaged(Pageable pageable);
A Stream potentially wraps underlying data store-specific resources and must, therefore, be closed after usage. You can either manually close the Stream by using the close() method or by using a Java 7 try-with-resources block, as shown in the following example:
|
Stream<T> result in a try-with-resources blocktry (Stream<User> stream = repository.findAllByCustomQueryAndStream()) {
stream.forEach(…);
}
Not all Spring Data modules currently support Stream<T> as a return type.
|
8.4.7. Async query results
Repository queries can be run asynchronously by using Spring’s asynchronous method execution capability. This means the method returns immediately upon invocation while the actual query execution occurs in a task that has been submitted to a Spring TaskExecutor. Asynchronous query execution is different from reactive query execution and should not be mixed. Refer to store-specific documentation for more details on reactive support. The following example shows a number of asynchronous queries:
@Async
Future<User> findByFirstname(String firstname);               (1)

@Async
CompletableFuture<User> findOneByFirstname(String firstname); (2)

@Async
ListenableFuture<User> findOneByLastname(String lastname); (3)| 1 | Use java.util.concurrent.Future as the return type. |
| 2 | Use a Java 8 java.util.concurrent.CompletableFuture as the return type. |
| 3 | Use a org.springframework.util.concurrent.ListenableFuture as the return type. |
8.5. Creating Repository Instances
In this section, you create instances and bean definitions for the defined repository interfaces. One way to do so is by using the Spring namespace that is shipped with each Spring Data module that supports the repository mechanism, although we generally recommend using Java configuration.
8.5.1. XML configuration
Each Spring Data module includes a repositories element that lets you define a base package that Spring scans for you, as shown in the following example:
<?xml version="1.0" encoding="UTF-8"?>
<beans:beans xmlns:beans="http://www.springframework.org/schema/beans"
  xmlns:xsi="http://www.w3.org/2001/XMLSchema-instance"
  xmlns="http://www.springframework.org/schema/data/jpa"
  xsi:schemaLocation="http://www.springframework.org/schema/beans
    https://www.springframework.org/schema/beans/spring-beans.xsd
    http://www.springframework.org/schema/data/jpa
    https://www.springframework.org/schema/data/jpa/spring-jpa.xsd">

  <repositories base-package="com.acme.repositories" />

</beans:beans>
In the preceding example, Spring is instructed to scan com.acme.repositories and all its sub-packages for interfaces extending Repository or one of its sub-interfaces. For each interface found, the infrastructure registers the persistence technology-specific FactoryBean to create the appropriate proxies that handle invocations of the query methods. Each bean is registered under a bean name that is derived from the interface name, so an interface of UserRepository would be registered under userRepository. The base-package attribute allows wildcards so that you can define a pattern of scanned packages.
Using filters
By default, the infrastructure picks up every interface extending the persistence technology-specific Repository sub-interface located under the configured base package and creates a bean instance for it. However, you might want more fine-grained control over which interfaces have bean instances created for them. To do so, use <include-filter /> and <exclude-filter /> elements inside the <repositories /> element. The semantics are exactly equivalent to the elements in Spring’s context namespace. For details, see the Spring reference documentation for these elements.
For example, to exclude certain interfaces from instantiation as repository beans, you could use the following configuration:
<repositories base-package="com.acme.repositories">
  <context:exclude-filter type="regex" expression=".*SomeRepository" />
</repositories>
The preceding example excludes all interfaces ending in SomeRepository from being instantiated.
8.5.2. JavaConfig
The repository infrastructure can also be triggered by using a store-specific @Enable${store}Repositories annotation on a JavaConfig class. For an introduction into Java-based configuration of the Spring container, see JavaConfig in the Spring reference documentation.
A sample configuration to enable Spring Data repositories resembles the following:
@Configuration
@EnableJpaRepositories("com.acme.repositories")
class ApplicationConfiguration {

  @Bean
  EntityManagerFactory entityManagerFactory() {
    // …
  }
}
The preceding example uses the JPA-specific annotation, which you would change according to the store module you actually use. The same applies to the definition of the EntityManagerFactory bean. See the sections covering the store-specific configuration.
|
8.5.3. Standalone usage
You can also use the repository infrastructure outside of a Spring container — for example, in CDI environments. You still need some Spring libraries in your classpath, but, generally, you can set up repositories programmatically as well. The Spring Data modules that provide repository support ship a persistence technology-specific RepositoryFactory that you can use as follows:
RepositoryFactorySupport factory = … // Instantiate factory here
UserRepository repository = factory.getRepository(UserRepository.class);
8.6. Custom Implementations for Spring Data Repositories
This section covers repository customization and how fragments form a composite repository.
When a query method requires a different behavior or cannot be implemented by query derivation, then it is necessary to provide a custom implementation. Spring Data repositories let you provide custom repository code and integrate it with generic CRUD abstraction and query method functionality.
8.6.1. Customizing Individual Repositories
To enrich a repository with custom functionality, you must first define a fragment interface and an implementation for the custom functionality, as shown in the following example:
interface CustomizedUserRepository {
  void someCustomMethod(User user);
}class CustomizedUserRepositoryImpl implements CustomizedUserRepository {
public void someCustomMethod(User user) {
// Your custom implementation
}
}
The most important part of the class name that corresponds to the fragment interface is the Impl postfix.
|
The implementation itself does not depend on Spring Data and can be a regular Spring bean. Consequently, you can use standard dependency injection behavior to inject references to other beans (such as a JdbcTemplate), take part in aspects, and so on.
Then you can let your repository interface extend the fragment interface, as shown in the following example:
interface UserRepository extends CrudRepository<User, Long>, CustomizedUserRepository {

  // Declare query methods here
}
Extending the fragment interface with your repository interface combines the CRUD and custom functionality and makes it available to clients.
Spring Data repositories are implemented by using fragments that form a repository composition. Fragments are the base repository, functional aspects (such as QueryDsl), and custom interfaces along with their implementation. Each time you add an interface to your repository interface, you enhance the composition by adding a fragment. The base repository and repository aspect implementations are provided by each Spring Data module.
The following example shows custom interfaces and their implementations:
interface HumanRepository {
  void someHumanMethod(User user);
}

class HumanRepositoryImpl implements HumanRepository {

  public void someHumanMethod(User user) {
    // Your custom implementation
  }
}

interface ContactRepository {

  void someContactMethod(User user);

  User anotherContactMethod(User user);
}

class ContactRepositoryImpl implements ContactRepository {

  public void someContactMethod(User user) {
    // Your custom implementation
  }

  public User anotherContactMethod(User user) {
    // Your custom implementation
  }
}
The following example shows the interface for a custom repository that extends CrudRepository:
interface UserRepository extends CrudRepository<User, Long>, HumanRepository, ContactRepository {

  // Declare query methods here
}
Repositories may be composed of multiple custom implementations that are imported in the order of their declaration. Custom implementations have a higher priority than the base implementation and repository aspects. This ordering lets you override base repository and aspect methods and resolves ambiguity if two fragments contribute the same method signature. Repository fragments are not limited to use in a single repository interface. Multiple repositories may use a fragment interface, letting you reuse customizations across different repositories.
The following example shows a repository fragment and its implementation:
save(…)interface CustomizedSave<T> {
<S extends T> S save(S entity);
}
class CustomizedSaveImpl<T> implements CustomizedSave<T> {
public <S extends T> S save(S entity) {
// Your custom implementation
}
}The following example shows a repository that uses the preceding repository fragment:
interface UserRepository extends CrudRepository<User, Long>, CustomizedSave<User> {
}

interface PersonRepository extends CrudRepository<Person, Long>, CustomizedSave<Person> {
}
Configuration
If you use namespace configuration, the repository infrastructure tries to autodetect custom implementation fragments by scanning for classes below the package in which it found a repository. These classes need to follow the naming convention of appending the namespace element’s repository-impl-postfix attribute to the fragment interface name. This postfix defaults to Impl. The following example shows a repository that uses the default postfix and a repository that sets a custom value for the postfix:
<repositories base-package="com.acme.repository" />

<repositories base-package="com.acme.repository" repository-impl-postfix="MyPostfix" />
The first configuration in the preceding example tries to look up a class called com.acme.repository.CustomizedUserRepositoryImpl to act as a custom repository implementation. The second example tries to lookup com.acme.repository.CustomizedUserRepositoryMyPostfix.
Resolution of Ambiguity
If multiple implementations with matching class names are found in different packages, Spring Data uses the bean names to identify which one to use.
Given the following two custom implementations for the CustomizedUserRepository shown earlier, the first implementation is used.
Its bean name is customizedUserRepositoryImpl, which matches that of the fragment interface (CustomizedUserRepository) plus the postfix Impl.
package com.acme.impl.one;

class CustomizedUserRepositoryImpl implements CustomizedUserRepository {

  // Your custom implementation
}
package com.acme.impl.two;
@Component("specialCustomImpl")
class CustomizedUserRepositoryImpl implements CustomizedUserRepository {
// Your custom implementation
}If you annotate the UserRepository interface with @Component("specialCustom"), the bean name plus Impl then matches the one defined for the repository implementation in com.acme.impl.two, and it is used instead of the first one.
Manual Wiring
If your custom implementation uses annotation-based configuration and autowiring only, the preceding approach shown works well, because it is treated as any other Spring bean. If your implementation fragment bean needs special wiring, you can declare the bean and name it according to the conventions described in the preceding section. The infrastructure then refers to the manually defined bean definition by name instead of creating one itself. The following example shows how to manually wire a custom implementation:
<repositories base-package="com.acme.repository" />

<beans:bean id="userRepositoryImpl" class="…">
  <!-- further configuration -->
</beans:bean>
8.6.2. Customize the Base Repository
The approach described in the preceding section requires customization of each repository interfaces when you want to customize the base repository behavior so that all repositories are affected. To instead change behavior for all repositories, you can create an implementation that extends the persistence technology-specific repository base class. This class then acts as a custom base class for the repository proxies, as shown in the following example:
class MyRepositoryImpl<T, ID extends Serializable>
  extends SimpleJpaRepository<T, ID> {

  private final EntityManager entityManager;

  MyRepositoryImpl(JpaEntityInformation entityInformation,
                          EntityManager entityManager) {
    super(entityInformation, entityManager);

    // Keep the EntityManager around to used from the newly introduced methods.
    this.entityManager = entityManager;
  }

  @Transactional
  public <S extends T> S save(S entity) {
    // implementation goes here
  }
}
The class needs to have a constructor of the super class which the store-specific repository factory implementation uses. If the repository base class has multiple constructors, override the one taking an EntityInformation plus a store specific infrastructure object (such as an EntityManager or a template class).
|
The final step is to make the Spring Data infrastructure aware of the customized repository base class. In Java configuration, you can do so by using the repositoryBaseClass attribute of the @Enable${store}Repositories annotation, as shown in the following example:
@Configuration
@EnableJpaRepositories(repositoryBaseClass = MyRepositoryImpl.class)
class ApplicationConfiguration { … }
A corresponding attribute is available in the XML namespace, as shown in the following example:
<repositories base-package="com.acme.repository"
     base-class="….MyRepositoryImpl" />
8.7. Publishing Events from Aggregate Roots
Entities managed by repositories are aggregate roots.
In a Domain-Driven Design application, these aggregate roots usually publish domain events.
Spring Data provides an annotation called @DomainEvents that you can use on a method of your aggregate root to make that publication as easy as possible, as shown in the following example:
class AnAggregateRoot {

    @DomainEvents (1)
    Collection<Object> domainEvents() {
        // … return events you want to get published here
    }

    @AfterDomainEventPublication (2)
    void callbackMethod() {
       // … potentially clean up domain events list
    }
}| 1 | The method using @DomainEvents can return either a single event instance or a collection of events. It must not take any arguments. |
| 2 | After all events have been published, we have a method annotated with @AfterDomainEventPublication. It can be used to potentially clean the list of events to be published (among other uses). |
The methods are called every time one of a Spring Data repository’s save(…) methods is called.
8.8. Spring Data Extensions
This section documents a set of Spring Data extensions that enable Spring Data usage in a variety of contexts. Currently, most of the integration is targeted towards Spring MVC.
8.8.1. Querydsl Extension
Querydsl is a framework that enables the construction of statically typed SQL-like queries through its fluent API.
Several Spring Data modules offer integration with Querydsl through QuerydslPredicateExecutor, as shown in the following example:
public interface QuerydslPredicateExecutor<T> {

  Optional<T> findById(Predicate predicate);  (1)

  Iterable<T> findAll(Predicate predicate);   (2)

  long count(Predicate predicate);            (3)

  boolean exists(Predicate predicate);        (4)

  // … more functionality omitted.
}| 1 | Finds and returns a single entity matching the Predicate. |
| 2 | Finds and returns all entities matching the Predicate. |
| 3 | Returns the number of entities matching the Predicate. |
| 4 | Returns whether an entity that matches the Predicate exists. |
To make use of Querydsl support, extend QuerydslPredicateExecutor on your repository interface, as shown in the following example
interface UserRepository extends CrudRepository<User, Long>, QuerydslPredicateExecutor<User> {
}
The preceding example lets you write typesafe queries using Querydsl Predicate instances, as shown in the following example:
Predicate predicate = user.firstname.equalsIgnoreCase("dave")
	.and(user.lastname.startsWithIgnoreCase("mathews"));

userRepository.findAll(predicate);
8.8.2. Web support
| This section contains the documentation for the Spring Data web support as it is implemented in the current (and later) versions of Spring Data Commons. As the newly introduced support changes many things, we kept the documentation of the former behavior in [web.legacy]. |
Spring Data modules that support the repository programming model ship with a variety of web support. The web related components require Spring MVC JARs to be on the classpath. Some of them even provide integration with Spring HATEOAS. In general, the integration support is enabled by using the @EnableSpringDataWebSupport annotation in your JavaConfig configuration class, as shown in the following example:
@Configuration
@EnableWebMvc
@EnableSpringDataWebSupport
class WebConfiguration {}
The @EnableSpringDataWebSupport annotation registers a few components we will discuss in a bit. It will also detect Spring HATEOAS on the classpath and register integration components for it as well if present.
Alternatively, if you use XML configuration, register either SpringDataWebConfiguration or HateoasAwareSpringDataWebConfiguration as Spring beans, as shown in the following example (for SpringDataWebConfiguration):
<bean class="org.springframework.data.web.config.SpringDataWebConfiguration" />

<!-- If you use Spring HATEOAS, register this one *instead* of the former -->
<bean class="org.springframework.data.web.config.HateoasAwareSpringDataWebConfiguration" />
Basic Web Support
The configuration shown in the previous section registers a few basic components:
-
A
DomainClassConverterto let Spring MVC resolve instances of repository-managed domain classes from request parameters or path variables. -
HandlerMethodArgumentResolverimplementations to let Spring MVC resolvePageableandSortinstances from request parameters.
DomainClassConverter
The DomainClassConverter lets you use domain types in your Spring MVC controller method signatures directly, so that you need not manually lookup the instances through the repository, as shown in the following example:
@Controller
@RequestMapping("/users")
class UserController {

  @RequestMapping("/{id}")
  String showUserForm(@PathVariable("id") User user, Model model) {

    model.addAttribute("user", user);
    return "userForm";
  }
}
As you can see, the method receives a User instance directly, and no further lookup is necessary. The instance can be resolved by letting Spring MVC convert the path variable into the id type of the domain class first and eventually access the instance through calling findById(…) on the repository instance registered for the domain type.
Currently, the repository has to implement CrudRepository to be eligible to be discovered for conversion.
|
HandlerMethodArgumentResolvers for Pageable and Sort
The configuration snippet shown in the previous section also registers a PageableHandlerMethodArgumentResolver as well as an instance of SortHandlerMethodArgumentResolver. The registration enables Pageable and Sort as valid controller method arguments, as shown in the following example:
@Controller
@RequestMapping("/users")
class UserController {

  private final UserRepository repository;

  UserController(UserRepository repository) {
    this.repository = repository;
  }

  @RequestMapping
  String showUsers(Model model, Pageable pageable) {

    model.addAttribute("users", repository.findAll(pageable));
    return "users";
  }
}
The preceding method signature causes Spring MVC try to derive a Pageable instance from the request parameters by using the following default configuration:
|
Page you want to retrieve. 0-indexed and defaults to 0. |
|
Size of the page you want to retrieve. Defaults to 20. |
|
Properties that should be sorted by in the format |
To customize this behavior, register a bean implementing the PageableHandlerMethodArgumentResolverCustomizer interface or the SortHandlerMethodArgumentResolverCustomizer interface, respectively. Its customize() method gets called, letting you change settings, as shown in the following example:
@Bean SortHandlerMethodArgumentResolverCustomizer sortCustomizer() {
    return s -> s.setPropertyDelimiter("<-->");
}
If setting the properties of an existing MethodArgumentResolver is not sufficient for your purpose, extend either SpringDataWebConfiguration or the HATEOAS-enabled equivalent, override the pageableResolver() or sortResolver() methods, and import your customized configuration file instead of using the @Enable annotation.
If you need multiple Pageable or Sort instances to be resolved from the request (for multiple tables, for example), you can use Spring’s @Qualifier annotation to distinguish one from another. The request parameters then have to be prefixed with ${qualifier}_. The followig example shows the resulting method signature:
String showUsers(Model model,
      @Qualifier("thing1") Pageable first,
      @Qualifier("thing2") Pageable second) { … }
you have to populate thing1_page and thing2_page and so on.
The default Pageable passed into the method is equivalent to a PageRequest.of(0, 20) but can be customized by using the @PageableDefault annotation on the Pageable parameter.
Hypermedia Support for Pageables
Spring HATEOAS ships with a representation model class (PagedResources) that allows enriching the content of a Page instance with the necessary Page metadata as well as links to let the clients easily navigate the pages. The conversion of a Page to a PagedResources is done by an implementation of the Spring HATEOAS ResourceAssembler interface, called the PagedResourcesAssembler. The following example shows how to use a PagedResourcesAssembler as a controller method argument:
@Controller
class PersonController {

  @Autowired PersonRepository repository;

  @RequestMapping(value = "/persons", method = RequestMethod.GET)
  HttpEntity<PagedResources<Person>> persons(Pageable pageable,
    PagedResourcesAssembler assembler) {

    Page<Person> persons = repository.findAll(pageable);
    return new ResponseEntity<>(assembler.toResources(persons), HttpStatus.OK);
  }
}
Enabling the configuration as shown in the preceding example lets the PagedResourcesAssembler be used as a controller method argument. Calling toResources(…) on it has the following effects:
-
The content of the
Pagebecomes the content of thePagedResourcesinstance. -
The
PagedResourcesobject gets aPageMetadatainstance attached, and it is populated with information from thePageand the underlyingPageRequest. -
The
PagedResourcesmay getprevandnextlinks attached, depending on the page’s state. The links point to the URI to which the method maps. The pagination parameters added to the method match the setup of thePageableHandlerMethodArgumentResolverto make sure the links can be resolved later.
Assume we have 30 Person instances in the database. You can now trigger a request (GET http://localhost:8080/persons) and see output similar to the following:
{ "links" : [ { "rel" : "next",
                "href" : "http://localhost:8080/persons?page=1&size=20 }
  ],
  "content" : [
     … // 20 Person instances rendered here
  ],
  "pageMetadata" : {
    "size" : 20,
    "totalElements" : 30,
    "totalPages" : 2,
    "number" : 0
  }
}
You see that the assembler produced the correct URI and also picked up the default configuration to resolve the parameters into a Pageable for an upcoming request. This means that, if you change that configuration, the links automatically adhere to the change. By default, the assembler points to the controller method it was invoked in, but that can be customized by handing in a custom Link to be used as base to build the pagination links, which overloads the PagedResourcesAssembler.toResource(…) method.
Web Databinding Support
Spring Data projections (described in Projections) can be used to bind incoming request payloads by either using JSONPath expressions (requires Jayway JsonPath or XPath expressions (requires XmlBeam), as shown in the following example:
@ProjectedPayload
public interface UserPayload {

  @XBRead("//firstname")
  @JsonPath("$..firstname")
  String getFirstname();

  @XBRead("/lastname")
  @JsonPath({ "$.lastname", "$.user.lastname" })
  String getLastname();
}
The type shown in the preceding example can be used as a Spring MVC handler method argument or by using ParameterizedTypeReference on one of RestTemplate's methods.
The preceding method declarations would try to find firstname anywhere in the given document.
The lastname XML lookup is performed on the top-level of the incoming document.
The JSON variant of that tries a top-level lastname first but also tries lastname nested in a user sub-document if the former does not return a value.
That way, changes in the structure of the source document can be mitigated easily without having clients calling the exposed methods (usually a drawback of class-based payload binding).
Nested projections are supported as described in Projections.
If the method returns a complex, non-interface type, a Jackson ObjectMapper is used to map the final value.
For Spring MVC, the necessary converters are registered automatically as soon as @EnableSpringDataWebSupport is active and the required dependencies are available on the classpath.
For usage with RestTemplate, register a ProjectingJackson2HttpMessageConverter (JSON) or XmlBeamHttpMessageConverter manually.
For more information, see the web projection example in the canonical Spring Data Examples repository.
Querydsl Web Support
For those stores having QueryDSL integration, it is possible to derive queries from the attributes contained in a Request query string.
Consider the following query string:
?firstname=Dave&lastname=MatthewsGiven the User object from previous examples, a query string can be resolved to the following value by using the QuerydslPredicateArgumentResolver.
QUser.user.firstname.eq("Dave").and(QUser.user.lastname.eq("Matthews"))
The feature is automatically enabled, along with @EnableSpringDataWebSupport, when Querydsl is found on the classpath.
|
Adding a @QuerydslPredicate to the method signature provides a ready-to-use Predicate, which can be run by using the QuerydslPredicateExecutor.
Type information is typically resolved from the method’s return type. Since that information does not necessarily match the domain type, it might be a good idea to use the root attribute of QuerydslPredicate.
|
The following exampe shows how to use @QuerydslPredicate in a method signature:
@Controller
class UserController {

  @Autowired UserRepository repository;

  @RequestMapping(value = "/", method = RequestMethod.GET)
  String index(Model model, @QuerydslPredicate(root = User.class) Predicate predicate,    (1)
          Pageable pageable, @RequestParam MultiValueMap<String, String> parameters) {

    model.addAttribute("users", repository.findAll(predicate, pageable));

    return "index";
  }
}| 1 | Resolve query string arguments to matching Predicate for User. |
The default binding is as follows:
-
Objecton simple properties aseq. -
Objecton collection like properties ascontains. -
Collectionon simple properties asin.
Those bindings can be customized through the bindings attribute of @QuerydslPredicate or by making use of Java 8 default methods and adding the QuerydslBinderCustomizer method to the repository interface.
interface UserRepository extends CrudRepository<User, String>,
                                 QuerydslPredicateExecutor<User>,                (1)
                                 QuerydslBinderCustomizer<QUser> {               (2)

  @Override
  default void customize(QuerydslBindings bindings, QUser user) {

    bindings.bind(user.username).first((path, value) -> path.contains(value))    (3)
    bindings.bind(String.class)
      .first((StringPath path, String value) -> path.containsIgnoreCase(value)); (4)
    bindings.excluding(user.password);                                           (5)
  }
}| 1 | QuerydslPredicateExecutor provides access to specific finder methods for Predicate. |
| 2 | QuerydslBinderCustomizer defined on the repository interface is automatically picked up and shortcuts @QuerydslPredicate(bindings=…). |
| 3 | Define the binding for the username property to be a simple contains binding. |
| 4 | Define the default binding for String properties to be a case-insensitive contains match. |
| 5 | Exclude the password property from Predicate resolution. |
8.8.3. Repository Populators
If you work with the Spring JDBC module, you are probably familiar with the support to populate a DataSource with SQL scripts. A similar abstraction is available on the repositories level, although it does not use SQL as the data definition language because it must be store-independent. Thus, the populators support XML (through Spring’s OXM abstraction) and JSON (through Jackson) to define data with which to populate the repositories.
Assume you have a file data.json with the following content:
[ { "_class" : "com.acme.Person",
 "firstname" : "Dave",
  "lastname" : "Matthews" },
  { "_class" : "com.acme.Person",
 "firstname" : "Carter",
  "lastname" : "Beauford" } ]
You can populate your repositories by using the populator elements of the repository namespace provided in Spring Data Commons. To populate the preceding data to your PersonRepository, declare a populator similar to the following:
<?xml version="1.0" encoding="UTF-8"?>
<beans xmlns="http://www.springframework.org/schema/beans"
  xmlns:xsi="http://www.w3.org/2001/XMLSchema-instance"
  xmlns:repository="http://www.springframework.org/schema/data/repository"
  xsi:schemaLocation="http://www.springframework.org/schema/beans
    https://www.springframework.org/schema/beans/spring-beans.xsd
    http://www.springframework.org/schema/data/repository
    https://www.springframework.org/schema/data/repository/spring-repository.xsd">

  <repository:jackson2-populator locations="classpath:data.json" />

</beans>
The preceding declaration causes the data.json file to
be read and deserialized by a Jackson ObjectMapper.
The type to which the JSON object is unmarshalled is determined by inspecting the _class attribute of the JSON document. The infrastructure eventually selects the appropriate repository to handle the object that was deserialized.
To instead use XML to define the data the repositories should be populated with, you can use the unmarshaller-populator element. You configure it to use one of the XML marshaller options available in Spring OXM. See the Spring reference documentation for details. The following example shows how to unmarshal a repository populator with JAXB:
<?xml version="1.0" encoding="UTF-8"?>
<beans xmlns="http://www.springframework.org/schema/beans"
  xmlns:xsi="http://www.w3.org/2001/XMLSchema-instance"
  xmlns:repository="http://www.springframework.org/schema/data/repository"
  xmlns:oxm="http://www.springframework.org/schema/oxm"
  xsi:schemaLocation="http://www.springframework.org/schema/beans
    https://www.springframework.org/schema/beans/spring-beans.xsd
    http://www.springframework.org/schema/data/repository
    https://www.springframework.org/schema/data/repository/spring-repository.xsd
    http://www.springframework.org/schema/oxm
    https://www.springframework.org/schema/oxm/spring-oxm.xsd">

  <repository:unmarshaller-populator locations="classpath:data.json"
    unmarshaller-ref="unmarshaller" />

  <oxm:jaxb2-marshaller contextPath="com.acme" />

</beans>
Reference Documentation
9. Introduction
9.1. Document Structure
This part of the reference documentation explains the core functionality offered by Spring Data MongoDB.
“MongoDB support” introduces the MongoDB module feature set.
“MongoDB Repositories” introduces the repository support for MongoDB.
10. MongoDB support
The MongoDB support contains a wide range of features:
-
Spring configuration support with Java-based
@Configurationclasses or an XML namespace for a Mongo driver instance and replica sets. -
MongoTemplatehelper class that increases productivity when performing common Mongo operations. Includes integrated object mapping between documents and POJOs. -
Exception translation into Spring’s portable Data Access Exception hierarchy.
-
Feature-rich Object Mapping integrated with Spring’s Conversion Service.
-
Annotation-based mapping metadata that is extensible to support other metadata formats.
-
Persistence and mapping lifecycle events.
-
Java-based Query, Criteria, and Update DSLs.
-
Automatic implementation of Repository interfaces, including support for custom finder methods.
-
QueryDSL integration to support type-safe queries.
-
Cross-store persistence support for JPA Entities with fields transparently persisted and retrieved with MongoDB (deprecated - to be removed without replacement).
-
GeoSpatial integration.
For most tasks, you should use MongoTemplate or the Repository support, which both leverage the rich mapping functionality. MongoTemplate is the place to look for accessing functionality such as incrementing counters or ad-hoc CRUD operations. MongoTemplate also provides callback methods so that it is easy for you to get the low-level API artifacts, such as com.mongodb.client.MongoDatabase, to communicate directly with MongoDB. The goal with naming conventions on various API artifacts is to copy those in the base MongoDB Java driver so you can easily map your existing knowledge onto the Spring APIs.
10.1. Getting Started
An easy way to bootstrap setting up a working environment is to create a Spring-based project in STS.
First, you need to set up a running MongoDB server. Refer to the MongoDB Quick Start guide for an explanation on how to startup a MongoDB instance. Once installed, starting MongoDB is typically a matter of running the following command: ${MONGO_HOME}/bin/mongod
To create a Spring project in STS:
-
Go to File → New → Spring Template Project → Simple Spring Utility Project, and press Yes when prompted. Then enter a project and a package name, such as
org.spring.mongodb.example. .Add the following to the pom.xml filesdependencieselement:<dependencies> <!-- other dependency elements omitted --> <dependency> <groupId>org.springframework.data</groupId> <artifactId>spring-data-mongodb</artifactId> <version>2.1.18.RELEASE</version> </dependency> </dependencies> -
Change the version of Spring in the pom.xml to be
<spring.framework.version>5.1.16.RELEASE</spring.framework.version> -
Add the following location of the Spring Milestone repository for Maven to your
pom.xmlsuch that it is at the same level of your<dependencies/>element:<repositories> <repository> <id>spring-milestone</id> <name>Spring Maven MILESTONE Repository</name> <url>https://repo.spring.io/libs-milestone</url> </repository> </repositories>
The repository is also browseable here.
You may also want to set the logging level to DEBUG to see some additional information. To do so, edit the log4j.properties file to have the following content:
log4j.category.org.springframework.data.mongodb=DEBUG
log4j.appender.stdout.layout.ConversionPattern=%d{ABSOLUTE} %5p %40.40c:%4L - %m%n
Then you can create a Person class to persist:
package org.spring.mongodb.example;

public class Person {

  private String id;
  private String name;
  private int age;

  public Person(String name, int age) {
    this.name = name;
    this.age = age;
  }

  public String getId() {
    return id;
  }
  public String getName() {
    return name;
  }
  public int getAge() {
    return age;
  }

  @Override
  public String toString() {
    return "Person [id=" + id + ", name=" + name + ", age=" + age + "]";
  }
}
You also need a main application to run:
package org.spring.mongodb.example;

import static org.springframework.data.mongodb.core.query.Criteria.where;

import org.apache.commons.logging.Log;
import org.apache.commons.logging.LogFactory;
import org.springframework.data.mongodb.core.MongoOperations;
import org.springframework.data.mongodb.core.MongoTemplate;
import org.springframework.data.mongodb.core.query.Query;

import com.mongodb.MongoClient;

public class MongoApp {

  private static final Log log = LogFactory.getLog(MongoApp.class);

  public static void main(String[] args) throws Exception {

    MongoOperations mongoOps = new MongoTemplate(new MongoClient(), "database");
    mongoOps.insert(new Person("Joe", 34));

    log.info(mongoOps.findOne(new Query(where("name").is("Joe")), Person.class));

    mongoOps.dropCollection("person");
  }
}
When you run the main program, the preceding examples produce the following output:
10:01:32,062 DEBUG apping.MongoPersistentEntityIndexCreator:  80 - Analyzing class class org.spring.example.Person for index information.
10:01:32,265 DEBUG ramework.data.mongodb.core.MongoTemplate: 631 - insert Document containing fields: [_class, age, name] in collection: Person
10:01:32,765 DEBUG ramework.data.mongodb.core.MongoTemplate:1243 - findOne using query: { "name" : "Joe"} in db.collection: database.Person
10:01:32,953  INFO      org.spring.mongodb.example.MongoApp:  25 - Person [id=4ddbba3c0be56b7e1b210166, name=Joe, age=34]
10:01:32,984 DEBUG ramework.data.mongodb.core.MongoTemplate: 375 - Dropped collection [database.person]
Even in this simple example, there are few things to notice:
-
You can instantiate the central helper class of Spring Mongo,
MongoTemplate, by using the standardcom.mongodb.MongoClientobject and the name of the database to use. -
The mapper works against standard POJO objects without the need for any additional metadata (though you can optionally provide that information. See here.).
-
Conventions are used for handling the
idfield, converting it to be anObjectIdwhen stored in the database. -
Mapping conventions can use field access. Notice that the
Personclass has only getters. -
If the constructor argument names match the field names of the stored document, they are used to instantiate the object
10.2. Examples Repository
There is a GitHub repository with several examples that you can download and play around with to get a feel for how the library works.
10.3. Connecting to MongoDB with Spring
One of the first tasks when using MongoDB and Spring is to create a com.mongodb.MongoClient or com.mongodb.client.MongoClient object using the IoC container. There are two main ways to do this, either by using Java-based bean metadata or by using XML-based bean metadata. Both are discussed in the following sections.
| For those not familiar with how to configure the Spring container using Java-based bean metadata instead of XML-based metadata, see the high-level introduction in the reference docs here as well as the detailed documentation here. |
10.3.1. Registering a Mongo Instance by using Java-based Metadata
The following example shows an example of using Java-based bean metadata to register an instance of a com.mongodb.MongoClient:
com.mongodb.MongoClient object using Java-based bean metadata@Configuration
public class AppConfig {
/*
* Use the standard Mongo driver API to create a com.mongodb.MongoClient instance.
*/
public @Bean MongoClient mongoClient() {
return new MongoClient("localhost");
}
}This approach lets you use the standard com.mongodb.MongoClient instance, with the container using Spring’s MongoClientFactoryBean. As compared to instantiating a com.mongodb.MongoClient instance directly, the FactoryBean has the added advantage of also providing the container with an ExceptionTranslator implementation that translates MongoDB exceptions to exceptions in Spring’s portable DataAccessException hierarchy for data access classes annotated with the @Repository annotation. This hierarchy and the use of @Repository is described in Spring’s DAO support features.
The following example shows an example of a Java-based bean metadata that supports exception translation on @Repository annotated classes:
com.mongodb.MongoClient object by using Spring’s MongoClientFactoryBean and enabling Spring’s exception translation support@Configuration
public class AppConfig {
/*
* Factory bean that creates the com.mongodb.MongoClient instance
*/
public @Bean MongoClientFactoryBean mongo() {
MongoClientFactoryBean mongo = new MongoClientFactoryBean();
mongo.setHost("localhost");
return mongo;
}
}To access the com.mongodb.MongoClient object created by the MongoClientFactoryBean in other @Configuration classes or your own classes, use a private @Autowired Mongo mongo; field.
10.3.2. Registering a Mongo Instance by Using XML-based Metadata
While you can use Spring’s traditional <beans/> XML namespace to register an instance of com.mongodb.MongoClient with the container, the XML can be quite verbose, as it is general-purpose. XML namespaces are a better alternative to configuring commonly used objects, such as the Mongo instance. The mongo namespace lets you create a Mongo instance server location, replica-sets, and options.
To use the Mongo namespace elements, you need to reference the Mongo schema, as follows:
<?xml version="1.0" encoding="UTF-8"?>
<beans xmlns="http://www.springframework.org/schema/beans"
          xmlns:xsi="http://www.w3.org/2001/XMLSchema-instance"
          xmlns:context="http://www.springframework.org/schema/context"
          xmlns:mongo="http://www.springframework.org/schema/data/mongo"
          xsi:schemaLocation=
          "http://www.springframework.org/schema/context
          https://www.springframework.org/schema/context/spring-context.xsd
          http://www.springframework.org/schema/data/mongo https://www.springframework.org/schema/data/mongo/spring-mongo.xsd
          http://www.springframework.org/schema/beans
          https://www.springframework.org/schema/beans/spring-beans.xsd">

    <!-- Default bean name is 'mongo' -->
    <mongo:mongo-client host="localhost" port="27017"/>

</beans>
The following example shows a more advanced configuration with MongoClientOptions (note that these are not recommended values):
<beans>

  <mongo:mongo-client host="localhost" port="27017">
    <mongo:client-options connections-per-host="8"
                   threads-allowed-to-block-for-connection-multiplier="4"
                   connect-timeout="1000"
                   max-wait-time="1500}"
                   auto-connect-retry="true"
                   socket-keep-alive="true"
                   socket-timeout="1500"
                   slave-ok="true"
                   write-number="1"
                   write-timeout="0"
                   write-fsync="true"/>
  </mongo:mongo-client>

</beans>
The following example shows a configuration using replica sets:
com.mongodb.MongoClient object with Replica Sets<mongo:mongo-client id="replicaSetMongo" replica-set="127.0.0.1:27017,localhost:27018"/>10.3.3. The MongoDbFactory Interface
While com.mongodb.MongoClient is the entry point to the MongoDB driver API, connecting to a specific MongoDB database instance requires additional information, such as the database name and an optional username and password. With that information, you can obtain a com.mongodb.client.MongoDatabase object and access all the functionality of a specific MongoDB database instance. Spring provides the org.springframework.data.mongodb.core.MongoDbFactory interface, shown in the following listing, to bootstrap connectivity to the database:
public interface MongoDbFactory {

  MongoDatabase getDb() throws DataAccessException;

  MongoDatabase getDb(String dbName) throws DataAccessException;
}
The following sections show how you can use the container with either Java-based or XML-based metadata to configure an instance of the MongoDbFactory interface. In turn, you can use the MongoDbFactory instance to configure MongoTemplate.
Instead of using the IoC container to create an instance of MongoTemplate, you can use them in standard Java code, as follows:
public class MongoApp {

  private static final Log log = LogFactory.getLog(MongoApp.class);

  public static void main(String[] args) throws Exception {

    MongoOperations mongoOps = new MongoTemplate(new SimpleMongoDbFactory(new MongoClient(), "database"));

    mongoOps.insert(new Person("Joe", 34));

    log.info(mongoOps.findOne(new Query(where("name").is("Joe")), Person.class));

    mongoOps.dropCollection("person");
  }
}
The code in bold highlights the use of SimpleMongoDbFactory and is the only difference between the listing shown in the getting started section.
Use SimpleMongoClientDbFactory when choosing com.mongodb.client.MongoClient as the entrypoint of choice.
|
10.3.4. Registering a MongoDbFactory Instance by Using Java-based Metadata
To register a MongoDbFactory instance with the container, you write code much like what was highlighted in the previous code listing. The following listing shows a simple example:
@Configuration
public class MongoConfiguration {

  public @Bean MongoDbFactory mongoDbFactory() {
    return new SimpleMongoDbFactory(new MongoClient(), "database");
  }
}
MongoDB Server generation 3 changed the authentication model when connecting to the DB. Therefore, some of the configuration options available for authentication are no longer valid. You should use the MongoClient-specific options for setting credentials through MongoCredential to provide authentication data, as shown in the following example:
@Configuration
public class ApplicationContextEventTestsAppConfig extends AbstractMongoConfiguration {

  @Override
  public String getDatabaseName() {
    return "database";
  }

  @Override
  @Bean
  public MongoClient mongoClient() {
    return new MongoClient(singletonList(new ServerAddress("127.0.0.1", 27017)),
      singletonList(MongoCredential.createCredential("name", "db", "pwd".toCharArray())));
  }
}
In order to use authentication with XML-based configuration, use the credentials attribute on the <mongo-client> element.
Username and password credentials used in XML-based configuration must be URL-encoded when these contain reserved characters, such as :, %, @, or ,.
The following example shows encoded credentials:
m0ng0@dmin:mo_res:bw6},Qsdxx@admin@database → m0ng0%40dmin:mo_res%3Abw6%7D%2CQsdxx%40admin@database
See section 2.2 of RFC 3986 for further details.
|
As of MongoDB java driver 3.7.0 there is an alternative entry point to MongoClient via the mongodb-driver-sync artifact.
com.mongodb.client.MongoClient is not compatible with com.mongodb.MongoClient and does not longer support
the legacy DBObject codec. Therefore, it cannot be used with Querydsl and requires a different configuration.
You can use AbstractMongoClientConfiguration to leverage the new MongoClients builder API.
@Configuration
public class MongoClientConfiguration extends AbstractMongoClientConfiguration {

	@Override
	protected String getDatabaseName() {
		return "database";
	}

	@Override
	public MongoClient mongoClient() {
		return MongoClients.create("mongodb://localhost:27017/?replicaSet=rs0&w=majority");
	}
}
10.3.5. Registering a MongoDbFactory Instance by Using XML-based Metadata
The mongo namespace provides a convenient way to create a SimpleMongoDbFactory, as compared to using the <beans/> namespace, as shown in the following example:
<mongo:db-factory dbname="database">If you need to configure additional options on the com.mongodb.MongoClient instance that is used to create a SimpleMongoDbFactory, you can refer to an existing bean by using the mongo-ref attribute as shown in the following example. To show another common usage pattern, the following listing shows the use of a property placeholder, which lets you parametrize the configuration and the creation of a MongoTemplate:
<context:property-placeholder location="classpath:/com/myapp/mongodb/config/mongo.properties"/>

<mongo:mongo-client host="${mongo.host}" port="${mongo.port}">
  <mongo:client-options
     connections-per-host="${mongo.connectionsPerHost}"
     threads-allowed-to-block-for-connection-multiplier="${mongo.threadsAllowedToBlockForConnectionMultiplier}"
     connect-timeout="${mongo.connectTimeout}"
     max-wait-time="${mongo.maxWaitTime}"
     auto-connect-retry="${mongo.autoConnectRetry}"
     socket-keep-alive="${mongo.socketKeepAlive}"
     socket-timeout="${mongo.socketTimeout}"
     slave-ok="${mongo.slaveOk}"
     write-number="1"
     write-timeout="0"
     write-fsync="true"/>
</mongo:mongo-client>

<mongo:db-factory dbname="database" mongo-ref="mongoClient"/>

<bean id="anotherMongoTemplate" class="org.springframework.data.mongodb.core.MongoTemplate">
  <constructor-arg name="mongoDbFactory" ref="mongoDbFactory"/>
</bean>
10.4. Introduction to MongoTemplate
The MongoTemplate class, located in the org.springframework.data.mongodb.core package, is the central class of Spring’s MongoDB support and provides a rich feature set for interacting with the database. The template offers convenience operations to create, update, delete, and query MongoDB documents and provides a mapping between your domain objects and MongoDB documents.
Once configured, MongoTemplate is thread-safe and can be reused across multiple instances.
|
The mapping between MongoDB documents and domain classes is done by delegating to an implementation of the MongoConverter interface. Spring provides MappingMongoConverter, but you can also write your own converter. See “Overriding Default Mapping with Custom Converters” for more detailed information.
The MongoTemplate class implements the interface MongoOperations. In as much as possible, the methods on MongoOperations are named after methods available on the MongoDB driver Collection object, to make the API familiar to existing MongoDB developers who are used to the driver API. For example, you can find methods such as find, findAndModify, findAndReplace, findOne, insert, remove, save, update, and updateMulti. The design goal was to make it as easy as possible to transition between the use of the base MongoDB driver and MongoOperations. A major difference between the two APIs is that MongoOperations can be passed domain objects instead of Document. Also, MongoOperations has fluent APIs for Query, Criteria, and Update operations instead of populating a Document to specify the parameters for those operations.
The preferred way to reference the operations on MongoTemplate instance is through its interface, MongoOperations.
|
The default converter implementation used by MongoTemplate is MappingMongoConverter. While the MappingMongoConverter can use additional metadata to specify the mapping of objects to documents, it can also convert objects that contain no additional metadata by using some conventions for the mapping of IDs and collection names. These conventions, as well as the use of mapping annotations, are explained in the “Mapping” chapter.
Another central feature of MongoTemplate is translation of exceptions thrown by the MongoDB Java driver into Spring’s portable Data Access Exception hierarchy. See “Exception Translation” for more information.
MongoTemplate offers many convenience methods to help you easily perform common tasks. However, if you need to directly access the MongoDB driver API, you can use one of several Execute callback methods. The execute callbacks gives you a reference to either a com.mongodb.client.MongoCollection or a com.mongodb.client.MongoDatabase object. See the “Execution Callbacks” section for more information.
The next section contains an example of how to work with the MongoTemplate in the context of the Spring container.
10.4.1. Instantiating MongoTemplate
You can use Java to create and register an instance of MongoTemplate, as the following example shows:
com.mongodb.MongoClient object and enabling Spring’s exception translation support@Configuration
public class AppConfig {
public @Bean MongoClient mongoClient() {
return new MongoClient("localhost");
}
public @Bean MongoTemplate mongoTemplate() {
return new MongoTemplate(mongoClient(), "mydatabase");
}
}There are several overloaded constructors of MongoTemplate:
-
MongoTemplate(MongoClient mongo, String databaseName): Takes theMongoClientobject and the default database name to operate against. -
MongoTemplate(MongoDbFactory mongoDbFactory): Takes a MongoDbFactory object that encapsulated theMongoClientobject, database name, and username and password. -
MongoTemplate(MongoDbFactory mongoDbFactory, MongoConverter mongoConverter): Adds aMongoConverterto use for mapping.
You can also configure a MongoTemplate by using Spring’s XML <beans/> schema, as the following example shows:
<mongo:mongo-client host="localhost" port="27017"/>

<bean id="mongoTemplate" class="org.springframework.data.mongodb.core.MongoTemplate">
  <constructor-arg ref="mongoClient"/>
  <constructor-arg name="databaseName" value="geospatial"/>
</bean>
Other optional properties that you might like to set when creating a MongoTemplate are the default WriteResultCheckingPolicy, WriteConcern, and ReadPreference properties.
The preferred way to reference the operations on MongoTemplate instance is through its interface, MongoOperations.
|
10.4.2. WriteResultChecking Policy
When in development, it is handy to either log or throw an exception if the com.mongodb.WriteResult returned from any MongoDB operation contains an error. It is quite common to forget to do this during development and then end up with an application that looks like it runs successfully when, in fact, the database was not modified according to your expectations. You can set the WriteResultChecking property of MongoTemplate to one of the following values: EXCEPTION or NONE, to either throw an Exception or do nothing, respectively. The default is to use a WriteResultChecking value of NONE.
10.4.3. WriteConcern
If it has not yet been specified through the driver at a higher level (such as com.mongodb.MongoClient), you can set the com.mongodb.WriteConcern property that the MongoTemplate uses for write operations. If the WriteConcern property is not set, it defaults to the one set in the MongoDB driver’s DB or Collection setting.
10.4.4. WriteConcernResolver
For more advanced cases where you want to set different WriteConcern values on a per-operation basis (for remove, update, insert, and save operations), a strategy interface called WriteConcernResolver can be configured on MongoTemplate. Since MongoTemplate is used to persist POJOs, the WriteConcernResolver lets you create a policy that can map a specific POJO class to a WriteConcern value. The following listing shows the WriteConcernResolver interface:
public interface WriteConcernResolver {
  WriteConcern resolve(MongoAction action);
}
You can use the MongoAction argument to determine the WriteConcern value or use the value of the Template itself as a default. MongoAction contains the collection name being written to, the java.lang.Class of the POJO, the converted Document, the operation (REMOVE, UPDATE, INSERT, INSERT_LIST, or SAVE), and a few other pieces of contextual information. The following example shows two sets of classes getting different WriteConcern settings:
private class MyAppWriteConcernResolver implements WriteConcernResolver {

  public WriteConcern resolve(MongoAction action) {
    if (action.getEntityClass().getSimpleName().contains("Audit")) {
      return WriteConcern.NONE;
    } else if (action.getEntityClass().getSimpleName().contains("Metadata")) {
      return WriteConcern.JOURNAL_SAFE;
    }
    return action.getDefaultWriteConcern();
  }
}
10.5. Saving, Updating, and Removing Documents
MongoTemplate lets you save, update, and delete your domain objects and map those objects to documents stored in MongoDB.
Consider the following class:
public class Person {

  private String id;
  private String name;
  private int age;

  public Person(String name, int age) {
    this.name = name;
    this.age = age;
  }

  public String getId() {
    return id;
  }
  public String getName() {
    return name;
  }
  public int getAge() {
    return age;
  }

  @Override
  public String toString() {
    return "Person [id=" + id + ", name=" + name + ", age=" + age + "]";
  }

}
Given the Person class in the preceding example, you can save, update and delete the object, as the following example shows:
MongoOperations is the interface that MongoTemplate implements.
|
package org.spring.example;

import static org.springframework.data.mongodb.core.query.Criteria.where;
import static org.springframework.data.mongodb.core.query.Update.update;
import static org.springframework.data.mongodb.core.query.Query.query;

import java.util.List;

import org.apache.commons.logging.Log;
import org.apache.commons.logging.LogFactory;
import org.springframework.data.mongodb.core.MongoOperations;
import org.springframework.data.mongodb.core.MongoTemplate;
import org.springframework.data.mongodb.core.SimpleMongoDbFactory;

import com.mongodb.MongoClient;

public class MongoApp {

  private static final Log log = LogFactory.getLog(MongoApp.class);

  public static void main(String[] args) {

    MongoOperations mongoOps = new MongoTemplate(new SimpleMongoDbFactory(new MongoClient(), "database"));

    Person p = new Person("Joe", 34);

    // Insert is used to initially store the object into the database.
    mongoOps.insert(p);
    log.info("Insert: " + p);

    // Find
    p = mongoOps.findById(p.getId(), Person.class);
    log.info("Found: " + p);

    // Update
    mongoOps.updateFirst(query(where("name").is("Joe")), update("age", 35), Person.class);
    p = mongoOps.findOne(query(where("name").is("Joe")), Person.class);
    log.info("Updated: " + p);

    // Delete
    mongoOps.remove(p);

    // Check that deletion worked
    List<Person> people =  mongoOps.findAll(Person.class);
    log.info("Number of people = : " + people.size());


    mongoOps.dropCollection(Person.class);
  }
}
The preceding example would produce the following log output (including debug messages from MongoTemplate):
DEBUG apping.MongoPersistentEntityIndexCreator:  80 - Analyzing class class org.spring.example.Person for index information.
DEBUG work.data.mongodb.core.MongoTemplate: 632 - insert Document containing fields: [_class, age, name] in collection: person
INFO               org.spring.example.MongoApp:  30 - Insert: Person [id=4ddc6e784ce5b1eba3ceaf5c, name=Joe, age=34]
DEBUG work.data.mongodb.core.MongoTemplate:1246 - findOne using query: { "_id" : { "$oid" : "4ddc6e784ce5b1eba3ceaf5c"}} in db.collection: database.person
INFO               org.spring.example.MongoApp:  34 - Found: Person [id=4ddc6e784ce5b1eba3ceaf5c, name=Joe, age=34]
DEBUG work.data.mongodb.core.MongoTemplate: 778 - calling update using query: { "name" : "Joe"} and update: { "$set" : { "age" : 35}} in collection: person
DEBUG work.data.mongodb.core.MongoTemplate:1246 - findOne using query: { "name" : "Joe"} in db.collection: database.person
INFO               org.spring.example.MongoApp:  39 - Updated: Person [id=4ddc6e784ce5b1eba3ceaf5c, name=Joe, age=35]
DEBUG work.data.mongodb.core.MongoTemplate: 823 - remove using query: { "id" : "4ddc6e784ce5b1eba3ceaf5c"} in collection: person
INFO               org.spring.example.MongoApp:  46 - Number of people = : 0
DEBUG work.data.mongodb.core.MongoTemplate: 376 - Dropped collection [database.person]
MongoConverter caused implicit conversion between a String and an ObjectId stored in the database by recognizing (through convention) the Id property name.
The preceding example is meant to show the use of save, update, and remove operations on MongoTemplate and not to show complex mapping functionality.
|
The query syntax used in the preceding example is explained in more detail in the section “Querying Documents”.
10.5.1. How the _id Field is Handled in the Mapping Layer
MongoDB requires that you have an _id field for all documents. If you do not provide one, the driver assigns an ObjectId with a generated value. When you use the MappingMongoConverter, certain rules govern how properties from the Java class are mapped to this _id field:
-
A property or field annotated with
@Id(org.springframework.data.annotation.Id) maps to the_idfield. -
A property or field without an annotation but named
idmaps to the_idfield.
The following outlines what type conversion, if any, is done on the property mapped to the _id document field when using the MappingMongoConverter (the default for MongoTemplate).
-
If possible, an
idproperty or field declared as aStringin the Java class is converted to and stored as anObjectIdby using a SpringConverter<String, ObjectId>. Valid conversion rules are delegated to the MongoDB Java driver. If it cannot be converted to anObjectId, then the value is stored as a string in the database. -
An
idproperty or field declared asBigIntegerin the Java class is converted to and stored as anObjectIdby using a SpringConverter<BigInteger, ObjectId>.
If no field or property specified in the previous sets of rules is present in the Java class, an implicit _id file is generated by the driver but not mapped to a property or field of the Java class.
When querying and updating, MongoTemplate uses the converter that corresponds to the preceding rules for saving documents so that field names and types used in your queries can match what is in your domain classes.
10.5.2. Type Mapping
MongoDB collections can contain documents that represent instances of a variety of types. This feature can be useful if you store a hierarchy of classes or have a class with a property of type Object. In the latter case, the values held inside that property have to be read in correctly when retrieving the object. Thus, we need a mechanism to store type information alongside the actual document.
To achieve that, the MappingMongoConverter uses a MongoTypeMapper abstraction with DefaultMongoTypeMapper as its main implementation. Its default behavior to store the fully qualified classname under _class inside the document. Type hints are written for top-level documents as well as for every value (if it is a complex type and a subtype of the declared property type). The following example (with a JSON representation at the end) shows how the mapping works:
public class Sample {
  Contact value;
}

public abstract class Contact { … }

public class Person extends Contact { … }

Sample sample = new Sample();
sample.value = new Person();

mongoTemplate.save(sample);

{
  "value" : { "_class" : "com.acme.Person" },
  "_class" : "com.acme.Sample"
}
Spring Data MongoDB stores the type information as the last field for the actual root class as well as for the nested type (because it is complex and a subtype of Contact). So, if you now use mongoTemplate.findAll(Object.class, "sample"), you can find out that the document stored is a Sample instance. You can also find out that the value property is actually a Person.
Customizing Type Mapping
If you want to avoid writing the entire Java class name as type information but would rather like to use a key, you can use the @TypeAlias annotation on the entity class. If you need to customize the mapping even more, have a look at the TypeInformationMapper interface. An instance of that interface can be configured at the DefaultMongoTypeMapper, which can, in turn, be configured on MappingMongoConverter. The following example shows how to define a type alias for an entity:
@TypeAlias("pers")
class Person {

}
Note that the resulting document contains pers as the value in the _class Field.
Configuring Custom Type Mapping
The following example shows how to configure a custom MongoTypeMapper in MappingMongoConverter:
MongoTypeMapper with Spring Java Configclass CustomMongoTypeMapper extends DefaultMongoTypeMapper {
//implement custom type mapping here
}@Configuration
class SampleMongoConfiguration extends AbstractMongoConfiguration {
@Override
protected String getDatabaseName() {
return "database";
}
@Override
public MongoClient mongoClient() {
return new MongoClient();
}
@Bean
@Override
public MappingMongoConverter mappingMongoConverter() throws Exception {
MappingMongoConverter mmc = super.mappingMongoConverter();
mmc.setTypeMapper(customTypeMapper());
return mmc;
}
@Bean
public MongoTypeMapper customTypeMapper() {
return new CustomMongoTypeMapper();
}
}Note that the preceding example extends the AbstractMongoConfiguration class and overrides the bean definition of the MappingMongoConverter where we configured our custom MongoTypeMapper.
The following example shows how to use XML to configure a custom MongoTypeMapper:
MongoTypeMapper with XML<mongo:mapping-converter type-mapper-ref="customMongoTypeMapper"/>
<bean name="customMongoTypeMapper" class="com.bubu.mongo.CustomMongoTypeMapper"/>10.5.3. Methods for Saving and Inserting Documents
There are several convenient methods on MongoTemplate for saving and inserting your objects. To have more fine-grained control over the conversion process, you can register Spring converters with the MappingMongoConverter — for example Converter<Person, Document> and Converter<Document, Person>.
| The difference between insert and save operations is that a save operation performs an insert if the object is not already present. |
The simple case of using the save operation is to save a POJO. In this case, the collection name is determined by name (not fully qualified) of the class. You may also call the save operation with a specific collection name. You can use mapping metadata to override the collection in which to store the object.
When inserting or saving, if the Id property is not set, the assumption is that its value will be auto-generated by the database. Consequently, for auto-generation of an ObjectId to succeed, the type of the Id property or field in your class must be a String, an ObjectId, or a BigInteger.
The following example shows how to save a document and retrieving its contents:
import static org.springframework.data.mongodb.core.query.Criteria.where;
import static org.springframework.data.mongodb.core.query.Criteria.query;
…

Person p = new Person("Bob", 33);
mongoTemplate.insert(p);

Person qp = mongoTemplate.findOne(query(where("age").is(33)), Person.class);
The following insert and save operations are available:
-
voidsave(Object objectToSave): Save the object to the default collection. -
voidsave(Object objectToSave, String collectionName): Save the object to the specified collection.
A similar set of insert operations is also available:
-
voidinsert(Object objectToSave): Insert the object to the default collection. -
voidinsert(Object objectToSave, String collectionName): Insert the object to the specified collection.
Into Which Collection Are My Documents Saved?
There are two ways to manage the collection name that is used for the documents. The default collection name that is used is the class name changed to start with a lower-case letter. So a com.test.Person class is stored in the person collection. You can customize this by providing a different collection name with the @Document annotation. You can also override the collection name by providing your own collection name as the last parameter for the selected MongoTemplate method calls.
Inserting or Saving Individual Objects
The MongoDB driver supports inserting a collection of documents in a single operation. The following methods in the MongoOperations interface support this functionality:
-
insert: Inserts an object. If there is an existing document with the same
id, an error is generated. -
insertAll: Takes a
Collectionof objects as the first parameter. This method inspects each object and inserts it into the appropriate collection, based on the rules specified earlier. -
save: Saves the object, overwriting any object that might have the same
id.
Inserting Several Objects in a Batch
The MongoDB driver supports inserting a collection of documents in one operation. The following methods in the MongoOperations interface support this functionality:
-
insert methods: Take a
Collectionas the first argument. They insert a list of objects in a single batch write to the database.
10.5.4. Updating Documents in a Collection
For updates, you can update the first document found by using MongoOperation.updateFirst or you can update all documents that were found to match the query by using the MongoOperation.updateMulti method. The following example shows an update of all SAVINGS accounts where we are adding a one-time $50.00 bonus to the balance by using the $inc operator:
MongoTemplateimport static org.springframework.data.mongodb.core.query.Criteria.where;
import static org.springframework.data.mongodb.core.query.Query;
import static org.springframework.data.mongodb.core.query.Update;
...
WriteResult wr = mongoTemplate.updateMulti(new Query(where("accounts.accountType").is(Account.Type.SAVINGS)),
new Update().inc("accounts.$.balance", 50.00), Account.class);In addition to the Query discussed earlier, we provide the update definition by using an Update object. The Update class has methods that match the update modifiers available for MongoDB.
Most methods return the Update object to provide a fluent style for the API.
Methods for Executing Updates for Documents
-
updateFirst: Updates the first document that matches the query document criteria with the updated document.
-
updateMulti: Updates all objects that match the query document criteria with the updated document.
updateFirst does not support ordering. Please use findAndModify to apply Sort.
|
Methods in the Update Class
You can use a little "'syntax sugar'" with the Update class, as its methods are meant to be chained together. Also, you can kick-start the creation of a new Update instance by using public static Update update(String key, Object value) and using static imports.
The Update class contains the following methods:
-
UpdateaddToSet(String key, Object value)Update using the$addToSetupdate modifier -
UpdatecurrentDate(String key)Update using the$currentDateupdate modifier -
UpdatecurrentTimestamp(String key)Update using the$currentDateupdate modifier with$typetimestamp -
Updateinc(String key, Number inc)Update using the$incupdate modifier -
Updatemax(String key, Object max)Update using the$maxupdate modifier -
Updatemin(String key, Object min)Update using the$minupdate modifier -
Updatemultiply(String key, Number multiplier)Update using the$mulupdate modifier -
Updatepop(String key, Update.Position pos)Update using the$popupdate modifier -
Updatepull(String key, Object value)Update using the$pullupdate modifier -
UpdatepullAll(String key, Object[] values)Update using the$pullAllupdate modifier -
Updatepush(String key, Object value)Update using the$pushupdate modifier -
UpdatepushAll(String key, Object[] values)Update using the$pushAllupdate modifier -
Updaterename(String oldName, String newName)Update using the$renameupdate modifier -
Updateset(String key, Object value)Update using the$setupdate modifier -
UpdatesetOnInsert(String key, Object value)Update using the$setOnInsertupdate modifier -
Updateunset(String key)Update using the$unsetupdate modifier
Some update modifiers, such as $push and $addToSet, allow nesting of additional operators.
// { $push : { "category" : { "$each" : [ "spring" , "data" ] } } }
new Update().push("category").each("spring", "data")

// { $push : { "key" : { "$position" : 0 , "$each" : [ "Arya" , "Arry" , "Weasel" ] } } }
new Update().push("key").atPosition(Position.FIRST).each(Arrays.asList("Arya", "Arry", "Weasel"));

// { $push : { "key" : { "$slice" : 5 , "$each" : [ "Arya" , "Arry" , "Weasel" ] } } }
new Update().push("key").slice(5).each(Arrays.asList("Arya", "Arry", "Weasel"));

// { $addToSet : { "values" : { "$each" : [ "spring" , "data" , "mongodb" ] } } }
new Update().addToSet("values").each("spring", "data", "mongodb");
10.5.5. “Upserting” Documents in a Collection
Related to performing an updateFirst operation, you can also perform an “upsert” operation, which will perform an insert if no document is found that matches the query. The document that is inserted is a combination of the query document and the update document. The following example shows how to use the upsert method:
template.upsert(query(where("ssn").is(1111).and("firstName").is("Joe").and("Fraizer").is("Update")), update("address", addr), Person.class);
upsert does not support ordering. Please use findAndModify to apply Sort.
|
10.5.6. Finding and Upserting Documents in a Collection
The findAndModify(…) method on MongoCollection can update a document and return either the old or newly updated document in a single operation. MongoTemplate provides four findAndModify overloaded methods that take Query and Update classes and converts from Document to your POJOs:
<T> T findAndModify(Query query, Update update, Class<T> entityClass);

<T> T findAndModify(Query query, Update update, Class<T> entityClass, String collectionName);

<T> T findAndModify(Query query, Update update, FindAndModifyOptions options, Class<T> entityClass);

<T> T findAndModify(Query query, Update update, FindAndModifyOptions options, Class<T> entityClass, String collectionName);
The following example inserts a few Person objects into the container and performs a findAndUpdate operation:
mongoTemplate.insert(new Person("Tom", 21));
mongoTemplate.insert(new Person("Dick", 22));
mongoTemplate.insert(new Person("Harry", 23));

Query query = new Query(Criteria.where("firstName").is("Harry"));
Update update = new Update().inc("age", 1);
Person p = mongoTemplate.findAndModify(query, update, Person.class); // return's old person object

assertThat(p.getFirstName(), is("Harry"));
assertThat(p.getAge(), is(23));
p = mongoTemplate.findOne(query, Person.class);
assertThat(p.getAge(), is(24));

// Now return the newly updated document when updating
p = template.findAndModify(query, update, new FindAndModifyOptions().returnNew(true), Person.class);
assertThat(p.getAge(), is(25));
The FindAndModifyOptions method lets you set the options of returnNew, upsert, and remove. An example extending from the previous code snippet follows:
Query query2 = new Query(Criteria.where("firstName").is("Mary"));
p = mongoTemplate.findAndModify(query2, update, new FindAndModifyOptions().returnNew(true).upsert(true), Person.class);
assertThat(p.getFirstName(), is("Mary"));
assertThat(p.getAge(), is(1));
10.5.7. Finding and Replacing Documents
The most straight forward method of replacing an entire Document is via its id using the save method. However this
might not always be feasible. findAndReplace offers an alternative that allows to identify the document to replace via
a simple query.
Optional<User> result = template.update(Person.class)      (1)
    .matching(query(where("firstame").is("Tom")))          (2)
    .replaceWith(new Person("Dick"))
    .withOptions(FindAndReplaceOptions.options().upsert()) (3)
    .as(User.class)                                        (4)
.findAndReplace(); (5)| 1 | Use the fluent update API with the domain type given for mapping the query and deriving the collection name or just use MongoOperations#findAndReplace. |
| 2 | The actual match query mapped against the given domain type. Provide sort, fields and collation settings via the query. |
| 3 | Additional optional hook to provide options other than the defaults, like upsert. |
| 4 | An optional projection type used for mapping the operation result. If none given the initial domain type is used. |
| 5 | Trigger the actual execution. Use findAndReplaceValue to obtain the nullable result instead of an Optional. |
Please note that the replacement must not hold an id itself as the id of the existing Document will be
carried over to the replacement by the store itself. Also keep in mind that findAndReplace will only replace the first
document matching the query criteria depending on a potentially given sort order.
|
10.5.8. Methods for Removing Documents
You can use one of five overloaded methods to remove an object from the database:
template.remove(tywin, "GOT");                                              (1)

template.remove(query(where("lastname").is("lannister")), "GOT");           (2)

template.remove(new Query().limit(3), "GOT");                               (3)

template.findAllAndRemove(query(where("lastname").is("lannister"), "GOT");  (4)

template.findAllAndRemove(new Query().limit(3), "GOT"); (5)| 1 | Remove a single entity specified by its _id from the associated collection. |
| 2 | Remove all documents that match the criteria of the query from the GOT collection. |
| 3 | Remove the first three documents in the GOT collection. Unlike <2>, the documents to remove are identified by their _id, executing the given query, applying sort, limit, and skip options first, and then removing all at once in a separate step. |
| 4 | Remove all documents matching the criteria of the query from the GOT collection. Unlike <3>, documents do not get deleted in a batch but one by one. |
| 5 | Remove the first three documents in the GOT collection. Unlike <3>, documents do not get deleted in a batch but one by one. |
10.5.9. Optimistic Locking
The @Version annotation provides syntax similar to that of JPA in the context of MongoDB and makes sure updates are only applied to documents with a matching version. Therefore, the actual value of the version property is added to the update query in such a way that the update does not have any effect if another operation altered the document in the meantime. In that case, an OptimisticLockingFailureException is thrown. The following example shows these features:
@Document
class Person {

  @Id String id;
  String firstname;
  String lastname;
  @Version Long version;
}

Person daenerys = template.insert(new Person("Daenerys"));                            (1)

Person tmp = template.findOne(query(where("id").is(daenerys.getId())), Person.class); (2)

daenerys.setLastname("Targaryen");
template.save(daenerys);                                                              (3)

template.save(tmp); // throws OptimisticLockingFailureException (4)| 1 | Intially insert document. version is set to 0. |
| 2 | Load the just inserted document. version is still 0. |
| 3 | Update the document with version = 0. Set the lastname and bump version to 1. |
| 4 | Try to update the previously loaded document that still has version = 0. The operation fails with an OptimisticLockingFailureException, as the current version is 1. |
Optimistic Locking requires to set the WriteConcern to ACKNOWLEDGED. Otherwise OptimisticLockingFailureException can be silently swallowed.
|
10.6. Querying Documents
You can use the Query and Criteria classes to express your queries. They have method names that mirror the native MongoDB operator names, such as lt, lte, is, and others. The Query and Criteria classes follow a fluent API style so that you can chain together multiple method criteria and queries while having easy-to-understand code. To improve readability, static imports let you avoid using the 'new' keyword for creating Query and Criteria instances. You can also use BasicQuery to create Query instances from plain JSON Strings, as shown in the following example:
BasicQuery query = new BasicQuery("{ age : { $lt : 50 }, accounts.balance : { $gt : 1000.00 }}");
List<Person> result = mongoTemplate.find(query, Person.class);
Spring MongoDB also supports GeoSpatial queries (see the GeoSpatial Queries section) and Map-Reduce operations (see the Map-Reduce section.).
10.6.1. Querying Documents in a Collection
Earlier, we saw how to retrieve a single document by using the findOne and findById methods on MongoTemplate. These methods return a single domain object. We can also query for a collection of documents to be returned as a list of domain objects. Assuming that we have a number of Person objects with name and age stored as documents in a collection and that each person has an embedded account document with a balance, we can now run a query using the following code:
import static org.springframework.data.mongodb.core.query.Criteria.where;
import static org.springframework.data.mongodb.core.query.Query.query;

…

List<Person> result = mongoTemplate.find(query(where("age").lt(50)
  .and("accounts.balance").gt(1000.00d)), Person.class);
All find methods take a Query object as a parameter. This object defines the criteria and options used to perform the query. The criteria are specified by using a Criteria object that has a static factory method named where to instantiate a new Criteria object. We recommend using static imports for org.springframework.data.mongodb.core.query.Criteria.where and Query.query to make the query more readable.
The query should return a list of Person objects that meet the specified criteria. The rest of this section lists the methods of the Criteria and Query classes that correspond to the operators provided in MongoDB. Most methods return the Criteria object, to provide a fluent style for the API.
Methods for the Criteria Class
The Criteria class provides the following methods, all of which correspond to operators in MongoDB:
-
Criteriaall(Object o)Creates a criterion using the$alloperator -
Criteriaand(String key)Adds a chainedCriteriawith the specifiedkeyto the currentCriteriaand returns the newly created one -
CriteriaandOperator(Criteria… criteria)Creates an and query using the$andoperator for all of the provided criteria (requires MongoDB 2.0 or later) -
CriteriaelemMatch(Criteria c)Creates a criterion using the$elemMatchoperator -
Criteriaexists(boolean b)Creates a criterion using the$existsoperator -
Criteriagt(Object o)Creates a criterion using the$gtoperator -
Criteriagte(Object o)Creates a criterion using the$gteoperator -
Criteriain(Object… o)Creates a criterion using the$inoperator for a varargs argument. -
Criteriain(Collection<?> collection)Creates a criterion using the$inoperator using a collection -
Criteriais(Object o)Creates a criterion using field matching ({ key:value }). If the specified value is a document, the order of the fields and exact equality in the document matters. -
Criterialt(Object o)Creates a criterion using the$ltoperator -
Criterialte(Object o)Creates a criterion using the$lteoperator -
Criteriamod(Number value, Number remainder)Creates a criterion using the$modoperator -
Criteriane(Object o)Creates a criterion using the$neoperator -
Criterianin(Object… o)Creates a criterion using the$ninoperator -
CriterianorOperator(Criteria… criteria)Creates an nor query using the$noroperator for all of the provided criteria -
Criterianot()Creates a criterion using the$notmeta operator which affects the clause directly following -
CriteriaorOperator(Criteria… criteria)Creates an or query using the$oroperator for all of the provided criteria -
Criteriaregex(String re)Creates a criterion using a$regex -
Criteriasize(int s)Creates a criterion using the$sizeoperator -
Criteriatype(int t)Creates a criterion using the$typeoperator -
CriteriamatchingDocumentStructure(MongoJsonSchema schema)Creates a criterion using the$jsonSchemaoperator for JSON schema criteria.$jsonSchemacan only be applied on the top level of a query and not property specific. Use thepropertiesattribute of the schema to match against nested fields. -
Criteriabits() is the gateway to MongoDB bitwise query operators like$bitsAllClear.
The Criteria class also provides the following methods for geospatial queries (see the GeoSpatial Queries section to see them in action):
-
Criteriawithin(Circle circle)Creates a geospatial criterion using$geoWithin $centeroperators. -
Criteriawithin(Box box)Creates a geospatial criterion using a$geoWithin $boxoperation. -
CriteriawithinSphere(Circle circle)Creates a geospatial criterion using$geoWithin $centeroperators. -
Criterianear(Point point)Creates a geospatial criterion using a$nearoperation -
CriterianearSphere(Point point)Creates a geospatial criterion using$nearSphere$centeroperations. This is only available for MongoDB 1.7 and higher. -
CriteriaminDistance(double minDistance)Creates a geospatial criterion using the$minDistanceoperation, for use with $near. -
CriteriamaxDistance(double maxDistance)Creates a geospatial criterion using the$maxDistanceoperation, for use with $near.
Methods for the Query class
The Query class has some additional methods that provide options for the query:
-
QueryaddCriteria(Criteria criteria)used to add additional criteria to the query -
Fieldfields()used to define fields to be included in the query results -
Querylimit(int limit)used to limit the size of the returned results to the provided limit (used for paging) -
Queryskip(int skip)used to skip the provided number of documents in the results (used for paging) -
Querywith(Sort sort)used to provide sort definition for the results
10.6.2. Methods for Querying for Documents
The query methods need to specify the target type T that is returned, and they are overloaded with an explicit collection name for queries that should operate on a collection other than the one indicated by the return type. The following query methods let you find one or more documents:
-
findAll: Query for a list of objects of type
Tfrom the collection. -
findOne: Map the results of an ad-hoc query on the collection to a single instance of an object of the specified type.
-
findById: Return an object of the given ID and target class.
-
find: Map the results of an ad-hoc query on the collection to a
Listof the specified type. -
findAndRemove: Map the results of an ad-hoc query on the collection to a single instance of an object of the specified type. The first document that matches the query is returned and removed from the collection in the database.
10.6.3. Query Distinct Values
MongoDB provides an operation to obtain distinct values for a single field by using a query from the resulting documents. Resulting values are not required to have the same data type, nor is the feature limited to simple types. For retrieval, the actual result type does matter for the sake of conversion and typing. The following example shows how to query for distinct values:
template.query(Person.class)  (1)
  .distinct("lastname")       (2)
.all(); (3)| 1 | Query the Person collection. |
| 2 | Select distinct values of the lastname field. The field name is mapped according to the domain types property declaration, taking potential @Field annotations into account. |
| 3 | Retrieve all distinct values as a List of Object (due to no explicit result type being specified). |
Retrieving distinct values into a Collection of Object is the most flexible way, as it tries to determine the property value of the domain type and convert results to the desired type or mapping Document structures.
Sometimes, when all values of the desired field are fixed to a certain type, it is more convenient to directly obtain a correctly typed Collection, as shown in the following example:
template.query(Person.class)  (1)
  .distinct("lastname")       (2)
  .as(String.class)           (3)
.all(); (4)| 1 | Query the collection of Person. |
| 2 | Select distinct values of the lastname field. The fieldname is mapped according to the domain types property declaration, taking potential @Field annotations into account. |
| 3 | Retrieved values are converted into the desired target type — in this case, String. It is also possible to map the values to a more complex type if the stored field contains a document. |
| 4 | Retrieve all distinct values as a List of String. If the type cannot be converted into the desired target type, this method throws a DataAccessException. |
10.6.4. GeoSpatial Queries
MongoDB supports GeoSpatial queries through the use of operators such as $near, $within, geoWithin, and $nearSphere. Methods specific to geospatial queries are available on the Criteria class. There are also a few shape classes (Box, Circle, and Point) that are used in conjunction with geospatial related Criteria methods.
| Using GeoSpatial queries requires attention when used within MongoDB transactions, see Special behavior inside transactions. |
To understand how to perform GeoSpatial queries, consider the following Venue class (taken from the integration tests and relying on the rich MappingMongoConverter):
@Document(collection="newyork")
public class Venue {

  @Id
  private String id;
  private String name;
  private double[] location;

  @PersistenceConstructor
  Venue(String name, double[] location) {
    super();
    this.name = name;
    this.location = location;
  }

  public Venue(String name, double x, double y) {
    super();
    this.name = name;
    this.location = new double[] { x, y };
  }

  public String getName() {
    return name;
  }

  public double[] getLocation() {
    return location;
  }

  @Override
  public String toString() {
    return "Venue [id=" + id + ", name=" + name + ", location="
        + Arrays.toString(location) + "]";
  }
}
To find locations within a Circle, you can use the following query:
Circle circle = new Circle(-73.99171, 40.738868, 0.01);
List<Venue> venues =
    template.find(new Query(Criteria.where("location").within(circle)), Venue.class);
To find venues within a Circle using spherical coordinates, you can use the following query:
Circle circle = new Circle(-73.99171, 40.738868, 0.003712240453784);
List<Venue> venues =
    template.find(new Query(Criteria.where("location").withinSphere(circle)), Venue.class);
To find venues within a Box, you can use the following query:
//lower-left then upper-right
Box box = new Box(new Point(-73.99756, 40.73083), new Point(-73.988135, 40.741404));
List<Venue> venues =
    template.find(new Query(Criteria.where("location").within(box)), Venue.class);
To find venues near a Point, you can use the following queries:
Point point = new Point(-73.99171, 40.738868);
List<Venue> venues =
    template.find(new Query(Criteria.where("location").near(point).maxDistance(0.01)), Venue.class);
Point point = new Point(-73.99171, 40.738868);
List<Venue> venues =
template.find(new Query(Criteria.where("location").near(point).minDistance(0.01).maxDistance(100)), Venue.class);To find venues near a Point using spherical coordinates, you can use the following query:
Point point = new Point(-73.99171, 40.738868);
List<Venue> venues =
    template.find(new Query(
        Criteria.where("location").nearSphere(point).maxDistance(0.003712240453784)),
        Venue.class);
Geo-near Queries
MongoDB supports querying the database for geo locations and calculating the distance from a given origin at the same time. With geo-near queries, you can express queries such as "find all restaurants in the surrounding 10 miles". To let you do so, MongoOperations provides geoNear(…) methods that take a NearQuery as an argument (as well as the already familiar entity type and collection), as shown in the following example:
Point location = new Point(-73.99171, 40.738868);
NearQuery query = NearQuery.near(location).maxDistance(new Distance(10, Metrics.MILES));

GeoResults<Restaurant> = operations.geoNear(query, Restaurant.class);
We use the NearQuery builder API to set up a query to return all Restaurant instances surrounding the given Point out to 10 miles. The Metrics enum used here actually implements an interface so that other metrics could be plugged into a distance as well. A Metric is backed by a multiplier to transform the distance value of the given metric into native distances. The sample shown here would consider the 10 to be miles. Using one of the built-in metrics (miles and kilometers) automatically triggers the spherical flag to be set on the query. If you want to avoid that, pass plain double values into maxDistance(…). For more information, see the JavaDoc of NearQuery and Distance.
The geo-near operations return a GeoResults wrapper object that encapsulates GeoResult instances. Wrapping GeoResults allows accessing the average distance of all results. A single GeoResult object carries the entity found plus its distance from the origin.
10.6.5. GeoJSON Support
MongoDB supports GeoJSON and simple (legacy) coordinate pairs for geospatial data. Those formats can both be used for storing as well as querying data. See the MongoDB manual on GeoJSON support to learn about requirements and restrictions.
GeoJSON Types in Domain Classes
Usage of GeoJSON types in domain classes is straightforward. The org.springframework.data.mongodb.core.geo package contains types such as GeoJsonPoint, GeoJsonPolygon, and others. These types are extend the existing org.springframework.data.geo types. The following example uses a GeoJsonPoint:
public class Store {

	String id;

	/**
	 * location is stored in GeoJSON format.
	 * {
	 *   "type" : "Point",
	 *   "coordinates" : [ x, y ]
	 * }
	 */
	GeoJsonPoint location;
}
GeoJSON Types in Repository Query Methods
Using GeoJSON types as repository query parameters forces usage of the $geometry operator when creating the query, as the following example shows:
public interface StoreRepository extends CrudRepository<Store, String> {

	List<Store> findByLocationWithin(Polygon polygon);  (1)

}

/*
 * {
 *   "location": {
 *     "$geoWithin": {
 *       "$geometry": {
 *         "type": "Polygon",
 *         "coordinates": [
 *           [
 *             [-73.992514,40.758934],
 *             [-73.961138,40.760348],
 *             [-73.991658,40.730006],
 *             [-73.992514,40.758934]
 *           ]
 *         ]
 *       }
 *     }
 *   }
 * }
 */
repo.findByLocationWithin(                              (2)
  new GeoJsonPolygon(
    new Point(-73.992514, 40.758934),
    new Point(-73.961138, 40.760348),
    new Point(-73.991658, 40.730006),
    new Point(-73.992514, 40.758934)));                 (3)

/*
 * {
 *   "location" : {
 *     "$geoWithin" : {
 *        "$polygon" : [ [-73.992514,40.758934] , [-73.961138,40.760348] , [-73.991658,40.730006] ]
 *     }
 *   }
 * }
 */
repo.findByLocationWithin(                              (4)
  new Polygon(
    new Point(-73.992514, 40.758934),
    new Point(-73.961138, 40.760348),
new Point(-73.991658, 40.730006));| 1 | Repository method definition using the commons type allows calling it with both the GeoJSON and the legacy format. |
| 2 | Use GeoJSON type to make use of $geometry operator. |
| 3 | Note that GeoJSON polygons need to define a closed ring. |
| 4 | Use the legacy format $polygon operator. |
10.6.6. Full-text Queries
Since version 2.6 of MongoDB, you can run full-text queries by using the $text operator. Methods and operations specific to full-text queries are available in TextQuery and TextCriteria. When doing full text search, see the MongoDB reference for its behavior and limitations.
Full-text Search
Before you can actually use full-text search, you must set up the search index correctly. See Text Index for more detail on how to create index structures. The following example shows how to set up a full-text search:
db.foo.createIndex(
{
  title : "text",
  content : "text"
},
{
  weights : {
              title : 3
            }
}
)
A query searching for coffee cake, sorted by relevance according to the weights, can be defined and executed as follows:
Query query = TextQuery.searching(new TextCriteria().matchingAny("coffee", "cake")).sortByScore();
List<Document> page = template.find(query, Document.class);
You can exclude search terms by prefixing the term with - or by using notMatching, as shown in the following example (note that the two lines have the same effect and are thus redundant):
// search for 'coffee' and not 'cake'
TextQuery.searching(new TextCriteria().matching("coffee").matching("-cake"));
TextQuery.searching(new TextCriteria().matching("coffee").notMatching("cake"));
TextCriteria.matching takes the provided term as is. Therefore, you can define phrases by putting them between double quotation marks (for example, \"coffee cake\") or using by TextCriteria.phrase. The following example shows both ways of defining a phrase:
// search for phrase 'coffee cake'
TextQuery.searching(new TextCriteria().matching("\"coffee cake\""));
TextQuery.searching(new TextCriteria().phrase("coffee cake"));
You can set flags for $caseSensitive and $diacriticSensitive by using the corresponding methods on TextCriteria. Note that these two optional flags have been introduced in MongoDB 3.2 and are not included in the query unless explicitly set.
10.6.7. Collations
Since version 3.4, MongoDB supports collations for collection and index creation and various query operations. Collations define string comparison rules based on the ICU collations. A collation document consists of various properties that are encapsulated in Collation, as the following listing shows:
Collation collation = Collation.of("fr")         (1)

  .strength(ComparisonLevel.secondary()          (2)
    .includeCase())

  .numericOrderingEnabled()                      (3)

  .alternate(Alternate.shifted().punct())        (4)

  .forwardDiacriticSort()                        (5)

.normalizationEnabled(); (6)| 1 | Collation requires a locale for creation. This can be either a string representation of the locale, a Locale (considering language, country, and variant) or a CollationLocale. The locale is mandatory for creation. |
| 2 | Collation strength defines comparison levels that denote differences between characters. You can configure various options (case-sensitivity, case-ordering, and others), depending on the selected strength. |
| 3 | Specify whether to compare numeric strings as numbers or as strings. |
| 4 | Specify whether the collation should consider whitespace and punctuation as base characters for purposes of comparison. |
| 5 | Specify whether strings with diacritics sort from back of the string, such as with some French dictionary ordering. |
| 6 | Specify whether to check whether text requires normalization and whether to perform normalization. |
Collations can be used to create collections and indexes. If you create a collection that specifies a collation, the collation is applied to index creation and queries unless you specify a different collation. A collation is valid for a whole operation and cannot be specified on a per-field basis, as the following example shows:
Collation french = Collation.of("fr");
Collation german = Collation.of("de");

template.createCollection(Person.class, CollectionOptions.just(collation));

template.indexOps(Person.class).ensureIndex(new Index("name", Direction.ASC).collation(german));
MongoDB uses simple binary comparison if no collation is specified (Collation.simple()).
|
Using collations with collection operations is a matter of specifying a Collation instance in your query or operation options, as the following two examples show:
findCollation collation = Collation.of("de");
Query query = new Query(Criteria.where("firstName").is("Amél")).collation(collation);
List<Person> results = template.find(query, Person.class);aggregateCollation collation = Collation.of("de");
AggregationOptions options = AggregationOptions.builder().collation(collation).build();
Aggregation aggregation = newAggregation(
project("tags"),
unwind("tags"),
group("tags")
.count().as("count")
).withOptions(options);
AggregationResults<TagCount> results = template.aggregate(aggregation, "tags", TagCount.class);| Indexes are only used if the collation used for the operation matches the index collation. |
10.6.8. JSON Schema
As of version 3.6, MongoDB supports collections that validate documents against a provided JSON Schema. The schema itself and both validation action and level can be defined when creating the collection, as the following example shows:
{
  "type": "object",                                                        (1)

  "required": [ "firstname", "lastname" ],                                 (2)

  "properties": {                                                          (3)

    "firstname": {                                                         (4)
      "type": "string",
      "enum": [ "luke", "han" ]
    },
    "address": {                                                           (5)
      "type": "object",
      "properties": {
        "postCode": { "type": "string", "minLength": 4, "maxLength": 5 }
      }
    }
  }
}| 1 | JSON schema documents always describe a whole document from its root. A schema is a schema object itself that can contain embedded schema objects that describe properties and subdocuments. |
| 2 | required is a property that describes which properties are required in a document. It can be specified optionally, along with other
schema constraints. See MongoDB’s documentation on available keywords. |
| 3 | properties is related to a schema object that describes an object type. It contains property-specific schema constraints. |
| 4 | firstname specifies constraints for the firsname field inside the document. Here, it is a string-based properties element declaring
possible field values. |
| 5 | address is a subdocument defining a schema for values in its postCode field. |
You can provide a schema either by specifying a schema document (that is, by using the Document API to parse or build a document object) or by building it with Spring Data’s JSON schema utilities in org.springframework.data.mongodb.core.schema. MongoJsonSchema is the entry point for all JSON schema-related operations. The following example shows how use MongoJsonSchema.builder() to create a JSON schema:
MongoJsonSchema.builder()                                                  (1)
    .required("firstname", "lastname")                                     (2)

    .properties(
                string("firstname").possibleValues("luke", "han"),         (3)

                object("address")
                     .properties(string("postCode").minLength(4).maxLength(5)))

.build(); (4)| 1 | Obtain a schema builder to configure the schema with a fluent API. |
| 2 | Configure required properties. |
| 3 | Configure the String-typed firstname field, allowing only luke and han values. Properties can be typed or untyped. Use a static import of JsonSchemaProperty to make the syntax slightly more compact and to get entry points such as string(…). |
| 4 | Build the schema object. Use the schema to create either a collection or query documents. |
There are already some predefined and strongly typed schema objects (JsonSchemaObject and JsonSchemaProperty) available
through static methods on the gateway interfaces.
However, you may need to build custom property validation rules, which can be created through the builder API, as the following example shows:
// "birthdate" : { "bsonType": "date" }
JsonSchemaProperty.named("birthdate").ofType(Type.dateType());

// "birthdate" : { "bsonType": "date", "description", "Must be a date" }
JsonSchemaProperty.named("birthdate").with(JsonSchemaObject.of(Type.dateType()).description("Must be a date"));
CollectionOptions provides the entry point to schema support for collections, as the following example shows:
$jsonSchemaMongoJsonSchema schema = MongoJsonSchema.builder().required("firstname", "lastname").build();
template.createCollection(Person.class, CollectionOptions.empty().schema(schema));You can use a schema to query any collection for documents that match a given structure defined by a JSON schema, as the following example shows:
$jsonSchemaMongoJsonSchema schema = MongoJsonSchema.builder().required("firstname", "lastname").build();
template.find(query(matchingDocumentStructure(schema)), Person.class);The following table shows the supported JSON schema types:
| Schema Type | Java Type | Schema Properties |
|---|---|---|
|
- |
|
|
|
|
|
any array except |
|
|
|
|
|
|
|
|
|
|
|
|
|
|
|
|
|
|
|
|
|
(none) |
|
|
(none) |
|
|
(none) |
|
|
(none) |
|
|
(none) |
|
|
(none) |
|
|
(none) |
untyped is a generic type that is inherited by all typed schema types. It provides all untyped schema properties to typed schema types.
|
For more information, see $jsonSchema.
10.6.9. Fluent Template API
The MongoOperations interface is one of the central components when it comes to more low-level interaction with MongoDB. It offers a wide range of methods covering needs from collection creation, index creation, and CRUD operations to more advanced functionality, such as Map-Reduce and aggregations.
You can find multiple overloads for each method. Most of them cover optional or nullable parts of the API.
FluentMongoOperations provides a more narrow interface for the common methods of MongoOperations and provides a more readable, fluent API.
The entry points (insert(…), find(…), update(…), and others) follow a natural naming schema based on the operation to be run. Moving on from the entry point, the API is designed to offer only context-dependent methods that lead to a terminating method that invokes the actual MongoOperations counterpart — the all method in the case of the following example:
List<SWCharacter> all = ops.find(SWCharacter.class)
  .inCollection("star-wars")                        (1)
.all();| 1 | Skip this step if SWCharacter defines the collection with @Document or if you use the class name as the collection name, which is fine. |
Sometimes, a collection in MongoDB holds entities of different types, such as a Jedi within a collection of SWCharacters.
To use different types for Query and return value mapping, you can use as(Class<?> targetType) to map results differently, as the following example shows:
List<Jedi> all = ops.find(SWCharacter.class)    (1)
  .as(Jedi.class)                               (2)
  .matching(query(where("jedi").is(true)))
.all();| 1 | The query fields are mapped against the SWCharacter type. |
| 2 | Resulting documents are mapped into Jedi. |
You can directly apply Projections to result documents by providing the target type via as(Class<?>).
|
Using projections allows MongoTemplate to optimize result mapping by limiting the actual response to fields required
by the projection target type. This applies as long as the Query itself does not contain any field restriction and the
target type is a closed interface or DTO projection.
|
You can switch between retrieving a single entity and retrieving multiple entities as a List or a Stream through the terminating methods: first(), one(), all(), or stream().
When writing a geo-spatial query with near(NearQuery), the number of terminating methods is altered to include only the methods that are valid for executing a geoNear command in MongoDB (fetching entities as a GeoResult within GeoResults), as the following example shows:
GeoResults<Jedi> results = mongoOps.query(SWCharacter.class)
  .as(Jedi.class)
  .near(alderaan) // NearQuery.near(-73.9667, 40.78).maxDis…
  .all();
10.6.10. Additional Query Options
MongoDB offers various ways of applying meta information, like a comment or a batch size, to a query. Using the Query API
directly there are several methods for those options.
Query query = query(where("firstname").is("luke"))
    .comment("find luke")         (1)
    .batchSize(100)                                 (2)
.slaveOk(); (3)| 1 | The comment propagated to the MongoDB profile log. |
| 2 | The number of documents to return in each response batch. |
| 3 | Allows querying a replica slave. |
On the repository level the @Meta annotation provides means to add query options in a declarative way.
@Meta(comment = "find luke", batchSize = 100, flags = { SLAVE_OK })
List<Person> findByFirstname(String firstname);
10.7. Query by Example
10.7.1. Introduction
This chapter provides an introduction to Query by Example and explains how to use it.
Query by Example (QBE) is a user-friendly querying technique with a simple interface. It allows dynamic query creation and does not require you to write queries that contain field names. In fact, Query by Example does not require you to write queries by using store-specific query languages at all.
10.7.2. Usage
The Query by Example API consists of three parts:
-
Probe: The actual example of a domain object with populated fields.
-
ExampleMatcher: TheExampleMatchercarries details on how to match particular fields. It can be reused across multiple Examples. -
Example: AnExampleconsists of the probe and theExampleMatcher. It is used to create the query.
Query by Example is well suited for several use cases:
-
Querying your data store with a set of static or dynamic constraints.
-
Frequent refactoring of the domain objects without worrying about breaking existing queries.
-
Working independently from the underlying data store API.
Query by Example also has several limitations:
-
No support for nested or grouped property constraints, such as
firstname = ?0 or (firstname = ?1 and lastname = ?2). -
Only supports starts/contains/ends/regex matching for strings and exact matching for other property types.
Before getting started with Query by Example, you need to have a domain object. To get started, create an interface for your repository, as shown in the following example:
public class Person {

  @Id
  private String id;
  private String firstname;
  private String lastname;
  private Address address;

  // … getters and setters omitted
}
The preceding example shows a simple domain object.
You can use it to create an Example.
By default, fields having null values are ignored, and strings are matched by using the store specific defaults.
Examples can be built by either using the of factory method or by using ExampleMatcher. Example is immutable.
The following listing shows a simple Example:
Person person = new Person();                         (1)
person.setFirstname("Dave");                          (2)

Example<Person> example = Example.of(person); (3)| 1 | Create a new instance of the domain object. |
| 2 | Set the properties to query. |
| 3 | Create the Example. |
Example queries can be executed by using repositories.
To do so, let your repository interface extend QueryByExampleExecutor<T>.
The following listing shows an excerpt from the QueryByExampleExecutor interface:
QueryByExampleExecutorpublic interface QueryByExampleExecutor<T> {
<S extends T> S findOne(Example<S> example);
<S extends T> Iterable<S> findAll(Example<S> example);
// … more functionality omitted.
}10.7.3. Example Matchers
Examples are not limited to default settings.
You can specify your own defaults for string matching, null handling, and property-specific settings by using the ExampleMatcher, as shown in the following example:
Person person = new Person();                          (1)
person.setFirstname("Dave");                           (2)

ExampleMatcher matcher = ExampleMatcher.matching()     (3)
  .withIgnorePaths("lastname")                         (4)
  .withIncludeNullValues()                             (5)
  .withStringMatcherEnding();                          (6)

Example<Person> example = Example.of(person, matcher); (7)| 1 | Create a new instance of the domain object. |
| 2 | Set properties. |
| 3 | Create an ExampleMatcher to expect all values to match.
It is usable at this stage even without further configuration. |
| 4 | Construct a new ExampleMatcher to ignore the lastname property path. |
| 5 | Construct a new ExampleMatcher to ignore the lastname property path and to include null values. |
| 6 | Construct a new ExampleMatcher to ignore the lastname property path, to include null values, and to perform suffix string matching. |
| 7 | Create a new Example based on the domain object and the configured ExampleMatcher. |
By default, the ExampleMatcher expects all values set on the probe to match.
If you want to get results matching any of the predicates defined implicitly, use ExampleMatcher.matchingAny().
You can specify behavior for individual properties (such as "firstname" and "lastname" or, for nested properties, "address.city"). You can tune it with matching options and case sensitivity, as shown in the following example:
ExampleMatcher matcher = ExampleMatcher.matching()
  .withMatcher("firstname", endsWith())
  .withMatcher("lastname", startsWith().ignoreCase());
}
Another way to configure matcher options is to use lambdas (introduced in Java 8). This approach creates a callback that asks the implementor to modify the matcher. You need not return the matcher, because configuration options are held within the matcher instance. The following example shows a matcher that uses lambdas:
ExampleMatcher matcher = ExampleMatcher.matching()
  .withMatcher("firstname", match -> match.endsWith())
  .withMatcher("firstname", match -> match.startsWith());
}
Queries created by Example use a merged view of the configuration.
Default matching settings can be set at the ExampleMatcher level, while individual settings can be applied to particular property paths.
Settings that are set on ExampleMatcher are inherited by property path settings unless they are defined explicitly.
Settings on a property patch have higher precedence than default settings.
The following table describes the scope of the various ExampleMatcher settings:
| Setting | Scope |
|---|---|
Null-handling |
|
String matching |
|
Ignoring properties |
Property path |
Case sensitivity |
|
Value transformation |
Property path |
10.7.4. Running an Example
The following example shows how to query by example when using a repository (of Person objects, in this case):
public interface PersonRepository extends QueryByExampleExecutor<Person> {

}

public class PersonService {

  @Autowired PersonRepository personRepository;

  public List<Person> findPeople(Person probe) {
    return personRepository.findAll(Example.of(probe));
  }
}
An Example containing an untyped ExampleSpec uses the Repository type and its collection name. Typed ExampleSpec instances use their type as the result type and the collection name from the Repository instance.
When including null values in the ExampleSpec, Spring Data Mongo uses embedded document matching instead of dot notation property matching. Doing so forces exact document matching for all property values and the property order in the embedded document.
|
Spring Data MongoDB provides support for the following matching options:
| Matching | Logical result |
|---|---|
|
|
|
|
|
|
|
|
|
|
|
|
|
|
|
|
|
|
|
|
|
|
|
|
10.7.5. Untyped Example
By default Example is strictly typed. This means that the mapped query has an included type match, restricting it to probe assignable types. For example, when sticking with the default type key (_class), the query has restrictions such as (_class : { $in : [ com.acme.Person] }).
By using the UntypedExampleMatcher, it is possible to bypass the default behavior and skip the type restriction. So, as long as field names match, nearly any domain type can be used as the probe for creating the reference, as the following example shows:
class JustAnArbitraryClassWithMatchingFieldName {
  @Field("lastname") String value;
}

JustAnArbitraryClassWithMatchingFieldNames probe = new JustAnArbitraryClassWithMatchingFieldNames();
probe.value = "stark";

Example example = Example.of(probe, UntypedExampleMatcher.matching());

Query query = new Query(new Criteria().alike(example));
List<Person> result = template.find(query, Person.class);
10.8. Map-Reduce Operations
You can query MongoDB by using Map-Reduce, which is useful for batch processing, for data aggregation, and for when the query language does not fulfill your needs.
Spring provides integration with MongoDB’s Map-Reduce by providing methods on MongoOperations to simplify the creation and execution of Map-Reduce operations. It can convert the results of a Map-Reduce operation to a POJO and integrates with Spring’s Resource abstraction. This lets you place your JavaScript files on the file system, classpath, HTTP server, or any other Spring Resource implementation and then reference the JavaScript resources through an easy URI style syntax — for example, classpath:reduce.js;. Externalizing JavaScript code in files is often preferable to embedding them as Java strings in your code. Note that you can still pass JavaScript code as Java strings if you prefer.
10.8.1. Example Usage
To understand how to perform Map-Reduce operations, we use an example from the book, MongoDB - The Definitive Guide [1]. In this example, we create three documents that have the values [a,b], [b,c], and [c,d], respectively. The values in each document are associated with the key, 'x', as the following example shows (assume these documents are in a collection named jmr1):
{ "_id" : ObjectId("4e5ff893c0277826074ec533"), "x" : [ "a", "b" ] }
{ "_id" : ObjectId("4e5ff893c0277826074ec534"), "x" : [ "b", "c" ] }
{ "_id" : ObjectId("4e5ff893c0277826074ec535"), "x" : [ "c", "d" ] }
The following map function counts the occurrence of each letter in the array for each document:
function () {
    for (var i = 0; i < this.x.length; i++) {
        emit(this.x[i], 1);
    }
}
The follwing reduce function sums up the occurrence of each letter across all the documents:
function (key, values) {
    var sum = 0;
    for (var i = 0; i < values.length; i++)
        sum += values[i];
    return sum;
}
Running the preceding functions result in the following collection:
{ "_id" : "a", "value" : 1 }
{ "_id" : "b", "value" : 2 }
{ "_id" : "c", "value" : 2 }
{ "_id" : "d", "value" : 1 }
Assuming that the map and reduce functions are located in map.js and reduce.js and bundled in your jar so they are available on the classpath, you can run a Map-Reduce operation as follows:
MapReduceResults<ValueObject> results = mongoOperations.mapReduce("jmr1", "classpath:map.js", "classpath:reduce.js", ValueObject.class);
for (ValueObject valueObject : results) {
  System.out.println(valueObject);
}
The preceding exmaple produces the following output:
ValueObject [id=a, value=1.0]
ValueObject [id=b, value=2.0]
ValueObject [id=c, value=2.0]
ValueObject [id=d, value=1.0]
The MapReduceResults class implements Iterable and provides access to the raw output and timing and count statistics. The following listing shows the ValueObject class:
public class ValueObject {

  private String id;
  private float value;

  public String getId() {
    return id;
  }

  public float getValue() {
    return value;
  }

  public void setValue(float value) {
    this.value = value;
  }

  @Override
  public String toString() {
    return "ValueObject [id=" + id + ", value=" + value + "]";
  }
}
By default, the output type of INLINE is used so that you need not specify an output collection. To specify additional Map-Reduce options, use an overloaded method that takes an additional MapReduceOptions argument. The class MapReduceOptions has a fluent API, so adding additional options can be done in a compact syntax. The following example sets the output collection to jmr1_out (note that setting only the output collection assumes a default output type of REPLACE):
MapReduceResults<ValueObject> results = mongoOperations.mapReduce("jmr1", "classpath:map.js", "classpath:reduce.js",
                                                                     new MapReduceOptions().outputCollection("jmr1_out"), ValueObject.class);
There is also a static import (import static org.springframework.data.mongodb.core.mapreduce.MapReduceOptions.options;) that can be used to make the syntax slightly more compact, as the following example shows:
MapReduceResults<ValueObject> results = mongoOperations.mapReduce("jmr1", "classpath:map.js", "classpath:reduce.js",
                                                                     options().outputCollection("jmr1_out"), ValueObject.class);
You can also specify a query to reduce the set of data that is fed into the Map-Reduce operation. The following example removes the document that contains [a,b] from consideration for Map-Reduce operations:
Query query = new Query(where("x").ne(new String[] { "a", "b" }));
MapReduceResults<ValueObject> results = mongoOperations.mapReduce(query, "jmr1", "classpath:map.js", "classpath:reduce.js",
                                                                     options().outputCollection("jmr1_out"), ValueObject.class);
Note that you can specify additional limit and sort values on the query, but you cannot skip values.
10.9. Script Operations
MongoDB allows executing JavaScript functions on the server by either directly sending the script or calling a stored one. ScriptOperations can be accessed through MongoTemplate and provides basic abstraction for JavaScript usage. The following example shows how to us the ScriptOperations class:
ScriptOperations scriptOps = template.scriptOps();

ExecutableMongoScript echoScript = new ExecutableMongoScript("function(x) { return x; }");
scriptOps.execute(echoScript, "directly execute script");     (1)

scriptOps.register(new NamedMongoScript("echo", echoScript)); (2)
scriptOps.call("echo", "execute script via name"); (3)| 1 | Execute the script directly without storing the function on server side. |
| 2 | Store the script using 'echo' as its name. The given name identifies the script and allows calling it later. |
| 3 | Execute the script with name 'echo' using the provided parameters. |
10.10. Group Operations
As an alternative to using Map-Reduce to perform data aggregation, you can use the group operation which feels similar to using SQL’s group by query style, so it may feel more approachable vs. using Map-Reduce. Using the group operations does have some limitations, for example it is not supported in a shared environment and it returns the full result set in a single BSON object, so the result should be small, less than 10,000 keys.
Spring provides integration with MongoDB’s group operation by providing methods on MongoOperations to simplify the creation and execution of group operations. It can convert the results of the group operation to a POJO and also integrates with Spring’s Resource abstraction abstraction. This will let you place your JavaScript files on the file system, classpath, http server or any other Spring Resource implementation and then reference the JavaScript resources via an easy URI style syntax, e.g. 'classpath:reduce.js;. Externalizing JavaScript code in files if often preferable to embedding them as Java strings in your code. Note that you can still pass JavaScript code as Java strings if you prefer.
10.10.1. Example Usage
In order to understand how group operations work the following example is used, which is somewhat artificial. For a more realistic example consult the book 'MongoDB - The definitive guide'. A collection named group_test_collection created with the following rows.
{ "_id" : ObjectId("4ec1d25d41421e2015da64f1"), "x" : 1 }
{ "_id" : ObjectId("4ec1d25d41421e2015da64f2"), "x" : 1 }
{ "_id" : ObjectId("4ec1d25d41421e2015da64f3"), "x" : 2 }
{ "_id" : ObjectId("4ec1d25d41421e2015da64f4"), "x" : 3 }
{ "_id" : ObjectId("4ec1d25d41421e2015da64f5"), "x" : 3 }
{ "_id" : ObjectId("4ec1d25d41421e2015da64f6"), "x" : 3 }
We would like to group by the only field in each row, the x field and aggregate the number of times each specific value of x occurs. To do this we need to create an initial document that contains our count variable and also a reduce function which will increment it each time it is encountered. The Java code to execute the group operation is shown below
GroupByResults<XObject> results = mongoTemplate.group("group_test_collection",
                                                      GroupBy.key("x").initialDocument("{ count: 0 }").reduceFunction("function(doc, prev) { prev.count += 1 }"),
                                                      XObject.class);
The first argument is the name of the collection to run the group operation over, the second is a fluent API that specifies properties of the group operation via a GroupBy class. In this example we are using just the intialDocument and reduceFunction methods. You can also specify a key-function, as well as a finalizer as part of the fluent API. If you have multiple keys to group by, you can pass in a comma separated list of keys.
The raw results of the group operation is a JSON document that looks like this
{
  "retval" : [ { "x" : 1.0 , "count" : 2.0} ,
               { "x" : 2.0 , "count" : 1.0} ,
               { "x" : 3.0 , "count" : 3.0} ] ,
  "count" : 6.0 ,
  "keys" : 3 ,
  "ok" : 1.0
}
The document under the "retval" field is mapped onto the third argument in the group method, in this case XObject which is shown below.
public class XObject {

  private float x;

  private float count;


  public float getX() {
    return x;
  }

  public void setX(float x) {
    this.x = x;
  }

  public float getCount() {
    return count;
  }

  public void setCount(float count) {
    this.count = count;
  }

  @Override
  public String toString() {
    return "XObject [x=" + x + " count = " + count + "]";
  }
}
You can also obtain the raw result as a Document by calling the method getRawResults on the GroupByResults class.
There is an additional method overload of the group method on MongoOperations which lets you specify a Criteria object for selecting a subset of the rows. An example which uses a Criteria object, with some syntax sugar using static imports, as well as referencing a key-function and reduce function javascript files via a Spring Resource string is shown below.
import static org.springframework.data.mongodb.core.mapreduce.GroupBy.keyFunction;
import static org.springframework.data.mongodb.core.query.Criteria.where;

GroupByResults<XObject> results = mongoTemplate.group(where("x").gt(0),
                                        "group_test_collection",
                                        keyFunction("classpath:keyFunction.js").initialDocument("{ count: 0 }").reduceFunction("classpath:groupReduce.js"), XObject.class);
10.11. Aggregation Framework Support
Spring Data MongoDB provides support for the Aggregation Framework introduced to MongoDB in version 2.2.
For further information, see the full reference documentation of the aggregation framework and other data aggregation tools for MongoDB.
10.11.1. Basic Concepts
The Aggregation Framework support in Spring Data MongoDB is based on the following key abstractions: Aggregation, AggregationOperation, and AggregationResults.
-
AggregationAn
Aggregationrepresents a MongoDBaggregateoperation and holds the description of the aggregation pipeline instructions. Aggregations are created by invoking the appropriatenewAggregation(…)static factory method of theAggregationclass, which takes a list ofAggregateOperationand an optional input class.The actual aggregate operation is executed by the
aggregatemethod of theMongoTemplate, which takes the desired output class as a parameter. -
TypedAggregationA
TypedAggregation, just like anAggregation, holds the instructions of the aggregation pipeline and a reference to the input type, that is used for mapping domain properties to actual document fields.On execution field references get checked against the given input type considering potential
@Fieldannotations and raising errors when referencing non existing properties. -
AggregationOperationAn
AggregationOperationrepresents a MongoDB aggregation pipeline operation and describes the processing that should be performed in this aggregation step. Although you could manually create anAggregationOperation, we recommend using the static factory methods provided by theAggregateclass to construct anAggregateOperation. -
AggregationResultsAggregationResultsis the container for the result of an aggregate operation. It provides access to the raw aggregation result, in the form of aDocumentto the mapped objects and other information about the aggregation.The following listing shows the canonical example for using the Spring Data MongoDB support for the MongoDB Aggregation Framework:
import static org.springframework.data.mongodb.core.aggregation.Aggregation.*;

Aggregation agg = newAggregation(
    pipelineOP1(),
    pipelineOP2(),
    pipelineOPn()
);

AggregationResults<OutputType> results = mongoTemplate.aggregate(agg, "INPUT_COLLECTION_NAME", OutputType.class);
List<OutputType> mappedResult = results.getMappedResults();
Note that, if you provide an input class as the first parameter to the newAggregation method, the MongoTemplate derives the name of the input collection from this class. Otherwise, if you do not not specify an input class, you must provide the name of the input collection explicitly. If both an input class and an input collection are provided, the latter takes precedence.
10.11.2. Supported Aggregation Operations
The MongoDB Aggregation Framework provides the following types of aggregation operations:
-
Pipeline Aggregation Operators
-
Group Aggregation Operators
-
Boolean Aggregation Operators
-
Comparison Aggregation Operators
-
Arithmetic Aggregation Operators
-
String Aggregation Operators
-
Date Aggregation Operators
-
Array Aggregation Operators
-
Conditional Aggregation Operators
-
Lookup Aggregation Operators
-
Convert Aggregation Operators
-
Object Aggregation Operators
At the time of this writing, we provide support for the following Aggregation Operations in Spring Data MongoDB:
Pipeline Aggregation Operators |
|
Set Aggregation Operators |
|
Group Aggregation Operators |
|
Arithmetic Aggregation Operators |
|
String Aggregation Operators |
|
Comparison Aggregation Operators |
|
Array Aggregation Operators |
|
Literal Operators |
|
Date Aggregation Operators |
|
Variable Operators |
|
Conditional Aggregation Operators |
|
Type Aggregation Operators |
|
Convert Aggregation Operators |
|
Object Aggregation Operators |
|
-
The operation is mapped or added by Spring Data MongoDB.
Note that the aggregation operations not listed here are currently not supported by Spring Data MongoDB. Comparison aggregation operators are expressed as Criteria expressions.
10.11.3. Projection Expressions
Projection expressions are used to define the fields that are the outcome of a particular aggregation step. Projection expressions can be defined through the project method of the Aggregation class, either by passing a list of String objects or an aggregation framework Fields object. The projection can be extended with additional fields through a fluent API by using the and(String) method and aliased by using the as(String) method.
Note that you can also define fields with aliases by using the Fields.field static factory method of the aggregation framework, which you can then use to construct a new Fields instance. References to projected fields in later aggregation stages are valid only for the field names of included fields or their aliases (including newly defined fields and their aliases). Fields not included in the projection cannot be referenced in later aggregation stages. The following listings show examples of projection expression:
// generates {$project: {name: 1, netPrice: 1}}
project("name", "netPrice")

// generates {$project: {thing1: $thing2}}
project().and("thing1").as("thing2")

// generates {$project: {a: 1, b: 1, thing2: $thing1}}
project("a","b").and("thing1").as("thing2")// generates {$project: {name: 1, netPrice: 1}}, {$sort: {name: 1}}
project("name", "netPrice"), sort(ASC, "name")
// generates {$project: {name: $firstname}}, {$sort: {name: 1}}
project().and("firstname").as("name"), sort(ASC, "name")
// does not work
project().and("firstname").as("name"), sort(ASC, "firstname")More examples for project operations can be found in the AggregationTests class. Note that further details regarding the projection expressions can be found in the corresponding section of the MongoDB Aggregation Framework reference documentation.
10.11.4. Faceted Classification
As of Version 3.4, MongoDB supports faceted classification by using the Aggregation Framework. A faceted classification uses semantic categories (either general or subject-specific) that are combined to create the full classification entry. Documents flowing through the aggregation pipeline are classified into buckets. A multi-faceted classification enables various aggregations on the same set of input documents, without needing to retrieve the input documents multiple times.
Buckets
Bucket operations categorize incoming documents into groups, called buckets, based on a specified expression and bucket boundaries. Bucket operations require a grouping field or a grouping expression. You can define them by using the bucket() and bucketAuto() methods of the Aggregate class. BucketOperation and BucketAutoOperation can expose accumulations based on aggregation expressions for input documents. You can extend the bucket operation with additional parameters through a fluent API by using the with…() methods and the andOutput(String) method. You can alias the operation by using the as(String) method. Each bucket is represented as a document in the output.
BucketOperation takes a defined set of boundaries to group incoming documents into these categories. Boundaries are required to be sorted. The following listing shows some examples of bucket operations:
// generates {$bucket: {groupBy: $price, boundaries: [0, 100, 400]}}
bucket("price").withBoundaries(0, 100, 400);

// generates {$bucket: {groupBy: $price, default: "Other" boundaries: [0, 100]}}
bucket("price").withBoundaries(0, 100).withDefault("Other");

// generates {$bucket: {groupBy: $price, boundaries: [0, 100], output: { count: { $sum: 1}}}}
bucket("price").withBoundaries(0, 100).andOutputCount().as("count");

// generates {$bucket: {groupBy: $price, boundaries: [0, 100], 5, output: { titles: { $push: "$title"}}}
bucket("price").withBoundaries(0, 100).andOutput("title").push().as("titles");
BucketAutoOperation determines boundaries in an attempt to evenly distribute documents into a specified number of buckets. BucketAutoOperation optionally takes a granularity value that specifies the preferred number series to use to ensure that the calculated boundary edges end on preferred round numbers or on powers of 10. The following listing shows examples of bucket operations:
// generates {$bucketAuto: {groupBy: $price, buckets: 5}}
bucketAuto("price", 5)

// generates {$bucketAuto: {groupBy: $price, buckets: 5, granularity: "E24"}}
bucketAuto("price", 5).withGranularity(Granularities.E24).withDefault("Other");

// generates {$bucketAuto: {groupBy: $price, buckets: 5, output: { titles: { $push: "$title"}}}
bucketAuto("price", 5).andOutput("title").push().as("titles");
To create output fields in buckets, bucket operations can use AggregationExpression through andOutput() and SpEL expressions through andOutputExpression().
Note that further details regarding bucket expressions can be found in the $bucket section and
$bucketAuto section of the MongoDB Aggregation Framework reference documentation.
Multi-faceted Aggregation
Multiple aggregation pipelines can be used to create multi-faceted aggregations that characterize data across multiple dimensions (or facets) within a single aggregation stage. Multi-faceted aggregations provide multiple filters and categorizations to guide data browsing and analysis. A common implementation of faceting is how many online retailers provide ways to narrow down search results by applying filters on product price, manufacturer, size, and other factors.
You can define a FacetOperation by using the facet() method of the Aggregation class. You can customize it with multiple aggregation pipelines by using the and() method. Each sub-pipeline has its own field in the output document where its results are stored as an array of documents.
Sub-pipelines can project and filter input documents prior to grouping. Common use cases include extraction of date parts or calculations before categorization. The following listing shows facet operation examples:
// generates {$facet: {categorizedByPrice: [ { $match: { price: {$exists : true}}}, { $bucketAuto: {groupBy: $price, buckets: 5}}]}}
facet(match(Criteria.where("price").exists(true)), bucketAuto("price", 5)).as("categorizedByPrice"))

// generates {$facet: {categorizedByCountry: [ { $match: { country: {$exists : true}}}, { $sortByCount: "$country"}]}}
facet(match(Criteria.where("country").exists(true)), sortByCount("country")).as("categorizedByCountry"))

// generates {$facet: {categorizedByYear: [
//     { $project: { title: 1, publicationYear: { $year: "publicationDate"}}},
//     { $bucketAuto: {groupBy: $price, buckets: 5, output: { titles: {$push:"$title"}}}
// ]}}
facet(project("title").and("publicationDate").extractYear().as("publicationYear"),
      bucketAuto("publicationYear", 5).andOutput("title").push().as("titles"))
  .as("categorizedByYear"))
Note that further details regarding facet operation can be found in the $facet section of the MongoDB Aggregation Framework reference documentation.
Sort By Count
Sort by count operations group incoming documents based on the value of a specified expression, compute the count of documents in each distinct group, and sort the results by count. It offers a handy shortcut to apply sorting when using Faceted Classification. Sort by count operations require a grouping field or grouping expression. The following listing shows a sort by count example:
// generates { $sortByCount: "$country" }
sortByCount("country");
A sort by count operation is equivalent to the following BSON (Binary JSON):
{ $group: { _id: <expression>, count: { $sum: 1 } } },
{ $sort: { count: -1 } }
Spring Expression Support in Projection Expressions
We support the use of SpEL expressions in projection expressions through the andExpression method of the ProjectionOperation and BucketOperation classes. This feature lets you define the desired expression as a SpEL expression. On query execution, the SpEL expression is translated into a corresponding MongoDB projection expression part. This arrangement makes it much easier to express complex calculations.
Complex Calculations with SpEL expressions
Consider the following SpEL expression:
1 + (q + 1) / (q - 1)The preceding expression is translated into the following projection expression part:
{ "$add" : [ 1, {
    "$divide" : [ {
        "$add":["$q", 1]}, {
        "$subtract":[ "$q", 1]}
    ]
}]}
You can see examples in more context in Aggregation Framework Example 5 and Aggregation Framework Example 6. You can find more usage examples for supported SpEL expression constructs in SpelExpressionTransformerUnitTests. The following table shows the SpEL transformations supported by Spring Data MongoDB:
| SpEL Expression | Mongo Expression Part |
|---|---|
a == b |
{ $eq : [$a, $b] } |
a != b |
{ $ne : [$a , $b] } |
a > b |
{ $gt : [$a, $b] } |
a >= b |
{ $gte : [$a, $b] } |
a < b |
{ $lt : [$a, $b] } |
a ⇐ b |
{ $lte : [$a, $b] } |
a + b |
{ $add : [$a, $b] } |
a - b |
{ $subtract : [$a, $b] } |
a * b |
{ $multiply : [$a, $b] } |
a / b |
{ $divide : [$a, $b] } |
a^b |
{ $pow : [$a, $b] } |
a % b |
{ $mod : [$a, $b] } |
a && b |
{ $and : [$a, $b] } |
a || b |
{ $or : [$a, $b] } |
!a |
{ $not : [$a] } |
In addition to the transformations shown in the preceding table, you can use standard SpEL operations such as new to (for example) create arrays and reference expressions through their names (followed by the arguments to use in brackets). The following example shows how to create an array in this fashion:
// { $setEquals : [$a, [5, 8, 13] ] }
.andExpression("setEquals(a, new int[]{5, 8, 13})");
Aggregation Framework Examples
The examples in this section demonstrate the usage patterns for the MongoDB Aggregation Framework with Spring Data MongoDB.
Aggregation Framework Example 1
In this introductory example, we want to aggregate a list of tags to get the occurrence count of a particular tag from a MongoDB collection (called tags) sorted by the occurrence count in descending order. This example demonstrates the usage of grouping, sorting, projections (selection), and unwinding (result splitting).
class TagCount {
 String tag;
 int n;
}
import static org.springframework.data.mongodb.core.aggregation.Aggregation.*;
Aggregation agg = newAggregation(
project("tags"),
unwind("tags"),
group("tags").count().as("n"),
project("n").and("tag").previousOperation(),
sort(DESC, "n")
);
AggregationResults<TagCount> results = mongoTemplate.aggregate(agg, "tags", TagCount.class);
List<TagCount> tagCount = results.getMappedResults();The preceding listing uses the following algorithm:
-
Create a new aggregation by using the
newAggregationstatic factory method, to which we pass a list of aggregation operations. These aggregate operations define the aggregation pipeline of ourAggregation. -
Use the
projectoperation to select thetagsfield (which is an array of strings) from the input collection. -
Use the
unwindoperation to generate a new document for each tag within thetagsarray. -
Use the
groupoperation to define a group for eachtagsvalue for which we aggregate the occurrence count (by using thecountaggregation operator and collecting the result in a new field calledn). -
Select the
nfield and create an alias for the ID field generated from the previous group operation (hence the call topreviousOperation()) with a name oftag. -
Use the
sortoperation to sort the resulting list of tags by their occurrence count in descending order. -
Call the
aggregatemethod onMongoTemplateto let MongoDB perform the actual aggregation operation, with the createdAggregationas an argument.
Note that the input collection is explicitly specified as the tags parameter to the aggregate Method. If the name of the input collection is not specified explicitly, it is derived from the input class passed as the first parameter to the newAggreation method.
Aggregation Framework Example 2
This example is based on the Largest and Smallest Cities by State example from the MongoDB Aggregation Framework documentation. We added additional sorting to produce stable results with different MongoDB versions. Here we want to return the smallest and largest cities by population for each state by using the aggregation framework. This example demonstrates grouping, sorting, and projections (selection).
class ZipInfo {
   String id;
   String city;
   String state;
   @Field("pop") int population;
   @Field("loc") double[] location;
}

class City {
   String name;
   int population;
}

class ZipInfoStats {
   String id;
   String state;
   City biggestCity;
   City smallestCity;
}
import static org.springframework.data.mongodb.core.aggregation.Aggregation.*;
TypedAggregation<ZipInfo> aggregation = newAggregation(ZipInfo.class,
group("state", "city")
.sum("population").as("pop"),
sort(ASC, "pop", "state", "city"),
group("state")
.last("city").as("biggestCity")
.last("pop").as("biggestPop")
.first("city").as("smallestCity")
.first("pop").as("smallestPop"),
project()
.and("state").previousOperation()
.and("biggestCity")
.nested(bind("name", "biggestCity").and("population", "biggestPop"))
.and("smallestCity")
.nested(bind("name", "smallestCity").and("population", "smallestPop")),
sort(ASC, "state")
);
AggregationResults<ZipInfoStats> result = mongoTemplate.aggregate(aggregation, ZipInfoStats.class);
ZipInfoStats firstZipInfoStats = result.getMappedResults().get(0);Note that the ZipInfo class maps the structure of the given input-collection. The ZipInfoStats class defines the structure in the desired output format.
The preceding listings use the following algorithm:
-
Use the
groupoperation to define a group from the input-collection. The grouping criteria is the combination of thestateandcityfields, which forms the ID structure of the group. We aggregate the value of thepopulationproperty from the grouped elements by using thesumoperator and save the result in thepopfield. -
Use the
sortoperation to sort the intermediate-result by thepop,stateandcityfields, in ascending order, such that the smallest city is at the top and the biggest city is at the bottom of the result. Note that the sorting onstateandcityis implicitly performed against the group ID fields (which Spring Data MongoDB handled). -
Use a
groupoperation again to group the intermediate result bystate. Note thatstateagain implicitly references a group ID field. We select the name and the population count of the biggest and smallest city with calls to thelast(…)andfirst(…)operators, respectively, in theprojectoperation. -
Select the
statefield from the previousgroupoperation. Note thatstateagain implicitly references a group ID field. Because we do not want an implicitly generated ID to appear, we exclude the ID from the previous operation by usingand(previousOperation()).exclude(). Because we want to populate the nestedCitystructures in our output class, we have to emit appropriate sub-documents by using the nested method. -
Sort the resulting list of
StateStatsby their state name in ascending order in thesortoperation.
Note that we derive the name of the input collection from the ZipInfo class passed as the first parameter to the newAggregation method.
Aggregation Framework Example 3
This example is based on the States with Populations Over 10 Million example from the MongoDB Aggregation Framework documentation. We added additional sorting to produce stable results with different MongoDB versions. Here we want to return all states with a population greater than 10 million, using the aggregation framework. This example demonstrates grouping, sorting, and matching (filtering).
class StateStats {
   @Id String id;
   String state;
   @Field("totalPop") int totalPopulation;
}
import static org.springframework.data.mongodb.core.aggregation.Aggregation.*;
TypedAggregation<ZipInfo> agg = newAggregation(ZipInfo.class,
group("state").sum("population").as("totalPop"),
sort(ASC, previousOperation(), "totalPop"),
match(where("totalPop").gte(10 * 1000 * 1000))
);
AggregationResults<StateStats> result = mongoTemplate.aggregate(agg, StateStats.class);
List<StateStats> stateStatsList = result.getMappedResults();The preceding listings use the following algorithm:
-
Group the input collection by the
statefield and calculate the sum of thepopulationfield and store the result in the new field"totalPop". -
Sort the intermediate result by the id-reference of the previous group operation in addition to the
"totalPop"field in ascending order. -
Filter the intermediate result by using a
matchoperation which accepts aCriteriaquery as an argument.
Note that we derive the name of the input collection from the ZipInfo class passed as first parameter to the newAggregation method.
Aggregation Framework Example 4
This example demonstrates the use of simple arithmetic operations in the projection operation.
class Product {
    String id;
    String name;
    double netPrice;
    int spaceUnits;
}
import static org.springframework.data.mongodb.core.aggregation.Aggregation.*;
TypedAggregation<Product> agg = newAggregation(Product.class,
project("name", "netPrice")
.and("netPrice").plus(1).as("netPricePlus1")
.and("netPrice").minus(1).as("netPriceMinus1")
.and("netPrice").multiply(1.19).as("grossPrice")
.and("netPrice").divide(2).as("netPriceDiv2")
.and("spaceUnits").mod(2).as("spaceUnitsMod2")
);
AggregationResults<Document> result = mongoTemplate.aggregate(agg, Document.class);
List<Document> resultList = result.getMappedResults();Note that we derive the name of the input collection from the Product class passed as first parameter to the newAggregation method.
Aggregation Framework Example 5
This example demonstrates the use of simple arithmetic operations derived from SpEL Expressions in the projection operation.
class Product {
    String id;
    String name;
    double netPrice;
    int spaceUnits;
}
import static org.springframework.data.mongodb.core.aggregation.Aggregation.*;
TypedAggregation<Product> agg = newAggregation(Product.class,
project("name", "netPrice")
.andExpression("netPrice + 1").as("netPricePlus1")
.andExpression("netPrice - 1").as("netPriceMinus1")
.andExpression("netPrice / 2").as("netPriceDiv2")
.andExpression("netPrice * 1.19").as("grossPrice")
.andExpression("spaceUnits % 2").as("spaceUnitsMod2")
.andExpression("(netPrice * 0.8 + 1.2) * 1.19").as("grossPriceIncludingDiscountAndCharge")
);
AggregationResults<Document> result = mongoTemplate.aggregate(agg, Document.class);
List<Document> resultList = result.getMappedResults();Aggregation Framework Example 6
This example demonstrates the use of complex arithmetic operations derived from SpEL Expressions in the projection operation.
Note: The additional parameters passed to the addExpression method can be referenced with indexer expressions according to their position. In this example, we reference the first parameter of the parameters array with [0]. When the SpEL expression is transformed into a MongoDB aggregation framework expression, external parameter expressions are replaced with their respective values.
class Product {
    String id;
    String name;
    double netPrice;
    int spaceUnits;
}
import static org.springframework.data.mongodb.core.aggregation.Aggregation.*;
double shippingCosts = 1.2;
TypedAggregation<Product> agg = newAggregation(Product.class,
project("name", "netPrice")
.andExpression("(netPrice * (1-discountRate) + [0]) * (1+taxRate)", shippingCosts).as("salesPrice")
);
AggregationResults<Document> result = mongoTemplate.aggregate(agg, Document.class);
List<Document> resultList = result.getMappedResults();Note that we can also refer to other fields of the document within the SpEL expression.
Aggregation Framework Example 7
This example uses conditional projection. It is derived from the $cond reference documentation.
public class InventoryItem {

  @Id int id;
  String item;
  String description;
  int qty;
}

public class InventoryItemProjection {

  @Id int id;
  String item;
  String description;
  int qty;
  int discount
}
import static org.springframework.data.mongodb.core.aggregation.Aggregation.*;
TypedAggregation<InventoryItem> agg = newAggregation(InventoryItem.class,
project("item").and("discount")
.applyCondition(ConditionalOperator.newBuilder().when(Criteria.where("qty").gte(250))
.then(30)
.otherwise(20))
.and(ifNull("description", "Unspecified")).as("description")
);
AggregationResults<InventoryItemProjection> result = mongoTemplate.aggregate(agg, "inventory", InventoryItemProjection.class);
List<InventoryItemProjection> stateStatsList = result.getMappedResults();This one-step aggregation uses a projection operation with the inventory collection. We project the discount field by using a conditional operation for all inventory items that have a qty greater than or equal to 250. A second conditional projection is performed for the description field. We apply the Unspecified description to all items that either do not have a description field or items that have a null description.
As of MongoDB 3.6, it is possible to exclude fields from the projection by using a conditional expression.
TypedAggregation<Book> agg = Aggregation.newAggregation(Book.class,
  project("title")
    .and(ConditionalOperators.when(ComparisonOperators.valueOf("author.middle")     (1)
        .equalToValue(""))                                                          (2)
        .then("$$REMOVE")                                                           (3)
        .otherwiseValueOf("author.middle")                                          (4)
    )
.as("author.middle"));| 1 | If the value of the field author.middle |
| 2 | does not contain a value, |
| 3 | then use $$REMOVE to exclude the field. |
| 4 | Otherwise, add the field value of author.middle. |
10.12. Overriding Default Mapping with Custom Converters
To have more fine-grained control over the mapping process, you can register Spring converters with the MongoConverter implementations, such as the MappingMongoConverter.
The MappingMongoConverter checks to see if any Spring converters can handle a specific class before attempting to map the object itself. To 'hijack' the normal mapping strategies of the MappingMongoConverter, perhaps for increased performance or other custom mapping needs, you first need to create an implementation of the Spring Converter interface and then register it with the MappingConverter.
| For more information on the Spring type conversion service, see the reference docs here. |
10.12.1. Saving by Using a Registered Spring Converter
The following example shows an implementation of the Converter that converts from a Person object to a org.bson.Document:
import org.springframework.core.convert.converter.Converter;

import org.bson.Document;

public class PersonWriteConverter implements Converter<Person, Document> {

  public Document convert(Person source) {
    Document document = new Document();
    document.put("_id", source.getId());
    document.put("name", source.getFirstName());
    document.put("age", source.getAge());
    return document;
  }
}
10.12.2. Reading by Using a Spring Converter
The following example shows an implementation of a Converter that converts from a Document to a Person object:
public class PersonReadConverter implements Converter<Document, Person> {

  public Person convert(Document source) {
    Person p = new Person((ObjectId) source.get("_id"), (String) source.get("name"));
    p.setAge((Integer) source.get("age"));
    return p;
  }
}
10.12.3. Registering Spring Converters with the MongoConverter
The Mongo Spring namespace provides a convenient way to register Spring Converter instances with the MappingMongoConverter. The following configuration snippet shows how to manually register converter beans as well as configure the wrapping MappingMongoConverter into a MongoTemplate:
<mongo:db-factory dbname="database"/>

<mongo:mapping-converter>
  <mongo:custom-converters>
    <mongo:converter ref="readConverter"/>
    <mongo:converter>
      <bean class="org.springframework.data.mongodb.test.PersonWriteConverter"/>
    </mongo:converter>
  </mongo:custom-converters>
</mongo:mapping-converter>

<bean id="readConverter" class="org.springframework.data.mongodb.test.PersonReadConverter"/>

<bean id="mongoTemplate" class="org.springframework.data.mongodb.core.MongoTemplate">
  <constructor-arg name="mongoDbFactory" ref="mongoDbFactory"/>
  <constructor-arg name="mongoConverter" ref="mappingConverter"/>
</bean>
You can also use the base-package attribute of the custom-converters element to enable classpath scanning for all Converter and GenericConverter implementations below the given package, as the following example shows:
<mongo:mapping-converter>
  <mongo:custom-converters base-package="com.acme.**.converters" />
</mongo:mapping-converter>
10.12.4. Converter Disambiguation
Generally, we inspect the Converter implementations for the source and target types they convert from and to. Depending on whether one of those is a type MongoDB can handle natively, we register the converter instance as a reading or a writing converter. The following examples show a writer converter and a read converter (note the difference is in the order of the qualifiers on Converter):
// Write converter as only the target type is one Mongo can handle natively
class MyConverter implements Converter<Person, String> { … }

// Read converter as only the source type is one Mongo can handle natively
class MyConverter implements Converter<String, Person> { … }
If you write a Converter whose source and target type are native Mongo types, we cannot determine whether we should consider it as a reading or a writing converter. Registering the converter instance as both might lead to unwanted results. For example, a Converter<String, Long> is ambiguous, although it probably does not make sense to try to convert all String instances into Long instances when writing. To let you force the infrastructure to register a converter for only one way, we provide @ReadingConverter and @WritingConverter annotations to be used in the converter implementation.
10.13. Index and Collection Management
MongoTemplate provides a few methods for managing indexes and collections. These methods are collected into a helper interface called IndexOperations. You can access these operations by calling the indexOps method and passing in either the collection name or the java.lang.Class of your entity (the collection name is derived from the .class, either by name or from annotation metadata).
The following listing shows the IndexOperations interface:
public interface IndexOperations {

  void ensureIndex(IndexDefinition indexDefinition);

  void dropIndex(String name);

  void dropAllIndexes();

  void resetIndexCache();

  List<IndexInfo> getIndexInfo();
}
10.13.1. Methods for Creating an Index
You can create an index on a collection to improve query performance by using the MongoTemplate class, as the following example shows:
mongoTemplate.indexOps(Person.class).ensureIndex(new Index().on("name",Order.ASCENDING));ensureIndex makes sure that an index for the provided IndexDefinition exists for the collection.
You can create standard, geospatial, and text indexes by using the IndexDefinition, GeoSpatialIndex and TextIndexDefinition classes. For example, given the Venue class defined in a previous section, you could declare a geospatial query, as the following example shows:
mongoTemplate.indexOps(Venue.class).ensureIndex(new GeospatialIndex("location"));
Index and GeospatialIndex support configuration of collations.
|
10.13.2. Accessing Index Information
The IndexOperations interface has the getIndexInfo method that returns a list of IndexInfo objects. This list contains all the indexes defined on the collection. The following example defines an index on the Person class that has an age property:
template.indexOps(Person.class).ensureIndex(new Index().on("age", Order.DESCENDING).unique());

List<IndexInfo> indexInfoList = template.indexOps(Person.class).getIndexInfo();

// Contains
// [IndexInfo [fieldSpec={_id=ASCENDING}, name=_id_, unique=false, sparse=false],
//  IndexInfo [fieldSpec={age=DESCENDING}, name=age_-1, unique=true, sparse=false]]
10.13.3. Methods for Working with a Collection
The following example shows how to create a collection:
MongoTemplateMongoCollection<Document> collection = null;
if (!mongoTemplate.getCollectionNames().contains("MyNewCollection")) {
collection = mongoTemplate.createCollection("MyNewCollection");
}
mongoTemplate.dropCollection("MyNewCollection");-
getCollectionNames: Returns a set of collection names.
-
collectionExists: Checks to see if a collection with a given name exists.
-
createCollection: Creates an uncapped collection.
-
dropCollection: Drops the collection.
-
getCollection: Gets a collection by name, creating it if it does not exist.
Collection creation allows customization with CollectionOptions and supports collations.
|
10.14. Executing Commands
You can get at the MongoDB driver’s MongoDatabase.runCommand( ) method by using the executeCommand(…) methods on MongoTemplate. These methods also perform exception translation into Spring’s DataAccessException hierarchy.
10.14.1. Methods for executing commands
-
DocumentexecuteCommand(Document command): Run a MongoDB command. -
DocumentexecuteCommand(Document command, ReadPreference readPreference): Run a MongoDB command with the given nullable MongoDBReadPreference. -
DocumentexecuteCommand(String jsonCommand): Execute a MongoDB command expressed as a JSON string.
10.15. Lifecycle Events
The MongoDB mapping framework includes several org.springframework.context.ApplicationEvent events that your application can respond to by registering special beans in the ApplicationContext. Being based on Spring’s ApplicationContext event infrastructure enables other products, such as Spring Integration, to easily receive these events, as they are a well known eventing mechanism in Spring-based applications.
To intercept an object before it goes through the conversion process (which turns your domain object into a org.bson.Document), you can register a subclass of AbstractMongoEventListener that overrides the onBeforeConvert method. When the event is dispatched, your listener is called and passed the domain object before it goes into the converter. The following example shows how to do so:
public class BeforeConvertListener extends AbstractMongoEventListener<Person> {
  @Override
  public void onBeforeConvert(BeforeConvertEvent<Person> event) {
    ... does some auditing manipulation, set timestamps, whatever ...
  }
}
To intercept an object before it goes into the database, you can register a subclass of org.springframework.data.mongodb.core.mapping.event.AbstractMongoEventListener that overrides the onBeforeSave method. When the event is dispatched, your listener is called and passed the domain object and the converted com.mongodb.Document. The following example shows how to do so:
public class BeforeSaveListener extends AbstractMongoEventListener<Person> {
  @Override
  public void onBeforeSave(BeforeSaveEvent<Person> event) {
    … change values, delete them, whatever …
  }
}
Declaring these beans in your Spring ApplicationContext causes them to be invoked whenever the event is dispatched.
The following callback methods are present in AbstractMappingEventListener:
-
onBeforeConvert: Called inMongoTemplateinsert,insertList, andsaveoperations before the object is converted to aDocumentby aMongoConverter. -
onBeforeSave: Called inMongoTemplateinsert,insertList, andsaveoperations before inserting or saving theDocumentin the database. -
onAfterSave: Called inMongoTemplateinsert,insertList, andsaveoperations after inserting or saving theDocumentin the database. -
onAfterLoad: Called inMongoTemplatefind,findAndRemove,findOne, andgetCollectionmethods after theDocumenthas been retrieved from the database. -
onAfterConvert: Called inMongoTemplatefind,findAndRemove,findOne, andgetCollectionmethods after theDocumenthas been retrieved from the database was converted to a POJO.
Lifecycle events are only emitted for root level types. Complex types used as properties within a document root are not subject to event publication unless they are document references annotated with @DBRef.
|
10.16. Exception Translation
The Spring framework provides exception translation for a wide variety of database and mapping technologies. This has traditionally been for JDBC and JPA. The Spring support for MongoDB extends this feature to the MongoDB Database by providing an implementation of the org.springframework.dao.support.PersistenceExceptionTranslator interface.
The motivation behind mapping to Spring’s consistent data access exception hierarchy is that you are then able to write portable and descriptive exception handling code without resorting to coding against MongoDB error codes. All of Spring’s data access exceptions are inherited from the root DataAccessException class so that you can be sure to catch all database related exception within a single try-catch block. Note that not all exceptions thrown by the MongoDB driver inherit from the MongoException class. The inner exception and message are preserved so that no information is lost.
Some of the mappings performed by the MongoExceptionTranslator are com.mongodb.Network to DataAccessResourceFailureException and MongoException error codes 1003, 12001, 12010, 12011, and 12012 to InvalidDataAccessApiUsageException. Look into the implementation for more details on the mapping.
10.17. Execution Callbacks
One common design feature of all Spring template classes is that all functionality is routed into one of the template’s execute callback methods. Doing so helps to ensure that exceptions and any resource management that may be required are performed consistently. While JDBC and JMS need this feature much more than MongoDB does, it still offers a single spot for exception translation and logging to occur. Consequently, using these execute callbacks is the preferred way to access the MongoDB driver’s MongoDatabase and MongoCollection objects to perform uncommon operations that were not exposed as methods on MongoTemplate.
The following list describes the execute callback methods.
-
<T> Texecute(Class<?> entityClass, CollectionCallback<T> action): Executes the givenCollectionCallbackfor the entity collection of the specified class. -
<T> Texecute(String collectionName, CollectionCallback<T> action): Executes the givenCollectionCallbackon the collection of the given name. -
<T> Texecute(DbCallback<T> action): Executes a DbCallback translating any exceptions as necessary. Spring Data MongoDB provides support for the Aggregation Framework introduced to MongoDB in version 2.2. -
<T> Texecute(String collectionName, DbCallback<T> action): Executes aDbCallbackon the collection of the given name translating any exceptions as necessary. -
<T> TexecuteInSession(DbCallback<T> action): Executes the givenDbCallbackwithin the same connection to the database so as to ensure consistency in a write-heavy environment where you may read the data that you wrote.
The following example uses the CollectionCallback to return information about an index:
boolean hasIndex = template.execute("geolocation", new CollectionCallbackBoolean>() {
  public Boolean doInCollection(Venue.class, DBCollection collection) throws MongoException, DataAccessException {
    List<Document> indexes = collection.getIndexInfo();
    for (Document document : indexes) {
      if ("location_2d".equals(document.get("name"))) {
        return true;
      }
    }
    return false;
  }
});
10.18. GridFS Support
MongoDB supports storing binary files inside its filesystem, GridFS. Spring Data MongoDB provides a GridFsOperations interface as well as the corresponding implementation, GridFsTemplate, to let you interact with the filesystem. You can set up a GridFsTemplate instance by handing it a MongoDbFactory as well as a MongoConverter, as the following example shows:
class GridFsConfiguration extends AbstractMongoConfiguration {

  // … further configuration omitted

  @Bean
  public GridFsTemplate gridFsTemplate() {
    return new GridFsTemplate(mongoDbFactory(), mappingMongoConverter());
  }
}
The corresponding XML configuration follows:
<?xml version="1.0" encoding="UTF-8"?>
<beans xmlns="http://www.springframework.org/schema/beans"
  xmlns:xsi="http://www.w3.org/2001/XMLSchema-instance"
  xmlns:mongo="http://www.springframework.org/schema/data/mongo"
  xsi:schemaLocation="http://www.springframework.org/schema/data/mongo
                      https://www.springframework.org/schema/data/mongo/spring-mongo.xsd
                      http://www.springframework.org/schema/beans
                      https://www.springframework.org/schema/beans/spring-beans.xsd">

  <mongo:db-factory id="mongoDbFactory" dbname="database" />
  <mongo:mapping-converter id="converter" />

  <bean class="org.springframework.data.mongodb.gridfs.GridFsTemplate">
    <constructor-arg ref="mongoDbFactory" />
    <constructor-arg ref="converter" />
  </bean>

</beans>
The template can now be injected and used to perform storage and retrieval operations, as the following example shows:
class GridFsClient {

  @Autowired
  GridFsOperations operations;

  @Test
  public void storeFileToGridFs() {

    FileMetadata metadata = new FileMetadata();
    // populate metadata
    Resource file = … // lookup File or Resource

    operations.store(file.getInputStream(), "filename.txt", metadata);
  }
}
The store(…) operations take an InputStream, a filename, and (optionally) metadata information about the file to store. The metadata can be an arbitrary object, which will be marshaled by the MongoConverter configured with the GridFsTemplate. Alternatively, you can also provide a Document.
You can read files from the filesystem through either the find(…) or the getResources(…) methods. Let’s have a look at the find(…) methods first. You can either find a single file or multiple files that match a Query. You can use the GridFsCriteria helper class to define queries. It provides static factory methods to encapsulate default metadata fields (such as whereFilename() and whereContentType()) or a custom one through whereMetaData(). The following example shows how to use GridFsTemplate to query for files:
class GridFsClient {

  @Autowired
  GridFsOperations operations;

  @Test
  public void findFilesInGridFs() {
    GridFSFindIterable result = operations.find(query(whereFilename().is("filename.txt")))
  }
}
Currently, MongoDB does not support defining sort criteria when retrieving files from GridFS. For this reason, any sort criteria defined on the Query instance handed into the find(…) method are disregarded.
|
The other option to read files from the GridFs is to use the methods introduced by the ResourcePatternResolver interface. They allow handing an Ant path into the method and can thus retrieve files matching the given pattern. The following example shows how to use GridFsTemplate to read files:
class GridFsClient {

  @Autowired
  GridFsOperations operations;

  @Test
  public void readFilesFromGridFs() {
    GridFsResources[] txtFiles = operations.getResources("*.txt");
  }
}
GridFsOperations extends ResourcePatternResolver and lets the GridFsTemplate (for example) to be plugged into an ApplicationContext to read Spring Config files from MongoDB database.
10.19. Infinite Streams with Tailable Cursors
By default, MongoDB automatically closes a cursor when the client exhausts all results supplied by the cursor. Closing a cursor on exhaustion turns a stream into a finite stream. For capped collections, you can use a Tailable Cursor that remains open after the client consumed all initially returned data.
Capped collections can be created with MongoOperations.createCollection. To do so, provide the required CollectionOptions.empty().capped()….
|
Tailable cursors can be consumed with both, the imperative and the reactive MongoDB API. It is highly recommended to use the reactive variant, as it is less resource-intensive. However, if you cannot use the reactive API, you can still use a messaging concept that is already prevalent in the Spring ecosystem.
10.19.1. Tailable Cursors with MessageListener
Listening to a capped collection using a Sync Driver creates a long running, blocking task that needs to be delegated to
a separate component. In this case, we need to first create a MessageListenerContainer, which will be the main entry point
for running the specific SubscriptionRequest. Spring Data MongoDB already ships with a default implementation that
operates on MongoTemplate and is capable of creating and executing Task instances for a TailableCursorRequest.
The following example shows how to use tailable cursors with MessageListener instances:
MessageListener instancesMessageListenerContainer container = new DefaultMessageListenerContainer(template);
container.start(); (1)
MessageListener<Document, User> listener = System.out::println; (2)
TailableCursorRequest request = TailableCursorRequest.builder()
.collection("orders") (3)
.filter(query(where("value").lt(100))) (4)
.publishTo(listener) (5)
.build();
container.register(request, User.class); (6)
// ...
container.stop(); (7)| 1 | Starting the container intializes the resources and starts Task instances for already registered SubscriptionRequest instances. Requests added after startup are ran immediately. |
| 2 | Define the listener called when a Message is received. The Message#getBody() is converted to the requested domain type. Use Document to receive raw results without conversion. |
| 3 | Set the collection to listen to. |
| 4 | Provide an optional filter for documents to receive. |
| 5 | Set the message listener to publish incoming Messages to. |
| 6 | Register the request. The returned Subscription can be used to check the current Task state and cancel its execution to free resources. |
| 7 | Do not forget to stop the container once you are sure you no longer need it. Doing so stops all running Task instances within the container. |
10.19.2. Reactive Tailable Cursors
Using tailable cursors with a reactive data types allows construction of infinite streams. A tailable cursor remains open until it is closed externally. It emits data as new documents arrive in a capped collection.
Tailable cursors may become dead, or invalid, if either the query returns no match or the cursor returns the document at the “end” of the collection and the application then deletes that document. The following example shows how to create and use an infinite stream query:
Flux<Person> stream = template.tail(query(where("name").is("Joe")), Person.class);
Disposable subscription = stream.doOnNext(person -> System.out.println(person)).subscribe();
// …
// Later: Dispose the subscription to close the stream
subscription.dispose();Spring Data MongoDB Reactive repositories support infinite streams by annotating a query method with @Tailable. This works for methods that return Flux and other reactive types capable of emitting multiple elements, as the following example shows:
public interface PersonRepository extends ReactiveMongoRepository<Person, String> {
@Tailable
Flux<Person> findByFirstname(String firstname);
}
Flux<Person> stream = repository.findByFirstname("Joe");
Disposable subscription = stream.doOnNext(System.out::println).subscribe();
// …
// Later: Dispose the subscription to close the stream
subscription.dispose();10.20. Change Streams
As of MongoDB 3.6, Change Streams let applications get notified about changes without having to tail the oplog.
| Change Stream support is only possible for replica sets or for a sharded cluster. |
Change Streams can be consumed with both, the imperative and the reactive MongoDB Java driver. It is highly recommended to use the reactive variant, as it is less resource-intensive. However, if you cannot use the reactive API, you can still obtain change events by using the messaging concept that is already prevalent in the Spring ecosystem.
It is possible to watch both on a collection as well as database level, whereas the database level variant publishes
changes from all collections within the database. When subscribing to a database change stream, make sure to use a
suitable type for the event type as conversion might not apply correctly across different entity types.
In doubt, use Document.
10.20.1. Change Streams with MessageListener
Listening to a Change Stream by using a Sync Driver creates a long running, blocking task that needs to be delegated to a separate component.
In this case, we need to first create a MessageListenerContainer, which will be the main entry point for running the specific SubscriptionRequest tasks.
Spring Data MongoDB already ships with a default implementation that operates on MongoTemplate and is capable of creating and executing Task instances for a ChangeStreamRequest.
The following example shows how to use Change Streams with MessageListener instances:
MessageListener instancesMessageListenerContainer container = new DefaultMessageListenerContainer(template);
container.start(); (1)
MessageListener<ChangeStreamDocument<Document>, User> listener = System.out::println; (2)
ChangeStreamRequestOptions options = new ChangeStreamRequestOptions("user", ChangeStreamOptions.empty()); (3)
Subscription subscription = container.register(new ChangeStreamRequest<>(listener, options), User.class); (4)
// ...
container.stop(); (5)| 1 | Starting the container initializes the resources and starts Task instances for already registered SubscriptionRequest instances. Requests added after startup are ran immediately. |
| 2 | Define the listener called when a Message is received. The Message#getBody() is converted to the requested domain type. Use Document to receive raw results without conversion. |
| 3 | Set the collection to listen to and provide additional options through ChangeStreamOptions. |
| 4 | Register the request. The returned Subscription can be used to check the current Task state and cancel its execution to free resources. |
| 5 | Do not forget to stop the container once you are sure you no longer need it. Doing so stops all running Task instances within the container. |
|
Errors while processing are passed on to an |
10.20.2. Reactive Change Streams
Subscribing to Change Streams with the reactive API is a more natural approach to work with streams. Still, the essential building blocks, such as ChangeStreamOptions, remain the same. The following example shows how to use Change Streams emitting ChangeStreamEvents:
ChangeStreamEventChangeStreamOptions options = ChangeStreamOptions.builder()
.filter(newAggregation(User.class, match(where("age").gte(38))) (1)
.build();
Flux<ChangeStreamEvent<User>> flux = reactiveTemplate.changeStream("user", options, User.class); (2)| 1 | Use an aggregation pipeline to filter events. |
| 2 | Obtain a Flux of change stream events. The ChangeStreamEvent#getBody() is converted to the requested domain type. Use Document to receive raw results without conversion. |
10.20.3. Resuming Change Streams
Change Streams can be resumed and resume emitting events where you left. To resume the stream, you need to supply either a resume
token or the last known server time (in UTC). Use ChangeStreamOptions to set the value accordingly.
The following example shows how to set the resume offset using server time:
ChangeStreamOptions = ChangeStreamOptions.builder()
.resumeAt(Instant.now().minusSeconds(1)) (1)
.build()
Flux<ChangeStreamEvent<Person>> resumed = template.changeStream("person", options, User.class)| 1 | You may obtain the server time of an ChangeStreamEvent through the getTimestamp method or use the resumeToken
exposed through getResumeToken. |
11. MongoDB Sessions
As of version 3.6, MongoDB supports the concept of sessions. The use of sessions enables MongoDB’s Causal Consistency model, which guarantees running operations in an order that respects their causal relationships. Those are split into ServerSession instances and ClientSession instances. In this section, when we speak of a session, we refer to ClientSession.
| Operations within a client session are not isolated from operations outside the session. |
Both MongoOperations and ReactiveMongoOperations provide gateway methods for tying a ClientSession to the operations. MongoCollection and MongoDatabase use session proxy objects that implement MongoDB’s collection and database interfaces, so you need not add a session on each call. This means that a potential call to MongoCollection#find() is delegated to MongoCollection#find(ClientSession).
Methods such as (Reactive)MongoOperations#getCollection return native MongoDB Java Driver gateway objects (such as MongoCollection) that themselves offer dedicated methods for ClientSession. These methods are NOT session-proxied. You should provide the ClientSession where needed when interacting directly with a MongoCollection or MongoDatabase and not through one of the #execute callbacks on MongoOperations.
|
11.1. Synchronous ClientSession support.
The following example shows the usage of a session:
ClientSession with MongoOperationsClientSessionOptions sessionOptions = ClientSessionOptions.builder()
.causallyConsistent(true)
.build();
ClientSession session = client.startSession(sessionOptions); (1)
template.withSession(() -> session)
.execute(action -> {
Query query = query(where("name").is("Durzo Blint"));
Person durzo = action.findOne(query, Person.class); (2)
Person azoth = new Person("Kylar Stern");
azoth.setMaster(durzo);
action.insert(azoth); (3)
return azoth;
});
session.close() (4)| 1 | Obtain a new session from the server. |
| 2 | Use MongoOperation methods as before. The ClientSession gets applied automatically. |
| 3 | Make sure to close the ClientSession. |
| 4 | Close the session. |
When dealing with DBRef instances, especially lazily loaded ones, it is essential to not close the ClientSession before all data is loaded. Otherwise, lazy fetch fails.
|
11.2. Reactive ClientSession support
The reactive counterpart uses the same building blocks as the imperative one, as the following example shows:
ReactiveMongoOperationsClientSessionOptions sessionOptions = ClientSessionOptions.builder()
.causallyConsistent(true)
.build();
Publisher<ClientSession> session = client.startSession(sessionOptions); (1)
template.withSession(session)
.execute(action -> {
Query query = query(where("name").is("Durzo Blint"));
return action.findOne(query, Person.class)
.flatMap(durzo -> {
Person azoth = new Person("Kylar Stern");
azoth.setMaster(durzo);
return action.insert(azoth); (2)
});
}, ClientSession::close) (3)
.subscribe(); (4)| 1 | Obtain a Publisher for new session retrieval. |
| 2 | Use ReactiveMongoOperation methods as before. The ClientSession is obtained and applied automatically. |
| 3 | Make sure to close the ClientSession. |
| 4 | Nothing happens until you subscribe. See the Project Reactor Reference Guide for details. |
By using a Publisher that provides the actual session, you can defer session acquisition to the point of actual subscription.
Still, you need to close the session when done, so as to not pollute the server with stale sessions. Use the doFinally hook on execute to call ClientSession#close() when you no longer need the session.
If you prefer having more control over the session itself, you can obtain the ClientSession through the driver and provide it through a Supplier.
Reactive use of ClientSession is limited to Template API usage. There’s currently no session integration with reactive repositories.
|
12. MongoDB Transactions
As of version 4, MongoDB supports Transactions. Transactions are built on top of Sessions and, consequently, require an active ClientSession.
Unless you specify a MongoTransactionManager within your application context, transaction support is DISABLED. You can use setSessionSynchronization(ALWAYS) to participate in ongoing non-native MongoDB transactions.
|
To get full programmatic control over transactions, you may want to use the session callback on MongoOperations.
The following example shows programmatic transaction control within a SessionCallback:
ClientSession session = client.startSession(options); (1)
template.withSession(session)
.execute(action -> {
session.startTransaction(); (2)
try {
Step step = // ...;
action.insert(step);
process(step);
action.update(Step.class).apply(Update.set("state", // ...
session.commitTransaction(); (3)
} catch (RuntimeException e) {
session.abortTransaction(); (4)
}
}, ClientSession::close) (5)| 1 | Obtain a new ClientSession. |
| 2 | Start the transaction. |
| 3 | If everything works out as expected, commit the changes. |
| 4 | Something broke, so roll back everything. |
| 5 | Do not forget to close the session when done. |
The preceding example lets you have full control over transactional behavior while using the session scoped MongoOperations instance within the callback to ensure the session is passed on to every server call.
To avoid some of the overhead that comes with this approach, you can use a TransactionTemplate to take away some of the noise of manual transaction flow.
12.1. Transactions with TransactionTemplate
Spring Data MongoDB transactions support a TransactionTemplate. The following example shows how to create and use a TransactionTemplate:
TransactionTemplatetemplate.setSessionSynchronization(ALWAYS); (1)
// ...
TransactionTemplate txTemplate = new TransactionTemplate(anyTxManager); (2)
txTemplate.execute(new TransactionCallbackWithoutResult() {
@Override
protected void doInTransactionWithoutResult(TransactionStatus status) { (3)
Step step = // ...;
template.insert(step);
process(step);
template.update(Step.class).apply(Update.set("state", // ...
};
});| 1 | Enable transaction synchronization during Template API configuration. |
| 2 | Create the TransactionTemplate using the provided PlatformTransactionManager. |
| 3 | Within the callback the ClientSession and transaction are already registered. |
Changing state of MongoTemplate during runtime (as you might think would be possible in item 1 of the preceding listing) can cause threading and visibility issues.
|
12.2. Transactions with MongoTransactionManager
MongoTransactionManager is the gateway to the well known Spring transaction support. It lets applications use the managed transaction features of Spring.
The MongoTransactionManager binds a ClientSession to the thread. MongoTemplate detects the session and operates on these resources which are associated with the transaction accordingly. MongoTemplate can also participate in other, ongoing transactions. The following example shows how to create and use transactions with a MongoTransactionManager:
MongoTransactionManager@Configuration
static class Config extends AbstractMongoConfiguration {
@Bean
MongoTransactionManager transactionManager(MongoDbFactory dbFactory) { (1)
return new MongoTransactionManager(dbFactory);
}
// ...
}
@Component
public class StateService {
@Transactional
void someBusinessFunction(Step step) { (2)
template.insert(step);
process(step);
template.update(Step.class).apply(Update.set("state", // ...
};
});| 1 | Register MongoTransactionManager in the application context. |
| 2 | Mark methods as transactional. |
@Transactional(readOnly = true) advises MongoTransactionManager to also start a transaction that adds the
ClientSession to outgoing requests.
|
12.3. Reactive Transactions
Same as with the reactive ClientSession support, the ReactiveMongoTemplate offers dedicated methods for operating
within a transaction without having to worry about the commit/abort actions depending on the operations outcome.
Reactive use of ClientSession and transactions is limited to Template API usage. There’s currently no session or transaction integration with reactive repositories.
|
Using the plain MongoDB reactive driver API a delete within a transactional flow may look like this.
Mono<DeleteResult> result = Mono
.from(client.startSession()) (1)
.flatMap(session -> {
session.startTransaction(); (2)
return Mono.from(collection.deleteMany(session, ...)) (3)
.onErrorResume(e -> Mono.from(session.abortTransaction()).then(Mono.error(e))) (4)
.flatMap(val -> Mono.from(session.commitTransaction()).then(Mono.just(val))) (5)
.doFinally(signal -> session.close()); (6)
});| 1 | First we obviously need to initiate the session. |
| 2 | Once we have the ClientSession at hand, start the transaction. |
| 3 | Operate within the transaction by passing on the ClientSession to the operation. |
| 4 | If the operations completes exceptionally, we need to abort the transaction and preserve the error. |
| 5 | Or of course, commit the changes in case of success. Still preserving the operations result. |
| 6 | Lastly, we need to make sure to close the session. |
The culprit of the above operation is in keeping the main flows DeleteResult instead of the transaction outcome
published via either commitTransaction() or abortTransaction(), which leads to a rather complicated setup.
MongoOperations.inTransaction() allows you to utilize the callback from for the reactive session support to actually preserve the flows outcome but also perform commit and abort actions
accordingly. This allows you to express the above flow simply as the following:
ReactiveMongoTemplate TransactionsMono<DeleteResult> result = template.inTransaction() (1)
.execute(action -> action.remove(query(where("id").is("step-1")), Step.class)); (2)| 1 | Initiate the transaction. |
| 2 | Operate within the ClientSession. Each execute(…) unit of work callback initiates a new transaction in the scope of the same ClientSession. |
In case you need access to the ClientSession within the flow, you can use ReactiveMongoContext.getSession()
to obtain in from the Reactor Context.
|
Everything happening inside the transactional callback is executed within a managed transaction. Errors within the
reactive flow of execute(…) that are not propagated to outside of the callback do not affect the operations within the transaction.
template.inTransaction() (1)
.execute(action -> action.find(query(where("state").is("active")), Step.class)
.flatMap(step -> action.update(Step.class)
.matching(query(where("id").is(step.id)))
.apply(update("state", "paused"))
.all())) (2)
.flatMap(updated -> {
// Exception could happen here (3)
});| 1 | Initiate the managed transaction. |
| 2 | Operate within the ClientSession. The transaction is committed after this is done or rolled back if an
error occurs here. |
| 3 | An error outside the transaction flow has no affect on the previous transactional execution. |
12.4. Special behavior inside transactions
Inside transactions, MongoDB server has a slightly different behavior.
Connection Settings
The MongoDB drivers offer a dedicated replica set name configuration option turing the driver into auto detection mode. This option helps identifying replica set master nodes and command routing during a transaction.
Make sure to add replicaSet to the MongoDB URI. Please refer to connection string options for further details.
|
Collection Operations
MongoDB does not support collection operations, such as collection creation, within a transaction. This also affects the on the fly collection creation that happens on first usage. Therefore make sure to have all required structures in place.
Transient Errors
MongoDB can add special labels to errors raised during transactional execution. Those may indicate transient failures
that might vanish by merely retrying the operation.
We highly recommend Spring Retry for those purposes. Nevertheless
one may override MongoTransactionManager#doCommit(MongoTransactionObject) to implement a Retry Commit Operation
behavior as outlined in the MongoDB reference manual.
Count
MongoDB count operates upon collection statistics which may not reflect the actual situation within a transaction.
The server responds with error 50851 when issuing a count command inside of a multi-document transaction.
Once MongoTemplate detects an active transaction, all exposed count() methods are converted and delegated to the
aggregation framework using $match and $count operators, preserving Query settings, such as collation.
Restrictions apply when using geo commands inside of the aggregation count helper. The following operators cannot be used and must be replaced with a different operator:
-
$where→$expr -
$near→$geoWithinwith$center -
$nearSphere→$geoWithinwith$centerSphere
Queries using Criteria.near(…) and Criteria.nearSphere(…) must be rewritten to Criteria.within(…) respective Criteria.withinSphere(…). Same applies for the near query keyword in repository query methods that must be changed to within. See also MongoDB JIRA ticket DRIVERS-518 for further reference.
The following snippet shows count usage inside the session-bound closure:
session.startTransaction();
template.withSession(session)
.execute(action -> {
action.count(query(where("state").is("active")), Step.class)
...The snippet above materializes in the following command:
db.collection.aggregate(
[
{ $match: { state: "active" } },
{ $count: "totalEntityCount" }
]
)instead of:
db.collection.find( { state: "active" } ).count()13. Reactive MongoDB support
The reactive MongoDB support contains the following basic set of features:
-
Spring configuration support that uses Java-based
@Configurationclasses, aMongoClientinstance, and replica sets. -
ReactiveMongoTemplate, which is a helper class that increases productivity by usingMongoOperationsin a reactive manner. It includes integrated object mapping betweenDocumentinstances and POJOs. -
Exception translation into Spring’s portable Data Access Exception hierarchy.
-
Feature-rich Object Mapping integrated with Spring’s
ConversionService. -
Annotation-based mapping metadata that is extensible to support other metadata formats.
-
Persistence and mapping lifecycle events.
-
Java based
Query,Criteria, andUpdateDSLs. -
Automatic implementation of reactive repository interfaces including support for custom query methods.
For most tasks, you should use ReactiveMongoTemplate or the repository support, both of which use the rich mapping functionality. ReactiveMongoTemplate is the place to look for accessing functionality such as incrementing counters or ad-hoc CRUD operations. ReactiveMongoTemplate also provides callback methods so that you can use the low-level API artifacts (such as MongoDatabase) to communicate directly with MongoDB. The goal with naming conventions on various API artifacts is to copy those in the base MongoDB Java driver so that you can map your existing knowledge onto the Spring APIs.
13.1. Getting Started
Spring MongoDB support requires MongoDB 2.6 or higher and Java SE 8 or higher.
First, you need to set up a running MongoDB server. Refer to the MongoDB Quick Start guide for an explanation on how to startup a MongoDB instance. Once installed, starting MongoDB is typically a matter of executing the following command: ${MONGO_HOME}/bin/mongod
To create a Spring project in STS, go to File → New → Spring Template Project → Simple Spring Utility Project and press Yes when prompted. Then enter a project and a package name, such as org.spring.mongodb.example.
Then add the following to the pom.xml dependencies section.
<dependencies>
<!-- other dependency elements omitted -->
<dependency>
<groupId>org.springframework.data</groupId>
<artifactId>spring-data-mongodb</artifactId>
<version>2.1.18.RELEASE</version>
</dependency>
<dependency>
<groupId>org.mongodb</groupId>
<artifactId>mongodb-driver-reactivestreams</artifactId>
<version>1.9.2</version>
</dependency>
<dependency>
<groupId>io.projectreactor</groupId>
<artifactId>reactor-core</artifactId>
<version>Californium-SR19</version>
</dependency>
</dependencies>| MongoDB uses two different drivers for blocking and reactive (non-blocking) data access. While blocking operations are provided by default, you can opt-in for reactive usage. |
To get started with a working example, create a simple Person class to persist, as follows:
@Document
public class Person {
private String id;
private String name;
private int age;
public Person(String name, int age) {
this.name = name;
this.age = age;
}
public String getId() {
return id;
}
public String getName() {
return name;
}
public int getAge() {
return age;
}
@Override
public String toString() {
return "Person [id=" + id + ", name=" + name + ", age=" + age + "]";
}
}Then create an application to run, as follows:
public class ReactiveMongoApp {
private static final Logger log = LoggerFactory.getLogger(ReactiveMongoApp.class);
public static void main(String[] args) throws Exception {
CountDownLatch latch = new CountDownLatch(1);
ReactiveMongoTemplate mongoOps = new ReactiveMongoTemplate(MongoClients.create(), "database");
mongoOps.insert(new Person("Joe", 34))
.flatMap(p -> mongoOps.findOne(new Query(where("name").is("Joe")), Person.class))
.doOnNext(person -> log.info(person.toString()))
.flatMap(person -> mongoOps.dropCollection("person"))
.doOnComplete(latch::countDown)
.subscribe();
latch.await();
}
}Running the preceding class produces the following output:
2016-09-20 14:56:57,373 DEBUG .index.MongoPersistentEntityIndexCreator: 124 - Analyzing class class example.ReactiveMongoApp$Person for index information.
2016-09-20 14:56:57,452 DEBUG .data.mongodb.core.ReactiveMongoTemplate: 975 - Inserting Document containing fields: [_class, name, age] in collection: person
2016-09-20 14:56:57,541 DEBUG .data.mongodb.core.ReactiveMongoTemplate:1503 - findOne using query: { "name" : "Joe"} fields: null for class: class example.ReactiveMongoApp$Person in collection: person
2016-09-20 14:56:57,545 DEBUG .data.mongodb.core.ReactiveMongoTemplate:1979 - findOne using query: { "name" : "Joe"} in db.collection: database.person
2016-09-20 14:56:57,567 INFO example.ReactiveMongoApp: 43 - Person [id=57e1321977ac501c68d73104, name=Joe, age=34]
2016-09-20 14:56:57,573 DEBUG .data.mongodb.core.ReactiveMongoTemplate: 528 - Dropped collection [person]Even in this simple example, there are a few things to take notice of:
-
You can instantiate the central helper class of Spring Mongo (
ReactiveMongoTemplate) by using the standardcom.mongodb.reactivestreams.client.MongoClientobject and the name of the database to use. -
The mapper works against standard POJO objects without the need for any additional metadata (though you can optionally provide that information. See here.).
-
Conventions are used for handling the ID field, converting it to be an
ObjectIdwhen stored in the database. -
Mapping conventions can use field access. Notice that the
Personclass has only getters. -
If the constructor argument names match the field names of the stored document, they are used to instantiate the object
There is a GitHub repository with several examples that you can download and play around with to get a feel for how the library works.
13.2. Connecting to MongoDB with Spring and the Reactive Streams Driver
One of the first tasks when using MongoDB and Spring is to create a com.mongodb.reactivestreams.client.MongoClient object by using the IoC container.
13.2.1. Registering a MongoClient Instance Using Java-based Metadata
The following example shows how to use Java-based bean metadata to register an instance of a com.mongodb.reactivestreams.client.MongoClient:
@Configuration
public class AppConfig {
/*
* Use the Reactive Streams Mongo Client API to create a com.mongodb.reactivestreams.client.MongoClient instance.
*/
public @Bean MongoClient reactiveMongoClient() {
return MongoClients.create("mongodb://localhost");
}
}This approach lets you use the standard com.mongodb.reactivestreams.client.MongoClient API (which you may already know).
An alternative is to register an instance of com.mongodb.reactivestreams.client.MongoClient instance with the container by using Spring’s ReactiveMongoClientFactoryBean. As compared to instantiating a com.mongodb.reactivestreams.client.MongoClient instance directly, the FactoryBean approach has the added advantage of also providing the container with an ExceptionTranslator implementation that translates MongoDB exceptions to exceptions in Spring’s portable DataAccessException hierarchy for data access classes annotated with the @Repository annotation. This hierarchy and use of @Repository is described in Spring’s DAO support features.
The following example shows Java-based bean metadata that supports exception translation on @Repository annotated classes:
@Configuration
public class AppConfig {
/*
* Factory bean that creates the com.mongodb.reactivestreams.client.MongoClient instance
*/
public @Bean ReactiveMongoClientFactoryBean mongoClient() {
ReactiveMongoClientFactoryBean clientFactory = new ReactiveMongoClientFactoryBean();
clientFactory.setHost("localhost");
return clientFactory;
}
}To access the com.mongodb.reactivestreams.client.MongoClient object created by the ReactiveMongoClientFactoryBean in other @Configuration or your own classes, get the MongoClient from the context.
13.2.2. The ReactiveMongoDatabaseFactory Interface
While com.mongodb.reactivestreams.client.MongoClient is the entry point to the reactive MongoDB driver API, connecting to a specific MongoDB database instance requires additional information, such as the database name. With that information, you can obtain a com.mongodb.reactivestreams.client.MongoDatabase object and access all the functionality of a specific MongoDB database instance. Spring provides the org.springframework.data.mongodb.core.ReactiveMongoDatabaseFactory interface to bootstrap connectivity to the database. The following listing shows the ReactiveMongoDatabaseFactory interface:
public interface ReactiveMongoDatabaseFactory {
/**
* Creates a default {@link MongoDatabase} instance.
*
* @return
* @throws DataAccessException
*/
MongoDatabase getMongoDatabase() throws DataAccessException;
/**
* Creates a {@link MongoDatabase} instance to access the database with the given name.
*
* @param dbName must not be {@literal null} or empty.
* @return
* @throws DataAccessException
*/
MongoDatabase getMongoDatabase(String dbName) throws DataAccessException;
/**
* Exposes a shared {@link MongoExceptionTranslator}.
*
* @return will never be {@literal null}.
*/
PersistenceExceptionTranslator getExceptionTranslator();
}The org.springframework.data.mongodb.core.SimpleReactiveMongoDatabaseFactory class implements the ReactiveMongoDatabaseFactory interface and is created with a standard com.mongodb.reactivestreams.client.MongoClient instance and the database name.
Instead of using the IoC container to create an instance of ReactiveMongoTemplate, you can use them in standard Java code, as follows:
public class MongoApp {
private static final Log log = LogFactory.getLog(MongoApp.class);
public static void main(String[] args) throws Exception {
ReactiveMongoOperations mongoOps = new ReactiveMongoOperations(new SimpleReactiveMongoDatabaseFactory(MongoClient.create(), "database"));
mongoOps.insert(new Person("Joe", 34))
.flatMap(p -> mongoOps.findOne(new Query(where("name").is("Joe")), Person.class))
.doOnNext(person -> log.info(person.toString()))
.flatMap(person -> mongoOps.dropCollection("person"))
.subscribe();
}
}The use of SimpleMongoDbFactory is the only difference between the listing shown in the getting started section.
13.2.3. Registering a ReactiveMongoDatabaseFactory Instance by Using Java-based Metadata
To register a ReactiveMongoDatabaseFactory instance with the container, you can write code much like what was highlighted in the previous code listing, as the following example shows:
@Configuration
public class MongoConfiguration {
public @Bean ReactiveMongoDatabaseFactory reactiveMongoDatabaseFactory() {
return new SimpleReactiveMongoDatabaseFactory(MongoClients.create(), "database");
}
}To define the username and password, create a MongoDB connection string and pass it into the factory method, as the next listing shows. The following listing also shows how to use ReactiveMongoDatabaseFactory to register an instance of ReactiveMongoTemplate with the container:
@Configuration
public class MongoConfiguration {
public @Bean ReactiveMongoDatabaseFactory reactiveMongoDatabaseFactory() {
return new SimpleReactiveMongoDatabaseFactory(MongoClients.create("mongodb://joe:secret@localhost"), "database");
}
public @Bean ReactiveMongoTemplate reactiveMongoTemplate() {
return new ReactiveMongoTemplate(reactiveMongoDatabaseFactory());
}
}13.3. Introduction to ReactiveMongoTemplate
The ReactiveMongoTemplate class, located in the org.springframework.data.mongodb package, is the central class of the Spring’s Reactive MongoDB support and provides a rich feature set to interact with the database. The template offers convenience operations to create, update, delete, and query for MongoDB documents and provides a mapping between your domain objects and MongoDB documents.
Once configured, ReactiveMongoTemplate is thread-safe and can be reused across multiple instances.
|
The mapping between MongoDB documents and domain classes is done by delegating to an implementation of the MongoConverter interface. Spring provides a default implementation with MongoMappingConverter, but you can also write your own converter. See the section on MongoConverter instances for more detailed information.
The ReactiveMongoTemplate class implements the ReactiveMongoOperations interface. As much as possible, the methods on ReactiveMongoOperations mirror methods available on the MongoDB driver Collection object, to make the API familiar to existing MongoDB developers who are used to the driver API. For example, you can find methods such as find, findAndModify, findOne, insert, remove, save, update, and updateMulti. The design goal is to make it as easy as possible to transition between the use of the base MongoDB driver and ReactiveMongoOperations. A major difference between the two APIs is that ReactiveMongoOperations can be passed domain objects instead of Document, and there are fluent APIs for Query, Criteria, and Update operations instead of populating a Document to specify the parameters for those operations.
The preferred way to reference the operations on ReactiveMongoTemplate instance is through its ReactiveMongoOperations interface.
|
The default converter implementation used by ReactiveMongoTemplate is MappingMongoConverter. While the MappingMongoConverter can use additional metadata to specify the mapping of objects to documents, it can also convert objects that contain no additional metadata by using some conventions for the mapping of IDs and collection names. These conventions as well as the use of mapping annotations are explained in the Mapping chapter.
Another central feature of ReactiveMongoTemplate is exception translation of exceptions thrown in the MongoDB Java driver into Spring’s portable Data Access Exception hierarchy. See the section on exception translation for more information.
There are many convenience methods on ReactiveMongoTemplate to help you easily perform common tasks. However, if you need to access the MongoDB driver API directly to access functionality not explicitly exposed by the MongoTemplate, you can use one of several execute callback methods to access underlying driver APIs. The execute callbacks give you a reference to either a com.mongodb.reactivestreams.client.MongoCollection or a com.mongodb.reactivestreams.client.MongoDatabase object. See Execution Callbacks for more information.
13.3.1. Instantiating ReactiveMongoTemplate
You can use Java to create and register an instance of ReactiveMongoTemplate, as follows:
com.mongodb.reactivestreams.client.MongoClient object and enabling Spring’s exception translation support@Configuration
public class AppConfig {
public @Bean MongoClient reactiveMongoClient() {
return MongoClients.create("mongodb://localhost");
}
public @Bean ReactiveMongoTemplate reactiveMongoTemplate() {
return new ReactiveMongoTemplate(reactiveMongoClient(), "mydatabase");
}
}There are several overloaded constructors of ReactiveMongoTemplate, including:
-
ReactiveMongoTemplate(MongoClient mongo, String databaseName): Takes thecom.mongodb.MongoClientobject and the default database name to operate against. -
ReactiveMongoTemplate(ReactiveMongoDatabaseFactory mongoDatabaseFactory): Takes aReactiveMongoDatabaseFactoryobject that encapsulated thecom.mongodb.reactivestreams.client.MongoClientobject and database name. -
ReactiveMongoTemplate(ReactiveMongoDatabaseFactory mongoDatabaseFactory, MongoConverter mongoConverter): Adds aMongoConverterto use for mapping.
When creating a ReactiveMongoTemplate, you might also want to set the following properties:
-
WriteResultCheckingPolicy -
WriteConcern -
ReadPreference
The preferred way to reference the operations on ReactiveMongoTemplate instance is through its ReactiveMongoOperations interface.
|
13.3.2. WriteResultChecking Policy
When in development, it is handy to either log or throw an Exception if the com.mongodb.WriteResult returned from any MongoDB operation contains an error. It is quite common to forget to do this during development and then end up with an application that looks like it runs successfully when, in fact, the database was not modified according to your expectations. Set the MongoTemplate WriteResultChecking property to an enum with the following values, LOG, EXCEPTION, or NONE to either log the error, throw and exception or do nothing. The default is to use a WriteResultChecking value of NONE.
13.3.3. WriteConcern
If it has not yet been specified through the driver at a higher level (such as MongoDatabase), you can set the com.mongodb.WriteConcern property that the ReactiveMongoTemplate uses for write operations. If ReactiveMongoTemplate’s WriteConcern property is not set, it defaults to the one set in the MongoDB driver’s MongoDatabase or MongoCollection setting.
13.3.4. WriteConcernResolver
For more advanced cases where you want to set different WriteConcern values on a per-operation basis (for remove, update, insert, and save operations), a strategy interface called WriteConcernResolver can be configured on ReactiveMongoTemplate. Since ReactiveMongoTemplate is used to persist POJOs, the WriteConcernResolver lets you create a policy that can map a specific POJO class to a WriteConcern value. The following listing shows the WriteConcernResolver interface:
public interface WriteConcernResolver {
WriteConcern resolve(MongoAction action);
}The argument, MongoAction, determines the WriteConcern value to be used and whether to use the value of the template itself as a default. MongoAction contains the collection name being written to, the java.lang.Class of the POJO, the converted DBObject, the operation as a value from the MongoActionOperation enumeration (one of REMOVE, UPDATE, INSERT, INSERT_LIST, and SAVE), and a few other pieces of contextual information. The following example shows how to create a WriteConcernResolver:
private class MyAppWriteConcernResolver implements WriteConcernResolver {
public WriteConcern resolve(MongoAction action) {
if (action.getEntityClass().getSimpleName().contains("Audit")) {
return WriteConcern.NONE;
} else if (action.getEntityClass().getSimpleName().contains("Metadata")) {
return WriteConcern.JOURNAL_SAFE;
}
return action.getDefaultWriteConcern();
}
}13.4. Saving, Updating, and Removing Documents
ReactiveMongoTemplate lets you save, update, and delete your domain objects and map those objects to documents stored in MongoDB.
Consider the following Person class:
public class Person {
private String id;
private String name;
private int age;
public Person(String name, int age) {
this.name = name;
this.age = age;
}
public String getId() {
return id;
}
public String getName() {
return name;
}
public int getAge() {
return age;
}
@Override
public String toString() {
return "Person [id=" + id + ", name=" + name + ", age=" + age + "]";
}
}The following listing shows how you can save, update, and delete the Person object:
public class ReactiveMongoApp {
private static final Logger log = LoggerFactory.getLogger(ReactiveMongoApp.class);
public static void main(String[] args) throws Exception {
CountDownLatch latch = new CountDownLatch(1);
ReactiveMongoTemplate mongoOps = new ReactiveMongoTemplate(MongoClients.create(), "database");
mongoOps.insert(new Person("Joe", 34)).doOnNext(person -> log.info("Insert: " + person))
.flatMap(person -> mongoOps.findById(person.getId(), Person.class))
.doOnNext(person -> log.info("Found: " + person))
.zipWith(person -> mongoOps.updateFirst(query(where("name").is("Joe")), update("age", 35), Person.class))
.flatMap(tuple -> mongoOps.remove(tuple.getT1())).flatMap(deleteResult -> mongoOps.findAll(Person.class))
.count().doOnSuccess(count -> {
log.info("Number of people: " + count);
latch.countDown();
})
.subscribe();
latch.await();
}
}The preceding example includes implicit conversion between a String and ObjectId (by using the MongoConverter) as stored in the database and recognizing a convention of the property Id name.
The preceding example is meant to show the use of save, update, and remove operations on ReactiveMongoTemplate and not to show complex mapping or chaining functionality.
|
“Querying Documents” explains the query syntax used in the preceding example in more detail. Additional documentation can be found in the blocking MongoTemplate section.
13.5. Execution Callbacks
One common design feature of all Spring template classes is that all functionality is routed into one of the templates execute callback methods. This helps ensure that exceptions and any resource management that maybe required are performed consistency. While this was of much greater need in the case of JDBC and JMS than with MongoDB, it still offers a single spot for exception translation and logging to occur. As such, using the execute callback is the preferred way to access the MongoDB driver’s MongoDatabase and MongoCollection objects to perform uncommon operations that were not exposed as methods on ReactiveMongoTemplate.
Here is a list of execute callback methods.
-
<T> Flux<T>execute(Class<?> entityClass, ReactiveCollectionCallback<T> action): Executes the givenReactiveCollectionCallbackfor the entity collection of the specified class. -
<T> Flux<T>execute(String collectionName, ReactiveCollectionCallback<T> action): Executes the givenReactiveCollectionCallbackon the collection of the given name. -
<T> Flux<T>execute(ReactiveDatabaseCallback<T> action): Executes aReactiveDatabaseCallbacktranslating any exceptions as necessary.
The following example uses the ReactiveCollectionCallback to return information about an index:
Flux<Boolean> hasIndex = operations.execute("geolocation",
collection -> Flux.from(collection.listIndexes(Document.class))
.filter(document -> document.get("name").equals("fancy-index-name"))
.flatMap(document -> Mono.just(true))
.defaultIfEmpty(false));14. MongoDB Repositories
14.1. Introduction
This chapter points out the specialties for repository support for MongoDB. This chapter builds on the core repository support explained in Working with Spring Data Repositories. You should have a sound understanding of the basic concepts explained there.
14.2. Usage
To access domain entities stored in a MongoDB, you can use our sophisticated repository support that eases implementation quite significantly. To do so, create an interface for your repository, as the following example shows:
public class Person {
@Id
private String id;
private String firstname;
private String lastname;
private Address address;
// … getters and setters omitted
}Note that the domain type shown in the preceding example has a property named id of type String. The default serialization mechanism used in MongoTemplate (which backs the repository support) regards properties named id as the document ID. Currently, we support String, ObjectId, and BigInteger as ID types.
Please see ID mapping for more information about on how the id field is handled in the mapping layer.
Now that we have a domain object, we can define an interface that uses it, as follows:
public interface PersonRepository extends PagingAndSortingRepository<Person, String> {
// additional custom query methods go here
}Right now this interface serves only to provide type information, but we can add additional methods to it later. To do so, in your Spring configuration, add the following content:
<?xml version="1.0" encoding="UTF-8"?>
<beans xmlns="http://www.springframework.org/schema/beans"
xmlns:xsi="http://www.w3.org/2001/XMLSchema-instance"
xmlns:mongo="http://www.springframework.org/schema/data/mongo"
xsi:schemaLocation="http://www.springframework.org/schema/beans
https://www.springframework.org/schema/beans/spring-beans-3.0.xsd
http://www.springframework.org/schema/data/mongo
https://www.springframework.org/schema/data/mongo/spring-mongo-1.0.xsd">
<mongo:mongo-client id="mongoClient" />
<bean id="mongoTemplate" class="org.springframework.data.mongodb.core.MongoTemplate">
<constructor-arg ref="mongoClient" />
<constructor-arg value="databaseName" />
</bean>
<mongo:repositories base-package="com.acme.*.repositories" />
</beans>This namespace element causes the base packages to be scanned for interfaces that extend MongoRepository and create Spring beans for each one found. By default, the repositories get a MongoTemplate Spring bean wired that is called mongoTemplate, so you only need to configure mongo-template-ref explicitly if you deviate from this convention.
If you would rather go with Java-based configuration, use the @EnableMongoRepositories annotation. That annotation carries the same attributes as the namespace element. If no base package is configured, the infrastructure scans the package of the annotated configuration class. The following example shows how to use Java configuration for a repository:
@Configuration
@EnableMongoRepositories
class ApplicationConfig extends AbstractMongoConfiguration {
@Override
protected String getDatabaseName() {
return "e-store";
}
@Override
public MongoClient mongoClient() {
return new MongoClient();
}
@Override
protected String getMappingBasePackage() {
return "com.oreilly.springdata.mongodb";
}
}Because our domain repository extends PagingAndSortingRepository, it provides you with CRUD operations as well as methods for paginated and sorted access to the entities. Working with the repository instance is just a matter of dependency injecting it into a client. Consequently, accessing the second page of Person objects at a page size of 10 would resemble the following code:
@RunWith(SpringJUnit4ClassRunner.class)
@ContextConfiguration
public class PersonRepositoryTests {
@Autowired PersonRepository repository;
@Test
public void readsFirstPageCorrectly() {
Page<Person> persons = repository.findAll(PageRequest.of(0, 10));
assertThat(persons.isFirstPage(), is(true));
}
}The preceding example creates an application context with Spring’s unit test support, which performs annotation-based dependency injection into test cases. Inside the test method, we use the repository to query the datastore. We hand the repository a PageRequest instance that requests the first page of Person objects at a page size of 10.
14.3. Query Methods
Most of the data access operations you usually trigger on a repository result in a query being executed against the MongoDB databases. Defining such a query is a matter of declaring a method on the repository interface, as the following example shows:
public interface PersonRepository extends PagingAndSortingRepository<Person, String> {
List<Person> findByLastname(String lastname); (1)
Page<Person> findByFirstname(String firstname, Pageable pageable); (2)
Person findByShippingAddresses(Address address); (3)
Person findFirstByLastname(String lastname) (4)
Stream<Person> findAllBy(); (5)
}| 1 | The findByLastname method shows a query for all people with the given last name. The query is derived by parsing the method name for constraints that can be concatenated with And and Or. Thus, the method name results in a query expression of {"lastname" : lastname}. |
| 2 | Applies pagination to a query. You can equip your method signature with a Pageable parameter and let the method return a Page instance and Spring Data automatically pages the query accordingly. |
| 3 | Shows that you can query based on properties that are not primitive types. Throws IncorrectResultSizeDataAccessException if more than one match is found. |
| 4 | Uses the First keyword to restrict the query to only the first result. Unlike <3>, this method does not throw an exception if more than one match is found. |
| 5 | Uses a Java 8 Stream that reads and converts individual elements while iterating the stream. |
We do not support referring to parameters that are mapped as DBRef in the domain class.
|
The following table shows the keywords that are supported for query methods:
| Keyword | Sample | Logical result |
|---|---|---|
|
|
|
|
|
|
|
|
|
|
|
|
|
|
|
|
|
|
|
|
|
|
|
|
|
|
|
|
|
|
|
|
|
|
|
|
|
|
|
|
|
|
|
|
|
|
|
|
|
|
|
|
|
|
|
|
|
|
|
|
|
|
|
|
|
|
|
|
|
|
|
|
|
|
|
|
|
|
|
|
|
|
|
|
| If the property criterion compares a document, the order of the fields and exact equality in the document matters. |
14.3.1. Repository Delete Queries
The keywords in the preceding table can be used in conjunction with delete…By or remove…By to create queries that delete matching documents.
Delete…By Querypublic interface PersonRepository extends MongoRepository<Person, String> {
List <Person> deleteByLastname(String lastname);
Long deletePersonByLastname(String lastname);
}Using a return type of List retrieves and returns all matching documents before actually deleting them. A numeric return type directly removes the matching documents, returning the total number of documents removed.
14.3.2. Geo-spatial Repository Queries
As you saw in the preceding table of keywords, a few keywords trigger geo-spatial operations within a MongoDB query. The Near keyword allows some further modification, as the next few examples show.
The following example shows how to define a near query that finds all persons with a given distance of a given point:
Near queriespublic interface PersonRepository extends MongoRepository<Person, String> {
// { 'location' : { '$near' : [point.x, point.y], '$maxDistance' : distance}}
List<Person> findByLocationNear(Point location, Distance distance);
}Adding a Distance parameter to the query method allows restricting results to those within the given distance. If the Distance was set up containing a Metric, we transparently use $nearSphere instead of $code, as the following example shows:
Distance with MetricsPoint point = new Point(43.7, 48.8);
Distance distance = new Distance(200, Metrics.KILOMETERS);
… = repository.findByLocationNear(point, distance);
// {'location' : {'$nearSphere' : [43.7, 48.8], '$maxDistance' : 0.03135711885774796}}Using a Distance with a Metric causes a $nearSphere (instead of a plain $near) clause to be added. Beyond that, the actual distance gets calculated according to the Metrics used.
(Note that Metric does not refer to metric units of measure. It could be miles rather than kilometers. Rather, metric refers to the concept of a system of measurement, regardless of which system you use.)
Using @GeoSpatialIndexed(type = GeoSpatialIndexType.GEO_2DSPHERE) on the target property forces usage of the $nearSphere operator.
|
Geo-near Queries
Spring Data MongoDb supports geo-near queries, as the following example shows:
public interface PersonRepository extends MongoRepository<Person, String> {
// {'geoNear' : 'location', 'near' : [x, y] }
GeoResults<Person> findByLocationNear(Point location);
// No metric: {'geoNear' : 'person', 'near' : [x, y], maxDistance : distance }
// Metric: {'geoNear' : 'person', 'near' : [x, y], 'maxDistance' : distance,
// 'distanceMultiplier' : metric.multiplier, 'spherical' : true }
GeoResults<Person> findByLocationNear(Point location, Distance distance);
// Metric: {'geoNear' : 'person', 'near' : [x, y], 'minDistance' : min,
// 'maxDistance' : max, 'distanceMultiplier' : metric.multiplier,
// 'spherical' : true }
GeoResults<Person> findByLocationNear(Point location, Distance min, Distance max);
// {'geoNear' : 'location', 'near' : [x, y] }
GeoResults<Person> findByLocationNear(Point location);
}14.3.3. MongoDB JSON-based Query Methods and Field Restriction
By adding the org.springframework.data.mongodb.repository.Query annotation to your repository query methods, you can specify a MongoDB JSON query string to use instead of having the query be derived from the method name, as the following example shows:
public interface PersonRepository extends MongoRepository<Person, String> {
@Query("{ 'firstname' : ?0 }")
List<Person> findByThePersonsFirstname(String firstname);
}The ?0 placeholder lets you substitute the value from the method arguments into the JSON query string.
String parameter values are escaped during the binding process, which means that it is not possible to add MongoDB specific operators through the argument.
|
You can also use the filter property to restrict the set of properties that is mapped into the Java object, as the following example shows:
public interface PersonRepository extends MongoRepository<Person, String> {
@Query(value="{ 'firstname' : ?0 }", fields="{ 'firstname' : 1, 'lastname' : 1}")
List<Person> findByThePersonsFirstname(String firstname);
}The query in the preceding example returns only the firstname, lastname and Id properties of the Person objects. The age property, a java.lang.Integer, is not set and its value is therefore null.
14.3.4. Sorting Query Method results
MongoDB repositories allow various approaches to define sorting order. Let’s take a look at the following example:
public interface PersonRepository extends MongoRepository<Person, String> {
List<Person> findByFirstnameSortByAgeDesc(String firstname); (1)
List<Person> findByFirstname(String firstname, Sort sort); (2)
@Query(sort = "{ age : -1 }")
List<Person> findByFirstname(String firstname); (3)
@Query(sort = "{ age : -1 }")
List<Person> findByLastname(String lastname, Sort sort); (4)
}| 1 | Static sorting derived from method name. SortByAgeDesc results in { age : -1 } for the sort parameter. |
| 2 | Dynamic sorting using a method argument. Sort.by(DESC, "age") creates { age : -1 } for the sort parameter. |
| 3 | Static sorting via Query annotation. Sort parameter applied as stated in the sort attribute. |
| 4 | Default sorting via Query annotation combined with dynamic one via a method argument. Sort.unsorted()
results in { age : -1 }. Using Sort.by(ASC, "age") overrides the defaults and creates { age : 1 }. Sort.by
(ASC, "firstname") alters the default and results in { age : -1, firstname : 1 }. |
14.3.5. JSON-based Queries with SpEL Expressions
Query strings and field definitions can be used together with SpEL expressions to create dynamic queries at runtime. SpEL expressions can provide predicate values and can be used to extend predicates with subdocuments.
Expressions expose method arguments through an array that contains all the arguments. The following query uses [0]
to declare the predicate value for lastname (which is equivalent to the ?0 parameter binding):
public interface PersonRepository extends MongoRepository<Person, String> {
@Query("{'lastname': ?#{[0]} }")
List<Person> findByQueryWithExpression(String param0);
}Expressions can be used to invoke functions, evaluate conditionals, and construct values. SpEL expressions used in conjunction with JSON reveal a side-effect, because Map-like declarations inside of SpEL read like JSON, as the following example shows:
public interface PersonRepository extends MongoRepository<Person, String> {
@Query("{'id': ?#{ [0] ? {$exists :true} : [1] }}")
List<Person> findByQueryWithExpressionAndNestedObject(boolean param0, String param1);
}SpEL in query strings can be a powerful way to enhance queries. However, they can also accept a broad range of unwanted arguments. You should make sure to sanitize strings before passing them to the query to avoid unwanted changes to your query.
Expression support is extensible through the Query SPI: org.springframework.data.repository.query.spi.EvaluationContextExtension.
The Query SPI can contribute properties and functions and can customize the root object. Extensions are retrieved from the application context
at the time of SpEL evaluation when the query is built. The following example shows how to use EvaluationContextExtension:
public class SampleEvaluationContextExtension extends EvaluationContextExtensionSupport {
@Override
public String getExtensionId() {
return "security";
}
@Override
public Map<String, Object> getProperties() {
return Collections.singletonMap("principal", SecurityContextHolder.getCurrent().getPrincipal());
}
}
Bootstrapping MongoRepositoryFactory yourself is not application context-aware and requires further configuration
to pick up Query SPI extensions.
|
14.3.6. Type-safe Query Methods
MongoDB repository support integrates with the Querydsl project, which provides a way to perform type-safe queries. To quote from the project description, "Instead of writing queries as inline strings or externalizing them into XML files they are constructed via a fluent API." It provides the following features:
-
Code completion in the IDE (all properties, methods, and operations can be expanded in your favorite Java IDE).
-
Almost no syntactically invalid queries allowed (type-safe on all levels).
-
Domain types and properties can be referenced safely — no strings involved!
-
Adapts better to refactoring changes in domain types.
-
Incremental query definition is easier.
See the QueryDSL documentation for how to bootstrap your environment for APT-based code generation using Maven or Ant.
QueryDSL lets you write queries such as the following:
QPerson person = new QPerson("person");
List<Person> result = repository.findAll(person.address.zipCode.eq("C0123"));
Page<Person> page = repository.findAll(person.lastname.contains("a"),
PageRequest.of(0, 2, Direction.ASC, "lastname"));QPerson is a class that is generated by the Java annotation post-processing tool. It is a Predicate that lets you write type-safe queries. Notice that there are no strings in the query other than the C0123 value.
You can use the generated Predicate class by using the QuerydslPredicateExecutor interface, which the following listing shows:
public interface QuerydslPredicateExecutor<T> {
T findOne(Predicate predicate);
List<T> findAll(Predicate predicate);
List<T> findAll(Predicate predicate, OrderSpecifier<?>... orders);
Page<T> findAll(Predicate predicate, Pageable pageable);
Long count(Predicate predicate);
}To use this in your repository implementation, add it to the list of repository interfaces from which your interface inherits, as the following example shows:
public interface PersonRepository extends MongoRepository<Person, String>, QuerydslPredicateExecutor<Person> {
// additional query methods go here
}14.3.7. Full-text Search Queries
MongoDB’s full-text search feature is store-specific and, therefore, can be found on MongoRepository rather than on the more general CrudRepository. We need a document with a full-text index (see “Text Indexes” to learn how to create a full-text index).
Additional methods on MongoRepository take TextCriteria as an input parameter. In addition to those explicit methods, it is also possible to add a TextCriteria-derived repository method. The criteria are added as an additional AND criteria. Once the entity contains a @TextScore-annotated property, the document’s full-text score can be retrieved. Furthermore, the @TextScore annotated also makes it possible to sort by the document’s score, as the following example shows:
@Document
class FullTextDocument {
@Id String id;
@TextIndexed String title;
@TextIndexed String content;
@TextScore Float score;
}
interface FullTextRepository extends Repository<FullTextDocument, String> {
// Execute a full-text search and define sorting dynamically
List<FullTextDocument> findAllBy(TextCriteria criteria, Sort sort);
// Paginate over a full-text search result
Page<FullTextDocument> findAllBy(TextCriteria criteria, Pageable pageable);
// Combine a derived query with a full-text search
List<FullTextDocument> findByTitleOrderByScoreDesc(String title, TextCriteria criteria);
}
Sort sort = Sort.by("score");
TextCriteria criteria = TextCriteria.forDefaultLanguage().matchingAny("spring", "data");
List<FullTextDocument> result = repository.findAllBy(criteria, sort);
criteria = TextCriteria.forDefaultLanguage().matching("film");
Page<FullTextDocument> page = repository.findAllBy(criteria, PageRequest.of(1, 1, sort));
List<FullTextDocument> result = repository.findByTitleOrderByScoreDesc("mongodb", criteria);14.3.8. Projections
Spring Data query methods usually return one or multiple instances of the aggregate root managed by the repository. However, it might sometimes be desirable to create projections based on certain attributes of those types. Spring Data allows modeling dedicated return types, to more selectively retrieve partial views of the managed aggregates.
Imagine a repository and aggregate root type such as the following example:
class Person {
@Id UUID id;
String firstname, lastname;
Address address;
static class Address {
String zipCode, city, street;
}
}
interface PersonRepository extends Repository<Person, UUID> {
Collection<Person> findByLastname(String lastname);
}Now imagine that we want to retrieve the person’s name attributes only. What means does Spring Data offer to achieve this? The rest of this chapter answers that question.
Interface-based Projections
The easiest way to limit the result of the queries to only the name attributes is by declaring an interface that exposes accessor methods for the properties to be read, as shown in the following example:
interface NamesOnly {
String getFirstname();
String getLastname();
}The important bit here is that the properties defined here exactly match properties in the aggregate root. Doing so lets a query method be added as follows:
interface PersonRepository extends Repository<Person, UUID> {
Collection<NamesOnly> findByLastname(String lastname);
}The query execution engine creates proxy instances of that interface at runtime for each element returned and forwards calls to the exposed methods to the target object.
Projections can be used recursively. If you want to include some of the Address information as well, create a projection interface for that and return that interface from the declaration of getAddress(), as shown in the following example:
interface PersonSummary {
String getFirstname();
String getLastname();
AddressSummary getAddress();
interface AddressSummary {
String getCity();
}
}On method invocation, the address property of the target instance is obtained and wrapped into a projecting proxy in turn.
Closed Projections
A projection interface whose accessor methods all match properties of the target aggregate is considered to be a closed projection. The following example (which we used earlier in this chapter, too) is a closed projection:
interface NamesOnly {
String getFirstname();
String getLastname();
}If you use a closed projection, Spring Data can optimize the query execution, because we know about all the attributes that are needed to back the projection proxy. For more details on that, see the module-specific part of the reference documentation.
Open Projections
Accessor methods in projection interfaces can also be used to compute new values by using the @Value annotation, as shown in the following example:
interface NamesOnly {
@Value("#{target.firstname + ' ' + target.lastname}")
String getFullName();
…
}The aggregate root backing the projection is available in the target variable.
A projection interface using @Value is an open projection.
Spring Data cannot apply query execution optimizations in this case, because the SpEL expression could use any attribute of the aggregate root.
The expressions used in @Value should not be too complex — you want to avoid programming in String variables.
For very simple expressions, one option might be to resort to default methods (introduced in Java 8), as shown in the following example:
interface NamesOnly {
String getFirstname();
String getLastname();
default String getFullName() {
return getFirstname().concat(" ").concat(getLastname());
}
}This approach requires you to be able to implement logic purely based on the other accessor methods exposed on the projection interface. A second, more flexible, option is to implement the custom logic in a Spring bean and then invoke that from the SpEL expression, as shown in the following example:
@Component
class MyBean {
String getFullName(Person person) {
…
}
}
interface NamesOnly {
@Value("#{@myBean.getFullName(target)}")
String getFullName();
…
}Notice how the SpEL expression refers to myBean and invokes the getFullName(…) method and forwards the projection target as a method parameter.
Methods backed by SpEL expression evaluation can also use method parameters, which can then be referred to from the expression.
The method parameters are available through an Object array named args. The following example shows how to get a method parameter from the args array:
interface NamesOnly {
@Value("#{args[0] + ' ' + target.firstname + '!'}")
String getSalutation(String prefix);
}Again, for more complex expressions, you should use a Spring bean and let the expression invoke a method, as described earlier.
Class-based Projections (DTOs)
Another way of defining projections is by using value type DTOs (Data Transfer Objects) that hold properties for the fields that are supposed to be retrieved. These DTO types can be used in exactly the same way projection interfaces are used, except that no proxying happens and no nested projections can be applied.
If the store optimizes the query execution by limiting the fields to be loaded, the fields to be loaded are determined from the parameter names of the constructor that is exposed.
The following example shows a projecting DTO:
class NamesOnly {
private final String firstname, lastname;
NamesOnly(String firstname, String lastname) {
this.firstname = firstname;
this.lastname = lastname;
}
String getFirstname() {
return this.firstname;
}
String getLastname() {
return this.lastname;
}
// equals(…) and hashCode() implementations
}|
Avoid boilerplate code for projection DTOs
You can dramatically simplify the code for a DTO by using Project Lombok, which provides an Fields are |
Dynamic Projections
So far, we have used the projection type as the return type or element type of a collection. However, you might want to select the type to be used at invocation time (which makes it dynamic). To apply dynamic projections, use a query method such as the one shown in the following example:
interface PersonRepository extends Repository<Person, UUID> {
<T> Collection<T> findByLastname(String lastname, Class<T> type);
}This way, the method can be used to obtain the aggregates as is or with a projection applied, as shown in the following example:
void someMethod(PersonRepository people) {
Collection<Person> aggregates =
people.findByLastname("Matthews", Person.class);
Collection<NamesOnly> aggregates =
people.findByLastname("Matthews", NamesOnly.class);
}14.4. CDI Integration
Instances of the repository interfaces are usually created by a container, and Spring is the most natural choice when working with Spring Data. As of version 1.3.0, Spring Data MongoDB ships with a custom CDI extension that lets you use the repository abstraction in CDI environments. The extension is part of the JAR. To activate it, drop the Spring Data MongoDB JAR into your classpath. You can now set up the infrastructure by implementing a CDI Producer for the MongoTemplate, as the following example shows:
class MongoTemplateProducer {
@Produces
@ApplicationScoped
public MongoOperations createMongoTemplate() {
MongoDbFactory factory = new SimpleMongoDbFactory(new MongoClient(), "database");
return new MongoTemplate(factory);
}
}The Spring Data MongoDB CDI extension picks up the MongoTemplate available as a CDI bean and creates a proxy for a Spring Data repository whenever a bean of a repository type is requested by the container. Thus, obtaining an instance of a Spring Data repository is a matter of declaring an @Inject-ed property, as the following example shows:
class RepositoryClient {
@Inject
PersonRepository repository;
public void businessMethod() {
List<Person> people = repository.findAll();
}
}15. Reactive MongoDB repositories
This chapter describes the specialties for reactive repository support for MongoDB. This chapter builds on the core repository support explained in Working with Spring Data Repositories. You should have a sound understanding of the basic concepts explained there.
15.1. Reactive Composition Libraries
The reactive space offers various reactive composition libraries. The most common libraries are RxJava and Project Reactor.
Spring Data MongoDB is built on top of the MongoDB Reactive Streams driver, to provide maximal interoperability by relying on the Reactive Streams initiative. Static APIs, such as ReactiveMongoOperations, are provided by using Project Reactor’s Flux and Mono types. Project Reactor offers various adapters to convert reactive wrapper types (Flux to Observable and vice versa), but conversion can easily clutter your code.
Spring Data’s Repository abstraction is a dynamic API, mostly defined by you and your requirements as you declare query methods. Reactive MongoDB repositories can be implemented by using either RxJava or Project Reactor wrapper types by extending from one of the following library-specific repository interfaces:
-
ReactiveCrudRepository -
ReactiveSortingRepository -
RxJava2CrudRepository -
RxJava2SortingRepository
Spring Data converts reactive wrapper types behind the scenes so that you can stick to your favorite composition library.
15.2. Usage
To access domain entities stored in a MongoDB database, you can use our sophisticated repository support that eases implementing those quite significantly. To do so, create an interface similar for your repository. Before you can do that, though, you need an entity, such as the entity defined in the following example:
Person entitypublic class Person {
@Id
private String id;
private String firstname;
private String lastname;
private Address address;
// … getters and setters omitted
}Note that the entity defined in the preceding example has a property named id of type String. The default serialization mechanism used in MongoTemplate (which backs the repository support) regards properties named id as the document ID. Currently, we support String, ObjectId, and BigInteger as id-types.
Please see ID mapping for more information about on how the id field is handled in the mapping layer.
The following example shows how to create an interface that defines queries against the Person object from the preceding example:
public interface ReactivePersonRepository extends ReactiveSortingRepository<Person, String> {
Flux<Person> findByFirstname(String firstname); (1)
Flux<Person> findByFirstname(Publisher<String> firstname); (2)
Flux<Person> findByFirstnameOrderByLastname(String firstname, Pageable pageable); (3)
Mono<Person> findByFirstnameAndLastname(String firstname, String lastname); (4)
Mono<Person> findFirstByLastname(String lastname); (5)
}| 1 | The method shows a query for all people with the given lastname. The query is derived by parsing the method name for constraints that can be concatenated with And and Or. Thus, the method name results in a query expression of {"lastname" : lastname}. |
| 2 | The method shows a query for all people with the given firstname once the firstname is emitted by the given Publisher. |
| 3 | Use Pageable to pass offset and sorting parameters to the database. |
| 4 | Find a single entity for the given criteria. It completes with IncorrectResultSizeDataAccessException on non-unique results. |
| 5 | Unless <4>, the first entity is always emitted even if the query yields more result documents. |
For Java configuration, use the @EnableReactiveMongoRepositories annotation. The annotation carries the same attributes as the namespace element. If no base package is configured, the infrastructure scans the package of the annotated configuration class.
| MongoDB uses two different drivers for imperative (synchronous/blocking) and reactive (non-blocking) data access. You must create a connection by using the Reactive Streams driver to provide the required infrastructure for Spring Data’s Reactive MongoDB support. Consequently, you must provide a separate configuration for MongoDB’s Reactive Streams driver. Note that your application operates on two different connections if you use reactive and blocking Spring Data MongoDB templates and repositories. |
The following listing shows how to use Java configuration for a repository:
@Configuration
@EnableReactiveMongoRepositories
class ApplicationConfig extends AbstractReactiveMongoConfiguration {
@Override
protected String getDatabaseName() {
return "e-store";
}
@Override
public MongoClient reactiveMongoClient() {
return MongoClients.create();
}
@Override
protected String getMappingBasePackage() {
return "com.oreilly.springdata.mongodb";
}
}Because our domain repository extends ReactiveSortingRepository, it provides you with CRUD operations as well as methods for sorted access to the entities. Working with the repository instance is a matter of dependency injecting it into a client, as the following example shows:
public class PersonRepositoryTests {
@Autowired ReactivePersonRepository repository;
@Test
public void sortsElementsCorrectly() {
Flux<Person> persons = repository.findAll(Sort.by(new Order(ASC, "lastname")));
}
}
The Page return type (as in Mono<Page>) is not supported by reactive repositories.
|
It is possible to use Pageable in derived finder methods, to pass on sort, limit and offset parameters to the query to reduce load and network traffic.
The returned Flux will only emit data within the declared range.
Pageable page = PageRequest.of(1, 10, Sort.by("lastname"));
Flux<Person> persons = repository.findByFirstnameOrderByLastname("luke", page);15.3. Features
Spring Data’s Reactive MongoDB support comes with a reduced feature set compared to the blocking MongoDB Repositories.
It supports the following features:
Reactive Repositories do not support type-safe query methods that use Querydsl.
|
15.3.1. Geo-spatial Repository Queries
As you saw earlier in “Geo-spatial Repository Queries”, a few keywords trigger geo-spatial operations within a MongoDB query. The Near keyword allows some further modification, as the next few examples show.
The following example shows how to define a near query that finds all persons with a given distance of a given point:
Near queriespublic interface PersonRepository extends ReactiveMongoRepository<Person, String> {
// { 'location' : { '$near' : [point.x, point.y], '$maxDistance' : distance}}
Flux<Person> findByLocationNear(Point location, Distance distance);
}Adding a Distance parameter to the query method allows restricting results to those within the given distance. If the Distance was set up containing a Metric, we transparently use $nearSphere instead of $code, as the following example shows:
Distance with MetricsPoint point = new Point(43.7, 48.8);
Distance distance = new Distance(200, Metrics.KILOMETERS);
… = repository.findByLocationNear(point, distance);
// {'location' : {'$nearSphere' : [43.7, 48.8], '$maxDistance' : 0.03135711885774796}}
Reactive Geo-spatial repository queries support the domain type and GeoResult<T> results within a reactive wrapper type. GeoPage and GeoResults are not supported as they contradict the deferred result approach with pre-calculating the average distance. Howevery, you can still pass in a Pageable argument to page results yourself.
|
Using a Distance with a Metric causes a $nearSphere (instead of a plain $near) clause to be added. Beyond that, the actual distance gets calculated according to the Metrics used.
(Note that Metric does not refer to metric units of measure. It could be miles rather than kilometers. Rather, metric refers to the concept of a system of measurement, regardless of which system you use.)
Using @GeoSpatialIndexed(type = GeoSpatialIndexType.GEO_2DSPHERE) on the target property forces usage of $nearSphere operator.
|
Geo-near Queries
Spring Data MongoDB supports geo-near queries, as the following example shows:
public interface PersonRepository extends ReactiveMongoRepository<Person, String> {
// {'geoNear' : 'location', 'near' : [x, y] }
Flux<GeoResult<Person>> findByLocationNear(Point location);
// No metric: {'geoNear' : 'person', 'near' : [x, y], maxDistance : distance }
// Metric: {'geoNear' : 'person', 'near' : [x, y], 'maxDistance' : distance,
// 'distanceMultiplier' : metric.multiplier, 'spherical' : true }
Flux<GeoResult<Person>> findByLocationNear(Point location, Distance distance);
// Metric: {'geoNear' : 'person', 'near' : [x, y], 'minDistance' : min,
// 'maxDistance' : max, 'distanceMultiplier' : metric.multiplier,
// 'spherical' : true }
Flux<GeoResult<Person>> findByLocationNear(Point location, Distance min, Distance max);
// {'geoNear' : 'location', 'near' : [x, y] }
Flux<GeoResult<Person>> findByLocationNear(Point location);
}16. Auditing
16.1. Basics
Spring Data provides sophisticated support to transparently keep track of who created or changed an entity and when the change happened. To benefit from that functionality, you have to equip your entity classes with auditing metadata that can be defined either using annotations or by implementing an interface.
16.1.1. Annotation-based Auditing Metadata
We provide @CreatedBy and @LastModifiedBy to capture the user who created or modified the entity as well as @CreatedDate and @LastModifiedDate to capture when the change happened.
class Customer {
@CreatedBy
private User user;
@CreatedDate
private DateTime createdDate;
// … further properties omitted
}As you can see, the annotations can be applied selectively, depending on which information you want to capture. The annotations capturing when changes were made can be used on properties of type Joda-Time, DateTime, legacy Java Date and Calendar, JDK8 date and time types, and long or Long.
16.1.2. Interface-based Auditing Metadata
In case you do not want to use annotations to define auditing metadata, you can let your domain class implement the Auditable interface. It exposes setter methods for all of the auditing properties.
There is also a convenience base class, AbstractAuditable, which you can extend to avoid the need to manually implement the interface methods. Doing so increases the coupling of your domain classes to Spring Data, which might be something you want to avoid. Usually, the annotation-based way of defining auditing metadata is preferred as it is less invasive and more flexible.
16.1.3. AuditorAware
In case you use either @CreatedBy or @LastModifiedBy, the auditing infrastructure somehow needs to become aware of the current principal. To do so, we provide an AuditorAware<T> SPI interface that you have to implement to tell the infrastructure who the current user or system interacting with the application is. The generic type T defines what type the properties annotated with @CreatedBy or @LastModifiedBy have to be.
The following example shows an implementation of the interface that uses Spring Security’s Authentication object:
class SpringSecurityAuditorAware implements AuditorAware<User> {
public Optional<User> getCurrentAuditor() {
return Optional.ofNullable(SecurityContextHolder.getContext())
.map(SecurityContext::getAuthentication)
.filter(Authentication::isAuthenticated)
.map(Authentication::getPrincipal)
.map(User.class::cast);
}
}The implementation accesses the Authentication object provided by Spring Security and looks up the custom UserDetails instance that you have created in your UserDetailsService implementation. We assume here that you are exposing the domain user through the UserDetails implementation but that, based on the Authentication found, you could also look it up from anywhere.
16.2. General Auditing Configuration for MongoDB
To activate auditing functionality, add the Spring Data Mongo auditing namespace element to your configuration, as the following example shows:
<mongo:auditing mapping-context-ref="customMappingContext" auditor-aware-ref="yourAuditorAwareImpl"/>Since Spring Data MongoDB 1.4, auditing can be enabled by annotating a configuration class with the @EnableMongoAuditing annotation, as the followign example shows:
@Configuration
@EnableMongoAuditing
class Config {
@Bean
public AuditorAware<AuditableUser> myAuditorProvider() {
return new AuditorAwareImpl();
}
}If you expose a bean of type AuditorAware to the ApplicationContext, the auditing infrastructure picks it up automatically and uses it to determine the current user to be set on domain types. If you have multiple implementations registered in the ApplicationContext, you can select the one to be used by explicitly setting the auditorAwareRef attribute of @EnableMongoAuditing.
17. Mapping
Rich mapping support is provided by the MappingMongoConverter. MappingMongoConverter has a rich metadata model that provides a full feature set to map domain objects to MongoDB documents. The mapping metadata model is populated by using annotations on your domain objects. However, the infrastructure is not limited to using annotations as the only source of metadata information. The MappingMongoConverter also lets you map objects to documents without providing any additional metadata, by following a set of conventions.
This section describes the features of the MappingMongoConverter, including fundamentals, how to use conventions for mapping objects to documents and how to override those conventions with annotation-based mapping metadata.
17.1. Object Mapping Fundamentals
This section covers the fundamentals of Spring Data object mapping, object creation, field and property access, mutability and immutability. Note, that this section only applies to Spring Data modules that do not use the object mapping of the underlying data store (like JPA). Also be sure to consult the store-specific sections for store-specific object mapping, like indexes, customizing column or field names or the like.
Core responsibility of the Spring Data object mapping is to create instances of domain objects and map the store-native data structures onto those. This means we need two fundamental steps:
-
Instance creation by using one of the constructors exposed.
-
Instance population to materialize all exposed properties.
17.1.1. Object creation
Spring Data automatically tries to detect a persistent entity’s constructor to be used to materialize objects of that type. The resolution algorithm works as follows:
-
If there’s a no-argument constructor, it will be used. Other constructors will be ignored.
-
If there’s a single constructor taking arguments, it will be used.
-
If there are multiple constructors taking arguments, the one to be used by Spring Data will have to be annotated with
@PersistenceConstructor.
The value resolution assumes constructor argument names to match the property names of the entity, i.e. the resolution will be performed as if the property was to be populated, including all customizations in mapping (different datastore column or field name etc.).
This also requires either parameter names information available in the class file or an @ConstructorProperties annotation being present on the constructor.
The value resolution can be customized by using Spring Framework’s @Value value annotation using a store-specific SpEL expression.
Please consult the section on store specific mappings for further details.
17.1.2. Property population
Once an instance of the entity has been created, Spring Data populates all remaining persistent properties of that class. Unless already populated by the entity’s constructor (i.e. consumed through its constructor argument list), the identifier property will be populated first to allow the resolution of cyclic object references. After that, all non-transient properties that have not already been populated by the constructor are set on the entity instance. For that we use the following algorithm:
-
If the property is immutable but exposes a wither method (see below), we use the wither to create a new entity instance with the new property value.
-
If property access (i.e. access through getters and setters) is defined, we’re invoking the setter method.
-
By default, we set the field value directly.
Let’s have a look at the following entity:
class Person {
private final @Id Long id; (1)
private final String firstname, lastname; (2)
private final LocalDate birthday;
private final int age; (3)
private String comment; (4)
private @AccessType(Type.PROPERTY) String remarks; (5)
static Person of(String firstname, String lastname, LocalDate birthday) { (6)
return new Person(null, firstname, lastname, birthday,
Period.between(birthday, LocalDate.now()).getYears());
}
Person(Long id, String firstname, String lastname, LocalDate birthday, int age) { (6)
this.id = id;
this.firstname = firstname;
this.lastname = lastname;
this.birthday = birthday;
this.age = age;
}
Person withId(Long id) { (1)
return new Person(id, this.firstname, this.lastname, this.birthday, this.age);
}
void setRemarks(String remarks) { (5)
this.remarks = remarks;
}
}| 1 | The identifier property is final but set to null in the constructor.
The class exposes a withId(…) method that’s used to set the identifier, e.g. when an instance is inserted into the datastore and an identifier has been generated.
The original Person instance stays unchanged as a new one is created.
The same pattern is usually applied for other properties that are store managed but might have to be changed for persistence operations. |
| 2 | The firstname and lastname properties are ordinary immutable properties potentially exposed through getters. |
| 3 | The age property is an immutable but derived one from the birthday property.
With the design shown, the database value will trump the defaulting as Spring Data uses the only declared constructor.
Even if the intent is that the calculation should be preferred, it’s important that this constructor also takes age as parameter (to potentially ignore it) as otherwise the property population step will attempt to set the age field and fail due to it being immutable and no wither being present. |
| 4 | The comment property is mutable is populated by setting its field directly. |
| 5 | The remarks properties are mutable and populated by setting the comment field directly or by invoking the setter method for |
| 6 | The class exposes a factory method and a constructor for object creation.
The core idea here is to use factory methods instead of additional constructors to avoid the need for constructor disambiguation through @PersistenceConstructor.
Instead, defaulting of properties is handled within the factory method. |
17.1.3. General recommendations
-
Try to stick to immutable objects — Immutable objects are straightforward to create as materializing an object is then a matter of calling its constructor only. Also, this avoids your domain objects to be littered with setter methods that allow client code to manipulate the objects state. If you need those, prefer to make them package protected so that they can only be invoked by a limited amount of co-located types. Constructor-only materialization is up to 30% faster than properties population.
-
Provide an all-args constructor — Even if you cannot or don’t want to model your entities as immutable values, there’s still value in providing a constructor that takes all properties of the entity as arguments, including the mutable ones, as this allows the object mapping to skip the property population for optimal performance.
-
Use factory methods instead of overloaded constructors to avoid
@PersistenceConstructor— With an all-argument constructor needed for optimal performance, we usually want to expose more application use case specific constructors that omit things like auto-generated identifiers etc. It’s an established pattern to rather use static factory methods to expose these variants of the all-args constructor. -
Make sure you adhere to the constraints that allow the generated instantiator and property accessor classes to be used —
-
For identifiers to be generated, still use a final field in combination with a wither method —
-
Use Lombok to avoid boilerplate code — As persistence operations usually require a constructor taking all arguments, their declaration becomes a tedious repetition of boilerplate parameter to field assignments that can best be avoided by using Lombok’s
@AllArgsConstructor.
17.1.4. Kotlin support
Spring Data adapts specifics of Kotlin to allow object creation and mutation.
Kotlin object creation
Kotlin classes are supported to be instantiated , all classes are immutable by default and require explicit property declarations to define mutable properties. Consider the following data class Person:
data class Person(val id: String, val name: String)The class above compiles to a typical class with an explicit constructor. We can customize this class by adding another constructor and annotate it with @PersistenceConstructor to indicate a constructor preference:
data class Person(var id: String, val name: String) {
@PersistenceConstructor
constructor(id: String) : this(id, "unknown")
}Kotlin supports parameter optionality by allowing default values to be used if a parameter is not provided.
When Spring Data detects a constructor with parameter defaulting, then it leaves these parameters absent if the data store does not provide a value (or simply returns null) so Kotlin can apply parameter defaulting. Consider the following class that applies parameter defaulting for name
data class Person(var id: String, val name: String = "unknown")Every time the name parameter is either not part of the result or its value is null, then the name defaults to unknown.
Property population of Kotlin data classes
In Kotlin, all classes are immutable by default and require explicit property declarations to define mutable properties. Consider the following data class Person:
data class Person(val id: String, val name: String)This class is effectively immutable. It allows to create new instances as Kotlin generates a copy(…) method that creates new object instances copying all property values from the existing object and applying property values provided as arguments to the method.
17.2. Convention-based Mapping
MappingMongoConverter has a few conventions for mapping objects to documents when no additional mapping metadata is provided. The conventions are:
-
The short Java class name is mapped to the collection name in the following manner. The class
com.bigbank.SavingsAccountmaps to thesavingsAccountcollection name. -
All nested objects are stored as nested objects in the document and not as DBRefs.
-
The converter uses any Spring Converters registered with it to override the default mapping of object properties to document fields and values.
-
The fields of an object are used to convert to and from fields in the document. Public
JavaBeanproperties are not used. -
If you have a single non-zero-argument constructor whose constructor argument names match top-level field names of document, that constructor is used. Otherwise, the zero-argument constructor is used. If there is more than one non-zero-argument constructor, an exception will be thrown.
17.2.1. How the _id field is handled in the mapping layer.
MongoDB requires that you have an _id field for all documents. If you don’t provide one the driver will assign a ObjectId with a generated value. The "_id" field can be of any type the, other than arrays, so long as it is unique. The driver naturally supports all primitive types and Dates. When using the MappingMongoConverter there are certain rules that govern how properties from the Java class is mapped to this _id field.
The following outlines what field will be mapped to the _id document field:
-
A field annotated with
@Id(org.springframework.data.annotation.Id) will be mapped to the_idfield. -
A field without an annotation but named
idwill be mapped to the_idfield. -
The default field name for identifiers is
_idand can be customized via the@Fieldannotation.
| Field definition | Resulting Id-Fieldname in MongoDB |
|---|---|
|
|
|
|
|
|
|
|
|
|
The following outlines what type conversion, if any, will be done on the property mapped to the _id document field.
-
If a field named
idis declared as a String or BigInteger in the Java class it will be converted to and stored as an ObjectId if possible. ObjectId as a field type is also valid. If you specify a value foridin your application, the conversion to an ObjectId is detected to the MongoDBdriver. If the specifiedidvalue cannot be converted to an ObjectId, then the value will be stored as is in the document’s _id field. -
If a field named
idid field is not declared as a String, BigInteger, or ObjectID in the Java class then you should assign it a value in your application so it can be stored 'as-is' in the document’s _id field. -
If no field named
idis present in the Java class then an implicit_idfile will be generated by the driver but not mapped to a property or field of the Java class.
When querying and updating MongoTemplate will use the converter to handle conversions of the Query and Update objects that correspond to the above rules for saving documents so field names and types used in your queries will be able to match what is in your domain classes.
17.3. Data Mapping and Type Conversion
This section explains how types are mapped to and from a MongoDB representation. Spring Data MongoDB supports all types that can be represented as BSON, MongoDB’s internal document format. In addition to these types, Spring Data MongoDB provides a set of built-in converters to map additional types. You can provide your own converters to adjust type conversion. See Overriding Mapping with Explicit Converters for further details.
The following provides samples of each available type conversion:
| Type | Type conversion | Sample |
|---|---|---|
|
native |
|
|
native |
|
|
native |
|
|
native |
|
|
native |
|
|
native |
|
|
native |
|
|
native |
|
|
native |
|
Array, |
native |
|
|
native |
|
|
native |
|
|
native |
|
|
native |
|
|
converter |
|
|
converter |
|
|
converter |
|
|
converter |
|
|
converter |
|
|
converter |
|
|
converter |
|
|
converter |
|
|
converter |
|
|
converter |
|
|
converter |
|
|
converter |
|
|
converter |
|
|
converter |
|
|
converter |
|
|
converter |
|
|
converter |
|
|
converter |
|
|
converter |
|
|
converter |
|
|
converter |
|
|
converter |
|
|
converter |
|
|
converter |
|
17.4. Mapping Configuration
Unless explicitly configured, an instance of MappingMongoConverter is created by default when you create a MongoTemplate. You can create your own instance of the MappingMongoConverter. Doing so lets you dictate where in the classpath your domain classes can be found, so that Spring Data MongoDB can extract metadata and construct indexes. Also, by creating your own instance, you can register Spring converters to map specific classes to and from the database.
You can configure the MappingMongoConverter as well as com.mongodb.MongoClient and MongoTemplate by using either Java-based or XML-based metadata. The following example uses Spring’s Java-based configuration:
@Configuration
public class GeoSpatialAppConfig extends AbstractMongoConfiguration {
@Bean
public MongoClient mongoClient() {
return new MongoClient("localhost");
}
@Override
public String getDatabaseName() {
return "database";
}
@Override
public String getMappingBasePackage() {
return "com.bigbank.domain";
}
// the following are optional
@Bean
@Override
public CustomConversions customConversions() throws Exception {
List<Converter<?, ?>> converterList = new ArrayList<Converter<?, ?>>();
converterList.add(new org.springframework.data.mongodb.test.PersonReadConverter());
converterList.add(new org.springframework.data.mongodb.test.PersonWriteConverter());
return new CustomConversions(converterList);
}
@Bean
public LoggingEventListener<MongoMappingEvent> mappingEventsListener() {
return new LoggingEventListener<MongoMappingEvent>();
}
}AbstractMongoConfiguration requires you to implement methods that define a com.mongodb.MongoClient as well as provide a database name. AbstractMongoConfiguration also has a method named getMappingBasePackage(…) that you can override to tell the converter where to scan for classes annotated with the @Document annotation.
You can add additional converters to the converter by overriding the customConversions method. Also shown in the preceding example is a LoggingEventListener, which logs MongoMappingEvent instances that are posted onto Spring’s ApplicationContextEvent infrastructure.
AbstractMongoConfiguration creates a MongoTemplate instance and registers it with the container under the name mongoTemplate.
|
Spring’s MongoDB namespace lets you enable mapping functionality in XML, as the following example shows:
<?xml version="1.0" encoding="UTF-8"?>
<beans xmlns="http://www.springframework.org/schema/beans"
xmlns:xsi="http://www.w3.org/2001/XMLSchema-instance"
xmlns:context="http://www.springframework.org/schema/context"
xmlns:mongo="http://www.springframework.org/schema/data/mongo"
xsi:schemaLocation="http://www.springframework.org/schema/context https://www.springframework.org/schema/context/spring-context-3.0.xsd
http://www.springframework.org/schema/data/mongo https://www.springframework.org/schema/data/mongo/spring-mongo-1.0.xsd
http://www.springframework.org/schema/beans https://www.springframework.org/schema/beans/spring-beans-3.0.xsd">
<!-- Default bean name is 'mongo' -->
<mongo:mongo-client host="localhost" port="27017"/>
<mongo:db-factory dbname="database" mongo-ref="mongoClient"/>
<!-- by default look for a Mongo object named 'mongo' - default name used for the converter is 'mappingConverter' -->
<mongo:mapping-converter base-package="com.bigbank.domain">
<mongo:custom-converters>
<mongo:converter ref="readConverter"/>
<mongo:converter>
<bean class="org.springframework.data.mongodb.test.PersonWriteConverter"/>
</mongo:converter>
</mongo:custom-converters>
</mongo:mapping-converter>
<bean id="readConverter" class="org.springframework.data.mongodb.test.PersonReadConverter"/>
<!-- set the mapping converter to be used by the MongoTemplate -->
<bean id="mongoTemplate" class="org.springframework.data.mongodb.core.MongoTemplate">
<constructor-arg name="mongoDbFactory" ref="mongoDbFactory"/>
<constructor-arg name="mongoConverter" ref="mappingConverter"/>
</bean>
<bean class="org.springframework.data.mongodb.core.mapping.event.LoggingEventListener"/>
</beans>The base-package property tells it where to scan for classes annotated with the @org.springframework.data.mongodb.core.mapping.Document annotation.
17.5. Metadata-based Mapping
To take full advantage of the object mapping functionality inside the Spring Data MongoDB support, you should annotate your mapped objects with the @Document annotation. Although it is not necessary for the mapping framework to have this annotation (your POJOs are mapped correctly, even without any annotations), it lets the classpath scanner find and pre-process your domain objects to extract the necessary metadata. If you do not use this annotation, your application takes a slight performance hit the first time you store a domain object, because the mapping framework needs to build up its internal metadata model so that it knows about the properties of your domain object and how to persist them. The following example shows a domain object:
package com.mycompany.domain;
@Document
public class Person {
@Id
private ObjectId id;
@Indexed
private Integer ssn;
private String firstName;
@Indexed
private String lastName;
}
The @Id annotation tells the mapper which property you want to use for the MongoDB _id property, and the @Indexed annotation tells the mapping framework to call createIndex(…) on that property of your document, making searches faster.
|
Automatic index creation is only done for types annotated with @Document.
|
17.5.1. Mapping Annotation Overview
The MappingMongoConverter can use metadata to drive the mapping of objects to documents. The following annotations are available:
-
@Id: Applied at the field level to mark the field used for identity purpose. -
@Document: Applied at the class level to indicate this class is a candidate for mapping to the database. You can specify the name of the collection where the data will be stored. -
@DBRef: Applied at the field to indicate it is to be stored using a com.mongodb.DBRef. -
@Indexed: Applied at the field level to describe how to index the field. -
@CompoundIndex: Applied at the type level to declare Compound Indexes -
@GeoSpatialIndexed: Applied at the field level to describe how to geoindex the field. -
@TextIndexed: Applied at the field level to mark the field to be included in the text index. -
@Language: Applied at the field level to set the language override property for text index. -
@Transient: By default, all fields are mapped to the document. This annotation excludes the field where it is applied from being stored in the database. Transient properties cannot be used within a persistence constructor as the converter cannot materialize a value for the constructor argument. -
@PersistenceConstructor: Marks a given constructor - even a package protected one - to use when instantiating the object from the database. Constructor arguments are mapped by name to the key values in the retrieved Document. -
@Value: This annotation is part of the Spring Framework . Within the mapping framework it can be applied to constructor arguments. This lets you use a Spring Expression Language statement to transform a key’s value retrieved in the database before it is used to construct a domain object. In order to reference a property of a given document one has to use expressions like:@Value("#root.myProperty")whererootrefers to the root of the given document. -
@Field: Applied at the field level and described the name of the field as it will be represented in the MongoDB BSON document thus allowing the name to be different than the fieldname of the class. -
@Version: Applied at field level is used for optimistic locking and checked for modification on save operations. The initial value iszero(onefor primitive types) which is bumped automatically on every update.
The mapping metadata infrastructure is defined in a separate spring-data-commons project that is technology agnostic. Specific subclasses are using in the MongoDB support to support annotation based metadata. Other strategies are also possible to put in place if there is demand.
Here is an example of a more complex mapping.
@Document
@CompoundIndexes({
@CompoundIndex(name = "age_idx", def = "{'lastName': 1, 'age': -1}")
})
public class Person<T extends Address> {
@Id
private String id;
@Indexed(unique = true)
private Integer ssn;
@Field("fName")
private String firstName;
@Indexed
private String lastName;
private Integer age;
@Transient
private Integer accountTotal;
@DBRef
private List<Account> accounts;
private T address;
public Person(Integer ssn) {
this.ssn = ssn;
}
@PersistenceConstructor
public Person(Integer ssn, String firstName, String lastName, Integer age, T address) {
this.ssn = ssn;
this.firstName = firstName;
this.lastName = lastName;
this.age = age;
this.address = address;
}
public String getId() {
return id;
}
// no setter for Id. (getter is only exposed for some unit testing)
public Integer getSsn() {
return ssn;
}
// other getters/setters omitted17.5.2. Customized Object Construction
The mapping subsystem allows the customization of the object construction by annotating a constructor with the @PersistenceConstructor annotation. The values to be used for the constructor parameters are resolved in the following way:
-
If a parameter is annotated with the
@Valueannotation, the given expression is evaluated and the result is used as the parameter value. -
If the Java type has a property whose name matches the given field of the input document, then it’s property information is used to select the appropriate constructor parameter to pass the input field value to. This works only if the parameter name information is present in the java
.classfiles which can be achieved by compiling the source with debug information or using the new-parameterscommand-line switch for javac in Java 8. -
Otherwise a
MappingExceptionwill be thrown indicating that the given constructor parameter could not be bound.
class OrderItem {
private @Id String id;
private int quantity;
private double unitPrice;
OrderItem(String id, @Value("#root.qty ?: 0") int quantity, double unitPrice) {
this.id = id;
this.quantity = quantity;
this.unitPrice = unitPrice;
}
// getters/setters ommitted
}
Document input = new Document("id", "4711");
input.put("unitPrice", 2.5);
input.put("qty",5);
OrderItem item = converter.read(OrderItem.class, input);
The SpEL expression in the @Value annotation of the quantity parameter falls back to the value 0 if the given property path cannot be resolved.
|
Additional examples for using the @PersistenceConstructor annotation can be found in the MappingMongoConverterUnitTests test suite.
17.5.3. Compound Indexes
Compound indexes are also supported. They are defined at the class level, rather than on individual properties.
| Compound indexes are very important to improve the performance of queries that involve criteria on multiple fields |
Here’s an example that creates a compound index of lastName in ascending order and age in descending order:
package com.mycompany.domain;
@Document
@CompoundIndexes({
@CompoundIndex(name = "age_idx", def = "{'lastName': 1, 'age': -1}")
})
public class Person {
@Id
private ObjectId id;
private Integer age;
private String firstName;
private String lastName;
}17.5.4. Text Indexes
| The text index feature is disabled by default for mongodb v.2.4. |
Creating a text index allows accumulating several fields into a searchable full-text index. It is only possible to have one text index per collection, so all fields marked with @TextIndexed are combined into this index. Properties can be weighted to influence the document score for ranking results. The default language for the text index is English. To change the default language, set the language attribute to whichever language you want (for example,@Document(language="spanish")). Using a property called language or @Language lets you define a language override on a per document base. The following example shows how to created a text index and set the language to Spanish:
@Document(language = "spanish")
class SomeEntity {
@TextIndexed String foo;
@Language String lang;
Nested nested;
}
class Nested {
@TextIndexed(weight=5) String bar;
String roo;
}17.5.5. Using DBRefs
The mapping framework does not have to store child objects embedded within the document. You can also store them separately and use a DBRef to refer to that document. When the object is loaded from MongoDB, those references are eagerly resolved so that you get back a mapped object that looks the same as if it had been stored embedded within your master document.
The following example uses a DBRef to refer to a specific document that exists independently of the object in which it is referenced (both classes are shown in-line for brevity’s sake):
@Document
public class Account {
@Id
private ObjectId id;
private Float total;
}
@Document
public class Person {
@Id
private ObjectId id;
@Indexed
private Integer ssn;
@DBRef
private List<Account> accounts;
}You need not use @OneToMany or similar mechanisms because the List of objects tells the mapping framework that you want a one-to-many relationship. When the object is stored in MongoDB, there is a list of DBRefs rather than the Account objects themselves.
When it comes to loading collections of DBRefs it is advisable to restrict references held in collection types to a specific MongoDB collection. This allows bulk loading of all references, whereas references pointing to different MongoDB collections need to be resolved one by one.
The mapping framework does not handle cascading saves. If you change an Account object that is referenced by a Person object, you must save the Account object separately. Calling save on the Person object does not automatically save the Account objects in the accounts property.
|
DBRefs can also be resolved lazily. In this case the actual Object or Collection of references is resolved on first access of the property. Use the lazy attribute of @DBRef to specify this.
Required properties that are also defined as lazy loading DBRef and used as constructor arguments are also decorated with the lazy loading proxy making sure to put as little pressure on the database and network as possible.
Lazily loaded DBRefs can be hard to debug. Make sure tooling does not accidentally trigger proxy resolution by eg. calling toString() or some inline debug rendering invoking property getters.
Please consider to enable trace logging for org.springframework.data.mongodb.core.convert.DefaultDbRefResolver to gain insight on DBRef resolution.
|
17.5.6. Mapping Framework Events
Events are fired throughout the lifecycle of the mapping process. This is described in the Lifecycle Events section.
Declaring these beans in your Spring ApplicationContext causes them to be invoked whenever the event is dispatched.
17.5.7. Overriding Mapping with Explicit Converters
When storing and querying your objects, it is convenient to have a MongoConverter instance handle the mapping of all Java types to Document instances. However, sometimes you may want the MongoConverter instances do most of the work but let you selectively handle the conversion for a particular type — perhaps to optimize performance.
To selectively handle the conversion yourself, register one or more one or more org.springframework.core.convert.converter.Converter instances with the MongoConverter.
| Spring 3.0 introduced a core.convert package that provides a general type conversion system. This is described in detail in the Spring reference documentation section entitled “Spring Type Conversion”. |
You can use the customConversions method in AbstractMongoConfiguration to configure converters. The examples at the beginning of this chapter show how to perform the configuration using Java and XML.
The following example of a Spring Converter implementation converts from a Document to a Person POJO:
@ReadingConverter
public class PersonReadConverter implements Converter<Document, Person> {
public Person convert(Document source) {
Person p = new Person((ObjectId) source.get("_id"), (String) source.get("name"));
p.setAge((Integer) source.get("age"));
return p;
}
}The following example converts from a Person to a Document:
@WritingConverter
public class PersonWriteConverter implements Converter<Person, Document> {
public Document convert(Person source) {
Document document = new Document();
document.put("_id", source.getId());
document.put("name", source.getFirstName());
document.put("age", source.getAge());
return document;
}
}18. Cross Store Support
| This feature has been deprecated and will be removed without replacement. |
Sometimes you need to store data in multiple data stores, and these data stores need to be of different types. One might be relational while the other is a document store. For this use case, we created a separate module in the MongoDB support that handles what we call “cross-store support”. The current implementation is based on JPA as the driver for the relational database and we let select fields in the Entities be stored in a Mongo database. In addition to letting you store your data in two stores, we also coordinate persistence operations for the non-transactional MongoDB store with the transaction life-cycle for the relational database.
18.1. Cross Store Configuration
Assuming that you have a working JPA application and would like to add some cross-store persistence for MongoDB, what do you have to add to your configuration?
First, you need to add a dependency on the cross-store module. If you use Maven, you can add the following dependency to your pom:
spring-data-mongodb-cross-store dependency<project xmlns="http://maven.apache.org/POM/4.0.0" xmlns:xsi="http://www.w3.org/2001/XMLSchema-instance"
xsi:schemaLocation="http://maven.apache.org/POM/4.0.0 https://maven.apache.org/xsd/maven-4.0.0.xsd">
<modelVersion>4.0.0</modelVersion>
...
<!-- Spring Data -->
<dependency>
<groupId>org.springframework.data</groupId>
<artifactId>spring-data-mongodb-cross-store</artifactId>
<version>${spring.data.mongo.version}</version>
</dependency>
...
</project>Once you have added the dependency, you need to enable AspectJ for the project. The cross-store support is implemented with AspectJ aspects so, if you enable compile-time AspectJ support, the cross-store features become available to your project. In Maven, you would add an additional plugin to the <build> section of the pom, as follows:
<project xmlns="http://maven.apache.org/POM/4.0.0" xmlns:xsi="http://www.w3.org/2001/XMLSchema-instance"
xsi:schemaLocation="http://maven.apache.org/POM/4.0.0 https://maven.apache.org/xsd/maven-4.0.0.xsd">
<modelVersion>4.0.0</modelVersion>
...
<build>
<plugins>
…
<plugin>
<groupId>org.codehaus.mojo</groupId>
<artifactId>aspectj-maven-plugin</artifactId>
<version>1.0</version>
<dependencies>
<!-- NB: You must use Maven 2.0.9 or above or these are ignored (see MNG-2972) -->
<dependency>
<groupId>org.aspectj</groupId>
<artifactId>aspectjrt</artifactId>
<version>${aspectj.version}</version>
</dependency>
<dependency>
<groupId>org.aspectj</groupId>
<artifactId>aspectjtools</artifactId>
<version>${aspectj.version}</version>
</dependency>
</dependencies>
<executions>
<execution>
<goals>
<goal>compile</goal>
<goal>test-compile</goal>
</goals>
</execution>
</executions>
<configuration>
<outxml>true</outxml>
<aspectLibraries>
<aspectLibrary>
<groupId>org.springframework</groupId>
<artifactId>spring-aspects</artifactId>
</aspectLibrary>
<aspectLibrary>
<groupId>org.springframework.data</groupId>
<artifactId>spring-data-mongodb-cross-store</artifactId>
</aspectLibrary>
</aspectLibraries>
<source>1.6</source>
<target>1.6</target>
</configuration>
</plugin>
...
</plugins>
</build>
...
</project>Finally, you need to configure your project to use MongoDB and also configure which aspects are used. You should add the following XML snippet to your application context:
<?xml version="1.0" encoding="UTF-8"?>
<beans xmlns="http://www.springframework.org/schema/beans"
xmlns:xsi="http://www.w3.org/2001/XMLSchema-instance"
xmlns:jdbc="http://www.springframework.org/schema/jdbc"
xmlns:jpa="http://www.springframework.org/schema/data/jpa"
xmlns:mongo="http://www.springframework.org/schema/data/mongo"
xsi:schemaLocation="http://www.springframework.org/schema/data/mongo
https://www.springframework.org/schema/data/mongo/spring-mongo.xsd
http://www.springframework.org/schema/jdbc
https://www.springframework.org/schema/jdbc/spring-jdbc-3.0.xsd
http://www.springframework.org/schema/beans
https://www.springframework.org/schema/beans/spring-beans-3.0.xsd
http://www.springframework.org/schema/data/jpa
https://www.springframework.org/schema/data/jpa/spring-jpa-1.0.xsd">
...
<!-- Mongo config -->
<mongo:mongo-client host="localhost" port="27017"/>
<bean id="mongoTemplate" class="org.springframework.data.mongodb.core.MongoTemplate">
<constructor-arg name="mongoClient" ref="mongoClient"/>
<constructor-arg name="databaseName" value="test"/>
<constructor-arg name="defaultCollectionName" value="cross-store"/>
</bean>
<bean class="org.springframework.data.mongodb.core.MongoExceptionTranslator"/>
<!-- Mongo cross-store aspect config -->
<bean class="org.springframework.data.persistence.document.mongo.MongoDocumentBacking"
factory-method="aspectOf">
<property name="changeSetPersister" ref="mongoChangeSetPersister"/>
</bean>
<bean id="mongoChangeSetPersister"
class="org.springframework.data.persistence.document.mongo.MongoChangeSetPersister">
<property name="mongoTemplate" ref="mongoTemplate"/>
<property name="entityManagerFactory" ref="entityManagerFactory"/>
</bean>
...
</beans>18.2. Writing the Cross Store Application
We assume that you have a working JPA application, so we cover only the additional steps needed to persist part of your entity in your Mongo database. To do so, you need to identify the field you want to persist. It should be a domain class and follow the general rules for the Mongo mapping support covered in previous chapters. The field you want to persist in MongoDB should be annotated with the @RelatedDocument annotation. That is really all you need to do. The cross-store aspects take care of the rest, including:
-
Marking the field with
@Transientso that it will not be persisted by JPA -
Keeping track of any changes made to the field value and writing them to the database on successful transaction completion
-
Loading the document from MongoDB the first time the value is used in your application.
The following example shows an entity that has a field annotated with @RelatedDocument:
@Entity
public class Customer {
@Id
@GeneratedValue(strategy = GenerationType.IDENTITY)
private Long id;
private String firstName;
private String lastName;
@RelatedDocument
private SurveyInfo surveyInfo;
// getters and setters omitted
}The following example shows a domain class that is to be stored as a Document:
public class SurveyInfo {
private Map<String, String> questionsAndAnswers;
public SurveyInfo() {
this.questionsAndAnswers = new HashMap<String, String>();
}
public SurveyInfo(Map<String, String> questionsAndAnswers) {
this.questionsAndAnswers = questionsAndAnswers;
}
public Map<String, String> getQuestionsAndAnswers() {
return questionsAndAnswers;
}
public void setQuestionsAndAnswers(Map<String, String> questionsAndAnswers) {
this.questionsAndAnswers = questionsAndAnswers;
}
public SurveyInfo addQuestionAndAnswer(String question, String answer) {
this.questionsAndAnswers.put(question, answer);
return this;
}
}In the preceding example, once the SurveyInfo has been set on the Customer object, the MongoTemplate that was configured previously is used to save the SurveyInfo (along with some metadata about the JPA Entity) in a MongoDB collection named after the fully qualified name of the JPA Entity class. The following code shows how to configure a JPA entity for cross-store persistence with MongoDB:
Customer customer = new Customer();
customer.setFirstName("Sven");
customer.setLastName("Olafsen");
SurveyInfo surveyInfo = new SurveyInfo()
.addQuestionAndAnswer("age", "22")
.addQuestionAndAnswer("married", "Yes")
.addQuestionAndAnswer("citizenship", "Norwegian");
customer.setSurveyInfo(surveyInfo);
customerRepository.save(customer);Running the preceding above results in the following JSON document being stored in MongoDB:
{ "_id" : ObjectId( "4d9e8b6e3c55287f87d4b79e" ),
"_entity_id" : 1,
"_entity_class" : "org.springframework.data.mongodb.examples.custsvc.domain.Customer",
"_entity_field_name" : "surveyInfo",
"questionsAndAnswers" : { "married" : "Yes",
"age" : "22",
"citizenship" : "Norwegian" },
"_entity_field_class" : "org.springframework.data.mongodb.examples.custsvc.domain.SurveyInfo" }19. JMX support
The JMX support for MongoDB exposes the results of executing the 'serverStatus' command on the admin database for a single MongoDB server instance. It also exposes an administrative MBean, MongoAdmin, that lets you perform administrative operations, such as dropping or creating a database. The JMX features build upon the JMX feature set available in the Spring Framework. See here for more details.
19.1. MongoDB JMX Configuration
Spring’s Mongo namespace lets you enable JMX functionality, as the following example shows:
<?xml version="1.0" encoding="UTF-8"?>
<beans xmlns="http://www.springframework.org/schema/beans"
xmlns:xsi="http://www.w3.org/2001/XMLSchema-instance"
xmlns:context="http://www.springframework.org/schema/context"
xmlns:mongo="http://www.springframework.org/schema/data/mongo"
xsi:schemaLocation="
http://www.springframework.org/schema/context
https://www.springframework.org/schema/context/spring-context-3.0.xsd
http://www.springframework.org/schema/data/mongo
https://www.springframework.org/schema/data/mongo/spring-mongo-1.0.xsd
http://www.springframework.org/schema/beans https://www.springframework.org/schema/beans/spring-beans-3.0.xsd">
<!-- Default bean name is 'mongo' -->
<mongo:mongo-client host="localhost" port="27017"/>
<!-- by default look for a Mongo object named 'mongo' -->
<mongo:jmx/>
<context:mbean-export/>
<!-- To translate any MongoExceptions thrown in @Repository annotated classes -->
<context:annotation-config/>
<bean id="registry" class="org.springframework.remoting.rmi.RmiRegistryFactoryBean" p:port="1099" />
<!-- Expose JMX over RMI -->
<bean id="serverConnector" class="org.springframework.jmx.support.ConnectorServerFactoryBean"
depends-on="registry"
p:objectName="connector:name=rmi"
p:serviceUrl="service:jmx:rmi://localhost/jndi/rmi://localhost:1099/myconnector" />
</beans>The preceding code exposes several MBeans:
-
AssertMetrics -
BackgroundFlushingMetrics -
BtreeIndexCounters -
ConnectionMetrics -
GlobalLockMetrics -
MemoryMetrics -
OperationCounters -
ServerInfo -
MongoAdmin
The following screenshot from JConsole shows the resulting configuration:
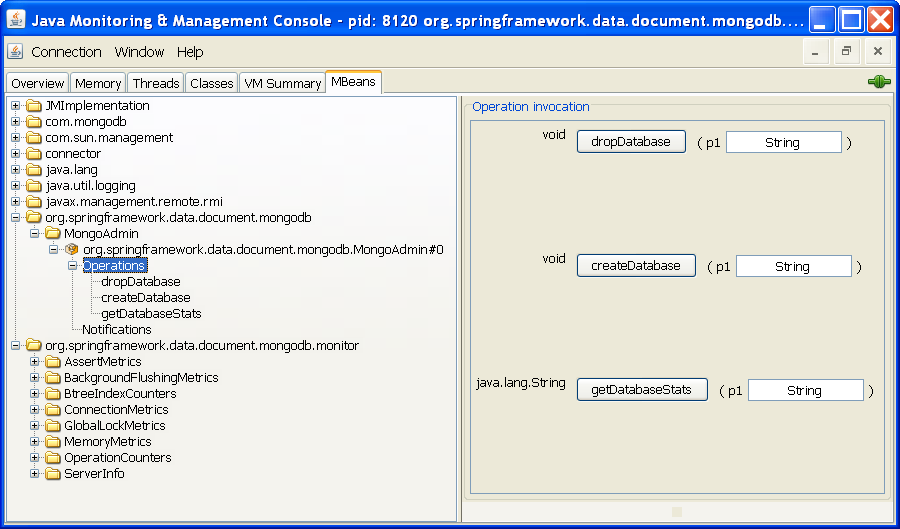
20. MongoDB 3.0 Support
Spring Data MongoDB requires MongoDB Java driver generations 3 when connecting to a MongoDB 2.6/3.0 server running MMap.v1 or a MongoDB server 3.0 using MMap.v1 or the WiredTiger storage engine.
| See the driver- and database-specific documentation for major differences between those engines. |
| Operations that are no longer valid when using a 3.x MongoDB Java driver have been deprecated within Spring Data and will be removed in a subsequent release. |
20.1. Using Spring Data MongoDB with MongoDB 3.0
The rest of this section describes how to use Spring Data MongoDB with MongoDB 3.0.
20.1.1. Configuration Options
Some of the configuration options have been changed or removed for the mongo-java-driver. The following options are ignored when using the generation 3 driver:
-
autoConnectRetry -
maxAutoConnectRetryTime -
slaveOk
Generally, you should use the <mongo:mongo-client … /> and <mongo:client-options … /> elements instead of <mongo:mongo … /> when doing XML based configuration, since those elements provide you with attributes that are only valid for the third generation Java driver. The follwoing example shows how to configure a Mongo client connection:
<?xml version="1.0" encoding="UTF-8"?>
<beans xmlns="http://www.springframework.org/schema/beans"
xmlns:xsi="http://www.w3.org/2001/XMLSchema-instance"
xmlns:mongo="http://www.springframework.org/schema/data/mongo"
xsi:schemaLocation="http://www.springframework.org/schema/data/mongo https://www.springframework.org/schema/data/mongo/spring-mongo.xsd
http://www.springframework.org/schema/beans https://www.springframework.org/schema/beans/spring-beans.xsd">
<mongo:mongo-client host="127.0.0.1" port="27017">
<mongo:client-options write-concern="NORMAL" />
</mongo:mongo-client>
</beans>20.1.2. WriteConcern and WriteConcernChecking
WriteConcern.NONE, which had been used as the default by Spring Data MongoDB, was removed in 3.0. Therefore, in a MongoDB 3 environment, the WriteConcern defaults to WriteConcern.UNACKNOWLEGED. If WriteResultChecking.EXCEPTION is enabled, the WriteConcern is altered to WriteConcern.ACKNOWLEDGED for write operations. Otherwise, errors during execution would not be thrown correctly, since they are not raised by the driver.
20.1.3. Authentication
MongoDB Server generation 3 changed the authentication model when connecting to the DB. Therefore, some of the configuration options available for authentication are no longer valid. You should use the MongoClient-specific options when setting credentials with MongoCredential to provide authentication data, as the following example shows:
@Configuration
public class ApplicationContextEventTestsAppConfig extends AbstractMongoConfiguration {
@Override
public String getDatabaseName() {
return "database";
}
@Override
@Bean
public MongoClient mongoClient() {
return new MongoClient(singletonList(new ServerAddress("127.0.0.1", 27017)),
singletonList(MongoCredential.createCredential("name", "db", "pwd".toCharArray())));
}
}In order to use authentication with XML configuration, you can use the credentials attribute on <mongo-client>, as the following example shows:
<?xml version="1.0" encoding="UTF-8"?>
<beans xmlns="http://www.springframework.org/schema/beans"
xmlns:xsi="http://www.w3.org/2001/XMLSchema-instance"
xmlns:mongo="http://www.springframework.org/schema/data/mongo"
xsi:schemaLocation="http://www.springframework.org/schema/data/mongo https://www.springframework.org/schema/data/mongo/spring-mongo.xsd
http://www.springframework.org/schema/beans https://www.springframework.org/schema/beans/spring-beans.xsd">
<mongo:mongo-client credentials="user:password@database" />
</beans>20.1.4. Server-side Validation
MongoDB supports Schema Validation as of version 3.2 with query operators and as of version 3.6 JSON-schema based validation.
This chapter will point out the specialties for validation in MongoDB and how to apply JSON schema validation.
JSON Schema Validation
MongoDB 3.6 allows validation and querying of documents with JSON schema draft 4 (including core specification and validation specification) with some differences. $jsonSchema can be used in a document validator (when creating a collection), which enforces that inserted or updated documents are valid against the schema. It can also be used to query for documents with the find command or $match aggregation stage.
Spring Data MongoDB supports MongoDB’s specific JSON schema implementation to define and use schemas. See JSON Schema for further details.
Query Expression Validation
In addition to the JSON Schema Validation, MongoDB supports (as of version 3.2) validating documents against a given structure described by a query. The structure can be built from Criteria objects in the same way as they are used for defining queries. The following example shows how to create and use such a validator:
Criteria queryExpression = Criteria.where("lastname").ne(null).type(2)
.and("age").ne(null).type(16).gt(0).lte(150);
Validator validator = Validator.criteria(queryExpression);
template.createCollection(Person.class, CollectionOptions.empty().validator(validator));
The field names used within the query expression are mapped to the domain types property names, taking potential @Field annotations into account.
|
20.1.5. Miscellaneous Details
This section covers briefly lists additional things to keep in mind when using the 3.0 driver:
-
IndexOperations.resetIndexCache()is no longer supported. -
Any
MapReduceOptions.extraOptionis silently ignored. -
WriteResultno longer holds error information but, instead, throws anException. -
MongoOperations.executeInSession(…)no longer callsrequestStartandrequestDone. -
Index name generation has become a driver-internal operation. Spring Data MongoDB still uses the 2.x schema to generate names.
-
Some
Exceptionmessages differ between the generation 2 and 3 servers as well as between the MMap.v1 and WiredTiger storage engines.
Appendix
Appendix A: Namespace reference
The <repositories /> Element
The <repositories /> element triggers the setup of the Spring Data repository infrastructure. The most important attribute is base-package, which defines the package to scan for Spring Data repository interfaces. See “XML configuration”. The following table describes the attributes of the <repositories /> element:
| Name | Description |
|---|---|
|
Defines the package to be scanned for repository interfaces that extend |
|
Defines the postfix to autodetect custom repository implementations. Classes whose names end with the configured postfix are considered as candidates. Defaults to |
|
Determines the strategy to be used to create finder queries. See “Query Lookup Strategies” for details. Defaults to |
|
Defines the location to search for a Properties file containing externally defined queries. |
|
Whether nested repository interface definitions should be considered. Defaults to |
Appendix B: Populators namespace reference
The <populator /> element
The <populator /> element allows to populate the a data store via the Spring Data repository infrastructure.[2]
| Name | Description |
|---|---|
|
Where to find the files to read the objects from the repository shall be populated with. |
Appendix C: Repository query keywords
Supported query keywords
The following table lists the keywords generally supported by the Spring Data repository query derivation mechanism. However, consult the store-specific documentation for the exact list of supported keywords, because some keywords listed here might not be supported in a particular store.
| Logical keyword | Keyword expressions |
|---|---|
|
|
|
|
|
|
|
|
|
|
|
|
|
|
|
|
|
|
|
|
|
|
|
|
|
|
|
|
|
|
|
|
|
|
|
|
|
|
|
|
|
|
|
|
|
|
|
|
|
|
|
|
|
|
|
|
Appendix D: Repository query return types
Supported Query Return Types
The following table lists the return types generally supported by Spring Data repositories. However, consult the store-specific documentation for the exact list of supported return types, because some types listed here might not be supported in a particular store.
Geospatial types (such as GeoResult, GeoResults, and GeoPage) are available only for data stores that support geospatial queries.
|
| Return type | Description |
|---|---|
|
Denotes no return value. |
Primitives |
Java primitives. |
Wrapper types |
Java wrapper types. |
|
A unique entity. Expects the query method to return one result at most. If no result is found, |
|
An |
|
A |
|
A |
|
A Java 8 or Guava |
|
Either a Scala or Javaslang |
|
A Java 8 |
|
A |
|
A Java 8 |
|
A |
|
A sized chunk of data with an indication of whether there is more data available. Requires a |
|
A |
|
A result entry with additional information, such as the distance to a reference location. |
|
A list of |
|
A |
|
A Project Reactor |
|
A Project Reactor |
|
A RxJava |
|
A RxJava |
|
A RxJava |