© 2008-2020 The original authors.
| Copies of this document may be made for your own use and for distribution to others, provided that you do not charge any fee for such copies and further provided that each copy contains this Copyright Notice, whether distributed in print or electronically. |
Preface
1. Your way through this document
If you are already familiar with the core concepts of Spring Data, head straight to Chapter 6. This chapter will walk you through different options of configuring an application to connect to a Neo4j instance and how to model your domain.
In most cases, you will need a domain. Go to Chapter 7 to learn about how to map nodes and relationships to your domain model.
After that, you will need some means to query the domain. Choices are Neo4j repositories, the Neo4j Template or on a lower level, the Neo4j Client. All of them are available in a reactive fashion as well. Apart from the paging mechanism, all the features of standard repositories are available in the reactive variant.
You will find the building blocks in the next chapter.
To learn more about the general concepts of repositories, head over to Chapter 5.
You can of course read on, continuing with the preface, and a gentle getting started guide.
2. NoSQL and Graph databases
A graph database is a storage engine that specializes in storing and retrieving vast networks of information. It efficiently stores data as nodes with relationships to other or even the same nodes, thus allowing high-performance retrieval and querying of those structures. Properties can be added to both nodes and relationships. Nodes can be labelled by zero or more labels, relationships are always directed and named.
Graph databases are well suited for storing most kinds of domain models. In almost all domains, there are certain things connected to other things. In most other modeling approaches, the relationships between things are reduced to a single link without identity and attributes. Graph databases allow to keep the rich relationships that originate from the domain equally well-represented in the database without resorting to also modeling the relationships as "things". There is very little "impedance mismatch" when putting real-life domains into a graph database.
2.1. Introducing Neo4j
Neo4j is an open source NoSQL graph database. It is a fully transactional database (ACID) that stores data structured as graphs consisting of nodes, connected by relationships. Inspired by the structure of the real world, it allows for high query performance on complex data, while remaining intuitive and simple for the developer.
The starting point for learning about Neo4j is neo4j.com. Here is a list of useful resources:
-
The Neo4j documentation introduces Neo4j and contains links to getting started guides, reference documentation and tutorials.
-
The online sandbox provides a convenient way to interact with a Neo4j instance in combination with the online tutorial.
-
Neo4j Java Bolt Driver
2.2. Spring and Spring Data
Spring Data uses Spring Framework’s core functionality, such as the IoC container, type conversion system, expression language, JMX integration, and portable DAO exception hierarchy. While it is not necessary to know all the Spring APIs, understanding the concepts behind them is. At a minimum, the idea behind IoC should be familiar.
The Spring Data Neo4j project applies Spring Data concepts to the development of solutions using the Neo4j graph data store. We provide repositories as a high-level abstraction for storing and querying documents as well as templates and clients for generic domain access or generic query execution. All of them are integrated with Spring’s application transactions.
The core functionality of the Neo4j support can be used directly, through either the Neo4jClient or the Neo4jTemplate or the reactive variants thereof.
All of them provide integration with Spring’s application level transactions.
On a lower level, you can grab the Bolt driver instance, but than you have to manage your own transactions.
To learn more about Spring, you can refer to the comprehensive documentation that explains in detail the Spring Framework. There are a lot of articles, blog entries and books on the matter - take a look at the Spring Framework home page for more information.
2.3. What is Spring Data Neo4j
The current Spring Data Neo4j is the successor to Spring Data Neo4j + Neo4j-OGM. The separate layer of Neo4j-OGM (Neo4j Object Graph Mapper) has been replaced by Spring infrastructure, but the basic concepts of an Object Graph Mapper (OGM) still apply.
An OGM maps nodes and relationships in the graph to objects and references in a domain model. Object instances are mapped to nodes while object references are mapped using relationships, or serialized to properties (e.g. references to a Date). JVM primitives are mapped to node or relationship properties. An OGM abstracts the database and provides a convenient way to persist your domain model in the graph and query it without having to use low level drivers directly. It also provides the flexibility to the developer to supply custom queries where the queries generated by SDN are insufficient.
2.3.1. What’s in the box?
Spring Data Neo4j or in short SDN is a next-generation Spring Data module, created and maintained by Neo4j, Inc. in close collaboration with VMware’s Spring Data Team.
SDN relies completely on the Neo4j Java Driver, without introducing another "driver" or "transport" layer between the mapping framework and the driver. The Neo4j Java Driver - sometimes dubbed Bolt or the Bolt driver - is used as a protocol much like JDBC is with relational databases.
Noteworthy features that differentiate the new SDN from Spring Data Neo4j + OGM are
-
Full support for immutable entities and thus full support for Kotlin’s data classes
-
Full support for the reactive programming model in the Spring Framework itself and Spring Data
-
Brand new Neo4j client and reactive client feature, resurrecting the idea of a template over the plain driver, easing database access
2.3.2. Why should I use SDN in favor of SDN+OGM
SDN has several features not present in SDN+OGM, notably
-
Full support for Springs reactive story, including reactive transaction
-
Full support for Query By Example
-
Full support for fully immutable entities
-
Support for all modifiers and variations of derived finder methods, including spatial queries
2.3.3. How does SDN relate to Neo4j-OGM?
Neo4j-OGM is an Object Graph Mapping library, which is mainly used by previous versions of Spring Data Neo4j as its backend for the heavy lifting of mapping nodes and relationships into domain object. The current SDN does not need and does not support Neo4j-OGM. SDN uses Spring Data’s mapping context exclusively for scanning classes and building the meta model.
While this pins SDN to the Spring ecosystem, it has several advantages, among them the smaller footprint regarding CPU and memory usage and especially, all the features of Spring’s mapping context.
2.3.5. Does SDN support embedded Neo4j?
Embedded Neo4j has multiple facets to it:
Does SDN interact directly with an embedded instance?
No.
An embedded database is usually represented by an instance of org.neo4j.graphdb.GraphDatabaseService and has no Bolt connector out of the box.
SDN can however work very much with Neo4j’s test harness, the test harness is specially meant to be a drop-in replacement for the real database.
Support for both Neo4j 3.5 and 4.0 test harness is implemented via the Spring Boot starter for the driver.
Have a look at the corresponding module org.neo4j.driver:neo4j-java-driver-test-harness-spring-boot-autoconfigure.
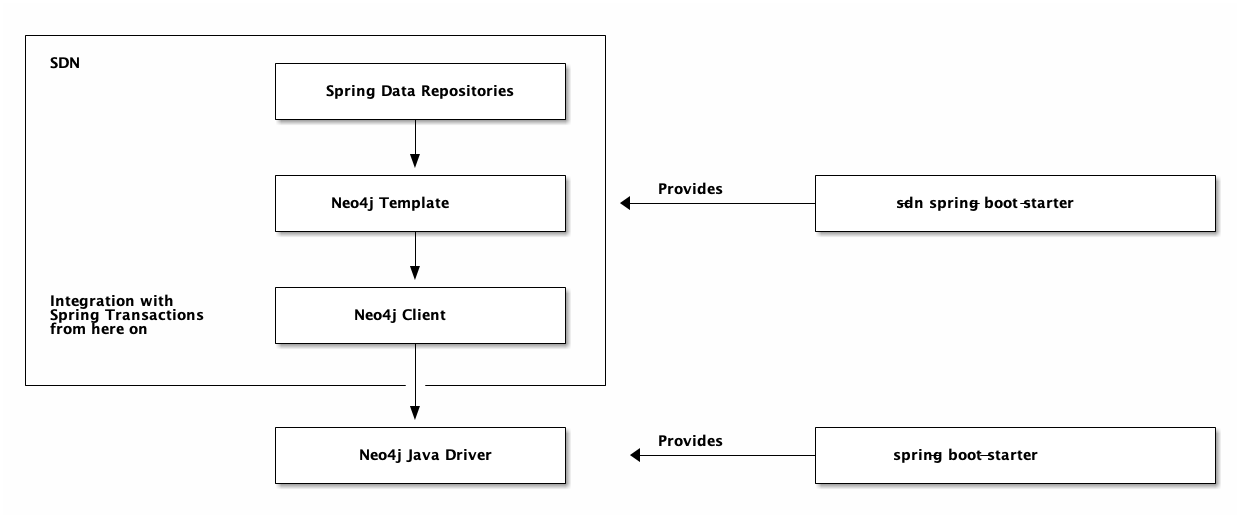
3. Building blocks
3.1. Overview
SDN consists of composable building blocks.
It builds on top of the Neo4j Java Driver.
The instance of the Java driver is provided through Spring Boot’s automatic configuration itself.
All configuration options of the driver are accessible in the namespace spring.neo4j.
The driver bean provides imperative, asynchronous and reactive methods to interact with Neo4j.
You can use all transaction methods the driver provides on that bean such as auto-commit transactions, transaction functions and unmanaged transactions. Be aware that those transactions are not tight to an ongoing Spring transaction.
Integration with Spring Data and Spring’s platform or reactive transaction manager starts at the Neo4j Client.
The client is part of SDN is configured through a separate starter, spring-boot-starter-data-neo4j.
The configuration namespace of that starter is spring.data.neo4j.
The client is mapping agnostic. It doesn’t know about your domain classes and you are responsible for mapping a result to an object suiting your needs.
The next higher level of abstraction is the Neo4j Template. It is aware of your domain and you can use it to query arbitrary domain objects. The template comes in handy in scenarios with a large number of domain classes or custom queries for which you don’t want to create an additional repository abstraction each.
The highest level of abstraction is a Spring Data repository.
All abstractions of SDN come in both imperative and reactive fashions. It is not recommend to mix both programming styles in the same application. The reactive infrastructure requires a Neo4j 4.0+ database.
3.2. On the package level
| Package | Description |
|---|---|
|
This package contains configuration related support classes that can be used for application specific, annotated configuration classes. The abstract base classes are helpful if you don’t rely on Spring Boot’s autoconfiguration. The package provides some additional annotations that enable auditing. |
|
This package contains the core infrastructure for creating a imperative or reactive client that can execute queries.
Packages marked as |
|
Provides a set of simples types that SDN supports. The |
|
This package provides a couple of support classes that might be helpful in your domain, for example a predicate indicating that some transaction may be retried and additional converters and id generators. |
|
Contains the core infrastructure for translating unmanaged Neo4j transaction into Spring managed transactions. Exposes
both the imperative and reactive |
|
This package provides the Neo4j imperative and reactive repository API. |
|
Configuration infrastructure for Neo4j specific repositories, especially dedicated annotations to enable imperative and reactive Spring Data Neo4j repositories. |
|
This package provides a couple of public support classes for building custom imperative and reactive Spring Data Neo4j repository base classes. The support classes are the same classes used by SDN itself. |
4. Dependencies
Due to the different inception dates of individual Spring Data modules, most of them carry different major and minor version numbers. The easiest way to find compatible ones is to rely on the Spring Data Release Train BOM that we ship with the compatible versions defined. In a Maven project, you would declare this dependency in the <dependencyManagement /> section of your POM as follows:
<dependencyManagement>
  <dependencies>
    <dependency>
      <groupId>org.springframework.data</groupId>
      <artifactId>spring-data-bom</artifactId>
      <version>2020.0.7</version>
      <scope>import</scope>
      <type>pom</type>
    </dependency>
  </dependencies>
</dependencyManagement>
The current release train version is 2020.0.7. The train version uses calver with the pattern YYYY.MINOR.MICRO.
The version name follows ${calver} for GA releases and service releases and the following pattern for all other versions: ${calver}-${modifier}, where modifier can be one of the following:
-
SNAPSHOT: Current snapshots -
M1,M2, and so on: Milestones -
RC1,RC2, and so on: Release candidates
You can find a working example of using the BOMs in our Spring Data examples repository. With that in place, you can declare the Spring Data modules you would like to use without a version in the <dependencies /> block, as follows:
<dependencies>
  <dependency>
    <groupId>org.springframework.data</groupId>
    <artifactId>spring-data-jpa</artifactId>
  </dependency>
<dependencies>
4.1. Dependency Management with Spring Boot
Spring Boot selects a recent version of Spring Data modules for you. If you still want to upgrade to a newer version, set
the spring-data-releasetrain.version property to the train version and iteration you would like to use.
5. Working with Spring Data Repositories
The goal of the Spring Data repository abstraction is to significantly reduce the amount of boilerplate code required to implement data access layers for various persistence stores.
|
Spring Data repository documentation and your module This chapter explains the core concepts and interfaces of Spring Data repositories. The information in this chapter is pulled from the Spring Data Commons module. It uses the configuration and code samples for the Java Persistence API (JPA) module. You should adapt the XML namespace declaration and the types to be extended to the equivalents of the particular module that you use. “[repositories.namespace-reference]” covers XML configuration, which is supported across all Spring Data modules that support the repository API. “Appendix A” covers the query method keywords supported by the repository abstraction in general. For detailed information on the specific features of your module, see the chapter on that module of this document. |
5.1. Core concepts
The central interface in the Spring Data repository abstraction is Repository.
It takes the domain class to manage as well as the ID type of the domain class as type arguments.
This interface acts primarily as a marker interface to capture the types to work with and to help you to discover interfaces that extend this one.
The CrudRepository interface provides sophisticated CRUD functionality for the entity class that is being managed.
CrudRepository Interfacepublic interface CrudRepository<T, ID> extends Repository<T, ID> {
<S extends T> S save(S entity); (1)
Optional<T> findById(ID primaryKey); (2)
Iterable<T> findAll(); (3)
long count(); (4)
void delete(T entity); (5)
boolean existsById(ID primaryKey); (6)
// … more functionality omitted.
}| 1 | Saves the given entity. |
| 2 | Returns the entity identified by the given ID. |
| 3 | Returns all entities. |
| 4 | Returns the number of entities. |
| 5 | Deletes the given entity. |
| 6 | Indicates whether an entity with the given ID exists. |
We also provide persistence technology-specific abstractions, such as JpaRepository or MongoRepository.
Those interfaces extend CrudRepository and expose the capabilities of the underlying persistence technology in addition to the rather generic persistence technology-agnostic interfaces such as CrudRepository.
|
On top of the CrudRepository, there is a PagingAndSortingRepository abstraction that adds additional methods to ease paginated access to entities:
PagingAndSortingRepository interfacepublic interface PagingAndSortingRepository<T, ID> extends CrudRepository<T, ID> {
Iterable<T> findAll(Sort sort);
Page<T> findAll(Pageable pageable);
}To access the second page of User by a page size of 20, you could do something like the following:
PagingAndSortingRepository<User, Long> repository = // … get access to a bean
Page<User> users = repository.findAll(PageRequest.of(1, 20));
In addition to query methods, query derivation for both count and delete queries is available. The following list shows the interface definition for a derived count query:
interface UserRepository extends CrudRepository<User, Long> {

  long countByLastname(String lastname);
}
The following listing shows the interface definition for a derived delete query:
interface UserRepository extends CrudRepository<User, Long> {

  long deleteByLastname(String lastname);

  List<User> removeByLastname(String lastname);
}
5.2. Query Methods
Standard CRUD functionality repositories usually have queries on the underlying datastore. With Spring Data, declaring those queries becomes a four-step process:
-
Declare an interface extending Repository or one of its subinterfaces and type it to the domain class and ID type that it should handle, as shown in the following example:
interface PersonRepository extends Repository<Person, Long> { … } -
Declare query methods on the interface.
interface PersonRepository extends Repository<Person, Long> { List<Person> findByLastname(String lastname); } -
Set up Spring to create proxy instances for those interfaces, either with JavaConfig or with XML configuration.
-
To use Java configuration, create a class similar to the following:
import org.springframework.data.jpa.repository.config.EnableJpaRepositories; @EnableJpaRepositories class Config { … } -
To use XML configuration, define a bean similar to the following:
<?xml version="1.0" encoding="UTF-8"?>
<beans xmlns="http://www.springframework.org/schema/beans"
   xmlns:xsi="http://www.w3.org/2001/XMLSchema-instance"
   xmlns:jpa="http://www.springframework.org/schema/data/jpa"
   xsi:schemaLocation="http://www.springframework.org/schema/beans
     https://www.springframework.org/schema/beans/spring-beans.xsd
     http://www.springframework.org/schema/data/jpa
     https://www.springframework.org/schema/data/jpa/spring-jpa.xsd">

   <jpa:repositories base-package="com.acme.repositories"/>

</beans>
The JPA namespace is used in this example. If you use the repository abstraction for any other store, you need to change this to the appropriate namespace declaration of your store module. In other words, you should exchange
jpain favor of, for example,mongodb.Also, note that the JavaConfig variant does not configure a package explicitly, because the package of the annotated class is used by default. To customize the package to scan, use one of the
basePackage…attributes of the data-store-specific repository’s@Enable${store}Repositories-annotation.
-
-
Inject the repository instance and use it, as shown in the following example:
class SomeClient {

  private final PersonRepository repository;

  SomeClient(PersonRepository repository) {
    this.repository = repository;
  }

  void doSomething() {
    List<Person> persons = repository.findByLastname("Matthews");
  }
}
The sections that follow explain each step in detail:
5.3. Defining Repository Interfaces
To define a repository interface, you first need to define a domain class-specific repository interface.
The interface must extend Repository and be typed to the domain class and an ID type.
If you want to expose CRUD methods for that domain type, extend CrudRepository instead of Repository.
5.3.1. Fine-tuning Repository Definition
Typically, your repository interface extends Repository, CrudRepository, or PagingAndSortingRepository.
Alternatively, if you do not want to extend Spring Data interfaces, you can also annotate your repository interface with @RepositoryDefinition.
Extending CrudRepository exposes a complete set of methods to manipulate your entities.
If you prefer to be selective about the methods being exposed, copy the methods you want to expose from CrudRepository into your domain repository.
| Doing so lets you define your own abstractions on top of the provided Spring Data Repositories functionality. |
The following example shows how to selectively expose CRUD methods (findById and save, in this case):
@NoRepositoryBean
interface MyBaseRepository<T, ID> extends Repository<T, ID> {

  Optional<T> findById(ID id);

  <S extends T> S save(S entity);
}

interface UserRepository extends MyBaseRepository<User, Long> {
  User findByEmailAddress(EmailAddress emailAddress);
}
In the prior example, you defined a common base interface for all your domain repositories and exposed findById(…) as well as save(…).These methods are routed into the base repository implementation of the store of your choice provided by Spring Data (for example, if you use JPA, the implementation is SimpleJpaRepository), because they match the method signatures in CrudRepository.
So the UserRepository can now save users, find individual users by ID, and trigger a query to find Users by email address.
The intermediate repository interface is annotated with @NoRepositoryBean.
Make sure you add that annotation to all repository interfaces for which Spring Data should not create instances at runtime.
|
5.3.2. Using Repositories with Multiple Spring Data Modules
Using a unique Spring Data module in your application makes things simple, because all repository interfaces in the defined scope are bound to the Spring Data module. Sometimes, applications require using more than one Spring Data module. In such cases, a repository definition must distinguish between persistence technologies. When it detects multiple repository factories on the class path, Spring Data enters strict repository configuration mode. Strict configuration uses details on the repository or the domain class to decide about Spring Data module binding for a repository definition:
-
If the repository definition extends the module-specific repository, it is a valid candidate for the particular Spring Data module.
-
If the domain class is annotated with the module-specific type annotation, it is a valid candidate for the particular Spring Data module. Spring Data modules accept either third-party annotations (such as JPA’s
@Entity) or provide their own annotations (such as@Documentfor Spring Data MongoDB and Spring Data Elasticsearch).
The following example shows a repository that uses module-specific interfaces (JPA in this case):
interface MyRepository extends JpaRepository<User, Long> { }

@NoRepositoryBean
interface MyBaseRepository<T, ID> extends JpaRepository<T, ID> { … }

interface UserRepository extends MyBaseRepository<User, Long> { … }
MyRepository and UserRepository extend JpaRepository in their type hierarchy.
They are valid candidates for the Spring Data JPA module.
The following example shows a repository that uses generic interfaces:
interface AmbiguousRepository extends Repository<User, Long> { … }

@NoRepositoryBean
interface MyBaseRepository<T, ID> extends CrudRepository<T, ID> { … }

interface AmbiguousUserRepository extends MyBaseRepository<User, Long> { … }
AmbiguousRepository and AmbiguousUserRepository extend only Repository and CrudRepository in their type hierarchy.
While this is fine when using a unique Spring Data module, multiple modules cannot distinguish to which particular Spring Data these repositories should be bound.
The following example shows a repository that uses domain classes with annotations:
interface PersonRepository extends Repository<Person, Long> { … }

@Entity
class Person { … }

interface UserRepository extends Repository<User, Long> { … }

@Document
class User { … }
PersonRepository references Person, which is annotated with the JPA @Entity annotation, so this repository clearly belongs to Spring Data JPA. UserRepository references User, which is annotated with Spring Data MongoDB’s @Document annotation.
The following bad example shows a repository that uses domain classes with mixed annotations:
interface JpaPersonRepository extends Repository<Person, Long> { … }

interface MongoDBPersonRepository extends Repository<Person, Long> { … }

@Entity
@Document
class Person { … }
This example shows a domain class using both JPA and Spring Data MongoDB annotations.
It defines two repositories, JpaPersonRepository and MongoDBPersonRepository.
One is intended for JPA and the other for MongoDB usage.
Spring Data is no longer able to tell the repositories apart, which leads to undefined behavior.
Repository type details and distinguishing domain class annotations are used for strict repository configuration to identify repository candidates for a particular Spring Data module. Using multiple persistence technology-specific annotations on the same domain type is possible and enables reuse of domain types across multiple persistence technologies. However, Spring Data can then no longer determine a unique module with which to bind the repository.
The last way to distinguish repositories is by scoping repository base packages. Base packages define the starting points for scanning for repository interface definitions, which implies having repository definitions located in the appropriate packages. By default, annotation-driven configuration uses the package of the configuration class. The base package in XML-based configuration is mandatory.
The following example shows annotation-driven configuration of base packages:
@EnableJpaRepositories(basePackages = "com.acme.repositories.jpa")
@EnableMongoRepositories(basePackages = "com.acme.repositories.mongo")
class Configuration { … }
5.4. Defining Query Methods
The repository proxy has two ways to derive a store-specific query from the method name:
-
By deriving the query from the method name directly.
-
By using a manually defined query.
Available options depend on the actual store. However, there must be a strategy that decides what actual query is created. The next section describes the available options.
5.4.1. Query Lookup Strategies
The following strategies are available for the repository infrastructure to resolve the query.
With XML configuration, you can configure the strategy at the namespace through the query-lookup-strategy attribute.
For Java configuration, you can use the queryLookupStrategy attribute of the Enable${store}Repositories annotation.
Some strategies may not be supported for particular datastores.
-
CREATEattempts to construct a store-specific query from the query method name. The general approach is to remove a given set of well known prefixes from the method name and parse the rest of the method. You can read more about query construction in “Section 5.4.2”. -
USE_DECLARED_QUERYtries to find a declared query and throws an exception if it cannot find one. The query can be defined by an annotation somewhere or declared by other means. See the documentation of the specific store to find available options for that store. If the repository infrastructure does not find a declared query for the method at bootstrap time, it fails. -
CREATE_IF_NOT_FOUND(the default) combinesCREATEandUSE_DECLARED_QUERY. It looks up a declared query first, and, if no declared query is found, it creates a custom method name-based query. This is the default lookup strategy and, thus, is used if you do not configure anything explicitly. It allows quick query definition by method names but also custom-tuning of these queries by introducing declared queries as needed.
5.4.2. Query Creation
The query builder mechanism built into the Spring Data repository infrastructure is useful for building constraining queries over entities of the repository.
The following example shows how to create a number of queries:
interface PersonRepository extends Repository<Person, Long> {

  List<Person> findByEmailAddressAndLastname(EmailAddress emailAddress, String lastname);

  // Enables the distinct flag for the query
  List<Person> findDistinctPeopleByLastnameOrFirstname(String lastname, String firstname);
  List<Person> findPeopleDistinctByLastnameOrFirstname(String lastname, String firstname);

  // Enabling ignoring case for an individual property
  List<Person> findByLastnameIgnoreCase(String lastname);
  // Enabling ignoring case for all suitable properties
  List<Person> findByLastnameAndFirstnameAllIgnoreCase(String lastname, String firstname);

  // Enabling static ORDER BY for a query
  List<Person> findByLastnameOrderByFirstnameAsc(String lastname);
  List<Person> findByLastnameOrderByFirstnameDesc(String lastname);
}
Parsing query method names is divided into subject and predicate.
The first part (find…By, exists…By) defines the subject of the query, the second part forms the predicate.
The introducing clause (subject) can contain further expressions.
Any text between find (or other introducing keywords) and By is considered to be descriptive unless using one of the result-limiting keywords such as a Distinct to set a distinct flag on the query to be created or Top/First to limit query results.
The appendix contains the full list of query method subject keywords and query method predicate keywords including sorting and letter-casing modifiers.
However, the first By acts as a delimiter to indicate the start of the actual criteria predicate.
At a very basic level, you can define conditions on entity properties and concatenate them with And and Or.
The actual result of parsing the method depends on the persistence store for which you create the query. However, there are some general things to notice:
-
The expressions are usually property traversals combined with operators that can be concatenated. You can combine property expressions with
ANDandOR. You also get support for operators such asBetween,LessThan,GreaterThan, andLikefor the property expressions. The supported operators can vary by datastore, so consult the appropriate part of your reference documentation. -
The method parser supports setting an
IgnoreCaseflag for individual properties (for example,findByLastnameIgnoreCase(…)) or for all properties of a type that supports ignoring case (usuallyStringinstances — for example,findByLastnameAndFirstnameAllIgnoreCase(…)). Whether ignoring cases is supported may vary by store, so consult the relevant sections in the reference documentation for the store-specific query method. -
You can apply static ordering by appending an
OrderByclause to the query method that references a property and by providing a sorting direction (AscorDesc). To create a query method that supports dynamic sorting, see “Section 5.4.4”.
5.4.3. Property Expressions
Property expressions can refer only to a direct property of the managed entity, as shown in the preceding example. At query creation time, you already make sure that the parsed property is a property of the managed domain class. However, you can also define constraints by traversing nested properties. Consider the following method signature:
List<Person> findByAddressZipCode(ZipCode zipCode);Assume a Person has an Address with a ZipCode.
In that case, the method creates the x.address.zipCode property traversal.
The resolution algorithm starts by interpreting the entire part (AddressZipCode) as the property and checks the domain class for a property with that name (uncapitalized).
If the algorithm succeeds, it uses that property.
If not, the algorithm splits up the source at the camel-case parts from the right side into a head and a tail and tries to find the corresponding property — in our example, AddressZip and Code.
If the algorithm finds a property with that head, it takes the tail and continues building the tree down from there, splitting the tail up in the way just described.
If the first split does not match, the algorithm moves the split point to the left (Address, ZipCode) and continues.
Although this should work for most cases, it is possible for the algorithm to select the wrong property.
Suppose the Person class has an addressZip property as well.
The algorithm would match in the first split round already, choose the wrong property, and fail (as the type of addressZip probably has no code property).
To resolve this ambiguity you can use _ inside your method name to manually define traversal points.
So our method name would be as follows:
List<Person> findByAddress_ZipCode(ZipCode zipCode);Because we treat the underscore character as a reserved character, we strongly advise following standard Java naming conventions (that is, not using underscores in property names but using camel case instead).
5.4.4. Special parameter handling
To handle parameters in your query, define method parameters as already seen in the preceding examples.
Besides that, the infrastructure recognizes certain specific types like Pageable and Sort, to apply pagination and sorting to your queries dynamically.
The following example demonstrates these features:
Pageable, Slice, and Sort in query methodsPage<User> findByLastname(String lastname, Pageable pageable);
Slice<User> findByLastname(String lastname, Pageable pageable);
List<User> findByLastname(String lastname, Sort sort);
List<User> findByLastname(String lastname, Pageable pageable);
APIs taking Sort and Pageable expect non-null values to be handed into methods.
If you do not want to apply any sorting or pagination, use Sort.unsorted() and Pageable.unpaged().
|
The first method lets you pass an org.springframework.data.domain.Pageable instance to the query method to dynamically add paging to your statically defined query.
A Page knows about the total number of elements and pages available.
It does so by the infrastructure triggering a count query to calculate the overall number.
As this might be expensive (depending on the store used), you can instead return a Slice.
A Slice knows only about whether a next Slice is available, which might be sufficient when walking through a larger result set.
Sorting options are handled through the Pageable instance, too.
If you need only sorting, add an org.springframework.data.domain.Sort parameter to your method.
As you can see, returning a List is also possible.
In this case, the additional metadata required to build the actual Page instance is not created (which, in turn, means that the additional count query that would have been necessary is not issued).
Rather, it restricts the query to look up only the given range of entities.
| To find out how many pages you get for an entire query, you have to trigger an additional count query. By default, this query is derived from the query you actually trigger. |
Paging and Sorting
You can define simple sorting expressions by using property names. You can concatenate expressions to collect multiple criteria into one expression.
Sort sort = Sort.by("firstname").ascending()
  .and(Sort.by("lastname").descending());
For a more type-safe way to define sort expressions, start with the type for which to define the sort expression and use method references to define the properties on which to sort.
TypedSort<Person> person = Sort.sort(Person.class);

Sort sort = person.by(Person::getFirstname).ascending()
  .and(person.by(Person::getLastname).descending());
TypedSort.by(…) makes use of runtime proxies by (typically) using CGlib, which may interfere with native image compilation when using tools such as Graal VM Native.
|
If your store implementation supports Querydsl, you can also use the generated metamodel types to define sort expressions:
QSort sort = QSort.by(QPerson.firstname.asc())
  .and(QSort.by(QPerson.lastname.desc()));
5.4.5. Limiting Query Results
You can limit the results of query methods by using the first or top keywords, which you can use interchangeably.
You can append an optional numeric value to top or first to specify the maximum result size to be returned.
If the number is left out, a result size of 1 is assumed.
The following example shows how to limit the query size:
Top and FirstUser findFirstByOrderByLastnameAsc();
User findTopByOrderByAgeDesc();
Page<User> queryFirst10ByLastname(String lastname, Pageable pageable);
Slice<User> findTop3ByLastname(String lastname, Pageable pageable);
List<User> findFirst10ByLastname(String lastname, Sort sort);
List<User> findTop10ByLastname(String lastname, Pageable pageable);The limiting expressions also support the Distinct keyword for datastores that support distinct queries.
Also, for the queries that limit the result set to one instance, wrapping the result into with the Optional keyword is supported.
If pagination or slicing is applied to a limiting query pagination (and the calculation of the number of available pages), it is applied within the limited result.
Limiting the results in combination with dynamic sorting by using a Sort parameter lets you express query methods for the 'K' smallest as well as for the 'K' biggest elements.
|
5.4.6. Repository Methods Returning Collections or Iterables
Query methods that return multiple results can use standard Java Iterable, List, and Set.
Beyond that, we support returning Spring Data’s Streamable, a custom extension of Iterable, as well as collection types provided by Vavr.
Refer to the appendix explaining all possible query method return types.
Using Streamable as Query Method Return Type
You can use Streamable as alternative to Iterable or any collection type.
It provides convenience methods to access a non-parallel Stream (missing from Iterable) and the ability to directly ….filter(…) and ….map(…) over the elements and concatenate the Streamable to others:
interface PersonRepository extends Repository<Person, Long> {
  Streamable<Person> findByFirstnameContaining(String firstname);
  Streamable<Person> findByLastnameContaining(String lastname);
}

Streamable<Person> result = repository.findByFirstnameContaining("av")
  .and(repository.findByLastnameContaining("ea"));
Returning Custom Streamable Wrapper Types
Providing dedicated wrapper types for collections is a commonly used pattern to provide an API for a query result that returns multiple elements. Usually, these types are used by invoking a repository method returning a collection-like type and creating an instance of the wrapper type manually. You can avoid that additional step as Spring Data lets you use these wrapper types as query method return types if they meet the following criteria:
-
The type implements
Streamable. -
The type exposes either a constructor or a static factory method named
of(…)orvalueOf(…)that takesStreamableas an argument.
The following listing shows an example:
class Product {                                         (1)
  MonetaryAmount getPrice() { … }
}

@RequiredArgConstructor(staticName = "of")
class Products implements Streamable<Product> {         (2)

  private Streamable<Product> streamable;

  public MonetaryAmount getTotal() {                    (3)
    return streamable.stream()
      .map(Priced::getPrice)
      .reduce(Money.of(0), MonetaryAmount::add);
  }


  @Override
  public Iterator<Product> iterator() {                 (4)
    return streamable.iterator();
  }
}

interface ProductRepository implements Repository<Product, Long> {
  Products findAllByDescriptionContaining(String text); (5)
}| 1 | A Product entity that exposes API to access the product’s price. |
| 2 | A wrapper type for a Streamable<Product> that can be constructed by using Products.of(…) (factory method created with the Lombok annotation).
A standard constructor taking the Streamable<Product> will do as well. |
| 3 | The wrapper type exposes an additional API, calculating new values on the Streamable<Product>. |
| 4 | Implement the Streamable interface and delegate to the actual result. |
| 5 | That wrapper type Products can be used directly as a query method return type.
You do not need to return Streamable<Product> and manually wrap it after the query in the repository client. |
Support for Vavr Collections
Vavr is a library that embraces functional programming concepts in Java. It ships with a custom set of collection types that you can use as query method return types, as the following table shows:
| Vavr collection type | Used Vavr implementation type | Valid Java source types |
|---|---|---|
|
|
|
|
|
|
|
|
|
You can use the types in the first column (or subtypes thereof) as query method return types and get the types in the second column used as implementation type, depending on the Java type of the actual query result (third column).
Alternatively, you can declare Traversable (the Vavr Iterable equivalent), and we then derive the implementation class from the actual return value.
That is, a java.util.List is turned into a Vavr List or Seq, a java.util.Set becomes a Vavr LinkedHashSet Set, and so on.
5.4.7. Null Handling of Repository Methods
As of Spring Data 2.0, repository CRUD methods that return an individual aggregate instance use Java 8’s Optional to indicate the potential absence of a value.
Besides that, Spring Data supports returning the following wrapper types on query methods:
-
com.google.common.base.Optional -
scala.Option -
io.vavr.control.Option
Alternatively, query methods can choose not to use a wrapper type at all.
The absence of a query result is then indicated by returning null.
Repository methods returning collections, collection alternatives, wrappers, and streams are guaranteed never to return null but rather the corresponding empty representation.
See “Appendix B” for details.
Nullability Annotations
You can express nullability constraints for repository methods by using Spring Framework’s nullability annotations.
They provide a tooling-friendly approach and opt-in null checks during runtime, as follows:
-
@NonNullApi: Used on the package level to declare that the default behavior for parameters and return values is, respectively, neither to accept nor to producenullvalues. -
@NonNull: Used on a parameter or return value that must not benull(not needed on a parameter and return value where@NonNullApiapplies). -
@Nullable: Used on a parameter or return value that can benull.
Spring annotations are meta-annotated with JSR 305 annotations (a dormant but widely used JSR).
JSR 305 meta-annotations let tooling vendors (such as IDEA, Eclipse, and Kotlin) provide null-safety support in a generic way, without having to hard-code support for Spring annotations.
To enable runtime checking of nullability constraints for query methods, you need to activate non-nullability on the package level by using Spring’s @NonNullApi in package-info.java, as shown in the following example:
package-info.java@org.springframework.lang.NonNullApi
package com.acme;Once non-null defaulting is in place, repository query method invocations get validated at runtime for nullability constraints.
If a query result violates the defined constraint, an exception is thrown.
This happens when the method would return null but is declared as non-nullable (the default with the annotation defined on the package in which the repository resides).
If you want to opt-in to nullable results again, selectively use @Nullable on individual methods.
Using the result wrapper types mentioned at the start of this section continues to work as expected: an empty result is translated into the value that represents absence.
The following example shows a number of the techniques just described:
package com.acme;                                                       (1)

import org.springframework.lang.Nullable;

interface UserRepository extends Repository<User, Long> {

  User getByEmailAddress(EmailAddress emailAddress);                    (2)

  @Nullable
  User findByEmailAddress(@Nullable EmailAddress emailAdress);          (3)

  Optional<User> findOptionalByEmailAddress(EmailAddress emailAddress); (4)
}| 1 | The repository resides in a package (or sub-package) for which we have defined non-null behavior. |
| 2 | Throws an EmptyResultDataAccessException when the query does not produce a result.
Throws an IllegalArgumentException when the emailAddress handed to the method is null. |
| 3 | Returns null when the query does not produce a result.
Also accepts null as the value for emailAddress. |
| 4 | Returns Optional.empty() when the query does not produce a result.
Throws an IllegalArgumentException when the emailAddress handed to the method is null. |
Nullability in Kotlin-based Repositories
Kotlin has the definition of nullability constraints baked into the language.
Kotlin code compiles to bytecode, which does not express nullability constraints through method signatures but rather through compiled-in metadata.
Make sure to include the kotlin-reflect JAR in your project to enable introspection of Kotlin’s nullability constraints.
Spring Data repositories use the language mechanism to define those constraints to apply the same runtime checks, as follows:
interface UserRepository : Repository<User, String> {

  fun findByUsername(username: String): User     (1)

  fun findByFirstname(firstname: String?): User? (2)
}| 1 | The method defines both the parameter and the result as non-nullable (the Kotlin default).
The Kotlin compiler rejects method invocations that pass null to the method.
If the query yields an empty result, an EmptyResultDataAccessException is thrown. |
| 2 | This method accepts null for the firstname parameter and returns null if the query does not produce a result. |
5.4.8. Streaming Query Results
You can process the results of query methods incrementally by using a Java 8 Stream<T> as the return type.
Instead of wrapping the query results in a Stream, data store-specific methods are used to perform the streaming, as shown in the following example:
Stream<T>@Query("select u from User u")
Stream<User> findAllByCustomQueryAndStream();
Stream<User> readAllByFirstnameNotNull();
@Query("select u from User u")
Stream<User> streamAllPaged(Pageable pageable);
A Stream potentially wraps underlying data store-specific resources and must, therefore, be closed after usage.
You can either manually close the Stream by using the close() method or by using a Java 7 try-with-resources block, as shown in the following example:
|
Stream<T> result in a try-with-resources blocktry (Stream<User> stream = repository.findAllByCustomQueryAndStream()) {
stream.forEach(…);
}
Not all Spring Data modules currently support Stream<T> as a return type.
|
5.4.9. Asynchronous Query Results
You can run repository queries asynchronously by using Spring’s asynchronous method running capability.
This means the method returns immediately upon invocation while the actual query occurs in a task that has been submitted to a Spring TaskExecutor.
Asynchronous queries differ from reactive queries and should not be mixed.
See the store-specific documentation for more details on reactive support.
The following example shows a number of asynchronous queries:
@Async
Future<User> findByFirstname(String firstname);               (1)

@Async
CompletableFuture<User> findOneByFirstname(String firstname); (2)

@Async
ListenableFuture<User> findOneByLastname(String lastname); (3)| 1 | Use java.util.concurrent.Future as the return type. |
| 2 | Use a Java 8 java.util.concurrent.CompletableFuture as the return type. |
| 3 | Use a org.springframework.util.concurrent.ListenableFuture as the return type. |
5.5. Creating Repository Instances
This section covers how to create instances and bean definitions for the defined repository interfaces. One way to do so is by using the Spring namespace that is shipped with each Spring Data module that supports the repository mechanism, although we generally recommend using Java configuration.
5.5.1. XML Configuration
Each Spring Data module includes a repositories element that lets you define a base package that Spring scans for you, as shown in the following example:
<?xml version="1.0" encoding="UTF-8"?>
<beans:beans xmlns:beans="http://www.springframework.org/schema/beans"
  xmlns:xsi="http://www.w3.org/2001/XMLSchema-instance"
  xmlns="http://www.springframework.org/schema/data/jpa"
  xsi:schemaLocation="http://www.springframework.org/schema/beans
    https://www.springframework.org/schema/beans/spring-beans.xsd
    http://www.springframework.org/schema/data/jpa
    https://www.springframework.org/schema/data/jpa/spring-jpa.xsd">

  <repositories base-package="com.acme.repositories" />

</beans:beans>
In the preceding example, Spring is instructed to scan com.acme.repositories and all its sub-packages for interfaces extending Repository or one of its sub-interfaces.
For each interface found, the infrastructure registers the persistence technology-specific FactoryBean to create the appropriate proxies that handle invocations of the query methods.
Each bean is registered under a bean name that is derived from the interface name, so an interface of UserRepository would be registered under userRepository.
Bean names for nested repository interfaces are prefixed with their enclosing type name.
The base-package attribute allows wildcards so that you can define a pattern of scanned packages.
Using Filters
By default, the infrastructure picks up every interface that extends the persistence technology-specific Repository sub-interface located under the configured base package and creates a bean instance for it.
However, you might want more fine-grained control over which interfaces have bean instances created for them.
To do so, use <include-filter /> and <exclude-filter /> elements inside the <repositories /> element.
The semantics are exactly equivalent to the elements in Spring’s context namespace.
For details, see the Spring reference documentation for these elements.
For example, to exclude certain interfaces from instantiation as repository beans, you could use the following configuration:
<repositories base-package="com.acme.repositories">
  <context:exclude-filter type="regex" expression=".*SomeRepository" />
</repositories>
The preceding example excludes all interfaces ending in SomeRepository from being instantiated.
5.5.2. Java Configuration
You can also trigger the repository infrastructure by using a store-specific @Enable${store}Repositories annotation on a Java configuration class.
For an introduction to Java-based configuration of the Spring container, see JavaConfig in the Spring reference documentation.
A sample configuration to enable Spring Data repositories resembles the following:
@Configuration
@EnableJpaRepositories("com.acme.repositories")
class ApplicationConfiguration {

  @Bean
  EntityManagerFactory entityManagerFactory() {
    // …
  }
}
The preceding example uses the JPA-specific annotation, which you would change according to the store module you actually use.
The same applies to the definition of the EntityManagerFactory bean.
See the sections covering the store-specific configuration.
|
5.5.3. Standalone Usage
You can also use the repository infrastructure outside of a Spring container — for example, in CDI environments.
You still need some Spring libraries in your classpath, but, generally, you can set up repositories programmatically as well.
The Spring Data modules that provide repository support ship with a persistence technology-specific RepositoryFactory that you can use, as follows:
RepositoryFactorySupport factory = … // Instantiate factory here
UserRepository repository = factory.getRepository(UserRepository.class);
5.6. Custom Implementations for Spring Data Repositories
This section covers repository customization and how fragments form a composite repository.
When a query method requires a different behavior or cannot be implemented by query derivation, you need to provide a custom implementation. Spring Data repositories let you provide custom repository code and integrate it with generic CRUD abstraction and query method functionality.
5.6.1. Customizing Individual Repositories
To enrich a repository with custom functionality, you must first define a fragment interface and an implementation for the custom functionality, as follows:
interface CustomizedUserRepository {
  void someCustomMethod(User user);
}class CustomizedUserRepositoryImpl implements CustomizedUserRepository {
public void someCustomMethod(User user) {
// Your custom implementation
}
}
The most important part of the class name that corresponds to the fragment interface is the Impl postfix.
|
The implementation itself does not depend on Spring Data and can be a regular Spring bean.
Consequently, you can use standard dependency injection behavior to inject references to other beans (such as a JdbcTemplate), take part in aspects, and so on.
Then you can let your repository interface extend the fragment interface, as follows:
interface UserRepository extends CrudRepository<User, Long>, CustomizedUserRepository {

  // Declare query methods here
}
Extending the fragment interface with your repository interface combines the CRUD and custom functionality and makes it available to clients.
Spring Data repositories are implemented by using fragments that form a repository composition. Fragments are the base repository, functional aspects (such as QueryDsl), and custom interfaces along with their implementations. Each time you add an interface to your repository interface, you enhance the composition by adding a fragment. The base repository and repository aspect implementations are provided by each Spring Data module.
The following example shows custom interfaces and their implementations:
interface HumanRepository {
  void someHumanMethod(User user);
}

class HumanRepositoryImpl implements HumanRepository {

  public void someHumanMethod(User user) {
    // Your custom implementation
  }
}

interface ContactRepository {

  void someContactMethod(User user);

  User anotherContactMethod(User user);
}

class ContactRepositoryImpl implements ContactRepository {

  public void someContactMethod(User user) {
    // Your custom implementation
  }

  public User anotherContactMethod(User user) {
    // Your custom implementation
  }
}
The following example shows the interface for a custom repository that extends CrudRepository:
interface UserRepository extends CrudRepository<User, Long>, HumanRepository, ContactRepository {

  // Declare query methods here
}
Repositories may be composed of multiple custom implementations that are imported in the order of their declaration. Custom implementations have a higher priority than the base implementation and repository aspects. This ordering lets you override base repository and aspect methods and resolves ambiguity if two fragments contribute the same method signature. Repository fragments are not limited to use in a single repository interface. Multiple repositories may use a fragment interface, letting you reuse customizations across different repositories.
The following example shows a repository fragment and its implementation:
save(…)interface CustomizedSave<T> {
<S extends T> S save(S entity);
}
class CustomizedSaveImpl<T> implements CustomizedSave<T> {
public <S extends T> S save(S entity) {
// Your custom implementation
}
}The following example shows a repository that uses the preceding repository fragment:
interface UserRepository extends CrudRepository<User, Long>, CustomizedSave<User> {
}

interface PersonRepository extends CrudRepository<Person, Long>, CustomizedSave<Person> {
}
Configuration
If you use namespace configuration, the repository infrastructure tries to autodetect custom implementation fragments by scanning for classes below the package in which it found a repository.
These classes need to follow the naming convention of appending the namespace element’s repository-impl-postfix attribute to the fragment interface name.
This postfix defaults to Impl.
The following example shows a repository that uses the default postfix and a repository that sets a custom value for the postfix:
<repositories base-package="com.acme.repository" />

<repositories base-package="com.acme.repository" repository-impl-postfix="MyPostfix" />
The first configuration in the preceding example tries to look up a class called com.acme.repository.CustomizedUserRepositoryImpl to act as a custom repository implementation.
The second example tries to look up com.acme.repository.CustomizedUserRepositoryMyPostfix.
Resolution of Ambiguity
If multiple implementations with matching class names are found in different packages, Spring Data uses the bean names to identify which one to use.
Given the following two custom implementations for the CustomizedUserRepository shown earlier, the first implementation is used.
Its bean name is customizedUserRepositoryImpl, which matches that of the fragment interface (CustomizedUserRepository) plus the postfix Impl.
package com.acme.impl.one;

class CustomizedUserRepositoryImpl implements CustomizedUserRepository {

  // Your custom implementation
}
package com.acme.impl.two;
@Component("specialCustomImpl")
class CustomizedUserRepositoryImpl implements CustomizedUserRepository {
// Your custom implementation
}If you annotate the UserRepository interface with @Component("specialCustom"), the bean name plus Impl then matches the one defined for the repository implementation in com.acme.impl.two, and it is used instead of the first one.
Manual Wiring
If your custom implementation uses annotation-based configuration and autowiring only, the preceding approach shown works well, because it is treated as any other Spring bean. If your implementation fragment bean needs special wiring, you can declare the bean and name it according to the conventions described in the preceding section. The infrastructure then refers to the manually defined bean definition by name instead of creating one itself. The following example shows how to manually wire a custom implementation:
<repositories base-package="com.acme.repository" />

<beans:bean id="userRepositoryImpl" class="…">
  <!-- further configuration -->
</beans:bean>
5.6.2. Customize the Base Repository
The approach described in the preceding section requires customization of each repository interfaces when you want to customize the base repository behavior so that all repositories are affected. To instead change behavior for all repositories, you can create an implementation that extends the persistence technology-specific repository base class. This class then acts as a custom base class for the repository proxies, as shown in the following example:
class MyRepositoryImpl<T, ID>
  extends SimpleJpaRepository<T, ID> {

  private final EntityManager entityManager;

  MyRepositoryImpl(JpaEntityInformation entityInformation,
                          EntityManager entityManager) {
    super(entityInformation, entityManager);

    // Keep the EntityManager around to used from the newly introduced methods.
    this.entityManager = entityManager;
  }

  @Transactional
  public <S extends T> S save(S entity) {
    // implementation goes here
  }
}
The class needs to have a constructor of the super class which the store-specific repository factory implementation uses.
If the repository base class has multiple constructors, override the one taking an EntityInformation plus a store specific infrastructure object (such as an EntityManager or a template class).
|
The final step is to make the Spring Data infrastructure aware of the customized repository base class.
In Java configuration, you can do so by using the repositoryBaseClass attribute of the @Enable${store}Repositories annotation, as shown in the following example:
@Configuration
@EnableJpaRepositories(repositoryBaseClass = MyRepositoryImpl.class)
class ApplicationConfiguration { … }
A corresponding attribute is available in the XML namespace, as shown in the following example:
<repositories base-package="com.acme.repository"
     base-class="….MyRepositoryImpl" />
5.7. Publishing Events from Aggregate Roots
Entities managed by repositories are aggregate roots.
In a Domain-Driven Design application, these aggregate roots usually publish domain events.
Spring Data provides an annotation called @DomainEvents that you can use on a method of your aggregate root to make that publication as easy as possible, as shown in the following example:
class AnAggregateRoot {

    @DomainEvents (1)
    Collection<Object> domainEvents() {
        // … return events you want to get published here
    }

    @AfterDomainEventPublication (2)
    void callbackMethod() {
       // … potentially clean up domain events list
    }
}| 1 | The method that uses @DomainEvents can return either a single event instance or a collection of events.
It must not take any arguments. |
| 2 | After all events have been published, we have a method annotated with @AfterDomainEventPublication.
You can use it to potentially clean the list of events to be published (among other uses). |
The methods are called every time one of a Spring Data repository’s save(…), saveAll(…), delete(…) or deleteAll(…) methods are called.
5.8. Spring Data Extensions
This section documents a set of Spring Data extensions that enable Spring Data usage in a variety of contexts. Currently, most of the integration is targeted towards Spring MVC.
5.8.1. Querydsl Extension
Querydsl is a framework that enables the construction of statically typed SQL-like queries through its fluent API.
Several Spring Data modules offer integration with Querydsl through QuerydslPredicateExecutor, as the following example shows:
public interface QuerydslPredicateExecutor<T> {

  Optional<T> findById(Predicate predicate);  (1)

  Iterable<T> findAll(Predicate predicate);   (2)

  long count(Predicate predicate);            (3)

  boolean exists(Predicate predicate);        (4)

  // … more functionality omitted.
}| 1 | Finds and returns a single entity matching the Predicate. |
| 2 | Finds and returns all entities matching the Predicate. |
| 3 | Returns the number of entities matching the Predicate. |
| 4 | Returns whether an entity that matches the Predicate exists. |
To use the Querydsl support, extend QuerydslPredicateExecutor on your repository interface, as the following example shows:
interface UserRepository extends CrudRepository<User, Long>, QuerydslPredicateExecutor<User> {
}
The preceding example lets you write type-safe queries by using Querydsl Predicate instances, as the following example shows:
Predicate predicate = user.firstname.equalsIgnoreCase("dave")
	.and(user.lastname.startsWithIgnoreCase("mathews"));

userRepository.findAll(predicate);
5.8.2. Web support
Spring Data modules that support the repository programming model ship with a variety of web support.
The web related components require Spring MVC JARs to be on the classpath.
Some of them even provide integration with Spring HATEOAS.
In general, the integration support is enabled by using the @EnableSpringDataWebSupport annotation in your JavaConfig configuration class, as the following example shows:
@Configuration
@EnableWebMvc
@EnableSpringDataWebSupport
class WebConfiguration {}
The @EnableSpringDataWebSupport annotation registers a few components.
We discuss those later in this section.
It also detects Spring HATEOAS on the classpath and registers integration components (if present) for it as well.
Alternatively, if you use XML configuration, register either SpringDataWebConfiguration or HateoasAwareSpringDataWebConfiguration as Spring beans, as the following example shows (for SpringDataWebConfiguration):
<bean class="org.springframework.data.web.config.SpringDataWebConfiguration" />

<!-- If you use Spring HATEOAS, register this one *instead* of the former -->
<bean class="org.springframework.data.web.config.HateoasAwareSpringDataWebConfiguration" />
Basic Web Support
The configuration shown in the previous section registers a few basic components:
-
A Section 5.8.2.1.1 to let Spring MVC resolve instances of repository-managed domain classes from request parameters or path variables.
-
HandlerMethodArgumentResolverimplementations to let Spring MVC resolvePageableandSortinstances from request parameters. -
Jackson Modules to de-/serialize types like
PointandDistance, or store specific ones, depending on the Spring Data Module used.
Using the DomainClassConverter Class
The DomainClassConverter class lets you use domain types in your Spring MVC controller method signatures directly so that you need not manually lookup the instances through the repository, as the following example shows:
@Controller
@RequestMapping("/users")
class UserController {

  @RequestMapping("/{id}")
  String showUserForm(@PathVariable("id") User user, Model model) {

    model.addAttribute("user", user);
    return "userForm";
  }
}
The method receives a User instance directly, and no further lookup is necessary.
The instance can be resolved by letting Spring MVC convert the path variable into the id type of the domain class first and eventually access the instance through calling findById(…) on the repository instance registered for the domain type.
Currently, the repository has to implement CrudRepository to be eligible to be discovered for conversion.
|
HandlerMethodArgumentResolvers for Pageable and Sort
The configuration snippet shown in the previous section also registers a PageableHandlerMethodArgumentResolver as well as an instance of SortHandlerMethodArgumentResolver.
The registration enables Pageable and Sort as valid controller method arguments, as the following example shows:
@Controller
@RequestMapping("/users")
class UserController {

  private final UserRepository repository;

  UserController(UserRepository repository) {
    this.repository = repository;
  }

  @RequestMapping
  String showUsers(Model model, Pageable pageable) {

    model.addAttribute("users", repository.findAll(pageable));
    return "users";
  }
}
The preceding method signature causes Spring MVC try to derive a Pageable instance from the request parameters by using the following default configuration:
|
Page you want to retrieve. 0-indexed and defaults to 0. |
|
Size of the page you want to retrieve. Defaults to 20. |
|
Properties that should be sorted by in the format |
To customize this behavior, register a bean that implements the PageableHandlerMethodArgumentResolverCustomizer interface or the SortHandlerMethodArgumentResolverCustomizer interface, respectively.
Its customize() method gets called, letting you change settings, as the following example shows:
@Bean SortHandlerMethodArgumentResolverCustomizer sortCustomizer() {
    return s -> s.setPropertyDelimiter("<-->");
}
If setting the properties of an existing MethodArgumentResolver is not sufficient for your purpose, extend either SpringDataWebConfiguration or the HATEOAS-enabled equivalent, override the pageableResolver() or sortResolver() methods, and import your customized configuration file instead of using the @Enable annotation.
If you need multiple Pageable or Sort instances to be resolved from the request (for multiple tables, for example), you can use Spring’s @Qualifier annotation to distinguish one from another.
The request parameters then have to be prefixed with ${qualifier}_.
The following example shows the resulting method signature:
String showUsers(Model model,
      @Qualifier("thing1") Pageable first,
      @Qualifier("thing2") Pageable second) { … }
You have to populate thing1_page, thing2_page, and so on.
The default Pageable passed into the method is equivalent to a PageRequest.of(0, 20), but you can customize it by using the @PageableDefault annotation on the Pageable parameter.
Hypermedia Support for Pageables
Spring HATEOAS ships with a representation model class (PagedResources) that allows enriching the content of a Page instance with the necessary Page metadata as well as links to let the clients easily navigate the pages.
The conversion of a Page to a PagedResources is done by an implementation of the Spring HATEOAS ResourceAssembler interface, called the PagedResourcesAssembler.
The following example shows how to use a PagedResourcesAssembler as a controller method argument:
@Controller
class PersonController {

  @Autowired PersonRepository repository;

  @RequestMapping(value = "/persons", method = RequestMethod.GET)
  HttpEntity<PagedResources<Person>> persons(Pageable pageable,
    PagedResourcesAssembler assembler) {

    Page<Person> persons = repository.findAll(pageable);
    return new ResponseEntity<>(assembler.toResources(persons), HttpStatus.OK);
  }
}
Enabling the configuration, as shown in the preceding example, lets the PagedResourcesAssembler be used as a controller method argument.
Calling toResources(…) on it has the following effects:
-
The content of the
Pagebecomes the content of thePagedResourcesinstance. -
The
PagedResourcesobject gets aPageMetadatainstance attached, and it is populated with information from thePageand the underlyingPageRequest. -
The
PagedResourcesmay getprevandnextlinks attached, depending on the page’s state. The links point to the URI to which the method maps. The pagination parameters added to the method match the setup of thePageableHandlerMethodArgumentResolverto make sure the links can be resolved later.
Assume we have 30 Person instances in the database.
You can now trigger a request (GET http://localhost:8080/persons) and see output similar to the following:
{ "links" : [ { "rel" : "next",
                "href" : "http://localhost:8080/persons?page=1&size=20" }
  ],
  "content" : [
     … // 20 Person instances rendered here
  ],
  "pageMetadata" : {
    "size" : 20,
    "totalElements" : 30,
    "totalPages" : 2,
    "number" : 0
  }
}
The assembler produced the correct URI and also picked up the default configuration to resolve the parameters into a Pageable for an upcoming request.
This means that, if you change that configuration, the links automatically adhere to the change.
By default, the assembler points to the controller method it was invoked in, but you can customize that by passing a custom Link to be used as base to build the pagination links, which overloads the PagedResourcesAssembler.toResource(…) method.
Spring Data Jackson Modules
The core module, and some of the store specific ones, ship with a set of Jackson Modules for types, like org.springframework.data.geo.Distance and org.springframework.data.geo.Point, used by the Spring Data domain.
Those Modules are imported once web support is enabled and com.fasterxml.jackson.databind.ObjectMapper is available.
During initialization SpringDataJacksonModules, like the SpringDataJacksonConfiguration, get picked up by the infrastructure, so that the declared com.fasterxml.jackson.databind.Modules are made available to the Jackson ObjectMapper.
Data binding mixins for the following domain types are registered by the common infrastructure.
org.springframework.data.geo.Distance
org.springframework.data.geo.Point
org.springframework.data.geo.Box
org.springframework.data.geo.Circle
org.springframework.data.geo.Polygon
|
The individual module may provide additional |
Web Databinding Support
You can use Spring Data projections (described in Chapter 8) to bind incoming request payloads by using either JSONPath expressions (requires Jayway JsonPath or XPath expressions (requires XmlBeam), as the following example shows:
@ProjectedPayload
public interface UserPayload {

  @XBRead("//firstname")
  @JsonPath("$..firstname")
  String getFirstname();

  @XBRead("/lastname")
  @JsonPath({ "$.lastname", "$.user.lastname" })
  String getLastname();
}
You can use the type shown in the preceding example as a Spring MVC handler method argument or by using ParameterizedTypeReference on one of methods of the RestTemplate.
The preceding method declarations would try to find firstname anywhere in the given document.
The lastname XML lookup is performed on the top-level of the incoming document.
The JSON variant of that tries a top-level lastname first but also tries lastname nested in a user sub-document if the former does not return a value.
That way, changes in the structure of the source document can be mitigated easily without having clients calling the exposed methods (usually a drawback of class-based payload binding).
Nested projections are supported as described in Chapter 8.
If the method returns a complex, non-interface type, a Jackson ObjectMapper is used to map the final value.
For Spring MVC, the necessary converters are registered automatically as soon as @EnableSpringDataWebSupport is active and the required dependencies are available on the classpath.
For usage with RestTemplate, register a ProjectingJackson2HttpMessageConverter (JSON) or XmlBeamHttpMessageConverter manually.
For more information, see the web projection example in the canonical Spring Data Examples repository.
Querydsl Web Support
For those stores that have QueryDSL integration, you can derive queries from the attributes contained in a Request query string.
Consider the following query string:
?firstname=Dave&lastname=MatthewsGiven the User object from the previous examples, you can resolve a query string to the following value by using the QuerydslPredicateArgumentResolver, as follows:
QUser.user.firstname.eq("Dave").and(QUser.user.lastname.eq("Matthews"))
The feature is automatically enabled, along with @EnableSpringDataWebSupport, when Querydsl is found on the classpath.
|
Adding a @QuerydslPredicate to the method signature provides a ready-to-use Predicate, which you can run by using the QuerydslPredicateExecutor.
Type information is typically resolved from the method’s return type.
Since that information does not necessarily match the domain type, it might be a good idea to use the root attribute of QuerydslPredicate.
|
The following example shows how to use @QuerydslPredicate in a method signature:
@Controller
class UserController {

  @Autowired UserRepository repository;

  @RequestMapping(value = "/", method = RequestMethod.GET)
  String index(Model model, @QuerydslPredicate(root = User.class) Predicate predicate,    (1)
          Pageable pageable, @RequestParam MultiValueMap<String, String> parameters) {

    model.addAttribute("users", repository.findAll(predicate, pageable));

    return "index";
  }
}| 1 | Resolve query string arguments to matching Predicate for User. |
The default binding is as follows:
-
Objecton simple properties aseq. -
Objecton collection like properties ascontains. -
Collectionon simple properties asin.
You can customize those bindings through the bindings attribute of @QuerydslPredicate or by making use of Java 8 default methods and adding the QuerydslBinderCustomizer method to the repository interface, as follows:
interface UserRepository extends CrudRepository<User, String>,
                                 QuerydslPredicateExecutor<User>,                (1)
                                 QuerydslBinderCustomizer<QUser> {               (2)

  @Override
  default void customize(QuerydslBindings bindings, QUser user) {

    bindings.bind(user.username).first((path, value) -> path.contains(value))    (3)
    bindings.bind(String.class)
      .first((StringPath path, String value) -> path.containsIgnoreCase(value)); (4)
    bindings.excluding(user.password);                                           (5)
  }
}| 1 | QuerydslPredicateExecutor provides access to specific finder methods for Predicate. |
| 2 | QuerydslBinderCustomizer defined on the repository interface is automatically picked up and shortcuts @QuerydslPredicate(bindings=…). |
| 3 | Define the binding for the username property to be a simple contains binding. |
| 4 | Define the default binding for String properties to be a case-insensitive contains match. |
| 5 | Exclude the password property from Predicate resolution. |
5.8.3. Repository Populators
If you work with the Spring JDBC module, you are probably familiar with the support for populating a DataSource with SQL scripts.
A similar abstraction is available on the repositories level, although it does not use SQL as the data definition language because it must be store-independent.
Thus, the populators support XML (through Spring’s OXM abstraction) and JSON (through Jackson) to define data with which to populate the repositories.
Assume you have a file called data.json with the following content:
[ { "_class" : "com.acme.Person",
 "firstname" : "Dave",
  "lastname" : "Matthews" },
  { "_class" : "com.acme.Person",
 "firstname" : "Carter",
  "lastname" : "Beauford" } ]
You can populate your repositories by using the populator elements of the repository namespace provided in Spring Data Commons.
To populate the preceding data to your PersonRepository, declare a populator similar to the following:
<?xml version="1.0" encoding="UTF-8"?>
<beans xmlns="http://www.springframework.org/schema/beans"
  xmlns:xsi="http://www.w3.org/2001/XMLSchema-instance"
  xmlns:repository="http://www.springframework.org/schema/data/repository"
  xsi:schemaLocation="http://www.springframework.org/schema/beans
    https://www.springframework.org/schema/beans/spring-beans.xsd
    http://www.springframework.org/schema/data/repository
    https://www.springframework.org/schema/data/repository/spring-repository.xsd">

  <repository:jackson2-populator locations="classpath:data.json" />

</beans>
The preceding declaration causes the data.json file to be read and deserialized by a Jackson ObjectMapper.
The type to which the JSON object is unmarshalled is determined by inspecting the _class attribute of the JSON document.
The infrastructure eventually selects the appropriate repository to handle the object that was deserialized.
To instead use XML to define the data the repositories should be populated with, you can use the unmarshaller-populator element.
You configure it to use one of the XML marshaller options available in Spring OXM. See the Spring reference documentation for details.
The following example shows how to unmarshall a repository populator with JAXB:
<?xml version="1.0" encoding="UTF-8"?>
<beans xmlns="http://www.springframework.org/schema/beans"
  xmlns:xsi="http://www.w3.org/2001/XMLSchema-instance"
  xmlns:repository="http://www.springframework.org/schema/data/repository"
  xmlns:oxm="http://www.springframework.org/schema/oxm"
  xsi:schemaLocation="http://www.springframework.org/schema/beans
    https://www.springframework.org/schema/beans/spring-beans.xsd
    http://www.springframework.org/schema/data/repository
    https://www.springframework.org/schema/data/repository/spring-repository.xsd
    http://www.springframework.org/schema/oxm
    https://www.springframework.org/schema/oxm/spring-oxm.xsd">

  <repository:unmarshaller-populator locations="classpath:data.json"
    unmarshaller-ref="unmarshaller" />

  <oxm:jaxb2-marshaller contextPath="com.acme" />

</beans>
Reference Documentation
Who should read this?
This manual is written for:
-
the enterprise architect investigating Spring integration for Neo4j.
-
the engineer developing Spring Data based applications with Neo4j.
6. Getting started
We provide a Spring Boot starter for SDN.
Please include the starter module via your dependency management and configure the bolt URL to use, for example org.neo4j.driver.uri=bolt://localhost:7687.
The starter assumes that the server has disabled authentication.
As the SDN starter depends on the starter for the Java Driver, all things regarding configuration said there, apply here as well.
For a reference of the available properties, use your IDEs autocompletion in the org.neo4j.driver namespace or look at the dedicated manual.
SDN supports
-
The well known and understood imperative programming model (much like Spring Data JDBC or JPA)
-
Reactive programming based on Reactive Streams, including full support for reactive transactions.
Those are all included in the same binary. The reactive programming model requires a 4.0 Neo4j server on the database side and reactive Spring on the other hand.
6.1. Prepare the database
For this example, we stay within the movie graph, as it comes for free with every Neo4j instance.
If you don’t have a running database but Docker installed, please run:
docker run --publish=7474:7474 --publish=7687:7687 -e 'NEO4J_AUTH=neo4j/secret' neo4j:4.1.5You know can access http://localhost:7474.
The above command sets the password of the server to secret.
Note the command ready to run in the prompt (:play movies).
Execute it to fill your database with some test data.
6.2. Create a new Spring Boot project
The easiest way to setup a Spring Boot project is start.spring.io (which is integrated in the major IDEs as well, in case you don’t want to use the website).
Select the "Spring Web Starter" to get all the dependencies needed for creating a Spring based web application. The Spring Initializr will take care of creating a valid project structure for you, with all the files and settings in place for the selected build tool.
6.2.1. Using Maven
You can issue a curl request against the Spring Initializer to create a basic Maven project:
curl https://start.spring.io/starter.tgz \
  -d dependencies=webflux,actuator,data-neo4j  \
  -d bootVersion=2.4.1 \
  -d baseDir=Neo4jSpringBootExample \
  -d name=Neo4j%20SpringBoot%20Example | tar -xzvf -
This will create a new folder Neo4jSpringBootExample.
As this starter is not yet on the initializer, you will have to add the following dependency manually to your pom.xml:
<dependency>
	<groupId>org.springframework.boot</groupId>
	<artifactId>spring-boot-starter-data-neo4j</artifactId>
</dependency>
You would also add the dependency manually in case of an existing project.
6.2.2. Using Gradle
The idea is the same, just generate a Gradle project:
curl https://start.spring.io/starter.tgz \
  -d dependencies=webflux,actuator,data-neo4j \
  -d type=gradle-project \
  -d bootVersion=2.4.1 \
  -d baseDir=Neo4jSpringBootExampleGradle \
  -d name=Neo4j%20SpringBoot%20Example | tar -xzvf -
The dependency for Gradle looks like this and must be added to build.gradle:
dependencies {
    implementation 'org.springframework.boot:spring-boot-starter-data-neo4j'
}
You would also add the dependency manually in case of an existing project.
6.3. Configure the project
Now open any of those projects in your favorite IDE.
Find application.properties and configure your Neo4j credentials:
spring.neo4j.uri=bolt://localhost:7687
spring.neo4j.authentication.username=neo4j
spring.neo4j.authentication.password=secret
This is the bare minimum of what you need to connect to a Neo4j instance.
| It is not necessary to add any programmatic configuration of the driver when you use this starter. SDN repositories will be automatically enabled by this starter. |
6.4. Create your domain
Our domain layer should accomplish two things:
-
Map your graph to objects
-
Provide access to those
6.4.1. Example Node-Entity
SDN fully supports unmodifiable entities, for both Java and data classes in Kotlin.
Therefore we will focus on immutable entities here, Listing 6 shows a such an entity.
| SDN supports all data types the Neo4j Java Driver supports, see Map Neo4j types to native language types inside the chapter "The Cypher type system". Future versions will support additional converters. |
import java.util.ArrayList;
import java.util.List;

import org.springframework.data.neo4j.core.schema.Id;
import org.springframework.data.neo4j.core.schema.Node;
import org.springframework.data.neo4j.core.schema.Property;
import org.springframework.data.neo4j.core.schema.Relationship;
import org.springframework.data.neo4j.core.schema.Relationship.Direction;

@Node("Movie") (1)
public class MovieEntity {

	@Id (2)
	private final String title;

	@Property("tagline") (3)
	private final String description;

	@Relationship(type = "ACTED_IN", direction = Direction.INCOMING) (4)
	private List<Roles> actorsAndRoles;

	@Relationship(type = "DIRECTED", direction = Direction.INCOMING) private List<PersonEntity> directors = new ArrayList<>();

	public MovieEntity(String title, String description) { (5)
		this.title = title;
		this.description = description;
	}

	// Getters omitted for brevity
}| 1 | @Node is used to mark this class as a managed entity.
It also is used to configure the Neo4j label.
The label defaults to the name of the class, if you’re just using plain @Node. |
| 2 | Each entity has to have an id.
The movie class shown here uses the attribute title as a unique business key.
If you don’t have such a unique key, you can use the combination of @Id and @GeneratedValue
to configure SDN to use Neo4j’s internal id.
We also provide generators for UUIDs. |
| 3 | This shows @Property as a way to use a different name for the field than for the graph property. |
| 4 | This defines a relationship to a class of type PersonEntity and the relationship type ACTED_IN |
| 5 | This is the constructor to be used by your application code. |
As a general remark: immutable entities using internally generated ids are a bit contradictory, as SDN needs a way to set the field with the value generated by the database.
If you don’t find a good business key or don’t want to use a generator for IDs, here’s the same entity using the internally generated id together with a regular constructor and a so called wither-Method, that is used by SDN:
import org.springframework.data.neo4j.core.schema.GeneratedValue;
import org.springframework.data.neo4j.core.schema.Id;
import org.springframework.data.neo4j.core.schema.Node;
import org.springframework.data.neo4j.core.schema.Property;

import org.springframework.data.annotation.PersistenceConstructor;

@Node("Movie")
public class MovieEntity {

	@Id @GeneratedValue
	private Long id;

	private final String title;

	@Property("tagline")
	private final String description;

	public MovieEntity(String title, String description) { (1)
		this.id = null;
		this.title = title;
		this.description = description;
	}

	public MovieEntity withId(Long id) { (2)
		if (this.id.equals(id)) {
			return this;
		} else {
			MovieEntity newObject = new MovieEntity(this.title, this.description);
			newObject.id = id;
			return newObject;
		}
	}
}| 1 | This is the constructor to be used by your application code. It sets the id to null, as the field containing the internal id should never be manipulated. |
| 2 | This is a so-called wither for the id-attribute.
It creates a new entity and sets the field accordingly, without modifying the original entity, thus making it immutable. |
You can of course use SDN with Kotlin and model your domain with Kotlin’s data classes. Project Lombok is an alternative if you want or need to stay purely within Java.
6.4.2. Declaring Spring Data repositories
You basically have two options here: you can work in a store-agnostic fashion with SDN and make your domain specific extend one of
-
org.springframework.data.repository.Repository -
org.springframework.data.repository.CrudRepository -
org.springframework.data.repository.reactive.ReactiveCrudRepository -
org.springframework.data.repository.reactive.ReactiveSortingRepository
Choose imperative and reactive accordingly.
| While technically not prohibited, it is not recommended mixing imperative and reactive database access in the same application. We won’t support you with scenarios like this. |
The other option is to settle on a store specific implementation and gain all the methods we support out of the box. The advantage of this approach is also its biggest disadvantage: once out, all those methods will be part of your API. Most of the time it’s harder to take something away, than to add stuff afterwards. Furthermore, using store specifics leaks your store into your domain. From a performance point of view, there is no penalty.
A repository fitting to any of the movie entities above looks like this:
import reactor.core.publisher.Mono;

import org.springframework.data.neo4j.repository.ReactiveNeo4jRepository;

public interface MovieRepository extends ReactiveNeo4jRepository<MovieEntity, String> {

	Mono<MovieEntity> findOneByTitle(String title);
}
Testing reactive code is done with a reactor.test.StepVerifier.
Have a look at the corresponding documentation of Project Reactor or see our example code.
|
7. Object Mapping
The following sections will explain the process of mapping between your graph and your domain. It is split into two parts. The first part explains the actual mapping and the available tools for you to describe how to map nodes, relationships and properties to objects. The second part will have a look at Spring Data’s object mapping fundamentals. It gives valuable tips on general mapping, why you should prefer immutable domain objects and how you can model them with Java or Kotlin.
7.1. Metadata-based Mapping
To take full advantage of the object mapping functionality inside SDN, you should annotate your mapped objects with the @Node annotation.
Although it is not necessary for the mapping framework to have this annotation (your POJOs are mapped correctly, even without any annotations), it lets the classpath scanner find and pre-process your domain objects to extract the necessary metadata.
If you do not use this annotation, your application takes a slight performance hit the first time you store a domain object, because the mapping framework needs to build up its internal metadata model so that it knows about the properties of your domain object and how to persist them.
7.1.1. Mapping Annotation Overview
From SDN
-
@Node: Applied at the class level to indicate this class is a candidate for mapping to the database. -
@Id: Applied at the field level to mark the field used for identity purpose. -
@GeneratedValue: Applied at the field level together with@Idto specify how unique identifiers should be generated. -
@Property: Applied at the field level to modify the mapping from attributes to properties. -
@CompositeProperty: Applied at the field level on attributes of type Map that shall be read back as a composite. See Composite properties. -
@Relationship: Applied at the field level to specify the details of a relationship. -
@DynamicLabels: Applied at the field level to specify the source of dynamic labels. -
@RelationshipProperties: Applied at the class level to indicate this class as the target for properties of a relationship. -
@TargetNode: Applied on a field of a class annotated with@RelationshipPropertiesto mark the target of that relationship from the perspective of the other end.
The following annotations are used to specify conversions and ensure backwards compatibility with OGM.
-
@DateLong -
@DateString -
@ConvertWith
See Conversions for more information on that.
From Spring Data commons
-
@org.springframework.data.annotation.Idsame as@Idfrom SDN, in fact,@Idis annotated with Spring Data Common’s Id-annotation. -
@CreatedBy: Applied at the field level to indicate the creator of a node. -
@CreatedDate: Applied at the field level to indicate the creation date of a node. -
@LastModifiedBy: Applied at the field level to indicate the author of the last change to a node. -
@LastModifiedDate: Applied at the field level to indicate the last modification date of a node. -
@PersistenceConstructor: Applied at one constructor to mark it as a the preferred constructor when reading entities. -
@Persistent: Applied at the class level to indicate this class is a candidate for mapping to the database. -
@Version: Applied at field level is used for optimistic locking and checked for modification on save operations. The initial value is zero which is bumped automatically on every update.
Have a look at Chapter 10 for all annotations regarding auditing support.
7.1.2. The basic building block: @Node
The @Node annotation is used to mark a class as a managed domain class, subject to the classpath scanning by the mapping context.
To map an Object to nodes in the graph and vice versa, we need a label to identify the class to map to and from.
@Node has an attribute labels that allows you to configure one or more labels to be used when reading and writing instances of the annotated class.
The value attribute is an alias for labels.
If you don’t specify a label, than the simple class name will be used as the primary label.
In case you want to provide multiple labels, you could either:
-
Supply an array to the
labelsproperty. The first element in the array will considered as the primary label. -
Supply a value for
primaryLabeland put the additional labels inlabels.
The primary label should always be the most concrete label that reflects your domain class.
For each instance of an annotated class that is written through a repository or through the Neo4j template, one node in the graph with at least the primary label will be written. Vice versa, all nodes with the primary label will be mapped to the instances of the annotated class.
The @Node annotation is not inherited from super-types and interfaces.
You can however annotate your domain classes individually at every inheritance level.
This allows polymorphic queries: You can pass in base or intermediate classes and retrieve the correct, concrete instance for your nodes.
This is only supported for abstract bases annotated with @Node.
The labels defined on such a class will be used as additional labels together with the labels of the concrete implementations.
Dynamic or "runtime" managed labels
All labels implicitly defined through the simple class name or explicitly via the @Node annotation are static.
They cannot be changed during runtime.
If you need additional labels that can be manipulated during runtime, you can use @DynamicLabels.
@DynamicLabels is an annotation on field level and marks an attribute of type java.util.Collection<String> (a List or Set) for example) as source of dynamic labels.
If this annotation is present, all labels present on a node and not statically mapped via @Node and the class names, will be collected into that collection during load.
During writes, all labels of the node will be replaced with the statically defined labels plus the contents of the collection.
If you have other applications add additional labels to nodes, don’t use @DynamicLabels.
If @DynamicLabels is present on a managed entity, the resulting set of labels will be "the truth" written to the database.
|
7.1.3. Identifying instances: @Id
While @Node creates a mapping between a class and nodes having a specific label, we also need to make the connection between individual instances of that class (objects) and instances of the node.
This is where @Id comes into play.
@Id marks an attribute of the class to be the unique identifier of the object.
That unique identifier is in an optimal world a unique business key or in other words, a natural key.
@Id can be used on all attributes with a supported simple type.
Natural keys are however pretty hard to find. Peoples names for example are seldom unique, change over time or worse, not everyone has a first and last name.
We therefore support two different kind of surrogate keys.
On an attribute of type long or Long, @Id can be used with @GeneratedValue.
This maps the Neo4j internal id, which is not a property on a node or relationship and usually not visible, to the attribute and allows SDN to retrieve individual instances of the class.
@GeneratedValue provides the attribute generatorClass.
generatorClass can be used to specify a class implementing IdGenerator.
An IdGenerator is a functional interface and its generateId takes the primary label and the instance to generate an Id for.
We support UUIDStringGenerator as one implementation out of the box.
You can also specify a Spring Bean from the application context on @GeneratedValue via generatorRef.
That bean also needs to implement IdGenerator, but can make use of everything in the context, including the Neo4j client or template to interact with the database.
| Don’t skip the important notes about ID handling in Section 7.2 |
7.1.4. Mapping properties: @Property
All attributes of a @Node-annotated class will be persisted as properties of Neo4j nodes and relationships.
Without further configuration, the name of the attribute in the Java or Kotlin class will be used as Neo4j property.
If you are working with an existing Neo4j schema or just like to adapt the mapping to your needs, you will need to use @Property.
The name is used to specify the name of the property inside the database.
7.1.5. Connecting nodes: @Relationship
The @Relationship annotation can be used on all attributes that are not a simple type.
It is applicable on attributes of other types annotated with @Node or collections and maps thereof.
The type or the value attribute allow configuration of the relationship’s type, direction allows specifying the direction.
The default direction in SDN is Relationship.Direction#OUTGOING.
We support dynamic relationships.
Dynamic relationships are represented as a Map<String, AnnotatedDomainClass> or Map<Enum, AnnotatedDomainClass>.
In such a case, the type of the relationship to the other domain class is given by the maps key and must not be configured through the @Relationship.
Map relationship properties
Neo4j supports defining properties not only on nodes but also on relationships.
To express those properties in the model SDN provides @RelationshipProperties to be applied on a simple Java class.
Within the properties class there have to be exactly one field marked as @TargetNode to define the entity the relationship points towards.
Or, in an INCOMING relationship context, is coming from.
A relationship property class and its usage may look like this:
Roles@RelationshipProperties
public class Roles {
@Id @GeneratedValue
private Long id;
private final List<String> roles;
@TargetNode
private final PersonEntity person;
public Roles(PersonEntity person, List<String> roles) {
this.person = person;
this.roles = roles;
}
public List<String> getRoles() {
return roles;
}
}You should define a property for the generated, internal ID so that SDN can determine during save which relationships
can be safely overwritten without losing properties.
A generated id property is optional in SDN 6.0.4 and upwards and will be required in SDN 6.1 for @RelationshipProperties.
@Relationship(type = "ACTED_IN", direction = Direction.INCOMING) (1)
private List<Roles> actorsAndRoles;
Relationship query remarks
In general there is no limitation of relationships / hops for creating the queries. SDN parses the whole reachable graph from your modelled nodes.
This said, when there is the idea of mapping a relationship bidirectional, meaning you define the relationship on both ends of your entity, you might get more than what you are expecting.
Consider an example where a movie has actors, and you want to fetch a certain movie with all its actors. This won’t be problematical if the relationship from movie to actor were just unidirectional. In a bidirectional scenario SDN would fetch the particular movie, its actors but also the other movies defined for this actor per definition of the relationship. In the worst case, this will cascade to fetching the whole graph for a single entity.
7.1.6. A complete example
Putting all those together, we can create a simple domain. We use movies and people with different roles:
MovieEntityimport java.util.ArrayList;
import java.util.List;
import org.springframework.data.neo4j.core.schema.Id;
import org.springframework.data.neo4j.core.schema.Node;
import org.springframework.data.neo4j.core.schema.Property;
import org.springframework.data.neo4j.core.schema.Relationship;
import org.springframework.data.neo4j.core.schema.Relationship.Direction;
@Node("Movie") (1)
public class MovieEntity {
@Id (2)
private final String title;
@Property("tagline") (3)
private final String description;
@Relationship(type = "ACTED_IN", direction = Direction.INCOMING) (4)
private List<Roles> actorsAndRoles;
@Relationship(type = "DIRECTED", direction = Direction.INCOMING) private List<PersonEntity> directors = new ArrayList<>();
public MovieEntity(String title, String description) { (5)
this.title = title;
this.description = description;
}
// Getters omitted for brevity
}| 1 | @Node is used to mark this class as a managed entity.
It also is used to configure the Neo4j label.
The label defaults to the name of the class, if you’re just using plain @Node. |
| 2 | Each entity has to have an id. We use the movie’s name as unique identifier. |
| 3 | This shows @Property as a way to use a different name for the field than for the graph property. |
| 4 | This configures an incoming relationship to a person. |
| 5 | This is the constructor to be used by your application code as well as by SDN. |
People are mapped in two roles here, actors and directors.
The domain class is the same:
PersonEntityimport org.springframework.data.neo4j.core.schema.Id;
import org.springframework.data.neo4j.core.schema.Node;
@Node("Person")
public class PersonEntity {
@Id private final String name;
private final Integer born;
public PersonEntity(Integer born, String name) {
this.born = born;
this.name = name;
}
public Integer getBorn() {
return born;
}
public String getName() {
return name;
}
}
We haven’t modelled the relationship between movies and people in both direction.
Why is that?
We see the MovieEntity as the aggregate root, owning the relationships.
On the other hand, we want to be able to pull all people from the database without selecting all the movies associated with them.
Please consider your applications use case before you try to map every relationship in your database in every direction.
While you can do this, you may end up rebuilding a graph database inside your object graph and this is not the intention of a mapping framework.
|
7.2. Handling and provisioning of unique IDs
7.2.1. Using the internal Neo4j id
The easiest way to give your domain classes an unique identifier is the combination of @Id and @GeneratedValue
on a field of type Long (preferable the object, not the scalar long, as literal null is the better indicator whether an instance is new or not):
@Node("Movie")
public class MovieEntity {

	@Id @GeneratedValue
	private Long id;

	private String name;

	public MovieEntity(String name) {
		this.name = name;
	}
}
You don’t need to provide a setter for the field, SDN will use reflection to assign the field, but use a setter if there is one. If you want to create an immutable entity with an internally generated id, you have to provide a wither.
@Node("Movie")
public class MovieEntity {

	@Id @GeneratedValue
	private final Long id; (1)

	private String name;

	public MovieEntity(String name) { (2)
		this(null, name);
	}

	private MovieEntity(Long id, String name) { (3)
		this.id = id;
		this.name = name;
	}

	public MovieEntity withId(Long id) { (4)
		if (this.id.equals(id)) {
			return this;
		} else {
			return new MovieEntity(id, this.title);
		}
	}
}| 1 | Immutable final id field indicating a generated value |
| 2 | Public constructor, used by the application and Spring Data |
| 3 | Internally used constructor |
| 4 | This is a so-called wither for the id-attribute.
It creates a new entity and set’s the field accordingly, without modifying the original entity, thus making it immutable. |
You either have to provide a setter for the id attribute or something like a wither, if you want to have
-
Advantages: It is pretty clear that the id attribute is the surrogate business key, it takes no further effort or configuration to use it.
-
Disadvantage: It is tied to Neo4js internal database id, which is not unique to our application entity only over a database lifetime.
-
Disadvantage: It takes more effort to create an immutable entity
7.2.2. Use externally provided surrogate keys
The @GeneratedValue annotation can take a class implementing org.springframework.data.neo4j.core.schema.IdGenerator as parameter.
SDN provides InternalIdGenerator (the default) and UUIDStringGenerator out of the box.
The later generates new UUIDs for each entity and returns them as java.lang.String.
An application entity using that would look like this:
@Node("Movie")
public class MovieEntity {

	@Id @GeneratedValue(UUIDStringGenerator.class)
	private String id;

	private String name;
}
We have to discuss two separate things regarding advantages and disadvantages. The assignment itself and the UUID-Strategy. A universally unique identifier is meant to be unique for practical purposes. To quote Wikipedia: “Thus, anyone can create a UUID and use it to identify something with near certainty that the identifier does not duplicate one that has already been, or will be, created to identify something else.” Our strategy uses Java internal UUID mechanism, employing a cryptographically strong pseudo random number generator. In most cases that should work fine, but your mileage might vary.
That leaves the assignment itself:
-
Advantage: The application is in full control and can generate a unique key that is just unique enough for the purpose of the application. The generated value will be stable and there won’t be a need to change it later on.
-
Disadvantage: The generated strategy is applied on the application side of things. In those days most applications will be deployed in more than one instance to scale nicely. If your strategy is prone to generate duplicates then inserts will fail as the uniqueness property of the primary key will be violated. So while you don’t have to think about a unique business key in this scenario, you have to think more what to generate.
You have several options to roll out your own ID generator. One is a POJO implementing a generator:
import java.util.concurrent.atomic.AtomicInteger;

import org.springframework.data.neo4j.core.schema.IdGenerator;
import org.springframework.util.StringUtils;

public class TestSequenceGenerator implements IdGenerator<String> {

	private final AtomicInteger sequence = new AtomicInteger(0);

	@Override
	public String generateId(String primaryLabel, Object entity) {
		return StringUtils.uncapitalize(primaryLabel) +
			"-" + sequence.incrementAndGet();
	}
}
Another option is to provide an additional Spring Bean like this:
@Component
class MyIdGenerator implements IdGenerator<String> {

	private final Neo4jClient neo4jClient;

	public MyIdGenerator(Neo4jClient neo4jClient) {
		this.neo4jClient = neo4jClient;
	}

	@Override
	public String generateId(String primaryLabel, Object entity) {
		return neo4jClient.query("YOUR CYPHER QUERY FOR THE NEXT ID") (1)
			.fetchAs(String.class).one().get();
	}
}| 1 | Use exactly the query or logic your need. |
The generator above would be configured as a bean reference like this:
@Node("Movie")
public class MovieEntity {

	@Id @GeneratedValue(generatorRef = "myIdGenerator")
	private String id;

	private String name;
}
7.2.3. Using a business key
We have been using a business key in the complete example’s MovieEntity and PersonEntity.
The name of the person is assigned at construction time, both by your application and while being loaded through Spring Data.
This is only possible, if you find a stable, unique business key, but makes great immutable domain objects.
-
Advantages: Using a business or natural key as primary key is natural. The entity in question is clearly identified and it feels most of the time just right in the further modelling of your domain.
-
Disadvantages: Business keys as primary keys will be hard to update once you realise that the key you found is not as stable as you thought. Often it turns out that it can change, even when promised otherwise. Apart from that, finding identifier that are truly unique for a thing is hard.
7.3. Spring Data Object Mapping Fundamentals
This section covers the fundamentals of Spring Data object mapping, object creation, field and property access, mutability and immutability.
Core responsibility of the Spring Data object mapping is to create instances of domain objects and map the store-native data structures onto those. This means we need two fundamental steps:
-
Instance creation by using one of the constructors exposed.
-
Instance population to materialize all exposed properties.
7.3.1. Object creation
Spring Data automatically tries to detect a persistent entity’s constructor to be used to materialize objects of that type. The resolution algorithm works as follows:
-
If there is a no-argument constructor, it will be used. Other constructors will be ignored.
-
If there is a single constructor taking arguments, it will be used.
-
If there are multiple constructors taking arguments, the one to be used by Spring Data will have to be annotated with
@PersistenceConstructor.
The value resolution assumes constructor argument names to match the property names of the entity, i.e. the resolution will be performed as if the property was to be populated, including all customizations in mapping (different datastore column or field name etc.).
This also requires either parameter names information available in the class file or an @ConstructorProperties annotation being present on the constructor.
7.3.2. Property population
Once an instance of the entity has been created, Spring Data populates all remaining persistent properties of that class. Unless already populated by the entity’s constructor (i.e. consumed through its constructor argument list), the identifier property will be populated first to allow the resolution of cyclic object references. After that, all non-transient properties that have not already been populated by the constructor are set on the entity instance. For that we use the following algorithm:
-
If the property is immutable but exposes a wither method (see below), we use the wither to create a new entity instance with the new property value.
-
If property access (i.e. access through getters and setters) is defined, we are invoking the setter method.
-
By default, we set the field value directly.
Let’s have a look at the following entity:
class Person {

  private final @Id Long id;                                                (1)
  private final String firstname, lastname;                                 (2)
  private final LocalDate birthday;
  private final int age; (3)

  private String comment;                                                   (4)
  private @AccessType(Type.PROPERTY) String remarks;                        (5)

  static Person of(String firstname, String lastname, LocalDate birthday) { (6)

    return new Person(null, firstname, lastname, birthday,
      Period.between(birthday, LocalDate.now()).getYears());
  }

  Person(Long id, String firstname, String lastname, LocalDate birthday, int age) { (6)

    this.id = id;
    this.firstname = firstname;
    this.lastname = lastname;
    this.birthday = birthday;
    this.age = age;
  }

  Person withId(Long id) {                                                  (1)
    return new Person(id, this.firstname, this.lastname, this.birthday);
  }

  void setRemarks(String remarks) {                                         (5)
    this.remarks = remarks;
  }
}| 1 | The identifier property is final but set to null in the constructor.
The class exposes a withId(…) method that’s used to set the identifier, e.g. when an instance is inserted into the datastore and an identifier has been generated.
The original Person instance stays unchanged as a new one is created.
The same pattern is usually applied for other properties that are store managed but might have to be changed for persistence operations. |
| 2 | The firstname and lastname properties are ordinary immutable properties potentially exposed through getters. |
| 3 | The age property is an immutable but derived one from the birthday property.
With the design shown, the database value will trump the defaulting as Spring Data uses the only declared constructor.
Even if the intent is that the calculation should be preferred, it’s important that this constructor also takes age as parameter (to potentially ignore it) as otherwise the property population step will attempt to set the age field and fail due to it being immutable and no wither being present. |
| 4 | The comment property is mutable is populated by setting its field directly. |
| 5 | The remarks properties are mutable and populated by setting the comment field directly or by invoking the setter method for |
| 6 | The class exposes a factory method and a constructor for object creation.
The core idea here is to use factory methods instead of additional constructors to avoid the need for constructor disambiguation through @PersistenceConstructor.
Instead, defaulting of properties is handled within the factory method. |
7.3.3. General recommendations
-
Try to stick to immutable objects — Immutable objects are straightforward to create as materializing an object is then a matter of calling its constructor only. Also, this prevents your domain objects from being littered with setter methods that allow client code to manipulate the objects state. If you need those, prefer to make them package protected so that they can only be invoked by a limited amount of co-located types. Constructor-only materialization is up to 30% faster than properties population.
-
Provide an all-args constructor — Even if you cannot or don’t want to model your entities as immutable values, there’s still value in providing a constructor that takes all properties of the entity as arguments, including the mutable ones, as this allows the object mapping to skip the property population for optimal performance.
-
Use factory methods instead of overloaded constructors to avoid
@PersistenceConstructor— With an all-argument constructor needed for optimal performance, we usually want to expose more application use case specific constructors that omit things like auto-generated identifiers etc. It’s an established pattern to rather use static factory methods to expose these variants of the all-args constructor. -
Make sure you adhere to the constraints that allow the generated instantiator and property accessor classes to be used
-
For identifiers to be generated, still use a final field in combination with a wither method
-
Use Lombok to avoid boilerplate code — As persistence operations usually require a constructor taking all arguments, their declaration becomes a tedious repetition of boilerplate parameter to field assignments that can best be avoided by using Lombok’s
@AllArgsConstructor.
7.3.4. Kotlin support
Spring Data adapts specifics of Kotlin to allow object creation and mutation.
Kotlin object creation
Kotlin classes are supported to be instantiated , all classes are immutable by default and require explicit property declarations to define mutable properties.
Consider the following data class Person:
data class Person(val id: String, val name: String)The class above compiles to a typical class with an explicit constructor.
We can customize this class by adding another constructor and annotate it with @PersistenceConstructor to indicate a constructor preference:
data class Person(var id: String, val name: String) {

    @PersistenceConstructor
    constructor(id: String) : this(id, "unknown")
}
Kotlin supports parameter optionality by allowing default values to be used if a parameter is not provided.
When Spring Data detects a constructor with parameter defaulting, then it leaves these parameters absent if the data store does not provide a value (or simply returns null) so Kotlin can apply parameter defaulting.
Consider the following class that applies parameter defaulting for name
data class Person(var id: String, val name: String = "unknown")Every time the name parameter is either not part of the result or its value is null, then the name defaults to unknown.
Property population of Kotlin data classes
In Kotlin, all classes are immutable by default and require explicit property declarations to define mutable properties.
Consider the following data class Person:
data class Person(val id: String, val name: String)This class is effectively immutable.
It allows to create new instances as Kotlin generates a copy(…) method that creates new object instances copying all property values from the existing object and applying property values provided as arguments to the method.
8. Projections
Spring Data query methods usually return one or multiple instances of the aggregate root managed by the repository. However, it might sometimes be desirable to create projections based on certain attributes of those types. Spring Data allows modeling dedicated return types, to more selectively retrieve partial views of the managed aggregates.
Imagine a repository and aggregate root type such as the following example:
class Person {

  @Id UUID id;
  String firstname, lastname;
  Address address;

  static class Address {
    String zipCode, city, street;
  }
}

interface PersonRepository extends Repository<Person, UUID> {

  Collection<Person> findByLastname(String lastname);
}
Now imagine that we want to retrieve the person’s name attributes only. What means does Spring Data offer to achieve this? The rest of this chapter answers that question.
8.1. Interface-based Projections
The easiest way to limit the result of the queries to only the name attributes is by declaring an interface that exposes accessor methods for the properties to be read, as shown in the following example:
interface NamesOnly {

  String getFirstname();
  String getLastname();
}
The important bit here is that the properties defined here exactly match properties in the aggregate root. Doing so lets a query method be added as follows:
interface PersonRepository extends Repository<Person, UUID> {

  Collection<NamesOnly> findByLastname(String lastname);
}
The query execution engine creates proxy instances of that interface at runtime for each element returned and forwards calls to the exposed methods to the target object.
Projections can be used recursively. If you want to include some of the Address information as well, create a projection interface for that and return that interface from the declaration of getAddress(), as shown in the following example:
interface PersonSummary {

  String getFirstname();
  String getLastname();
  AddressSummary getAddress();

  interface AddressSummary {
    String getCity();
  }
}
On method invocation, the address property of the target instance is obtained and wrapped into a projecting proxy in turn.
8.1.1. Closed Projections
A projection interface whose accessor methods all match properties of the target aggregate is considered to be a closed projection. The following example (which we used earlier in this chapter, too) is a closed projection:
interface NamesOnly {

  String getFirstname();
  String getLastname();
}
If you use a closed projection, Spring Data can optimize the query execution, because we know about all the attributes that are needed to back the projection proxy. For more details on that, see the module-specific part of the reference documentation.
8.1.2. Open Projections
Accessor methods in projection interfaces can also be used to compute new values by using the @Value annotation, as shown in the following example:
interface NamesOnly {

  @Value("#{target.firstname + ' ' + target.lastname}")
  String getFullName();
  …
}
The aggregate root backing the projection is available in the target variable.
A projection interface using @Value is an open projection.
Spring Data cannot apply query execution optimizations in this case, because the SpEL expression could use any attribute of the aggregate root.
The expressions used in @Value should not be too complex — you want to avoid programming in String variables.
For very simple expressions, one option might be to resort to default methods (introduced in Java 8), as shown in the following example:
interface NamesOnly {

  String getFirstname();
  String getLastname();

  default String getFullName() {
    return getFirstname().concat(" ").concat(getLastname());
  }
}
This approach requires you to be able to implement logic purely based on the other accessor methods exposed on the projection interface. A second, more flexible, option is to implement the custom logic in a Spring bean and then invoke that from the SpEL expression, as shown in the following example:
@Component
class MyBean {

  String getFullName(Person person) {
    …
  }
}

interface NamesOnly {

  @Value("#{@myBean.getFullName(target)}")
  String getFullName();
  …
}
Notice how the SpEL expression refers to myBean and invokes the getFullName(…) method and forwards the projection target as a method parameter.
Methods backed by SpEL expression evaluation can also use method parameters, which can then be referred to from the expression.
The method parameters are available through an Object array named args. The following example shows how to get a method parameter from the args array:
interface NamesOnly {

  @Value("#{args[0] + ' ' + target.firstname + '!'}")
  String getSalutation(String prefix);
}
Again, for more complex expressions, you should use a Spring bean and let the expression invoke a method, as described earlier.
8.1.3. Nullable Wrappers
Getters in projection interfaces can make use of nullable wrappers for improved null-safety. Currently supported wrapper types are:
-
java.util.Optional -
com.google.common.base.Optional -
scala.Option -
io.vavr.control.Option
interface NamesOnly {

  Optional<String> getFirstname();
}
If the underlying projection value is not null, then values are returned using the present-representation of the wrapper type.
In case the backing value is null, then the getter method returns the empty representation of the used wrapper type.
8.2. Class-based Projections (DTOs)
Another way of defining projections is by using value type DTOs (Data Transfer Objects) that hold properties for the fields that are supposed to be retrieved. These DTO types can be used in exactly the same way projection interfaces are used, except that no proxying happens and no nested projections can be applied.
If the store optimizes the query execution by limiting the fields to be loaded, the fields to be loaded are determined from the parameter names of the constructor that is exposed.
The following example shows a projecting DTO:
class NamesOnly {

  private final String firstname, lastname;

  NamesOnly(String firstname, String lastname) {

    this.firstname = firstname;
    this.lastname = lastname;
  }

  String getFirstname() {
    return this.firstname;
  }

  String getLastname() {
    return this.lastname;
  }

  // equals(…) and hashCode() implementations
}|
Avoid boilerplate code for projection DTOs
You can dramatically simplify the code for a DTO by using Project Lombok, which provides an Fields are |
8.3. Dynamic Projections
So far, we have used the projection type as the return type or element type of a collection. However, you might want to select the type to be used at invocation time (which makes it dynamic). To apply dynamic projections, use a query method such as the one shown in the following example:
interface PersonRepository extends Repository<Person, UUID> {

  <T> Collection<T> findByLastname(String lastname, Class<T> type);
}
This way, the method can be used to obtain the aggregates as is or with a projection applied, as shown in the following example:
void someMethod(PersonRepository people) {

  Collection<Person> aggregates =
    people.findByLastname("Matthews", Person.class);

  Collection<NamesOnly> aggregates =
    people.findByLastname("Matthews", NamesOnly.class);
}
8.4. General remarks
As stated above, projections come in two flavors: Interface and DTO based projections. In Spring Data Neo4j both types of projections have a direct influence which properties and relationships are transferred over the wire. Therefore, both approaches can reduce the load on your database in case you are dealing with nodes and entities containing lots of properties which might not be needed in all usage scenarios in your application.
For both interface and DTO based projections, Spring Data Neo4j will use the repository’s domain type for building the
query. All annotations on all attributes that might change the query will be taken in consideration.
The domain type is the type that has been defined through the repository declaration
(Given a declaration like interface TestRepository extends CrudRepository<TestEntity, Long> the domain type would be
TestEntity).
Interface based projections will always be dynamic proxies to the underlying domain type. The names of the accessors defined
on such interfaces (like getName) must resolve to properties (here: name) that are present on the projected entity.
Whether those properties have accessors or not on the domain type is not relevant, as long as they can be accessed through
the common Spring Data infrastructure. The latter is already ensured, as the domain type wouldn’t be a persistent entity in
the first place.
DTO based projections are somewhat more flexible when used with custom queries. While the standard query is derived from the original domain type and therefore only the properties and relationship beeing defined there can be used, custom queries can add additional properties.
The rules are as follows: first, the properties of the domain type are used to populate the DTO. In case the DTO declares
additional properties - via accessors or fields - Spring Data Neo4j looks in the resulting record for matching properties.
Properties must match exactly by name and can be of simple types (as defined in org.springframework.data.neo4j.core.convert.Neo4jSimpleTypes)
or of known persistent entites. Collections of those are supported, but maps are not.
8.5. A full example
Given the following entities, projections and the corresponding repository:
@Node
class TestEntity {
    @Id @GeneratedValue private Long id;

    private String name;

    @Property("a_property") (1)
    private String aProperty;
}| 1 | This property has a different name in the Graph |
TestEntity@Node
class ExtendedTestEntity extends TestEntity {
private String otherAttribute;
}TestEntityinterface TestEntityInterfaceProjection {
String getName();
}TestEntity, including one additional attributeclass TestEntityDTOProjection {
private String name;
private Long numberOfRelations; (1)
public String getName() {
return name;
}
public void setName(String name) {
this.name = name;
}
public Long getNumberOfRelations() {
return numberOfRelations;
}
public void setNumberOfRelations(Long numberOfRelations) {
this.numberOfRelations = numberOfRelations;
}
}| 1 | This attribute doesn’t exist on the projected entity |
A repository for TestEntity is shown below and it will behave as explained with the listing.
TestEntityinterface TestRepository extends CrudRepository<TestEntity, Long> { (1)
List<TestEntity> findAll(); (2)
List<ExtendedTestEntity> findAllExtendedEntites(); (3)
List<TestEntityInterfaceProjection> findAllInterfaceProjections(); (4)
List<TestEntityDTOProjection> findAllDTOProjections(); (5)
@Query("MATCH (t:TestEntity) - [r:RELATED_TO] -> () RETURN t, COUNT(r) AS numberOfRelations") (6)
List<TestEntityDTOProjection> findAllDTOProjectionsWithCustomQuery();
}| 1 | The domain type of the repository is TestEntity |
| 2 | Methods returning one or more TestEntity will just return instances of it, as it matches the domain type |
| 3 | Methods returning one or more instances of class that extend the domain type will just return instances of the extending class. The domain type of the method in question will the extended class, which still satifies the domain type of the repository itself |
| 4 | This method returns an interface projection, the return type of the method is therefore different from the repository’s domain type. The interface can only access properties defined in the domain type |
| 5 | This method returns a DTO projection. Executing it will cause SDN to issue a warning, as the DTO defines
numberOfRelations as additional attribute, which is not in the contract of the domain type.
The annotated attribute aProperty in TestEntity will be correctly translated to a_property in the query.
As above, the return type is different from the repositories domain type. |
| 6 | This method also returns a DTO projection. However, no warning will be issued, as the query contains a fitting value for the additional attributes defined in the projection. |
9. Testing
9.1. Without Spring Boot
We work a lot with our abstract base classes for configuration in our own integration tests. They can be used like this:
import org.junit.jupiter.api.Test;
import org.junit.jupiter.api.extension.ExtendWith;
import org.neo4j.driver.AuthTokens;
import org.neo4j.driver.Driver;
import org.neo4j.driver.GraphDatabase;
import org.springframework.beans.factory.annotation.Autowired;
import org.springframework.context.annotation.Bean;
import org.springframework.context.annotation.Configuration;
import org.springframework.data.neo4j.config.AbstractNeo4jConfig;
import org.springframework.data.neo4j.core.Neo4jTemplate;
import org.springframework.data.neo4j.repository.config.EnableNeo4jRepositories;
import org.springframework.test.context.junit.jupiter.SpringExtension;
import org.springframework.transaction.annotation.EnableTransactionManagement;

@ExtendWith(SpringExtension.class)
class YourIntegrationTest {

	@Test
	void thingsShouldWork(@Autowired Neo4jTemplate neo4jTemplate) {
		// Add your test
	}

	@Configuration
	@EnableNeo4jRepositories(considerNestedRepositories = true)
	@EnableTransactionManagement
	static class Config extends AbstractNeo4jConfig {

		@Bean
		public Driver driver() {
			return GraphDatabase.driver("bolt://yourtestserver:7687", AuthTokens.none()); (1)
		}
	}
}-
Here you should provide a connection to your test server or container.
Similar classes are provided for reactive tests.
9.2. With Spring Boot and @DataNeo4jTest
Spring Boot offers @DataNeo4jTest through org.springframework.boot:spring-boot-starter-test.
The latter brings in org.springframework.boot:spring-boot-test-autoconfigure which contains the annotation and the
required infrastructure code.
<dependency>
    <groupId>org.springframework.boot</groupId>
    <artifactId>spring-boot-starter-test</artifactId>
    <scope>test</scope>
</dependency>dependencies {
testImplementation 'org.springframework.boot:spring-boot-starter-test'
}@DataNeo4jTest is a Spring Boot test slice.
The test slice provides all the necessary infrastructure for tests using Neo4j: a transaction manager, a client, a template and declared repositories, in their imperative or reactive variants,
depending on reactive dependencies present or not.
The test slice already includes @ExtendWith(SpringExtension.class) so that it runs automatically with JUnit 5 (JUnit Jupiter).
@DataNeo4jTest provides both imperative and reactive infrastructure by default and also adds an implicit @Transactional as well.
@Transactional in Spring tests however always means imperative transactional, as declarative transactions needs the
return type of a method to decide whether the imperative PlatformTransactionManager or the reactive ReactiveTransactionManager is needed.
To assert the correct transactional behaviour for reactive repositories or services, you will need to inject a TransactionalOperator
into the test or wrap your domain logic in services that use annotated methods exposing a return type that makes it possible
for the infrastructure to select the correct transaction manager.
The test slice does not bring in an embedded database or any other connection setting. It is up to you to use an appropriate connection.
We recommend one of two options: either use the Neo4j Testcontainers module or the Neo4j test harness. While Testcontainers is a known project with modules for a lot of different services, Neo4j test harness is rather unknown. It is an embedded instance that is especially useful when testing stored procedures as described in Testing your Neo4j-based Java application. The test harness can however be used to test an application as well. As it brings up a database inside the same JVM as your application, performance and timings may not resemble your production setup.
For your convinience we provide three possible scenarios, Neo4j test harness 3.5 and 4.0 as well as Testcontainers Neo4j. We provide different examples for 3.5 and 4.0 as the test harness changed between those versions. Also, 4.0 requires JDK 11.
9.2.1. @DataNeo4jTest with Neo4j test harness 3.5
You need the following dependencies to run Listing 20:
<dependency>
    <groupId>org.neo4j.test</groupId>
    <artifactId>neo4j-harness</artifactId>
    <version>3.5.23</version>
    <scope>test</scope>
</dependency>
The dependencies for the enterprise version of Neo4j 3.5 are available under the com.neo4j.test:neo4j-harness-enterprise and
an appropriate repository configuration.
import static org.assertj.core.api.Assertions.assertThat;

import java.util.Optional;

import org.junit.jupiter.api.AfterAll;
import org.junit.jupiter.api.BeforeAll;
import org.junit.jupiter.api.Test;
import org.neo4j.harness.ServerControls;
import org.neo4j.harness.TestServerBuilders;
import org.springframework.beans.factory.annotation.Autowired;
import org.springframework.boot.test.autoconfigure.data.neo4j.DataNeo4jTest;
import org.springframework.data.neo4j.core.Neo4jClient;
import org.springframework.test.context.DynamicPropertyRegistry;
import org.springframework.test.context.DynamicPropertySource;

@DataNeo4jTest
class MovieRepositoryTest {

	private static ServerControls embeddedDatabaseServer;

	@BeforeAll
	static void initializeNeo4j() {

		embeddedDatabaseServer = TestServerBuilders.newInProcessBuilder() (1)
			.newServer();
	}

	@AfterAll
	static void stopNeo4j() {

		embeddedDatabaseServer.close(); (2)
	}

	@DynamicPropertySource  (3)
	static void neo4jProperties(DynamicPropertyRegistry registry) {

		registry.add("spring.neo4j.uri", embeddedDatabaseServer::boltURI);
		registry.add("spring.neo4j.authentication.username", () -> "neo4j");
		registry.add("spring.neo4j.authentication.password", () -> null);
	}

	@Test
	public void findSomethingShouldWork(@Autowired Neo4jClient client) {

		Optional<Long> result = client.query("MATCH (n) RETURN COUNT(n)")
			.fetchAs(Long.class)
			.one();
		assertThat(result).hasValue(0L);
	}
}| 1 | Entrypoint to create an embedded Neo4j |
| 2 | This is a Spring Boot annotation that allows for dynamically registered application properties. We overwrite the corresponding Neo4j settings. |
| 3 | Shutdown Neo4j after all tests. |
9.2.2. @DataNeo4jTest with Neo4j test harness 4.0+
You need the following dependencies to run Listing 22:
<dependency>
    <groupId>org.neo4j.test</groupId>
    <artifactId>neo4j-harness</artifactId>
    <version>{neo4j-version}</version>
    <scope>test</scope>
    <exclusions>
        <exclusion>
            <groupId>org.slf4j</groupId>
            <artifactId>slf4j-nop</artifactId>
        </exclusion>
    </exclusions>
</dependency>
The dependencies for the enterprise version of Neo4j 4.x are available under the com.neo4j.test:neo4j-harness-enterprise and
an appropriate repository configuration.
import static org.assertj.core.api.Assertions.assertThat;

import java.util.Optional;

import org.junit.jupiter.api.AfterAll;
import org.junit.jupiter.api.BeforeAll;
import org.junit.jupiter.api.Test;
import org.neo4j.harness.Neo4j;
import org.neo4j.harness.Neo4jBuilders;
import org.springframework.beans.factory.annotation.Autowired;
import org.springframework.boot.test.autoconfigure.data.neo4j.DataNeo4jTest;
import org.springframework.data.neo4j.core.Neo4jClient;
import org.springframework.test.context.DynamicPropertyRegistry;
import org.springframework.test.context.DynamicPropertySource;

@DataNeo4jTest
class MovieRepositoryTest {

	private static Neo4j embeddedDatabaseServer;

	@BeforeAll
	static void initializeNeo4j() {

		embeddedDatabaseServer = Neo4jBuilders.newInProcessBuilder() (1)
			.withDisabledServer() (2)
			.build();
	}

	@DynamicPropertySource (3)
	static void neo4jProperties(DynamicPropertyRegistry registry) {

		registry.add("spring.neo4j.uri", embeddedDatabaseServer::boltURI);
		registry.add("spring.neo4j.authentication.username", () -> "neo4j");
		registry.add("spring.neo4j.authentication.password", () -> null);
	}

	@AfterAll
	static void stopNeo4j() {

		embeddedDatabaseServer.close(); (4)
	}

	@Test
	public void findSomethingShouldWork(@Autowired Neo4jClient client) {

		Optional<Long> result = client.query("MATCH (n) RETURN COUNT(n)")
			.fetchAs(Long.class)
			.one();
		assertThat(result).hasValue(0L);
	}
}| 1 | Entrypoint to create an embedded Neo4j |
| 2 | Disable the unneeded Neo4j HTTP server |
| 3 | This is a Spring Boot annotation that allows for dynamically registered application properties. We overwrite the corresponding Neo4j settings. |
| 4 | Shut down Neo4j after all tests. |
9.2.3. @DataNeo4jTest with Testcontainers Neo4j
The principal of configuring the connection is of course still the same with Testcontainers as shown in Listing 23. You need the following dependencies:
<dependency>
    <groupId>org.testcontainers</groupId>
    <artifactId>neo4j</artifactId>
    <version>1.14.3</version>
    <scope>test</scope>
</dependency>
And a complete test:
import static org.assertj.core.api.Assertions.assertThat;

import java.util.Optional;

import org.junit.jupiter.api.AfterAll;
import org.junit.jupiter.api.BeforeAll;
import org.junit.jupiter.api.Test;
import org.springframework.beans.factory.annotation.Autowired;
import org.springframework.boot.test.autoconfigure.data.neo4j.DataNeo4jTest;
import org.springframework.data.neo4j.core.Neo4jClient;
import org.springframework.test.context.DynamicPropertyRegistry;
import org.springframework.test.context.DynamicPropertySource;
import org.testcontainers.containers.Neo4jContainer;

@DataNeo4jTest
class MovieRepositoryTCTest {

	private static Neo4jContainer<?> neo4jContainer;

	@BeforeAll
	static void initializeNeo4j() {

		neo4jContainer = new Neo4jContainer<>()
			.withAdminPassword("somePassword");
		neo4jContainer.start();
	}

	@AfterAll
	static void stopNeo4j() {

		neo4jContainer.close();
	}

	@DynamicPropertySource
	static void neo4jProperties(DynamicPropertyRegistry registry) {

		registry.add("spring.neo4j.uri", neo4jContainer::getBoltUrl);
		registry.add("spring.neo4j.authentication.username", () -> "neo4j");
		registry.add("spring.neo4j.authentication.password", neo4jContainer::getAdminPassword);
	}

	@Test
	public void findSomethingShouldWork(@Autowired Neo4jClient client) {

		Optional<Long> result = client.query("MATCH (n) RETURN COUNT(n)")
			.fetchAs(Long.class)
			.one();
		assertThat(result).hasValue(0L);
	}
}
9.2.4. Alternatives to a @DynamicPropertySource
There are some scenarios in which the above annotation does not fit your usecase. One of those might be that you want to have 100% control over how the driver is initialized. With a test container running, you could do this with a nested, static configuration class like this:
@TestConfiguration(proxyBeanMethods = false)
static class TestNeo4jConfig {

    @Bean
    Driver driver() {
        return GraphDatabase.driver(
        		neo4jContainer.getBoltUrl(),
        		AuthTokens.basic("neo4j", neo4jContainer.getAdminPassword())
        );
    }
}
If you want to use the properties but cannot use a @DynamicPropertySource, you would use an initializer:
@ContextConfiguration(initializers = PriorToBoot226Test.Initializer.class)
@DataNeo4jTest
class PriorToBoot226Test {

    private static Neo4jContainer<?> neo4jContainer;

    @BeforeAll
    static void initializeNeo4j() {

        neo4jContainer = new Neo4jContainer<>()
            .withAdminPassword("somePassword");
        neo4jContainer.start();
    }

    @AfterAll
    static void stopNeo4j() {

        neo4jContainer.close();
    }

    static class Initializer implements ApplicationContextInitializer<ConfigurableApplicationContext> {
        public void initialize(ConfigurableApplicationContext configurableApplicationContext) {
            TestPropertyValues.of(
                "spring.neo4j.uri=" + neo4jContainer.getBoltUrl(),
                "spring.neo4j.authentication.username=neo4j",
                "spring.neo4j.authentication.password=" + neo4jContainer.getAdminPassword()
            ).applyTo(configurableApplicationContext.getEnvironment());
        }
    }
}
10. Auditing
10.1. Basics
Spring Data provides sophisticated support to transparently keep track of who created or changed an entity and when the change happened. To benefit from that functionality, you have to equip your entity classes with auditing metadata that can be defined either using annotations or by implementing an interface. Additionally, auditing has to be enabled either through Annotation configuration or XML configuration to register the required infrastructure components. Please refer to the store-specific section for configuration samples.
|
Applications that only track creation and modification dates do not need to specify an Section 10.1.3. |
10.1.1. Annotation-based Auditing Metadata
We provide @CreatedBy and @LastModifiedBy to capture the user who created or modified the entity as well as @CreatedDate and @LastModifiedDate to capture when the change happened.
class Customer {

  @CreatedBy
  private User user;

  @CreatedDate
  private Instant createdDate;

  // … further properties omitted
}
As you can see, the annotations can be applied selectively, depending on which information you want to capture. The annotations capturing when changes were made can be used on properties of type Joda-Time, DateTime, legacy Java Date and Calendar, JDK8 date and time types, and long or Long.
Auditing metadata does not necessarily need to live in the root level entity but can be added to an embedded one (depending on the actual store in use), as shown in the snipped below.
class Customer {

  private AuditMetadata auditingMetadata;

  // … further properties omitted
}

class AuditMetadata {

  @CreatedBy
  private User user;

  @CreatedDate
  private Instant createdDate;

}
10.1.2. Interface-based Auditing Metadata
In case you do not want to use annotations to define auditing metadata, you can let your domain class implement the Auditable interface. It exposes setter methods for all of the auditing properties.
There is also a convenience base class, AbstractAuditable, which you can extend to avoid the need to manually implement the interface methods. Doing so increases the coupling of your domain classes to Spring Data, which might be something you want to avoid. Usually, the annotation-based way of defining auditing metadata is preferred as it is less invasive and more flexible.
10.1.3. AuditorAware
In case you use either @CreatedBy or @LastModifiedBy, the auditing infrastructure somehow needs to become aware of the current principal. To do so, we provide an AuditorAware<T> SPI interface that you have to implement to tell the infrastructure who the current user or system interacting with the application is. The generic type T defines what type the properties annotated with @CreatedBy or @LastModifiedBy have to be.
The following example shows an implementation of the interface that uses Spring Security’s Authentication object:
AuditorAware based on Spring Securityclass SpringSecurityAuditorAware implements AuditorAware<User> {
@Override
public Optional<User> getCurrentAuditor() {
return Optional.ofNullable(SecurityContextHolder.getContext())
.map(SecurityContext::getAuthentication)
.filter(Authentication::isAuthenticated)
.map(Authentication::getPrincipal)
.map(User.class::cast);
}
}The implementation accesses the Authentication object provided by Spring Security and looks up the custom UserDetails instance that you have created in your UserDetailsService implementation. We assume here that you are exposing the domain user through the UserDetails implementation but that, based on the Authentication found, you could also look it up from anywhere.
10.1.4. ReactiveAuditorAware
When using reactive infrastructure you might want to make use of contextual information to provide @CreatedBy or @LastModifiedBy information.
We provide an ReactiveAuditorAware<T> SPI interface that you have to implement to tell the infrastructure who the current user or system interacting with the application is. The generic type T defines what type the properties annotated with @CreatedBy or @LastModifiedBy have to be.
The following example shows an implementation of the interface that uses reactive Spring Security’s Authentication object:
ReactiveAuditorAware based on Spring Securityclass SpringSecurityAuditorAware implements ReactiveAuditorAware<User> {
@Override
public Mono<User> getCurrentAuditor() {
return ReactiveSecurityContextHolder.getContext()
.map(SecurityContext::getAuthentication)
.filter(Authentication::isAuthenticated)
.map(Authentication::getPrincipal)
.map(User.class::cast);
}
}The implementation accesses the Authentication object provided by Spring Security and looks up the custom UserDetails instance that you have created in your UserDetailsService implementation. We assume here that you are exposing the domain user through the UserDetails implementation but that, based on the Authentication found, you could also look it up from anywhere.
11. Frequently Asked Questions
Here are a couple of more frequently asked question in addition to the ones in the preface.
11.1. Neo4j 4.0 supports multiple databases - How can I use them?
You can either statically configure the database name or run your own database name provider. Bear in mind that SDN will not create the databases for you. You can do this with the help of a migrations tool or of course with a simple script upfront.
11.1.1. Statically configured
Configure the database name to use in your Spring Boot configuration like this (the same property applies of course for YML or environment based configuration, with Spring Boot’s conventions applied):
spring.data.neo4j.database = yourDatabaseWith that configuration in place, all queries generated by all instances of SDN repositories (both reactive and imperative) and by the ReactiveNeo4jTemplate respectively Neo4jTemplate will be executed against the database yourDatabase.
11.1.2. Dynamically configured
Provide a bean with the type Neo4jDatabaseNameProvider or ReactiveDatabaseSelectionProvider depending on the type of your Spring application.
That bean could use for example Spring’s security context to retrieve a tenant. Here is a working example for an imperative application secured with Spring Security:
import org.neo4j.springframework.data.core.DatabaseSelection;
import org.neo4j.springframework.data.core.DatabaseSelectionProvider;
import org.springframework.context.annotation.Bean;
import org.springframework.context.annotation.Configuration;
import org.springframework.security.core.Authentication;
import org.springframework.security.core.context.SecurityContext;
import org.springframework.security.core.context.SecurityContextHolder;
import org.springframework.security.core.userdetails.User;

@Configuration
public class Neo4jConfig {

	@Bean
	DatabaseSelectionProvider databaseSelectionProvider() {

		return () -> Optional.ofNullable(SecurityContextHolder.getContext()).map(SecurityContext::getAuthentication)
				.filter(Authentication::isAuthenticated).map(Authentication::getPrincipal).map(User.class::cast)
				.map(User::getUsername).map(DatabaseSelection::byName).orElseGet(DatabaseSelection::undecided);
	}
}| Be careful that you don’t mix up entities retrieved from one database with another database. The database name is requested for each new transaction, so you might end up with less or more entities than expected when changing the database name in between calls. Or worse, you could inevitably store the wrong entities in the wrong database. |
11.2. Do I need specific configuration so that transactions work seamless with a Neo4j Causal Cluster?
No, you don’t. SDN uses Neo4j Causal Cluster bookmarks internally without any configuration on your side required. Transactions in the same thread or the same reactive stream following each other will be able to read their previously changed values as you would expect.
11.3. Do I need to use Neo4j specific annotations?
No. You are free to use the following, equivalent Spring Data annotations:
| SDN specific annotation | Spring Data common annotation | Purpose | Difference |
|---|---|---|---|
|
|
Marks the annotated attribute as the unique id. |
Specific annotation has no additional features. |
|
|
Marks the class as persistent entity. |
|
11.4. How do I use assigned ids?
Just use @Id without @GeneratedValue and fill your id attribute via a constructor parameter or a setter or wither.
See this blog post for some general remarks about finding good ids.
11.5. How do I use externally generated ids?
We provide the interface org.springframework.data.neo4j.core.schema.IdGenerator.
Implement it in any way you want and configure your implementation like this:
@Node
public class ThingWithGeneratedId {

	@Id @GeneratedValue(TestSequenceGenerator.class)
	private String theId;
}
If you pass in the name of a class to @GeneratedValue, this class must have a no-args default constructor.
You can however use a string as well:
@Node
public class ThingWithIdGeneratedByBean {

	@Id @GeneratedValue(generatorRef = "idGeneratingBean")
	private String theId;
}
With that, idGeneratingBean refers to a bean in the Spring context.
This might be useful for sequence generating.
| Setters are not required on non-final fields for the id. |
11.6. Do I have to create repositories for each domain class?
No.
Have a look at the SDN building blocks and find the Neo4jTemplate or the ReactiveNeo4jTemplate.
Those templates know your domain and provide all necessary basic CRUD methods for retrieving, writing and counting entities.
This is our canonical movie example with the imperative template:
import static org.assertj.core.api.Assertions.assertThat;

import java.util.Collections;
import java.util.Optional;

import org.junit.jupiter.api.Test;
import org.springframework.beans.factory.annotation.Autowired;
import org.springframework.data.neo4j.core.Neo4jTemplate;
import org.springframework.data.neo4j.documentation.domain.MovieEntity;
import org.springframework.data.neo4j.documentation.domain.PersonEntity;
import org.springframework.data.neo4j.documentation.domain.Roles;

@DataNeo4jTest
public class TemplateExampleTest {

	@Test
	void shouldSaveAndReadEntities(@Autowired Neo4jTemplate neo4jTemplate) {

		MovieEntity movie = new MovieEntity("The Love Bug",
				"A movie that follows the adventures of Herbie, Herbie's driver, "
						+ "Jim Douglas (Dean Jones), and Jim's love interest, " + "Carole Bennett (Michele Lee)");

		Roles roles1 = new Roles(new PersonEntity(1931, "Dean Jones"), Collections.singletonList("Didi"));
		Roles roles2 = new Roles(new PersonEntity(1942, "Michele Lee"), Collections.singletonList("Michi"));
		movie.getActorsAndRoles().add(roles1);
		movie.getActorsAndRoles().add(roles2);

		neo4jTemplate.save(movie);

		Optional<PersonEntity> person = neo4jTemplate.findById("Dean Jones", PersonEntity.class);
		assertThat(person).map(PersonEntity::getBorn).hasValue(1931);

		assertThat(neo4jTemplate.count(PersonEntity.class)).isEqualTo(2L);
	}
}
And here is the reactive version, omitting the setup for brevity:
import reactor.test.StepVerifier;

import java.util.Collections;

import org.junit.jupiter.api.Test;
import org.springframework.beans.factory.annotation.Autowired;
import org.springframework.data.neo4j.core.ReactiveNeo4jTemplate;
import org.springframework.data.neo4j.documentation.domain.MovieEntity;
import org.springframework.data.neo4j.documentation.domain.PersonEntity;
import org.springframework.data.neo4j.documentation.domain.Roles;
import org.springframework.test.context.DynamicPropertyRegistry;
import org.springframework.test.context.DynamicPropertySource;
import org.testcontainers.containers.Neo4jContainer;
import org.testcontainers.junit.jupiter.Container;
import org.testcontainers.junit.jupiter.Testcontainers;

@Testcontainers
@DataNeo4jTest
class ReactiveTemplateExampleTest {

	@Container private static Neo4jContainer<?> neo4jContainer = new Neo4jContainer<>("neo4j:4.0");

	@DynamicPropertySource
	static void neo4jProperties(DynamicPropertyRegistry registry) {
		registry.add("org.neo4j.driver.uri", neo4jContainer::getBoltUrl);
		registry.add("org.neo4j.driver.authentication.username", () -> "neo4j");
		registry.add("org.neo4j.driver.authentication.password", neo4jContainer::getAdminPassword);
	}

	@Test
	void shouldSaveAndReadEntities(@Autowired ReactiveNeo4jTemplate neo4jTemplate) {

		MovieEntity movie = new MovieEntity("The Love Bug",
				"A movie that follows the adventures of Herbie, Herbie's driver, "
						+ "Jim Douglas (Dean Jones), and Jim's love interest, " + "Carole Bennett (Michele Lee)");

		Roles role1 = new Roles(new PersonEntity(1931, "Dean Jones"), Collections.singletonList("Didi"));
		Roles role2 = new Roles(new PersonEntity(1942, "Michele Lee"), Collections.singletonList("Michi"));
		movie.getActorsAndRoles().add(role1);
		movie.getActorsAndRoles().add(role2);

		StepVerifier.create(neo4jTemplate.save(movie)).expectNextCount(1L).verifyComplete();

		StepVerifier.create(neo4jTemplate.findById("Dean Jones", PersonEntity.class).map(PersonEntity::getBorn))
				.expectNext(1931).verifyComplete();

		StepVerifier.create(neo4jTemplate.count(PersonEntity.class)).expectNext(2L).verifyComplete();
	}
}
Please note that both examples use @DataNeo4jTest from Spring Boot.
11.7. How do I use custom queries with repository methods returning Page<T> or Slice<T>?
While you don’t have to provide anything else apart a Pageable as a parameter on derived finder methods
that return a Page<T> or a Slice<T>, you must prepare your custom query to handle the pageable.
Listing 30 gives you an overview about what’s needed.
import org.springframework.data.domain.Pageable;
import org.springframework.data.neo4j.repository.Neo4jRepository;
import org.springframework.data.neo4j.repository.query.Query;

public interface MyPersonRepository extends Neo4jRepository<Person, Long> {

    Page<Person> findByName(String name, Pageable pageable); (1)

    @Query(""
        + "MATCH (n:Person) WHERE n.name = $name RETURN n "
        + "ORDER BY n.name ASC SKIP $skip LIMIT $limit"
    )
    Slice<Person> findSliceByName(String name, Pageable pageable); (2)

    @Query(
    	value = ""
            + "MATCH (n:Person) WHERE n.name = $name RETURN n "
            + "ORDER BY n.name ASC SKIP $skip LIMIT $limit",
        countQuery = ""
            + "MATCH (n:Person) WHERE n.name = $name RETURN count(n)"
    )
    Page<Person> findPageByName(String name, Pageable pageable); (3)
}| 1 | A derived finder method that creates a query for you.
It handles the Pageable for you.
You should use a sorted pageable. |
| 2 | This method uses @Query to define a custom query. It returns a Slice<Person>.
A slice does not know about the total number of pages, so the custom query
doesn’t need a dedicated count query. SDN will notify you that it estimates the next slice.
The Cypher template must spot both $skip and $limit Cypher parameter.
If you omit them, SDN will issue a warning. The will probably not match your expectations.
Also, the Pageable should be unsorted and you should provide a stable order.
We won’t use the sorting information from the pageable. |
| 3 | This method returns a page. A page knows about the exact number of total pages. Therefore you must specify an additional count query. All other restrictions from the second method apply. |
11.8. Is @Query the only way to use custom queries?
No, @Query is not the only way to run custom queries.
The annotation is comfortable in situations in which your custom query fills your domain completely.
Please remember that SDN 6 assumes your mapped domain model to be the truth.
That means if you use a custom query via @Query that only fills a model partially, you are in danger of using the same
object to write the data back which will eventually erase or overwrite data you didn’t consider in your query.
So, please use repositories and declarative methods with @Query in all cases where the result is shaped like your domain
model or you are sure you don’t use a partially mapped model for write commands.
What are the alternatives? First, please read up on two things: custom repository fragments the levels of abstractions we offer in SDN 6.
Why speaking about custom repository fragments?
-
You might want to use the Cypher-DSL for building type-safe queries
-
You might have more complex situation in which a dynamic query is required, but the query still belongs conceptually in a repository and not in the service layer
-
Your custom query returns a graph shaped result that fits not quite to your domain model and therefore the custom query should be accomponied by a custom mapping as well
-
You have the need for interacting with the driver, i.e. for bulk loads that should not go through object mapping.
Assume the following repository declaration that basically aggregates one base repository plus 3 fragments:
import org.springframework.data.neo4j.repository.Neo4jRepository;

public interface MovieRepository extends Neo4jRepository<MovieEntity, String>,
        DomainResults,
        NonDomainResults,
        LowlevelInteractions {
}
The repository contains Movies as shown in the getting started section.
The additional interface from which the repository extends (DomainResults, NonDomainResults and LowlevelInteractions)
are the fragments that addresses all the concerncs above.
11.8.1. Using complex, dynamic custom queries and but still returning domain types
The fragment DomainResults declares one additional method findMoviesAlongShortestPath:
interface DomainResults {

    @Transactional(readOnly = true)
    List<MovieEntity> findMoviesAlongShortestPath(PersonEntity from, PersonEntity to);
}
This method is annotated with @Transactional(readOnly = true) to indicate that readers can answer it.
It cannot be derived by SDN but would need a custom query.
This custom query is provided by the one implementation of that interface.
The implementation has the same name with the suffix Impl:
import static org.neo4j.cypherdsl.core.Cypher.anyNode;
import static org.neo4j.cypherdsl.core.Cypher.listWith;
import static org.neo4j.cypherdsl.core.Cypher.name;
import static org.neo4j.cypherdsl.core.Cypher.node;
import static org.neo4j.cypherdsl.core.Cypher.parameter;
import static org.neo4j.cypherdsl.core.Cypher.shortestPath;

import org.neo4j.cypherdsl.core.Cypher;
import org.neo4j.cypherdsl.core.Functions;
import org.neo4j.cypherdsl.core.NamedPath;
import org.neo4j.cypherdsl.core.Node;
import org.neo4j.cypherdsl.core.Statement;
import org.neo4j.cypherdsl.core.SymbolicName;

class DomainResultsImpl implements DomainResults {

    private final Neo4jTemplate neo4jTemplate; (1)

    DomainResultsImpl(Neo4jTemplate neo4jTemplate) {
        this.neo4jTemplate = neo4jTemplate;
    }

    @Override
    public List<MovieEntity> findMoviesAlongShortestPath(PersonEntity from, PersonEntity to) {

        Node p1 = node("Person").withProperties("name", parameter("person1"));
        Node p2 = node("Person").withProperties("name", parameter("person2"));
        NamedPath shortestPath = shortestPath("p").definedBy(
                p1.relationshipBetween(p2).unbounded()
        );
        SymbolicName p = shortestPath.getRequiredSymbolicName();
        Statement statement = Cypher.match(shortestPath)
                .with(p, listWith(name("n"))
                        .in(Functions.nodes(shortestPath))
                        .where(anyNode().named("n").hasLabels("Movie")).returning().as("mn")
                )
                .unwind(name("mn")).as("m")
                .with(p, name("m"))
                .match(node("Person").named("d")
                        .relationshipTo(anyNode("m"), "DIRECTED").named("r")
                )
                .returning(p, Functions.collect(name("r")), Functions.collect(name("d")))
                .build();

        Map<String, Object> parameters = new HashMap<>();
        parameters.put("person1", from.getName());
        parameters.put("person2", to.getName());
        return neo4jTemplate.findAll(statement, parameters, MovieEntity.class); (2)
    }
}| 1 | The Neo4jTemplate is injected by the runtime through the constructor of DomainResultsImpl. No need for @Autowired. |
| 2 | The Cypher-DSL is used to build a complex statement (pretty much the same as shown in path mapping.) The statement can be passed directly to the template. |
The template has overloads for String-based queries as well, so you could write down the query as String as well. The important takeaway here is:
-
The template "knows" your domain objects and maps them accordingly
-
@Queryis not the only option to define custom queries -
The can be generated in various ways
-
The
@Transactionalannotation is respected
11.8.2. Using custom queries and custom mappings
Often times a custom query indicates custom results.
Should all of those results be mapepd as @Node? Of course not! Many times those objects represents read commands
and are not meant to be used as write commands.
It is also not unlikely that SDN 6 cannot or want not map everything that is possible with Cypher.
It does however offer several hooks to run your own mapping: On the Neo4jClient.
The benefit of using the SDN 6 Neo4jClient over the driver:
-
The
Neo4jClientis integrated with Springs transaction management -
It has a fluent API for binding parameters
-
It has a fluent API exposing both the records and the Neo4j typesystem so that you can access everything in your result to execute the mapping
Declaring the fragment is exactly the same as before:
interface NonDomainResults {

    class Result { (1)
        public final String name;

        public final String typeOfRelation;

        Result(String name, String typeOfRelation) {
            this.name = name;
            this.typeOfRelation = typeOfRelation;
        }
    }

    @Transactional(readOnly = true)
    Collection<Result> findRelationsToMovie(MovieEntity movie); (2)
}| 1 | This is a made up non-domain result. A real world query result would probably look more complex. |
| 2 | The method this fragment adds. Again, the method is annotated with Spring’s @Transactional |
Without an implementation for that fragment, startup would fail, so here it is:
class NonDomainResultsImpl implements NonDomainResults {

    private final Neo4jClient neo4jClient; (1)

    NonDomainResultsImpl(Neo4jClient neo4jClient) {
        this.neo4jClient = neo4jClient;
    }

    @Override
    public Collection<Result> findRelationsToMovie(MovieEntity movie) {
        return this.neo4jClient
                .query(""
                       + "MATCH (people:Person)-[relatedTo]-(:Movie {title: $title}) "
                       + "RETURN people.name AS name, "
                       + "       Type(relatedTo) as typeOfRelation"
                ) (2)
                .bind(movie.getTitle()).to("title") (3)
                .fetchAs(Result.class) (4)
                .mappedBy((typeSystem, record) -> new Result(record.get("name").asString(),
                        record.get("typeOfRelation").asString())) (5)
                .all(); (6)
    }
}| 1 | Here we use the Neo4jClient, as provided by the infrastructure. |
| 2 | The client takes only in Strings, but the Cypher-DSL can still be used when rendering into a String |
| 3 | Bind one single value to a named parameter. There’s also an overload to bind a whole map of parameters |
| 4 | This is the type of the result you want |
| 5 | And finally, the mappedBy method, exposing one Record for each entry in the result plus the drivers typesystem if needed.
This is the API in which you hook in for your custom mappings |
The whole query runs in the context of a Spring transaction, in this case, a read-only one.
Low level interactions
Sometimes you might want to do bulk loadings from a repository or delete whole subgraphs or interact in very specific ways with the Neo4j Java-Driver. This is possible as well. The following example shows how:
interface LowlevelInteractions {

    int deleteGraph();
}

class LowlevelInteractionsImpl implements LowlevelInteractions {

    private final Driver driver; (1)

    LowlevelInteractionsImpl(Driver driver) {
        this.driver = driver;
    }

    @Override
    public int deleteGraph() {

        try (Session session = driver.session()) {
            SummaryCounters counters = session
                    .writeTransaction(tx -> tx.run("MATCH (n) DETACH DELETE n").consume()) (2)
                    .counters();
            return counters.nodesDeleted() + counters.relationshipsDeleted();
        }
    }
}| 1 | Work with the driver directly. As with all the examples: There is no need for @Autowired magic. All the fragments
are actually testable on their own. |
| 2 | The usecase is made up. Here we use a driver managed transaction deleting the whole graph and return the number of deleted nodes and relationships |
This interaction does of course not run in a Spring transaction, as the driver does not know about Spring.
Putting it all together, this test succeeds:
@Test
void customRepositoryFragmentsShouldWork(
        @Autowired PersonRepository people,
        @Autowired MovieRepository movies
) {

    PersonEntity meg = people.findById("Meg Ryan").get();
    PersonEntity kevin = people.findById("Kevin Bacon").get();

    List<MovieEntity> moviesBetweenMegAndKevin = movies.
            findMoviesAlongShortestPath(meg, kevin);
    assertThat(moviesBetweenMegAndKevin).isNotEmpty();

    Collection<NonDomainResults.Result> relatedPeople = movies
            .findRelationsToMovie(moviesBetweenMegAndKevin.get(0));
    assertThat(relatedPeople).isNotEmpty();

    assertThat(movies.deleteGraph()).isGreaterThan(0);
    assertThat(movies.findAll()).isEmpty();
    assertThat(people.findAll()).isEmpty();
}
As a final word: All three interfaces and implementations are picked up by Spring Data Neo4j automatically. There is no need for further configuration. Also, the same overall repository could have been created with only one additional fragment (the interface defining all three methods) and one implementation. The implementation would than have had all three abstractions injected (template, client and driver).
All of this applies of course to reactive repositories as well.
They would work with the ReactiveNeo4jTemplate and ReactiveNeo4jClient and the reactive session provided by the driver.
If you have recuring methods for all repositories, you could swap out the default repository implementation.
11.9. How do I use custom Spring Data Neo4j base repositories?
Basically the same ways as the shared Spring Data Commons documentation shows for Spring Data JPA in Section 5.6.2. Only that in our case you would extend from
public class MyRepositoryImpl<T, ID> extends SimpleNeo4jRepository<T, ID> {

    MyRepositoryImpl(
            Neo4jOperations neo4jOperations,
            Neo4jEntityInformation<T, ID> entityInformation
    ) {
        super(neo4jOperations, entityInformation); (1)
    }

    @Override
    public List<T> findAll() {
        throw new UnsupportedOperationException("This implementation does not support `findAll`.");
    }
}| 1 | This signature is required by the base class. Take the Neo4jOperations (the actual specification of the Neo4jTemplate)
and the entity information and store them on an attribute if needed. |
In this example we forbide the use of the findAll method.
You could add methods taking in a fetch depth and run custom queries based on that depth.
One way to do this is shown in Listing 32.
To use this base repository for all declared repositories enable Neo4j repositories with: @EnableNeo4jRepositories(repositoryBaseClass = MyRepositoryImpl.class).
11.10. How do I audit entities?
All Spring Data annotations are supported. Those are
-
org.springframework.data.annotation.CreatedBy -
org.springframework.data.annotation.CreatedDate -
org.springframework.data.annotation.LastModifiedBy -
org.springframework.data.annotation.LastModifiedDate
11.11. How do I use "Find by example"?
"Find by example" is a new feature in SDN.
You instantiate an entity or use an existing one.
With this instance you create an org.springframework.data.domain.Example.
If your repository extends org.springframework.data.neo4j.repository.Neo4jRepository or org.springframework.data.neo4j.repository.ReactiveNeo4jRepository, you can immediately use the available findBy methods taking in an example, like shown in Listing 39
Example<MovieEntity> movieExample = Example.of(new MovieEntity("The Matrix", null));
Flux<MovieEntity> movies = this.movieRepository.findAll(movieExample);

movieExample = Example.of(
	new MovieEntity("Matrix", null),
	ExampleMatcher
	    .matchingAny()
        .withMatcher(
        	"title",
        	ExampleMatcher.GenericPropertyMatcher.of(ExampleMatcher.StringMatcher.CONTAINING)
        )
);
movies = this.movieRepository.findAll(movieExample);
11.12. Can I map named paths?
A series of connected nodes and relationships is called a "path" in Neo4j. Cypher allows paths to be named using an identifer, as exemplified by:
p = (a)-[*3..5]->(b)or as in the infamous Movie graph, that includes the following path (in that case, one of the shortest path between two actors):
MATCH p=shortestPath((bacon:Person {name:"Kevin Bacon"})-[*]-(meg:Person {name:"Meg Ryan"}))
RETURN p
Which looks like this:
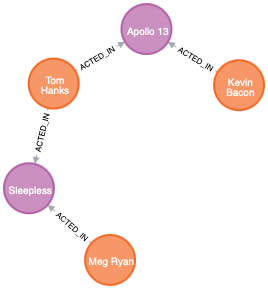
We find 3 nodes labeled Person and 2 nodes labeled Movie. Both can be mapped with a custom queury.
Assume there’s a node entity for both Person and Movie as well as Actor taking care of the relationship:
@Node
public final class Person {

	@Id @GeneratedValue
	private final Long id;

	private final String name;

	private Integer born;

	@Relationship("REVIEWED")
	private List<Movie> reviewed = new ArrayList<>();
}

@RelationshipProperties
public final class Actor {

	@Id @GeneratedValue
	private final Long id;

	@TargetNode
	private final Person person;

	private final List<String> roles;
}

@Node
public final class Movie {

	@Id
	private final String title;

	@Property("tagline")
	private final String description;

	@Relationship(value = "ACTED_IN", direction = Direction.INCOMING)
	private final List<Actor> actors;
}
When using a query as shown in Listing 40 for a domain class of type Person like this
interface PeopleRepository extends Neo4jRepository<Person, Long> {
    @Query(""
        + "MATCH p=shortestPath((bacon:Person {name: $person1})-[*]-(meg:Person {name: $person2}))\n"
        + "RETURN p"
    )
    List<Person> findAllOnShortestPathBetween(@Param("person1") String person1, @Param("person2") String person2);
}
it will retrieve all people from the path and map them.
If there are relationship types on the path like REVIEWED that are also present on the domain, these
will be filled accordingly from the path.
| Take special care when you use nodes hydrated from a path based query to save data. If not all relationships are hydrated, data will be lost. |
The other way round works as well. The same query can be used with the Movie entity.
It then will only populate movies.
The following listing shows how todo this as well as how the query can be enriched with additional data
not found on the path. That data is used to correctly populate the missing relationships (in that case, all the actors)
interface MovieRepository extends Neo4jRepository<Movie, String> {

    @Query(""
        + "MATCH p=shortestPath(\n"
        + "(bacon:Person {name: $person1})-[*]-(meg:Person {name: $person2}))\n"
        + "WITH p, [n IN nodes(p) WHERE n:Movie] AS x\n"
        + "UNWIND x AS m\n"
        + "MATCH (m) <-[r:DIRECTED]-(d:Person)\n"
        + "RETURN p, collect(r), collect(d)"
    )
    List<Movie> findAllOnShortestPathBetween(@Param("person1") String person1, @Param("person2") String person2);
}
The query returns the path plus all relationships and related nodes collected so that the movie entities are fully hydrated.
The path mapping works for single paths as well for multiple records of paths (which are returned by the allShortestPath function.)
11.13. Do I need Spring Boot to use Spring Data Neo4j?
No, you don’t. While the automatic configuration of many Spring aspects through Spring Boot takes away a lot of manual cruft and is the recommended approach for setting up new Spring projects, you don’t need to have to use this.
The following dependency is required for the solutions described above:
<dependency>
	<groupId>org.springframework.data</groupId>
	<artifactId>spring-data-neo4j</artifactId>
	<version>6.0.2</version>
</dependency>
The coordinates for a Gradle setup are the same.
To select a different database - either statically or dynamically - you can add a Bean of type DatabaseSelectionProvider as explained in Section 11.1.
For a reactive scenario, we provide ReactiveDatabaseSelectionProvider.
11.13.1. Using Spring Data Neo4j inside a Spring context without Spring Boot
We provide two abstract configuration classes to support you in bringing in the necessary beans: AbstractNeo4jConfig for imperative database access and AbstractReactiveNeo4jConfig for the reactive version.
They are meant to be used with @EnableNeo4jRepositories and @EnableReactiveNeo4jRepositories respectively.
See Listing 42 and Listing 43 for an example usage.
Both classes require you to override driver() in which you are supposed to create the driver.
To get the imperative version of the Neo4j client, the template and support for imperative repositories, use something similar as shown here:
import org.neo4j.driver.Driver;

import org.springframework.context.annotation.Bean;
import org.springframework.context.annotation.Configuration;

import org.springframework.transaction.annotation.EnableTransactionManagement;

import org.springframework.data.neo4j.config.AbstractNeo4jConfig;
import org.springframework.data.neo4j.core.DatabaseSelectionProvider;
import org.springframework.data.neo4j.repository.config.EnableNeo4jRepositories;

@Configuration
@EnableNeo4jRepositories
@EnableTransactionManagement
class MyConfiguration extends AbstractNeo4jConfig {

    @Override @Bean
    public Driver driver() { (1)
        return GraphDatabase.driver("bolt://localhost:7687", AuthTokens.basic("neo4j", "secret"));
    }

    @Override
    protected Collection<String> getMappingBasePackages() {
        return Collections.singletonList(Person.class.getPackage().getName());
    }

    @Override @Bean (2)
    protected DatabaseSelectionProvider databaseSelectionProvider() {

        return DatabaseSelectionProvider.createStaticDatabaseSelectionProvider("yourDatabase");
    }
}| 1 | The driver bean is required. |
| 2 | This statically selects a database named yourDatabase and is optional. |
The following listing provides the reactive Neo4j client and template, enables reactive transaction management and discovers Neo4j related repositories:
import org.neo4j.driver.Driver;

import org.springframework.context.annotation.Bean;
import org.springframework.context.annotation.Configuration;
import org.springframework.data.neo4j.config.AbstractReactiveNeo4jConfig;
import org.springframework.data.neo4j.repository.config.EnableReactiveNeo4jRepositories;
import org.springframework.transaction.annotation.EnableTransactionManagement;

@Configuration
@EnableReactiveNeo4jRepositories
@EnableTransactionManagement
class MyConfiguration extends AbstractReactiveNeo4jConfig {

    @Bean
    @Override
    public Driver driver() {
        return GraphDatabase.driver("bolt://localhost:7687", AuthTokens.basic("neo4j", "secret"));
    }

    @Override
    protected Collection<String> getMappingBasePackages() {
        return Collections.singletonList(Person.class.getPackage().getName());
    }
}
11.13.2. Using Spring Data Neo4j in a CDI 2.0 environment
For your convenience we provide a CDI extension with Neo4jCdiExtension.
When run in a compatible CDI 2.0 container, it will be automatically be registered and loaded through Java’s service loader SPI.
The only thing you have to bring into your application is an annotated type that produces the Neo4j Java Driver:
import javax.enterprise.context.ApplicationScoped;
import javax.enterprise.inject.Disposes;
import javax.enterprise.inject.Produces;

import org.neo4j.driver.AuthTokens;
import org.neo4j.driver.Driver;
import org.neo4j.driver.GraphDatabase;

public class Neo4jConfig {

    @Produces @ApplicationScoped
    public Driver driver() { (1)
        return GraphDatabase
            .driver("bolt://localhost:7687", AuthTokens.basic("neo4j", "secret"));
    }

    public void close(@Disposes Driver driver) {
        driver.close();
    }

    @Produces @Singleton
    public DatabaseSelectionProvider getDatabaseSelectionProvider() { (2)
        return DatabaseSelectionProvider.createStaticDatabaseSelectionProvider("yourDatabase");
    }
}| 1 | Same as with plain Spring in Listing 42, but annotated with the corresponding CDI infrastructure. |
| 2 | This is optional. However, if you run a custom database selection provider, you must not qualify this bean. |
If you are running in a SE Container - like the one Weld provides for example, you can enable the extension like that:
import javax.enterprise.inject.se.SeContainer;
import javax.enterprise.inject.se.SeContainerInitializer;

import org.springframework.data.neo4j.config.Neo4jCdiExtension;

public class SomeClass {
    void someMethod() {
        try (SeContainer container = SeContainerInitializer.newInstance()
                .disableDiscovery()
                .addExtensions(Neo4jCdiExtension.class)
                .addBeanClasses(YourDriverFactory.class)
                .addPackages(Package.getPackage("your.domain.package"))
            .initialize()
        ) {
            SomeRepository someRepository = container.select(SomeRepository.class).get();
        }
    }
}
12. Spring Data Neo4j Appendix
Conversions
We support a broad range of conversions out of the box. Find the list of supported cypher types in the official drivers manual: Working with Cypher values.
Primitive types of wrapper types are equally supported.
| Domain type | Cypher type | Maps directly to native type |
|---|---|---|
|
Boolean |
✔ |
|
List of Boolean |
✔ |
|
Integer |
✔ |
|
List of Integer |
✔ |
|
Float |
✔ |
|
String |
✔ |
|
List of String |
✔ |
|
ByteArray |
✔ |
|
ByteArray with length 1 |
|
|
String with length 1 |
|
|
List of String with length 1 |
|
|
String formatted as ISO 8601 Date ( |
|
|
List of Float |
✔ |
|
String |
|
|
List of String |
|
|
Integer |
|
|
List of Integer |
|
|
String formatted as BCP 47 language tag |
|
|
Integer |
|
|
List of Integer |
|
|
String |
|
|
String |
|
|
Date |
✔ |
|
Time |
✔ |
|
LocalTime |
✔ |
|
DateTime |
✔ |
|
LocalDateTime |
✔ |
|
Duration |
|
|
Duration |
|
|
Duration |
✔ |
|
Point |
✔ |
|
Point with CRS 4326 |
|
|
Point with CRS 4979 |
|
|
Point with CRS 7203 |
|
|
Point with CRS 9157 |
|
|
Point with CRS 4326 and x/y corresponding to lat/long |
|
Instances of |
String (The name value of the enum) |
|
Instances of |
List of String (The name value of the enum) |
|
java.net.URL |
String |
|
java.net.URI |
String |
Custom conversions
For attributes of a given type
If you prefer to work with your own types in the entities or as parameters for @Query annotated methods, you can define and provide a custom converter implementation.
First you have to implement a GenericConverter and register the types your converter should handle.
For entity property type converters you need to take care of converting your type to and from a Neo4j Java Driver Value.
If your converter is supposed to work only with custom query methods in the repositories, it is sufficient to provide the one-way conversion to the Value type.
public class MyCustomTypeConverter implements GenericConverter {

	@Override
	public Set<ConvertiblePair> getConvertibleTypes() {
		Set<ConvertiblePair> convertiblePairs = new HashSet<>();
		convertiblePairs.add(new ConvertiblePair(MyCustomType.class, Value.class));
		convertiblePairs.add(new ConvertiblePair(Value.class, MyCustomType.class));
		return convertiblePairs;
	}

	@Override
	public Object convert(Object source, TypeDescriptor sourceType, TypeDescriptor targetType) {
		if (MyCustomType.class.isAssignableFrom(sourceType.getType())) {
			// convert to Neo4j Driver Value
			return convertToNeo4jValue(source);
		} else {
			// convert to MyCustomType
			return convertToMyCustomType(source);
		}
	}

}
To make SDN aware of your converter, it has to be registered in the Neo4jConversions.
To do this, you have to create a @Bean with the type org.springframework.data.neo4j.core.convert.Neo4jConversions.
Otherwise, the Neo4jConversions will get created in the background with the internal default converters only.
@Bean
public Neo4jConversions neo4jConversions() {
	Set<GenericConverter> additionalConverters = Collections.singleton(new MyCustomTypeConverter());
	return new Neo4jConversions(additionalConverters);
}
If you need multiple converters in your application, you can add as many as you need in the Neo4jConversions constructor.
For specific attributes only
If you need conversions only for some specific attributes, we provide @ConvertWith.
This is an annotation that can be put on attributes carrying a Neo4jPersistentPropertyConverter on its converter attribute
and an optional Neo4jPersistentPropertyConverterFactory to construct the former.
With an implementation of Neo4jPersistentPropertyConverter all specific conversions for a given type can be addressed.
We provide @DateLong and @DateString as meta-annotated annotations for backward compatibility with Neo4j-OGM schemes not using native types.
Composite properties
With @CompositeProperty, attributes of type Map<String, Object> or Map<? extends Enum, Object> can be stored as composite properties.
All entries inside the map will be added as properties to the node or relationship containing the property.
Either with a configured prefix or prefixed with the name of the property.
While we only offer that feature for maps out of the box, you can Neo4jPersistentPropertyToMapConverter and configure it
as the converter to use on @CompositeProperty. A Neo4jPersistentPropertyToMapConverter needs to know how a given type can
be decomposed to and composed back from a map.
Neo4jClient
Spring Data Neo4j comes with a Neo4j Client, providing a thin layer on top of Neo4j’s Java driver.
While the plain Java driver is a very versatile tool providing an asynchronous API in addition to the imperative and reactive versions, it doesn’t integrate with Spring application level transactions.
SDN uses the driver through the concept of a idiomatic client as directly as possible.
The client has the following main goals
-
Integrate into Springs transaction management, for both imperative and reactive scenarios
-
Participate in JTA-Transactions if necessary
-
Provide a consistent API for both imperative and reactive scenarios
-
Don’t add any mapping overhead
SDN relies on all those features and uses them to fulfill its entity mapping features.
Have a look at the SDN building blocks for where both the imperative and reactive Neo4 clients are positioned in our stack.
The Neo4j Client comes in two flavors:
-
org.springframework.data.neo4j.core.Neo4jClient -
org.springframework.data.neo4j.core.ReactiveNeo4jClient
While both versions provide an API using the same vocabulary and syntax, they are not API compatible. Both versions feature the same, fluent API to specify queries, bind parameters and extract results.
Imperative or reactive?
Interactions with a Neo4j Client usually ends with a call to
-
fetch().one() -
fetch().first() -
fetch().all() -
run()
The imperative version will interact at this moment with the database and get the requested results or summary, wrapped in a Optional<> or a Collection.
The reactive version will in contrast return a publisher of the requested type. Interaction with the database and retrieval of the results will not happen until the publisher is subscribed to. The publisher can only be subscribed once.
Getting an instance of the client
As with most things in SDN, both clients depend on a configured driver instance.
import org.neo4j.driver.AuthTokens;
import org.neo4j.driver.Driver;
import org.neo4j.driver.GraphDatabase;

import org.springframework.data.neo4j.core.Neo4jClient;

public class Demo {

    public static void main(String...args) {

        Driver driver = GraphDatabase
            .driver("neo4j://localhost:7687", AuthTokens.basic("neo4j", "secret"));

        Neo4jClient client = Neo4jClient.create(driver);
    }
}
The driver can only open a reactive session against a 4.0 database and will fail with an exception on any lower version.
import org.neo4j.driver.AuthTokens;
import org.neo4j.driver.Driver;
import org.neo4j.driver.GraphDatabase;

import org.springframework.data.neo4j.core.ReactiveNeo4jClient;

public class Demo {

    public static void main(String...args) {

        Driver driver = GraphDatabase
            .driver("neo4j://localhost:7687", AuthTokens.basic("neo4j", "secret"));

        ReactiveNeo4jClient client = ReactiveNeo4jClient.create(driver);
    }
}
Make sure you use the same driver instance for the client as you used for providing a Neo4jTransactionManager or ReactiveNeo4jTransactionManager
in case you have enabled transactions.
The client won’t be able to synchronize transactions if you use another instance of a driver.
|
Our Spring Boot starter provide a ready to use bean of the Neo4j Client that fits the environment (imperative or reactive) and you usually don’t have to configure your own instance.
Usage
Selecting the target database
The Neo4j client is well prepared to be used with the multidatabase features of Neo4j 4.0. The client uses the default database unless you specify otherwise. The fluent API of the client allows to specify the target database exactly once, after the declaration of the query to execute. Listing 50 demonstrates it with the reactive client:
Flux<Map<String, Object>> allActors = client
	.query("MATCH (p:Person) RETURN p")
	.in("neo4j") (1)
	.fetch()
.all();| 1 | Select the target database in which the query is to be executed. |
Specifying queries
The interaction with the clients starts with a query.
A query can be defined by a plain String or a Supplier<String>.
The supplier will be evaluated as late as possible and can be provided by any query builder.
Mono<Map<String, Object>> firstActor = client
	.query(() -> "MATCH (p:Person) RETURN p")
	.fetch()
	.first();
Retrieving results
As the previous listings shows, the interaction with the client always ends with a call to fetch and how many results shall be received.
Both reactive and imperative client offer
one()-
Expect exactly one result from the query
first()-
Expect results and return the first record
all()-
Retrieve all records returned
The imperative client returns Optional<T> and Collection<T> respectively, while the reactive client returns Mono<T> and Flux<T>, the later one being executed only if subscribed to.
If you don’t expect any results from your query, than use run() after specificity the query.
Mono<ResultSummary> summary = reactiveClient
    .query("MATCH (m:Movie) where m.title = 'Aeon Flux' DETACH DELETE m")
    .run();

summary
    .map(ResultSummary::counters)
    .subscribe(counters ->
        System.out.println(counters.nodesDeleted() + " nodes have been deleted")
); (1)| 1 | The actual query is triggered here by subscribing to the publisher. |
Please take a moment to compare both listings and understand the difference when the actual query is triggered.
ResultSummary resultSummary = imperativeClient
	.query("MATCH (m:Movie) where m.title = 'Aeon Flux' DETACH DELETE m")
	.run(); (1)

SummaryCounters counters = resultSummary.counters();
System.out.println(counters.nodesDeleted() + " nodes have been deleted")| 1 | Here the query is immediately triggered. |
Mapping parameters
Queries can contain named parameters ($someName) and the Neo4j client makes it easy to bind values to them.
| The client doesn’t check whether all parameters are bound or whether there are too many values. That is left to the driver. However, the client prevents you from using a parameter name twice. |
You can either bind simple types that the Java driver understands without conversion or complex classes. For complex classes you need to provide a binder function as shown in this listing. Please have a look at the drivers manual, to see which simple types are supported.
Map<String, Object> parameters = new HashMap<>();
parameters.put("name", "Li.*");

Flux<Map<String, Object>> directorAndMovies = client
	.query(
		"MATCH (p:Person) - [:DIRECTED] -> (m:Movie {title: $title}), (p) - [:WROTE] -> (om:Movie) " +
			"WHERE p.name =~ $name " +
			"  AND p.born < $someDate.year " +
			"RETURN p, om"
	)
	.bind("The Matrix").to("title") (1)
	.bind(LocalDate.of(1979, 9, 21)).to("someDate")
	.bindAll(parameters) (2)
	.fetch()
.all();| 1 | There’s a fluent API for binding simple types. |
| 2 | Alternatively parameters can be bound via a map of named parameters. |
SDN does a lot of complex mapping and it uses the same API that you can use from the client.
You can provide a Function<T, Map<String, Object>> for any given domain object like an owner of bicycles in Listing 55
to the Neo4j Client to map those domain objects to parameters the driver can understand.
public class Director {

    private final String name;

    private final List<Movie> movies;

    Director(String name, List<Movie> movies) {
        this.name = name;
        this.movies = new ArrayList<>(movies);
    }

    public String getName() {
        return name;
    }

    public List<Movie> getMovies() {
        return Collections.unmodifiableList(movies);
    }
}

public class Movie {

    private final String title;

    public Movie(String title) {
        this.title = title;
    }

    public String getTitle() {
        return title;
    }
}
The mapping function has to fill in all named parameters that might occur in the query like Listing 56 shows:
Director joseph = new Director("Joseph Kosinski",
        Arrays.asList(new Movie("Tron Legacy"), new Movie("Top Gun: Maverick")));

Mono<ResultSummary> summary = client
    .query(""
        + "MERGE (p:Person {name: $name}) "
        + "WITH p UNWIND $movies as movie "
        + "MERGE (m:Movie {title: movie}) "
        + "MERGE (p) - [o:DIRECTED] -> (m) "
    )
    .bind(joseph).with(director -> { (1)
        Map<String, Object> mappedValues = new HashMap<>();
        List<String> movies = director.getMovies().stream()
            .map(Movie::getTitle).collect(Collectors.toList());
        mappedValues.put("name", director.getName());
        mappedValues.put("movies", movies);
        return mappedValues;
    })
.run();| 1 | The with method allows for specifying the binder function. |
Working with result objects
Both clients return collections or publishers of maps (Map<String, Object>).
Those maps correspond exactly with the records that a query might have produced.
In addition, you can plug in your own BiFunction<TypeSystem, Record, T> through fetchAs to reproduce your domain object.
Mono<Director> lily = client
    .query(""
        + " MATCH (p:Person {name: $name}) - [:DIRECTED] -> (m:Movie)"
        + "RETURN p, collect(m) as movies")
    .bind("Lilly Wachowski").to("name")
    .fetchAs(Director.class).mappedBy((TypeSystem t, Record record) -> {
        List<Movie> movies = record.get("movies")
            .asList(v -> new Movie((v.get("title").asString())));
        return new Director(record.get("name").asString(), movies);
    })
    .one();
TypeSystem gives access to the types the underlying Java driver used to fill the record.
Interacting directly with the driver while using managed transactions
In case you don’t want or don’t like the opinionated "client" approach of the Neo4jClient or the ReactiveNeo4jClient, you can have the client delegate all interactions with the database to your code.
The interaction after the delegation is slightly different with the imperative and reactive versions of the client.
The imperative version takes in a Function<StatementRunner, Optional<T>> as a callback.
Returning an empty optional is ok.
StatementRunnerOptional<Long> result = client
.delegateTo((StatementRunner runner) -> {
// Do as many interactions as you want
long numberOfNodes = runner.run("MATCH (n) RETURN count(n) as cnt")
.single().get("cnt").asLong();
return Optional.of(numberOfNodes);
})
// .in("aDatabase") (1)
.run();| 1 | The database selection as described in Selecting the target database is optional. |
The reactive version receives a RxStatementRunner.
RxStatementRunnerMono<Integer> result = client
.delegateTo((RxStatementRunner runner) ->
Mono.from(runner.run("MATCH (n:Unused) DELETE n").summary())
.map(ResultSummary::counters)
.map(SummaryCounters::nodesDeleted))
// .in("aDatabase") (1)
.run();| 1 | Optional selection of the target database. |
Note that in both Listing 58 and Listing 59 the types of the runner have only been stated to provide more clarity to reader of this manual.
Query creation
This chapter is about the technical creation of queries when using SDN’s abstraction layers. There will be some simplifications because we do not discuss every possible case but stick with the general idea behind it.
Save
Beside the find/load operations the save operation is one of the most used when working with data.
A save operation call in general issues multiple statements against the database to ensure that the resulting graph model matches the given Java model.
-
A union statement will get created that either creates a node, if the node’s identifier cannot be found, or updates the node’s property if the node itself exists.
(
OPTIONAL MATCH (hlp:Person) WHERE id(hlp) = $__id__ WITH hlp WHERE hlp IS NULL CREATE (n:Person) SET n = $__properties__ RETURN id(n) UNION MATCH (n) WHERE id(n) = $__id__ SET n = $__properties__ RETURN id(n)) -
If the entity is not new all relationships of the first found type at the domain model will get removed from the database.
(
MATCH (startNode)-[rel:Has]→(:Hobby) WHERE id(startNode) = $fromId DELETE rel) -
The related entity will get created in the same way as the root entity.
(
OPTIONAL MATCH (hlp:Hobby) WHERE id(hlp) = $__id__ WITH hlp WHERE hlp IS NULL CREATE (n:Hobby) SET n = $__properties__ RETURN id(n) UNION MATCH (n) WHERE id(n) = $__id__ SET n = $__properties__ RETURN id(n)) -
The relationship itself will get created
(
MATCH (startNode) WHERE id(startNode) = $fromId MATCH (endNode) WHERE id(endNode) = 631 MERGE (startNode)-[:Has]→(endNode)) -
If the related entity also has relationships to other entities, the same procedure as in 2. will get started.
-
For the next defined relationship on the root entity start with 2. but replace first with next.
| As you can see SDN does its best to keep your graph model in sync with the Java world. This is one of the reasons why we really advise you to not load, manipulate and save sub-graphs as this might cause relationships to get removed from the database. |
Multiple entities
The save operation is overloaded with the functionality for accepting multiple entities of the same type.
If you are working with generated id values or make use of optimistic locking, every entity will result in a separate CREATE call.
In other cases SDN will create a parameter list with the entity information and provide it with a MERGE call.
UNWIND $__entities__ AS entity MERGE (n:Person {customId: entity.$__id__}) SET n = entity.__properties__ RETURN collect(n.customId) AS $__ids__
and the parameters look like
:params {__entities__: [{__id__: 'aa', __properties__: {name: "PersonName", theId: "aa"}}, {__id__ 'bb', __properties__: {name: "AnotherPersonName", theId: "bb"}}]}
Load
The load documentation will not only show you how the MATCH part of the query looks like but also how the data gets returned.
The simplest kind of load operation is a findById call.
It will match all nodes with the label of the type you queried for and does a filter on the id value.
MATCH (n:Person) WHERE id(n) = 1364
If there is a custom id provided SDN will use the property you have defined as the id.
MATCH (n:Person) WHERE n.customId = 'anId'
The data to return is defined as a map projection.
RETURN n{.first_name, .personNumber, __internalNeo4jId__: id(n), __nodeLabels__: labels(n)}
As you can see there are two special fields in there: The __internalNeo4jId__ and the __nodeLabels__.
Both are critical when it comes to mapping the data to Java objects.
The value of the __internalNeo4jId__ is either id(n) or the provided custom id but in the mapping process one known field to refer to has to exist.
The __nodeLabels__ ensures that all defined labels on this node can be found and mapped.
This is needed for situations when inheritance is used and you query not for the concrete classes or have relationships defined that only define a super-type.
Talking about relationships: If you have defined relationships in your entity, they will get added to the returned map as pattern comprehensions. The above return part will then look like:
RETURN n{.first_name, …, Person_Has_Hobby: [(n)-[:Has]→(n_hobbies:Hobby)|n_hobbies{__internalNeo4jId__: id(n_hobbies), .name, nodeLabels: labels(n_hobbies)}]}
The map projection and pattern comprehension used by SDN ensures that only the properties and relationships you have defined are getting queried.
In cases where you have self-referencing nodes or creating schemas that potentially lead to cycles in the data that gets returned, SDN falls back to a cascading / data-driven query creation. Starting with an initial query that looks for the specific node and considering the conditions, it steps through the resulting nodes and, if their relationships are also mapped, would create further queries on the fly. This query creation and execution loop will continue until no query finds new relationships or nodes. The way of the creation can be seen analogue to the save/update process.
Custom queries
Spring Data Neo4j, like all the other Spring Data modules, allows you to specify custom queries in you repositories. Those come in handy if you cannot express the finder logic via derived query functions.
Because Spring Data Neo4j works heavily record-oriented under the hood, it is important to keep this in mind and not build up a result set with multiple records for the same "root node".
| Please have a look in the FAQ as well to learn about alternative forms of using custom queries from repositories, especially how to use custom queries with custom mappings: Section 11.8. |
Queries with relationships
Beware of the cartesian product
Assuming you have a query like MATCH (m:Movie{title: 'The Matrix'})←[r:ACTED_IN]-(p:Person) return m,r,p that results into something like this:
+------------------------------------------------------------------------------------------+
| m        | r                                    | p                                      |
+------------------------------------------------------------------------------------------+
| (:Movie) | [:ACTED_IN {roles: ["Emil"]}]        | (:Person {name: "Emil Eifrem"})        |
| (:Movie) | [:ACTED_IN {roles: ["Agent Smith"]}] | (:Person {name: "Hugo Weaving})        |
| (:Movie) | [:ACTED_IN {roles: ["Morpheus"]}]    | (:Person {name: "Laurence Fishburne"}) |
| (:Movie) | [:ACTED_IN {roles: ["Trinity"]}]     | (:Person {name: "Carrie-Anne Moss"})   |
| (:Movie) | [:ACTED_IN {roles: ["Neo"]}]         | (:Person {name: "Keanu Reeves"})       |
+------------------------------------------------------------------------------------------+
The result from the mapping would be most likely unusable.
If this would get mapped into a list, it will contain duplicates for the Movie but this movie will only have one relationship.
Getting one record per root node
To get the right object(s) back, it is required to collect the relationships and related nodes in the query: MATCH (m:Movie{title: 'The Matrix'})←[r:ACTED_IN]-(p:Person) return m,collect(r),collect(p)
+------------------------------------------------------------------------+
| m        | collect(r)                     | collect(p)                 |
+------------------------------------------------------------------------+
| (:Movie) | [[:ACTED_IN], [:ACTED_IN], ...]| [(:Person), (:Person),...] |
+------------------------------------------------------------------------+
With this result as a single record it is possible for Spring Data Neo4j to add all related nodes correctly to the root node.
Reaching deeper into the graph
The example above assumes that you are only trying to fetch the first level of related nodes. This is sometimes not enough and there are maybe nodes deeper in the graph that should also be part of the mapped instance. There are two ways to achieve this: Database-side or client-side reduction.
For this the example from above should also contain Movies on the Persons that get returned with the initial Movie.
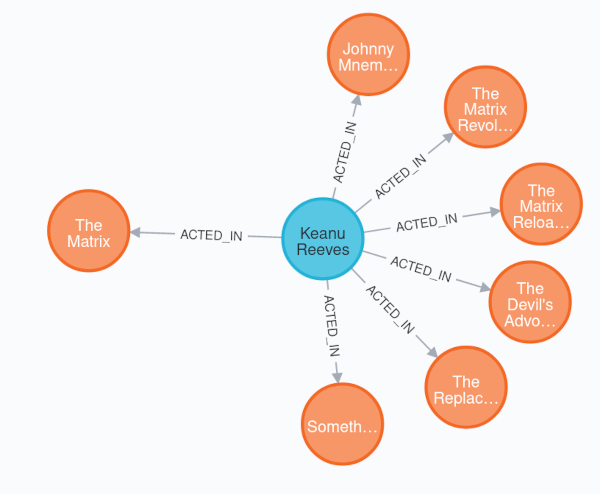
Database-side reduction
Keeping in mind that Spring Data Neo4j can only properly process record based, the result for one entity instance needs to be in one record. Using Cypher’s path capabilities is a valid option to fetch all branches in the graph.
MATCH p=(m:Movie{title: 'The Matrix'})<-[:ACTED_IN]-(:Person)-[:ACTED_IN*..0]->(:Movie)
RETURN p;
This will result in multiple paths that are not merged within one record.
It is possible to call collect(p) but Spring Data Neo4j does not understand the concept of paths in the mapping process.
Thus, nodes and relationships needs to get extracted for the result.
MATCH p=(m:Movie{title: 'The Matrix'})<-[:ACTED_IN]-(:Person)-[:ACTED_IN*..0]->(:Movie)
RETURN m, nodes(p), relationships(p);
Because there are multiple paths that lead from 'The Matrix' to another movie, the result still won’t be a single record. This is where Cypher’s reduce function comes into play.
MATCH p=(m:Movie{title: 'The Matrix'})<-[:ACTED_IN]-(:Person)-[:ACTED_IN*..0]->(:Movie)
WITH collect(p) as paths, m
WITH m,
reduce(a=[], node in reduce(b=[], c in [aa in paths | nodes(aa)] | b + c) | case when node in a then a else a + node end) as nodes,
reduce(d=[], relationship in reduce(e=[], f in [dd in paths | relationships(dd)] | e + f) | case when relationship in d then d else d + relationship end) as relationships
RETURN m, relationships, nodes;
The reduce function allows us to flatten the nodes and relationships from various paths.
As a result we will get a tuple similar to Getting one record per root node but with a mixture of relationship types or nodes in the collections.
Client-side reduction
If the reduction should happen on the client-side, Spring Data Neo4j enables you to map also lists of lists of relationships or nodes. Still, the requirement applies that the returned record should contain all information to hydrate the resulting entity instance correctly.
MATCH p=(m:Movie{title: 'The Matrix'})<-[:ACTED_IN]-(:Person)-[:ACTED_IN*..0]->(:Movie)
RETURN m, collect(nodes(p)), collect(relationships(p));
The additional collect statement creates lists in the format:
[[rel1, rel2], [rel3, rel4]]
Those lists will now get converted during the mapping process into a flat list.
Deciding if you want to go with client-side or database-side reduction depends on the amount of data that will get generated.
All the paths needs to get created in the database’s memory first when the reduce function is used.
On the other hand a large amount of data that needs to get merged on the client-side results in a higher memory usage there.
|
Parameters in custom queries
You do this exactly the same way as in a standard Cypher query issued in the Neo4j Browser or the Cypher-Shell,
with the $ syntax (from Neo4j 4.0 on upwards, the old {foo} syntax for Cypher parameters has been removed from the database).
public interface ARepository extends Neo4jRepository<AnAggregateRoot, String> {

	@Query("MATCH (a:AnAggregateRoot {name: $name}) RETURN a") (1)
	Optional<AnAggregateRoot> findByCustomQuery(String name);
}| 1 | Here we are referring to the parameter by its name.
You can also use $0 etc. instead. |
You need to compile your Java 8+ project with -parameters to make named parameters work without further annotations.
The Spring Boot Maven and Gradle plugins do this automatically for you.
If this is not feasible for any reason, you can either add
@Param and specify the name explicitly or use the parameters index.
|
Spring Expression Language in custom queries
Spring Expression Language (SpEL) can be used in custom queries inside :#{}.
This is the standard Spring Data way of defining a block of text inside a query that undergoes SpEL evaluation.
The following example basically defines the same query as above, but uses a WHERE clause to avoid even more curly braces:
public interface ARepository extends Neo4jRepository<AnAggregateRoot, String> {

	@Query("MATCH (a:AnAggregateRoot) WHERE a.name = :#{#pt1 + #pt2} RETURN a")
	Optional<AnAggregateRoot> findByCustomQueryWithSpEL(String pt1, String pt2);
}
The SpEL blocked starts with :#{ and than refers to the given String parameters by name (#pt1).
Don’t confuse this with the above Cypher syntax!
The SpEL expression concatenates both parameters into one single value that is eventually passed on to the Neo4jClient.
The SpEL block ends with }.
SpEL also solves two additional problems. We provide two extensions that allow to pass in a Sort object into custom queries.
Remember Listing 30 from custom queries?
With the orderBy extension you can pass in a Pageable with a dynamic sort to a custom query:
import org.springframework.data.domain.Pageable;
import org.springframework.data.domain.Sort;
import org.springframework.data.neo4j.repository.Neo4jRepository;
import org.springframework.data.neo4j.repository.query.Query;

public interface MyPersonRepository extends Neo4jRepository<Person, Long> {

    @Query(""
        + "MATCH (n:Person) WHERE n.name = $name RETURN n "
        + ":#{orderBy(#pageable)} SKIP $skip LIMIT $limit" (1)
    )
    Slice<Person> findSliceByName(String name, Pageable pageable);

    @Query(""
        + "MATCH (n:Person) WHERE n.name = $name RETURN n :#{orderBy(#sort)}" (2)
    )
    List<Person> findAllByName(String name, Sort sort);
}| 1 | A Pageable has always the name pageable inside the SpEL context. |
| 2 | A Sort has always the name sort inside the SpEL context. |
The literal extension can be used to make things like labels or relationship-types "dynamic" in custom queries.
Neither labels nor relationship types can be parameterized in Cypher, so they must be given literal.
interface BaseClassRepository extends Neo4jRepository<Inheritance.BaseClass, Long> {

    @Query("MATCH (n:`:#{literal(#label)}`) RETURN n") (1)
    List<Inheritance.BaseClass> findByLabel(String label);
}| 1 | The literal extension will be replaced with the literal value of the evaluated parameter. |
Here, the literal value has been used to match dynamically on a Label.
If you pass in SomeLabel as a parameter to the method, MATCH (n:
will be generated. Ticks have been added to correctly escape values. SDN won’t do this
for you as this is probably not what you want in all cases.SomeLabel) RETURN n
Migrating from SDN+OGM to SDN
Known issues with past SDN+OGM migrations
SDN+OGM has had quite a history over the years and we understand that migrating big application systems is neither fun nor something that provides immediate profit. The main issues we observed when migrating from older versions of Spring Data Neo4j to newer ones are roughly in order the following:
- Having skipped more than one major upgrade
-
While Neo4j-OGM can be used stand-alone, Spring Data Neo4j cannot. It depends to large extend on the Spring Data and therefore, on the Spring Framework itself, which eventually affects large parts of your application. Depending on how the application has been structured, that is, how much the any of the framework part leaked into your business code, the more you have to adapt your application. It gets worse when you have more than one Spring Data module in your application, if you accessed a relational database in the same service layer as your graph database. Updating two object mapping frameworks is not fun.
- Relying on a embedded database configured through Spring Data itself
-
The embedded database in a SDN+OGM project is configured by Neo4j-OGM. Say you want to upgrade from Neo4j 3.0 to 3.5, you can’t without upgrading your whole application. Why is that? As you chose to embed a database into your application, you tied yourself into the modules that configure this embedded database. To have another, embedded database version, you have to upgrade the module that configured it, because the old one does not support the new database. As there is always a Spring Data version corresponding to Neo4j-OGM, you would have to upgrade that as well. Spring Data however depends on Spring Framework and than the arguments from the first bullet apply.
- Being unsure about which building blocks to include
-
It’s not easy to get the terms right. We wrote the building blocks of an SDN+OGM setting here. It may be so that all of them have been added by coincidence and you’re dealing with a lot of conflicting dependencies.
| Backed by those observations, we recommend to make sure you’re using only the Bolt or http transport in your current application before switching from SDN+OGM to SDN. Thus, your application and the access layer of your application is to large extend independent from the databases version. From that state, consider moving from SDN+OGM to SDN. |
Prepare the migration from SDN+OGM Lovelace or SDN+OGM Moore to SDN
| The Lovelace release train corresponds to SDN 5.1.x and OGM 3.1.x, while the Moore is SDN 5.2.x and OGM 3.2.x. |
First, you must make sure that your application runs against Neo4j in server mode over the Bolt protocol, which means work in two of three cases:
You’re on embedded
You have added org.neo4j:neo4j-ogm-embedded-driver and org.neo4j:neo4j to you project and starting the database via OGM facilities.
This is no longer supported and you have to set up a standard Neo4j server (both standalone and cluster are supported).
The above dependencies have to be removed.
Migrating from the embedded solution is probably the toughest migration, as you need to set up a server, too. It is however the one that gives you much value in itself: In the future, you will be able to upgrade the database itself without having to consider your application framework, and your data access framework as well.
You’re using the HTTP transport
You have added org.neo4j:neo4j-ogm-http-driver and configured an url like http://user:password@localhost:7474.
The dependency has to be replaced with org.neo4j:neo4j-ogm-bolt-driver and you need to configure a Bolt url like bolt://localhost:7687 or use the new neo4j:// scheme, which takes care of routing, too.
Migrating
Once you have made sure, that your SDN+OGM application works over Bolt as expected, you can start migrating to SDN.
-
Remove all
org.neo4j:neo4j-ogm-*dependencies -
Configuring SDN through a
org.neo4j.ogm.config.Configurationbean is not supported, instead of, all configuration of the driver goes through our new Java driver starter. You will especially have to adapt the properties for the url and authentication, see Listing 70
| You cannot configure SDN through XML. In case you did this with your SDN+OGM application, make sure you learn about annotation-driven or functional configuration of Spring Applications. The easiest choice these days is Spring Boot. With our starter in place, all the necessary bits apart from the connection URL and the authentication is already configured for you. |
# Old
spring.data.neo4j.embedded.enabled=false # No longer supported
spring.data.neo4j.uri=bolt://localhost:7687
spring.data.neo4j.username=neo4j
spring.data.neo4j.password=secret

# New
spring.neo4j.uri=bolt://localhost:7687
spring.neo4j.authentication.username=neo4j
spring.neo4j.authentication.password=secret| Those new properties might change in the future again when SDN and the driver eventually fully replace the old setup. |
And finally, add the new dependency, see Chapter 6 for both Gradle and Maven.
You’re then ready to replace annotations:
| Old | New |
|---|---|
|
|
|
|
|
|
|
|
|
|
|
No replacement, not needed |
|
No replacement, not needed |
| Several Neo4j-OGM annotations have not yet a corresponding annotation in SDN, some will never have. We will add to the list above as we support additional features. |
Bookmarkmanagement
Both @EnableBookmarkManagement and @UseBookmark as well as the org.springframework.data.neo4j.bookmark.BookmarkManager
interface and its only implementation org.springframework.data.neo4j.bookmark.CaffeineBookmarkManager are gone and are not needed anymore.
SDN uses Bookmarks for all transactions, without configuration.
You can remove the bean declaration of CaffeineBookmarkManager as well as the the dependency to com.github.ben-manes.caffeine:caffeine.
Automatic creation of constraints and indexes
SDN 5.3 and prior provided the "Automatic index manager" from Neo4j-OGM.
@Index, @CompositeIndex and @Required have been removed without replacement.
Why?
We think that creating the schema - even for a schemaless database - is not part of the domain modelling.
You could argue that an SDN model is the schema, but than we would answer that we even prefer a Command-query separation,
meaning that we would rather define separate read and write models.
Those come in very handy for writing "boring" things and reading graph-shaped answers.
Apart from that, some of those annotations respectively their values are tied to specific Neo4j editions or versions, which makes them hard to maintain.
The best argument however is going to production: While all tools that generate a schema are indeed helpful during development, even more so with databases that enforces a strict scheme, they tend to be not so nice in production: How do you handle different versions of your application running at the same time? Version A asserting the indexes that have been created by a newer version B?
We think it’s better to take control about this upfront and recommend using controlled database migrations, based on a tool like Liquigraph or Neo4j migrations. The later has been seen in use with SDN inside the JHipster project. Both projects have in common that they store the current version of the schema within the database and make sure that a schema matches expectations before things are being updated.
Migrating off from previous Neo4j-OGM annotations affects @Index, @CompositeIndex and @Required and an example for those is given here in Listing 71:
import org.neo4j.ogm.annotation.CompositeIndex;
import org.neo4j.ogm.annotation.GeneratedValue;
import org.neo4j.ogm.annotation.Id;
import org.neo4j.ogm.annotation.Index;
import org.neo4j.ogm.annotation.Required;

@CompositeIndex(properties = {"tagline", "released"})
public class Movie {

    @Id @GeneratedValue Long id;

    @Index(unique = true)
    private String title;

    private String description;

    private String tagline;

    @Required
    private Integer released;
}
It’s annotations are equivalent to the following scheme in Cypher (as of Neo4j 4.2):
CREATE CONSTRAINT movies_unique_title ON (m:Movie) ASSERT m.title IS UNIQUE;
CREATE CONSTRAINT movies_released_exists ON (m:Movie) ASSERT EXISTS (m.released);
CREATE INDEX movies_tagline_released_idx FOR (m:Movie) ON (m.tagline, m.released);
Using @Index without unique = true is equivalent to CREATE INDEX movie_title_index FOR (m:Movie) ON (m.title).
Note that a unique index already implies an index.
Building Spring Data Neo4j
Requirements
-
JDK 8+ (Can be OpenJDK or Oracle JDK)
-
Maven 3.6.2 (We provide the Maven wrapper, see
mvnwrespectivelymvnw.cmdin the project root; the wrapper downloads the appropriate Maven version automatically) -
A Neo4j 3.5.+ database, either
-
running locally
-
or indirectly via Testcontainers and Docker
-
About the JDK version
Choosing JDK 8 is a decision influenced by various aspects
-
SDN is a Spring Data project. Spring Data commons baseline is still JDK 8 and so is Spring Framework’s baseline. Thus, it is only natural to keep the JDK 8 baseline.
-
While there is an increase of projects started with JDK 11 (which is Oracle’s current LTS release of Java), many existing projects are still on JDK 8. We don’t want to lose them as users right from the start.
Running the build
The following sections are alternatives and roughly sorted by increased effort.
All builds require a local copy of the project:
$ git clone [email protected]:spring-projects/spring-data-neo4j.gitBefore you proceed, verify your locally installed JDK version. The output should be similar:
$ java -version
java version "12.0.1" 2019-04-16
Java(TM) SE Runtime Environment (build 12.0.1+12)
Java HotSpot(TM) 64-Bit Server VM (build 12.0.1+12, mixed mode, sharing)
With Docker installed
Using the default image
If you don’t have Docker installed, head over to Docker Desktop. In short, Docker is a tool that helps you running lightweight software images using OS-level virtualization in so-called containers.
Our build uses Testcontainers Neo4j to bring up a database instance.
$ ./mvnw clean verifyOn a Windows machine, use
$ mvnw.cmd clean verifyThe output should be similar.
Using another image
The image version to use can be configured through an environmental variable like this:
$ SDN_NEO4J_VERSION=3.5.11-enterprise SDN_NEO4J_ACCEPT_COMMERCIAL_EDITION=yes ./mvnw clean verifyHere we are using 3.5.11 enterprise and also accept the license agreement.
Consult your operating system or shell manual on how to define environment variables if specifying them inline does not work for you.
Against a locally running database
| Running against a locally running database will erase its complete content. |
Building against a locally running database is faster, as it does not restart a container each time. We do this a lot during our development.
You can get a copy of Neo4j at our download center free of charge.
Please download the version applicable to your operating system and follow the instructions to start it.
A required step is to open a browser and go to http://localhost:7474 after you started the database and change the default password from neo4j to something of your liking.
After that, you can run a complete build by specifying the local bolt URL:
$ SDN_NEO4J_URL=bolt://localhost:7687 SDN_NEO4J_PASSWORD=secret ./mvnw clean verifySummary of environment variables controlling the build
| Name | Default value | Meaning |
|---|---|---|
|
3.5.6 |
Version of the Neo4j docker image to use, see Neo4j Docker Official Images |
|
no |
Some tests may require the enterprise edition of Neo4j. We build and test against the enterprise edition internally, but we won’t force you to accept the license if you don’t want to. |
|
not set |
Setting this environment allows connecting to a locally running Neo4j instance. We use this a lot during development. |
|
not set |
Password for the |
You need to set both SDN_NEO4J_URL and SDN_NEO4J_PASSWORD to use a local instance.
|
Checkstyle and friends
There is no quality gate in place at the moment to ensure that the code/test ratio stays as is, but please consider adding tests to your contributions.
We have some rather mild checkstyle rules in place, enforcing more or less default Java formatting rules. Your build will break on formatting errors or something like unused imports.
jQAssistant
We also use jQAssistant, a Neo4j-based tool, to verify some aspects of our architecture. The rules are described with Cypher and your build will break when they are violated:
Coding Rules
The following rules are checked during a build:
API
Ensure that we publish our API in a sane and consistent way.
We use @API Guardian to keep track of what we expose as public or internal API. To keep things both clear and concise, we restrict the usage of those annotations to interfaces, classes (incl. constructors) and annotations.
MATCH (c:Java)-[:ANNOTATED_BY]->(a)-[:OF_TYPE]->(t:Type {fqn: 'org.apiguardian.api.API'}),
      (p)-[:DECLARES]->(c)
WHERE c:Member AND NOT c:Constructor
RETURN p.fqn, c.name
Public interfaces, classes or annotations are either part of internal or public API and have a status.
MATCH (c:Java)-[:ANNOTATED_BY]->(a)-[:OF_TYPE]->(t:Type {fqn: 'org.apiguardian.api.API'}),
      (a)-[:HAS]->({name: 'status'})-[:IS]->(s)
WHERE ANY (label IN labels(c) WHERE label in ['Interface', 'Class', 'Annotation'])
WITH  c, trim(split(s.signature, ' ')[1]) AS status
WITH  c, status,
      CASE status
        WHEN 'INTERNAL' THEN 'Internal'
        ELSE 'Public'
      END AS type
MERGE (a:Api {type: type, status: status})
MERGE (c)-[:IS_PART_OF]->(a)
RETURN c,aSee ADR-003.
MATCH (c:Class)-[:IS_PART_OF]->(:Api {type: 'Internal'})
WHERE c.visibility = 'public'
  AND coalesce(c.abstract, false) = false
  AND NOT exists(c.final)
RETURN c.name
Naming things
The following naming conventions are used throughout the project:
org.springframework.data.neo4j.MATCH
(project:Maven:Project)-[:CREATES]->(:Artifact)-[:CONTAINS]->(type:Type)
WHERE
NOT type.fqn starts with 'org.springframework.data.neo4j'
RETURN
project as Project, collect(type) as TypeWithWrongNameStructuring things
Most of the time, the package structure under org.springframework.data.neo4j should reflect the main building parts.
schema and convertMATCH (a:Main:Artifact)
OPTIONAL MATCH (a)-[:CONTAINS]->(s:Package) WHERE s.fqn in ['org.springframework.data.neo4j.core.schema', 'org.springframework.data.neo4j.core.convert']
WITH collect(s) as allowed, a
MATCH (a)-[:CONTAINS]->(p1:Package)-[:DEPENDS_ON]->(p2:Package)<-[:CONTAINS]-(a)
WHERE p1.fqn = 'org.springframework.data.neo4j.core.mapping'
AND NOT (p2 in allowed OR (p1) -[:CONTAINS]-> (p2))
RETURN p1,p2MATCH (a:Main:Artifact)
MATCH (a)-[:CONTAINS]->(p1:Package)
WHERE p1.fqn in [
'org.springframework.data.neo4j.core.convert',
'org.springframework.data.neo4j.core.schema',
'org.springframework.data.neo4j.core.support',
'org.springframework.data.neo4j.core.transaction'
]
WITH p1, a
MATCH (p1)-[:CONTAINS]->(t:Type)
MATCH (t)-[:DEPENDS_ON]->(t2:Type)<-[:CONTAINS]-(p2:Package)<-[:CONTAINS]-(a)
WHERE t2.fqn <> 'org.springframework.data.neo4j.core.mapping.Neo4jPersistentProperty'
AND p2.fqn = 'org.springframework.data.neo4j.core.mapping'
RETURN tAccessing the jQAssistant database
jQAssistant uses Neo4j to store information about a project. To access the database, please build the project as described above. When the build finishes, execute the following command:
$ ./mvnw -pl org.springframework.data.neo4j:spring-data-neo4j jqassistant:serverAccess the standard Neo4j browser at http://localhost:7474 and a dedicated jQA-Dashboard at http://localhost:7474/jqassistant/dashboard/.
The scanning and analyzing can be triggered individually, without going through the full verify again:
$ ./mvnw -pl org.springframework.data.neo4j:spring-data-neo4j jqassistant:scan@jqassistant-scan
$ ./mvnw -pl org.springframework.data.neo4j:spring-data-neo4j jqassistant:analyze@jqassistant-analyze
Appendix
Appendix A: Repository query keywords
Supported query method subject keywords
The following table lists the subject keywords generally supported by the Spring Data repository query derivation mechanism to express the predicate. Consult the store-specific documentation for the exact list of supported keywords, because some keywords listed here might not be supported in a particular store.
| Keyword | Description |
|---|---|
|
General query method returning typically the repository type, a |
|
Exists projection, returning typically a |
|
Count projection returning a numeric result. |
|
Delete query method returning either no result ( |
|
Limit the query results to the first |
|
Use a distinct query to return only unique results. Consult the store-specific documentation whether that feature is supported. This keyword can occur in any place of the subject between |
Supported query method predicate keywords and modifiers
The following table lists the predicate keywords generally supported by the Spring Data repository query derivation mechanism. However, consult the store-specific documentation for the exact list of supported keywords, because some keywords listed here might not be supported in a particular store.
| Logical keyword | Keyword expressions |
|---|---|
|
|
|
|
|
|
|
|
|
|
|
|
|
|
|
|
|
|
|
|
|
|
|
|
|
|
|
|
|
|
|
|
|
|
|
|
|
|
|
|
|
|
|
|
|
|
|
|
|
|
|
|
|
|
|
|
In addition to filter predicates, the following list of modifiers is supported:
| Keyword | Description |
|---|---|
|
Used with a predicate keyword for case-insensitive comparison. |
|
Ignore case for all suitable properties. Used somewhere in the query method predicate. |
|
Specify a static sorting order followed by the property path and direction (e. g. |
Appendix B: Repository query return types
Supported Query Return Types
The following table lists the return types generally supported by Spring Data repositories. However, consult the store-specific documentation for the exact list of supported return types, because some types listed here might not be supported in a particular store.
Geospatial types (such as GeoResult, GeoResults, and GeoPage) are available only for data stores that support geospatial queries.
Some store modules may define their own result wrapper types.
|
| Return type | Description |
|---|---|
|
Denotes no return value. |
Primitives |
Java primitives. |
Wrapper types |
Java wrapper types. |
|
A unique entity. Expects the query method to return one result at most. If no result is found, |
|
An |
|
A |
|
A |
|
A Java 8 or Guava |
|
Either a Scala or Vavr |
|
A Java 8 |
|
A convenience extension of |
Types that implement |
Types that expose a constructor or |
Vavr |
Vavr collection types. See Section 5.4.6.3 for details. |
|
A |
|
A Java 8 |
|
A |
|
A sized chunk of data with an indication of whether there is more data available. Requires a |
|
A |
|
A result entry with additional information, such as the distance to a reference location. |
|
A list of |
|
A |
|
A Project Reactor |
|
A Project Reactor |
|
A RxJava |
|
A RxJava |
|
A RxJava |