VMware Cloud Foundry is a recently-released platform as a service (PaaS) offering for developers on many popular programming languages, including Java.
Spring Roo provides comprehensive integration with Cloud Foundry. With Roo you can easily login to Cloud Foundry, view your applications, bind to services, deploy applications and gather statistics. In fact there are more than 30 unique Cloud Foundry commands added to the Spring Roo shell to help you explore and benefit from Cloud Foundry.
The Cloud Foundry add-on provides the mechanism through which Cloud Foundry features are available in Spring Roo. To install this add-on, you simply load Spring Roo 1.1.3 and type (most of which can be completed using the TAB key, or CTRL + SPACE if using STS):
pgp automatic trust
addon install bundle --bundleSymbolicName org.springframework.roo.addon.cloud.foundry
The “pgp” command simply ensures the signed bundles needed by the Cloud Foundry add-on can be installed. The “addon install” command instructs Roo to download and install the Cloud Foundry support. The add-on is successfully installed once you see the “Successfully installed add-on: Spring Roo - Addon - Cloud Foundry [version: a.b.c.d]” message on your screen.
As with all Roo add-ons, you could also install the Cloud Foundry add-on by simply attempting to use it. To follow this alternate installation path, enter the “pgp automatic trust” command, then “cloud foundry” and press enter. A list of matching add-ons will be displayed. You’ll probably want to install the first (and currently only match), so use the “addon install id --searchResultId 1” command.
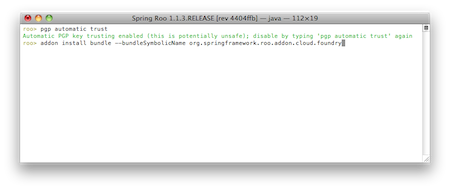
Alternatively you can just executing the following command which will prompt you to install the Cloud Foundry add-on, it is still required that you enable automatic trust prior to installation.
pgp automatic trust
cloud foundry login

The integration of Cloud Foundry into Roo has added a lot of new functionality and commands to the Roo shell, in this chapter we will explore these new commands and deploy a sample application to the cloud. After installing the Cloud Foundry add-on you will first need to login. To do this, use the following command:
cloud foundry login
This command takes in three options: email, password, and cloudControllerUrl. The cloudControllerUrl is optional, but the when logging into Cloud Foundry for the first login the email and password are mandatory. You aren't required to enter the email and password everytime you login, Roo will store these locally for you. The cloudControllerUrl defaults the Cloud service provided by VMware, api.cloudfoundry.com, but can be changed to point to private Cloud Foundry instances.
After logging in a many new Cloud Foundry comands will be presented to you. You can see these by typing "cloud foundry" in the shell and then pressing TAB.

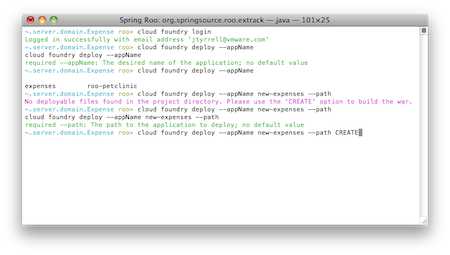
The first command that is likely to be of use is "cloud foundry deploy". With this command you are are able to deploy an application to Cloud Foundry. The deploy command has a number of options: appName (mandatory), path (mandatory), urls, instances, and memory. Roo will automatically present you with existing deployed applications to enable you to choose a unique name, and will also present any WARs found in the project. If a WAR isn't found the "CREATE" option presented. By selecting create you will trigger a Maven package, which will create a deployable application. Onece the application has been successfully deployed when you see "The application 'new-expenses' was successfully pushed".
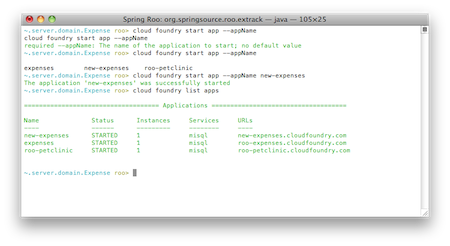
After running the above command, and assuming that you had created a project in the first place your application will be deployed to Cloud Foundry. To verify this you can run the command "cloud foundry list apps", which will display all applications currently deployed.
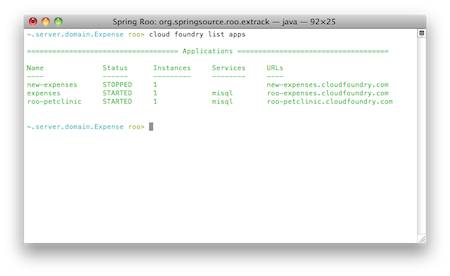
There are two other application deployed, both of which are started and bound to services. You will also notice that a URL has been mapped to the each application and that the application that was just deployed "new-expenses" is currently stopped and no services have been bound to it. The URL has been created and mapped based on the application name, which is what Roo defaults to if a URL is not provided.
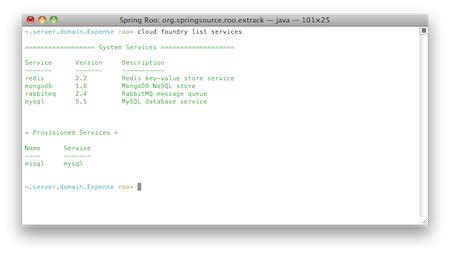
The next step is to bind the application "new-expenses" to a service, before we do this though we need to check that we have a service to bind to. To this we use the "cloud foundry list services" command which will display a list of possible services we can create instances of and currently provisioned services. As can be seen above Cloud Foundry currently provides 4 services: Redis, MongoDB, RabbitMQ, and MySQL. There is currently one provisioned service, that is an instance of MySQL called "misql". As there is already a MySQL service present we are going to bind this to our "new-expenses" application.
To bind "new-expenses" to a service we use the "cloud foundry bind service --serviceName misql --appName new-expenses" command. Roo's auto-completion makes navigating the options a breeze.

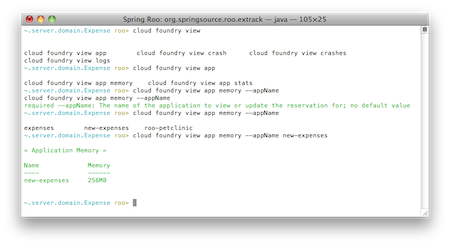
If you were to run "cloud foundry list apps" at this point you would see that the application "new-expenses" is now bound to the MySQL service instance "misql". We should now be ready to start the application, but before we do lets take a look at how much memory has been assigned to the application. To do this we run "cloud foundry view app memory". When we first deployed the application no memory value was specified so, as you can see below, the default value provisioned is 256 megabytes.
Now that we have verified that we should have enough memory to start we simple run "cloud foundry start app --appName new-expenses".
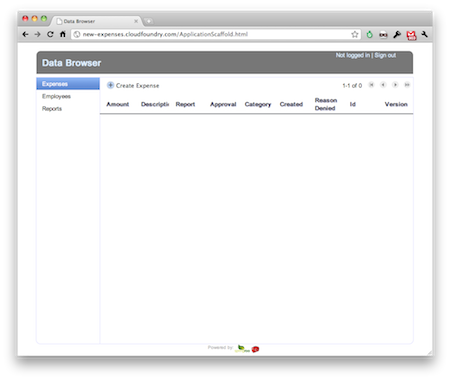
To verify that the application has actually started simply navigate to the URL you previously mapped to the application, in this case it is "new-expenses.cloudfoundry.com", and you should see your application.
Cloud Foundry is a ground breaking service and open source platform that allows developers to maximise there productivity by not having to manage the platform to which they deploy. The initial integration with Roo allows developers to deploy and manage their applications with very little effort from with in the shell. In this chapter we have installed the Cloud Foundry Add-On in Roo which enabled applications to be deployed to and managed on Cloud Foundry. We have shown how easy Cloud Foundry makes it for the developer to take advantage of the cloud from with Roo, by going the deployment process step-by-step. There are other commands that haven't been explicity covered by this guide and may be expanded on in the future.