Spring Boot for Apache Geode provides the convenience of Spring Boot’s convention over configuration approach by using auto-configuration with Spring Framework’s powerful abstractions and highly consistent programming model to simplify the development of Apache Geode applications in a Spring context.
Secondarily, Spring Boot for Apache Geode provides developers with a consistent experience whether building and running Spring Boot, Apache Geode applications locally or in a managed environment, such as with VMware Tanzu Application Service (TAS).
This project is a continuation and a logical extension to Spring Data for Apache Geode’s Annotation-based configuration model, and the goals set forth in that model: To enable application developers to get up and running as quickly, reliably, and as easily as possible. In fact, Spring Boot for Apache Geode builds on this very foundation cemented in Spring Data for Apache Geode since the Spring Data Kay (2.0) Release Train.
1. Introduction
Spring Boot for Apache Geode automatically applies auto-configuration to several key application concerns (use cases) including, but not limited to:
-
Look-Aside, [Async] Inline, Near and Multi-Site Caching, by using Apache Geode as a caching provider in Spring’s Cache Abstraction. For more information, see Caching with Apache Geode.
-
System of Record (SOR), persisting application state in Apache Geode by using Spring Data Repositories. For more information, see Spring Data Repositories.
-
Transactions, managing application state consistently with Spring Transaction Management with support for both Local Cache and Global JTA Transactions.
-
Distributed Computations, run with Apache Geode’s Function Execution framework and conveniently implemented and executed with POJO-based, annotation support for Functions. For more information, see Function Implementations & Executions.
-
Continuous Queries, expressing interests in a stream of events and letting applications react to and process changes to data in near real-time with Apache Geode’s Continuous Query (CQ). Listeners/Handlers are defined as simple Message-Driven POJOs (MDP) with Spring’s Message Listener Container, which has been extended with its configurable CQ support. For more information, see Continuous Query.
-
Data Serialization using Apache Geode PDX with first-class configuration and support. For more information, see Data Serialization with PDX.
-
Data Initialization to quickly load (import) data to hydrate the cache during application startup or write (export) data on application shutdown to move data between environments (for example, TEST to DEV). For more information, see Using Data.
-
Actuator, to gain insight into the runtime behavior and operation of your cache, whether a client or a peer. For more information, see Spring Boot Actuator.
-
Logging, to quickly and conveniently enable or adjust Apache Geode log levels in your Spring Boot application to gain insight into the runtime operations of the application as they occur. For more information, see Logging.
-
Security, including Authentication & Authorization, and Transport Layer Security (TLS) with Apache Geode Secure Socket Layer (SSL). Once more, Spring Data for Apache Geode includes first-class support for configuring Auth and SSL. For more information, see Security.
-
HTTP Session state management, by including Spring Session for Apache Geode on your application’s classpath. For more information, see Spring Session.
-
Testing. Whether you write Unit or Integration Tests for Apache Geode in a Spring context, SBDG covers all your testing needs with the help of STDG.
While Spring Data for Apache Geode offers a simple, consistent, convenient and declarative approach to configure all these powerful Apache Geode features, Spring Boot for Apache Geode makes it even easier to do, as we will explore throughout this reference documentation.
1.1. Goals
While the SBDG project has many goals and objectives, the primary goals of this project center around three key principles:
-
From Open Source (Apache Geode) to Commercial (VMware Tanzu GemFire).
-
From Non-Managed (self-managed/self-hosted or on-premise installations) to Managed (VMware Tanzu GemFire for VMs, VMware Tanzu GemFire for K8S) environments.
-
With little to no code or configuration changes necessary.
It is also possible to go in the reverse direction, from Managed back to a Non-Managed environment and even from Commercial back to the Open Source offering, again, with little to no code or configuration changes.
| SBDG’s promise is to deliver on these principles as much as is technically possible and as is technically allowed by Apache Geode. |
2. Getting Started
To be immediately productive and as effective as possible when you use Spring Boot for Apache Geode, it helps to understand the foundation on which this project is built.
The story begins with the Spring Framework and the core technologies and concepts built into the Spring container.
Then our journey continues with the extensions built into Spring Data for Apache Geode to simplify the development of Apache Geode applications in a Spring context, using Spring’s powerful abstractions and highly consistent programming model. This part of the story was greatly enhanced in Spring Data Kay, with the Annotation-based configuration model. Though this new configuration approach uses annotations and provides sensible defaults, its use is also very explicit and assumes nothing. If any part of the configuration is ambiguous, SDG will fail fast. SDG gives you choice, so you still must tell SDG what you want.
Next, we venture into Spring Boot and all of its wonderfully expressive and highly opinionated “convention over configuration” approach for getting the most out of your Spring Apache Geode applications in the easiest, quickest, and most reliable way possible. We accomplish this by combining Spring Data for Apache Geode’s annotation-based configuration with Spring Boot’s auto-configuration to get you up and running even faster and more reliably so that you are productive from the start.
As a result, it would be pertinent to begin your Spring Boot education with Spring Boot’s documentation.
Finally, we arrive at Spring Boot for Apache Geode (SBDG).
3. Using Spring Boot for Apache Geode
To use Spring Boot for Apache Geode, declare the spring-geode-starter on your Spring Boot application classpath:
<dependencies>
    <dependency>
        <groupId>org.springframework.geode</groupId>
        <artifactId>spring-geode-starter</artifactId>
        <version>1.6.14</version>
    </dependency>
</dependencies>dependencies {
compile 'org.springframework.geode:spring-geode-starter:1.6.14'
}3.1. Maven BOM
If you anticipate using more than one Spring Boot for Apache Geode (SBDG) module in your Spring Boot application,
you can also declare the new org.springframework.geode:spring-geode-bom Maven BOM in your application Maven POM.
Your application use case may require more than one module if (for example, you need (HTTP) Session state management
and replication with, for example, spring-geode-starter-session), if you need to enable Spring Boot Actuator endpoints
for Apache Geode (for example, spring-geode-starter-actuator), or if you need assistance writing complex Unit
and (Distributed) Integration Tests with Spring Test for Apache Geode (STDG) (for example, spring-geode-starter-test).
You can declare and use any one of the SBDG modules:
-
spring-geode-starter -
spring-geode-starter-actuator -
spring-geode-starter-logging -
spring-geode-starter-session -
spring-geode-starter-test
When more than one SBDG module is in use, it makes sense to declare the spring-geode-bom to manage all the dependencies
such that the versions and transitive dependencies necessarily align properly.
A Spring Boot application Maven POM that declares the spring-geode-bom along with two or more module dependencies
might appear as follows:
<project xmlns="http://maven.apache.org/POM/4.0.0">

    <modelVersion>4.0.0</modelVersion>

    <parent>
        <groupId>org.springframework.boot</groupId>
        <artifactId>spring-boot-starter-parent</artifactId>
        <version>2.6.14</version>
    </parent>

    <artifactId>my-spring-boot-application</artifactId>

    <properties>
        <spring-geode.version>1.6.14</spring-geode.version>
    </properties>

    <dependencyManagement>
        <dependencies>
            <dependency>
                <groupId>org.springframework.geode</groupId>
                <artifactId>spring-geode-bom</artifactId>
                <version>${spring-geode.version}</version>
                <scope>import</scope>
                <type>pom</type>
            </dependency>
        </dependencies>
    </dependencyManagement>

    <dependencies>
        <dependency>
            <groupId>org.springframework.geode</groupId>
            <artifactId>spring-geode-starter</artifactId>
        </dependency>
        <dependency>
            <groupId>org.springframework.geode</groupId>
            <artifactId>spring-geode-starter-session</artifactId>
        </dependency>
        <dependency>
            <groupId>org.springframework.geode</groupId>
            <artifactId>spring-geode-starter-test</artifactId>
            <scope>test</scope>
        </dependency>
    </dependencies>

</project>
Notice that:
-
The Spring Boot application Maven POM (
pom.xml) contains a<dependencyManagement>section that declares theorg.springframework.geode:spring-geode-bom. -
None of the
spring-geode-starter[-xyz]dependencies explicitly specify a<version>. The version is managed by thespring-geode.versionproperty, making it easy to switch between versions of SBDG as needed and use it in all the SBDG modules declared and used in your application Maven POM.
If you change the version of SBDG, be sure to change the org.springframework.boot:spring-boot-starter-parent POM
version to match. SBDG is always one major version behind but matches on minor version and patch version
(and version qualifier — SNAPSHOT, M#, RC#, or RELEASE, if applicable).
For example, SBDG 1.4.0 is based on Spring Boot 2.4.0. SBDG 1.3.5.RELEASE is based on Spring Boot 2.3.5.RELEASE,
and so on. It is important that the versions align.
| All of these concerns are handled for you by going to start.spring.io and adding the “_Spring for Apache Geode_” dependency to a project. For convenience, you can click this link to get started. |
3.2. Gradle Dependency Management
Using Gradle is similar to using Maven.
Again, if you declare and use more than one SBDG module in your Spring Boot application (for example,
the spring-geode-starter along with the spring-geode-starter-session dependency), declaring the spring-geode-bom
inside your application Gradle build file helps.
Your application Gradle build file configuration (roughly) appears as follows:
plugins {
  id 'org.springframework.boot' version '2.6.14'
  id 'io.spring.dependency-management' version '1.0.10.RELEASE'
  id 'java'
}

// ...

ext {
  set('springGeodeVersion', "1.6.14")
}

dependencies {
  implementation 'org.springframework.geode:spring-geode-starter'
  implementation 'org.springframework.geode:spring-geode-starter-actuator'
  testImplementation 'org.springframework.boot:spring-boot-starter-test'
}

dependencyManagement {
  imports {
    mavenBom "org.springframework.geode:spring-geode-bom:${springGeodeVersion}"
  }
}
A combination of the Spring Boot Gradle Plugin and the Spring Dependency Management Gradle Plugin manages the application dependencies for you.
In a nutshell, the Spring Dependency Management Gradle Plugin provides dependency management capabilities for Gradle, much like Maven. The Spring Boot Gradle Plugin defines a curated and tested set of versions for many third party Java libraries. Together, they make adding dependencies and managing (compatible) versions easier.
Again, you do not need to explicitly declare the version when adding a dependency, including a new SBDG module
dependency (for example, spring-geode-starter-session), since this has already been determined for you.
You can declare the dependency as follows:
implementation 'org.springframework.geode:spring-geode-starter-session'The version of SBDG is controlled by the extension property (springGeodeVersion) in the application Gradle build file.
To use a different version of SBDG, set the springGeodeVersion property to the desired version (for example,
1.3.5.RELEASE). Remember to be sure that the version of Spring Boot matches.
SBDG is always one major version behind but matches on minor version and patch version (and version qualifier,
such as SNAPSHOT, M#, RC#, or RELEASE, if applicable). For example, SBDG 1.4.0 is based on Spring Boot 2.4.0,
SBDG 1.3.5.RELEASE is based on Spring Boot 2.3.5.RELEASE, and so on. It is important that the versions align.
| All of these concerns are handled for you by going to start.spring.io and adding the “_Spring for Apache Geode_” dependency to a project. For convenience, you can click this link to get started. |
4. Primary Dependency Versions
Spring Boot for Apache Geode 1.6.14 builds and depends on the following versions of the base projects listed below:
| Name | Version |
|---|---|
Java (JRE) |
1.8 |
Apache Geode |
1.14.4 |
Spring Framework |
5.3.24 |
Spring Boot |
2.6.14 |
Spring Data for Apache Geode |
2.6.10 |
Spring Session for Apache Geode |
2.6.3 |
Spring Test for Apache Geode |
0.2.4-Q |
It is essential that the versions of all the dependencies listed in the table above align accordingly. If the dependency versions are misaligned, then functionality could be missing, or certain functions could behave unpredictably from its specified contract.
Please follow dependency versions listed in the table above and use it as a guide when setting up your Spring Boot projects using Apache Geode.
Again, the best way to setup your Spring Boot projects is by first, declaring the spring-boot-starter-parent Maven POM
as the parent POM in your project POM:
<parent>
    <groupId>org.springframework.boot</groupId>
    <artifactId>spring-boot-starter-parent</artifactId>
    <version>2.6.14</version>
</parent>
Or, when using Grade:
plugins {
  id 'org.springframework.boot' version '2.6.14'
  id 'io.spring.dependency-management' version '1.0.10.RELEASE'
  id 'java'
}
And then, use the Spring Boot for Apache Geode, spring-geode-bom. For example, with Maven:
spring-geode-bom BOM in Maven<properties>
<spring-geode.version>1.6.14</spring-geode.version>
</properties>
<dependencyManagement>
<dependencies>
<dependency>
<groupId>org.springframework.geode</groupId>
<artifactId>spring-geode-bom</artifactId>
<version>${spring-geode.version}</version>
<scope>import</scope>
<type>pom</type>
</dependency>
</dependencies>
</dependencyManagement>
<dependencies>
<dependency>
<groupId>org.springframework.geode</groupId>
<artifactId>spring-geode-starter</artifactId>
</dependency>
</dependencies>Or, with Gradle:
spring-geode-bom BOM in Gradleext {
set('springGeodeVersion', "1.6.14")
}
dependencies {
implementation 'org.springframework.geode:spring-geode-starter'
}
dependencyManagement {
imports {
mavenBom "org.springframework.geode:spring-geode-bom:${springGeodeVersion}"
}
}All of this is made simple by going to start.spring.io and creating a Spring Boot
2.6.14 project using Apache Geode.
4.1. Overriding Dependency Versions
While Spring Boot for Apache Geode requires baseline versions of the primary dependencies listed above, it is possible, using Spring Boot’s dependency management capabilities, to override the versions of 3rd-party Java libraries and dependencies managed by Spring Boot itself.
When your Spring Boot application Maven POM inherits from the org.springframework.boot:spring-boot-starter-parent,
or alternatively, applies the Spring Dependency Management Gradle Plugin (io.spring.dependency-management) along with
the Spring Boot Gradle Plugin (org.springframework.boot) in your Spring Boot application Gradle build file, then you
automatically enable the dependency management capabilities provided by Spring Boot for all 3rd-party Java libraries
and dependencies curated and managed by Spring Boot.
Spring Boot’s dependency management harmonizes all 3rd-party Java libraries and dependencies that you are likely to use in your Spring Boot applications. All these dependencies have been tested and proven to work with the version of Spring Boot and other Spring dependencies (e.g. Spring Data, Spring Security) you may be using in your Spring Boot applications.
Still, there may be times when you want, or even need to override the version of some 3rd-party Java libraries used by your Spring Boot applications, that are specifically managed by Spring Boot. In cases where you know that using a different version of a managed dependency is safe to do so, then you have a few options for how to override the dependency version:
| Use caution when overriding dependencies since they may not be compatible with other dependencies managed by Spring Boot for which you may have declared on your application classpath, for example, by adding a starter. It is common for multiple Java libraries to share the same transitive dependencies but use different versions of the Java library (e.g. logging). This will often lead to Exceptions thrown at runtime due to API differences. Keep in mind that Java resolves classes on the classpath from the first class definition that is found in the order that JARs or paths have been defined on the classpath. Finally, Spring does not support dependency versions that have been overridden and do not match the versions declared and managed by Spring Boot. See documentation. |
| You should refer to Spring Boot’s documentation on Dependency Management for more details. |
4.1.1. Version Property Override
Perhaps the easiest option to change the version of a Spring Boot managed dependency is to set the version property used by Spring Boot to control the dependency’s version to the desired Java library version.
For example, if you want to use a different version of Log4j than what is currently set and determined by Spring Boot, then you would do:
<properties>
  <log4j2.version>2.17.2</log4j2.version>
</properties>ext['log4j2.version'] = '2.17.2'
The Log4j version number used in the Maven and Gradle examples shown above is arbitrary. You must set
the log4j2.version property to a valid Log4j version that would be resolvable by Maven or Gradle when given
the fully qualified artifact: org.apache.logging.log4j:log4j:2.17.2.
|
The version property name must precisely match the version property declared in the spring-boot-dependencies
Maven POM.
See Spring Boot’s documentation on version properties.
Additional details can be found in the Spring Boot Maven Plugin documentation as well as the Spring Boot Gradle Plugin documentation.
4.1.2. Override with Dependency Management
This option is not specific to Spring in general, or Spring Boot in particular, but applies to Maven and Gradle, which both have intrinsic dependency management features and capabilities.
This approach is useful to not only control the versions of the dependencies managed by Spring Boot directly, but also control the versions of dependencies that may be transitively pulled in by the dependencies that are managed by Spring Boot. Additionally, this approach is more universal since it is handled by Maven or Gradle itself.
For example, when you declare the org.springframework.boot:spring-boot-starter-test dependency in your Spring Boot
application Maven POM or Gradle build file for testing purposes, you will see a dependency tree similar to:
$gradlew dependencies OR $mvn dependency:tree...
[INFO] +- org.springframework.boot:spring-boot-starter-test:jar:2.6.4:test
[INFO] | +- org.springframework.boot:spring-boot-test:jar:2.6.4:test
[INFO] | +- org.springframework.boot:spring-boot-test-autoconfigure:jar:2.6.4:test
[INFO] | +- com.jayway.jsonpath:json-path:jar:2.6.0:test
[INFO] | | +- net.minidev:json-smart:jar:2.4.8:test
[INFO] | | | \- net.minidev:accessors-smart:jar:2.4.8:test
[INFO] | | | \- org.ow2.asm:asm:jar:9.1:test
[INFO] | | \- org.slf4j:slf4j-api:jar:1.7.36:compile
[INFO] | +- jakarta.xml.bind:jakarta.xml.bind-api:jar:2.3.3:test
[INFO] | | \- jakarta.activation:jakarta.activation-api:jar:1.2.2:test
[INFO] | +- org.assertj:assertj-core:jar:3.21.0:compile
[INFO] | +- org.hamcrest:hamcrest:jar:2.2:compile
[INFO] | +- org.junit.jupiter:junit-jupiter:jar:5.8.2:test
[INFO] | | +- org.junit.jupiter:junit-jupiter-api:jar:5.8.2:test
[INFO] | | | +- org.opentest4j:opentest4j:jar:1.2.0:test
[INFO] | | | +- org.junit.platform:junit-platform-commons:jar:1.8.2:test
[INFO] | | | \- org.apiguardian:apiguardian-api:jar:1.1.2:test
[INFO] | | +- org.junit.jupiter:junit-jupiter-params:jar:5.8.2:test
[INFO] | | \- org.junit.jupiter:junit-jupiter-engine:jar:5.8.2:test
[INFO] | | \- org.junit.platform:junit-platform-engine:jar:1.8.2:test
...If you wanted to override and control the version of the opentest4j transitive dependency, for whatever reason,
perhaps because you are using the opentest4j API directly in your application tests, then you could add dependency
management in either Maven or Gradle to control the opentest4j dependency version.
The opentest4j dependency is pulled in by JUnit and is not a dependency that Spring Boot specifically manages.
Of course, Maven or Gradle’s dependency management capabilities can be used to override dependencies that are managed
by Spring Boot as well.
|
Using the opentest4j dependency as an example, you can override the dependency version by doing the following:
<project>

    <dependencyManagement>
        <dependencies>
            <dependency>
                <groupId>org.opentest4j</groupId>
                <artifactId>opentest4j</artifactId>
                <version>1.0.0</version>
            </dependency>
        </dependencies>
    </dependencyManagement>

</project>plugins {
id 'org.springframework.boot' version '2.6.14'
}
apply plugin: 'io.spring.dependency-management'
dependencyManagement {
dependencies {
dependency 'org.opentest4j:openttest4j:1.0.0'
}
}After applying Maven or Gradle dependency management configuration, you will then see:
$gradlew dependencies OR $mvn dependency:tree...
[INFO] +- org.springframework.boot:spring-boot-starter-test:jar:2.6.4:test
...
[INFO] | | | +- org.opentest4j:opentest4j:jar:1.0.0:test
...For more details on Maven dependency management, refer to the documentation.
For more details on Gradle dependency management, please refer to the documentation
5. Building ClientCache Applications
The first opinionated option provided to you by Spring Boot for Apache Geode (SBDG) is a
ClientCache instance
that you get by declaring Spring Boot for Apache Geode on your application classpath.
It is assumed that most application developers who use Spring Boot to build applications backed by Apache Geode are building cache client applications deployed in an Apache Geode Client/Server Topology. The client/server topology is the most common and traditional architecture employed by enterprise applications that use Apache Geode.
For example, you can begin building a Spring Boot Apache Geode ClientCache application by declaring the
spring-geode-starter on your application’s classpath:
<dependency>
  <groupId>org.springframework.geode</groupId>
  <artifactId>spring-geode-starter</artifactId>
</dependency>
Then you configure and bootstrap your Spring Boot, Apache Geode ClientCache application with the following
main application class:
ClientCache Application@SpringBootApplication
public class SpringBootApacheGeodeClientCacheApplication {
public static void main(String[] args) {
SpringApplication.run(SpringBootApacheGeodeClientCacheApplication.class, args);
}
}Your application now has a ClientCache instance that can connect to an Apache Geode server running on localhost
and listening on the default CacheServer port, 40404.
By default, an Apache Geode server (that is, CacheServer) must be running for the application to use the ClientCache
instance. However, it is perfectly valid to create a ClientCache instance and perform data access operations by using
LOCAL Regions. This is useful during development.
To develop with LOCAL Regions, configure your cache Regions with the
ClientRegionShortcut.LOCAL
data management policy.
|
When you are ready to switch from your local development environment (IDE) to a client/server architecture in a managed
environment, change the data management policy of the client Region from LOCAL back to the default (PROXY)
or even a CACHING_PROXY, which causes the data to be sent to and received from one or more servers.
| Compare and contrast the preceding configuration with the Spring Data for Apache Geode approach. |
It is uncommon to ever need a direct reference to the ClientCache instance provided by SBDG injected into your
application components (for example, @Service or @Repository beans defined in a Spring ApplicationContext),
whether you are configuring additional Apache Geode objects (Regions, Indexes, and so on) or are using those objects
indirectly in your applications. However, it is possible to do so if and when needed.
For example, perhaps you want to perform some additional ClientCache initialization in a Spring Boot
ApplicationRunner on startup:
GemFireCache reference@SpringBootApplication
public class SpringBootApacheGeodeClientCacheApplication {
public static void main(String[] args) {
SpringApplication.run(SpringBootApacheGeodeClientCacheApplication.class, args);
}
@Bean
ApplicationRunner runAdditionalClientCacheInitialization(GemFireCache gemfireCache) {
return args -> {
ClientCache clientCache = (ClientCache) gemfireCache;
// perform additional ClientCache initialization as needed
};
}
}5.1. Building Embedded (Peer & Server) Cache Applications
What if you want to build an embedded peer Cache application instead?
Perhaps you need an actual peer cache member, configured and bootstrapped with Spring Boot, along with the ability to join this member to an existing cluster (of data servers) as a peer node.
Remember the second goal in Spring Boot’s documentation:
Be opinionated out of the box but get out of the way quickly as requirements start to diverge from the defaults.
Here, we focus on the second part of the goal: "get out of the way quickly as requirements start to diverge from the defaults".
If your application requirements demand you use Spring Boot to configure and bootstrap an embedded peer Cache instance,
declare your intention with either SDG’s
@PeerCacheApplication annotation,
or, if you also need to enable connections from ClientCache applications, use SDG’s
@CacheServerApplication annotation:
CacheServer Application@SpringBootApplication
@CacheServerApplication(name = "SpringBootApacheGeodeCacheServerApplication")
public class SpringBootApacheGeodeCacheServerApplication {
public static void main(String[] args) {
SpringApplication.run(SpringBootApacheGeodeCacheServerApplication.class, args);
}
}
An Apache Geode server is not necessarily a CacheServer capable of serving cache clients. It is merely a peer
member node in an Apache Geode cluster (that is, a distributed system) that stores and manages data.
|
By explicitly declaring the @CacheServerApplication annotation, you tell Spring Boot that you do not want the default
ClientCache instance but rather want an embedded peer Cache instance with a CacheServer component, which enables
connections from ClientCache applications.
You can also enable two other Apache Geode services: * An embedded Locator, which allows clients or even other peers to locate servers in the cluster. * An embedded Manager, which allows the Apache Geode application process to be managed and monitored by using Gfsh, Apache Geode’s command-line shell tool:
CacheServer Application with Locator and Manager services enabled@SpringBootApplication
@CacheServerApplication(name = "SpringBootApacheGeodeCacheServerApplication")
@EnableLocator
@EnableManager
public class SpringBootApacheGeodeCacheServerApplication {
public static void main(String[] args) {
SpringApplication.run(SpringBootApacheGeodeCacheServerApplication.class, args);
}
}Then you can use Gfsh to connect to and manage this server:
$ echo $GEMFIRE
/Users/jblum/pivdev/apache-geode-1.2.1

$ gfsh
    _________________________     __
   / _____/ ______/ ______/ /____/ /
  / /  __/ /___  /_____  / _____  /
 / /__/ / ____/  _____/ / /    / /
/______/_/      /______/_/    /_/    1.2.1

Monitor and Manage Apache Geode

gfsh>connect
Connecting to Locator at [host=localhost, port=10334] ..
Connecting to Manager at [host=10.0.0.121, port=1099] ..
Successfully connected to: [host=10.0.0.121, port=1099]


gfsh>list members
                   Name                     | Id
------------------------------------------- | --------------------------------------------------------------------------
SpringBootApacheGeodeCacheServerApplication | 10.0.0.121(SpringBootApacheGeodeCacheServerApplication:29798)<ec><v0>:1024


gfsh>describe member --name=SpringBootApacheGeodeCacheServerApplication
Name        : SpringBootApacheGeodeCacheServerApplication
Id          : 10.0.0.121(SpringBootApacheGeodeCacheServerApplication:29798)<ec><v0>:1024
Host        : 10.0.0.121
Regions     :
PID         : 29798
Groups      :
Used Heap   : 168M
Max Heap    : 3641M
Working Dir : /Users/jblum/pivdev/spring-boot-data-geode/spring-geode-docs/build
Log file    : /Users/jblum/pivdev/spring-boot-data-geode/spring-geode-docs/build
Locators    : localhost[10334]

Cache Server Information
Server Bind              :
Server Port              : 40404
Running                  : true
Client Connections       : 0
You can even start additional servers in Gfsh. These additional servers connect to your Spring Boot configured
and bootstrapped Apache Geode CacheServer application. These additional servers started in Gfsh know about
the Spring Boot, Apache Geode server because of the embedded Locator service, which is running on localhost
and listening on the default Locator port, 10334:
gfsh>start server --name=GfshServer --log-level=config --disable-default-server
Starting a Geode Server in /Users/jblum/pivdev/lab/GfshServer...
...
Server in /Users/jblum/pivdev/lab/GfshServer on 10.0.0.121 as GfshServer is currently online.
Process ID: 30031
Uptime: 3 seconds
Geode Version: 1.2.1
Java Version: 1.8.0_152
Log File: /Users/jblum/pivdev/lab/GfshServer/GfshServer.log
JVM Arguments: -Dgemfire.default.locators=10.0.0.121:127.0.0.1[10334] -Dgemfire.use-cluster-configuration=true -Dgemfire.start-dev-rest-api=false -Dgemfire.log-level=config -XX:OnOutOfMemoryError=kill -KILL %p -Dgemfire.launcher.registerSignalHandlers=true -Djava.awt.headless=true -Dsun.rmi.dgc.server.gcInterval=9223372036854775806
Class-Path: /Users/jblum/pivdev/apache-geode-1.2.1/lib/geode-core-1.2.1.jar:/Users/jblum/pivdev/apache-geode-1.2.1/lib/geode-dependencies.jar


gfsh>list members
                   Name                     | Id
------------------------------------------- | --------------------------------------------------------------------------
SpringBootApacheGeodeCacheServerApplication | 10.0.0.121(SpringBootApacheGeodeCacheServerApplication:29798)<ec><v0>:1024
GfshServer                                  | 10.0.0.121(GfshServer:30031)<v1>:1025
Perhaps you want to start the other way around. You may need to connect a Spring Boot configured and bootstrapped Apache Geode server application to an existing cluster. You can start the cluster in Gfsh with the following commands (shown with partial typical output):
gfsh>start locator --name=GfshLocator --port=11235 --log-level=config
Starting a Geode Locator in /Users/jblum/pivdev/lab/GfshLocator...
...
Locator in /Users/jblum/pivdev/lab/GfshLocator on 10.0.0.121[11235] as GfshLocator is currently online.
Process ID: 30245
Uptime: 3 seconds
Geode Version: 1.2.1
Java Version: 1.8.0_152
Log File: /Users/jblum/pivdev/lab/GfshLocator/GfshLocator.log
JVM Arguments: -Dgemfire.log-level=config -Dgemfire.enable-cluster-configuration=true -Dgemfire.load-cluster-configuration-from-dir=false -Dgemfire.launcher.registerSignalHandlers=true -Djava.awt.headless=true -Dsun.rmi.dgc.server.gcInterval=9223372036854775806
Class-Path: /Users/jblum/pivdev/apache-geode-1.2.1/lib/geode-core-1.2.1.jar:/Users/jblum/pivdev/apache-geode-1.2.1/lib/geode-dependencies.jar

Successfully connected to: JMX Manager [host=10.0.0.121, port=1099]

Cluster configuration service is up and running.


gfsh>start server --name=GfshServer --log-level=config --disable-default-server
Starting a Geode Server in /Users/jblum/pivdev/lab/GfshServer...
....
Server in /Users/jblum/pivdev/lab/GfshServer on 10.0.0.121 as GfshServer is currently online.
Process ID: 30270
Uptime: 4 seconds
Geode Version: 1.2.1
Java Version: 1.8.0_152
Log File: /Users/jblum/pivdev/lab/GfshServer/GfshServer.log
JVM Arguments: -Dgemfire.default.locators=10.0.0.121[11235] -Dgemfire.use-cluster-configuration=true -Dgemfire.start-dev-rest-api=false -Dgemfire.log-level=config -XX:OnOutOfMemoryError=kill -KILL %p -Dgemfire.launcher.registerSignalHandlers=true -Djava.awt.headless=true -Dsun.rmi.dgc.server.gcInterval=9223372036854775806
Class-Path: /Users/jblum/pivdev/apache-geode-1.2.1/lib/geode-core-1.2.1.jar:/Users/jblum/pivdev/apache-geode-1.2.1/lib/geode-dependencies.jar


gfsh>list members
   Name     | Id
----------- | --------------------------------------------------
GfshLocator | 10.0.0.121(GfshLocator:30245:locator)<ec><v0>:1024
GfshServer  | 10.0.0.121(GfshServer:30270)<v1>:1025
Then modify the SpringBootApacheGeodeCacheServerApplication class to connect to the existing cluster:
CacheServer Application connecting to an external cluster@SpringBootApplication
@CacheServerApplication(name = "SpringBootApacheGeodeCacheServerApplication", locators = "localhost[11235]")
public class SpringBootApacheGeodeCacheServerApplication {
public static void main(String[] args) {
SpringApplication.run(SpringBootApacheGeodeClientCacheApplication.class, args);
}
}
Notice that the SpringBootApacheGeodeCacheServerApplication class, @CacheServerApplication annotation’s
locators property are configured with the host and port (localhost[11235]), on which the Locator was started
by using Gfsh.
|
After running your Spring Boot Apache Geode CacheServer application again and executing the list members command
in Gfsh again, you should see output similar to the following:
gfsh>list members
                   Name                     | Id
------------------------------------------- | ----------------------------------------------------------------------
GfshLocator                                 | 10.0.0.121(GfshLocator:30245:locator)<ec><v0>:1024
GfshServer                                  | 10.0.0.121(GfshServer:30270)<v1>:1025
SpringBootApacheGeodeCacheServerApplication | 10.0.0.121(SpringBootApacheGeodeCacheServerApplication:30279)<v2>:1026


gfsh>describe member --name=SpringBootApacheGeodeCacheServerApplication
Name        : SpringBootApacheGeodeCacheServerApplication
Id          : 10.0.0.121(SpringBootApacheGeodeCacheServerApplication:30279)<v2>:1026
Host        : 10.0.0.121
Regions     :
PID         : 30279
Groups      :
Used Heap   : 165M
Max Heap    : 3641M
Working Dir : /Users/jblum/pivdev/spring-boot-data-geode/spring-geode-docs/build
Log file    : /Users/jblum/pivdev/spring-boot-data-geode/spring-geode-docs/build
Locators    : localhost[11235]

Cache Server Information
Server Bind              :
Server Port              : 40404
Running                  : true
Client Connections       : 0
In both scenarios, the Spring Boot configured and bootstrapped Apache Geode server, the Gfsh Locator and Gfsh server formed a cluster.
While you can use either approach and Spring does not care, it is far more convenient to use Spring Boot and your IDE to form a small cluster while developing. Spring profiles make it far simpler and much faster to configure and start a small cluster.
Also, this approach enables rapidly prototyping, testing, and debugging your entire end-to-end application and system architecture right from the comfort and familiarity of your IDE. No additional tooling (such as Gfsh) or knowledge is required to get started quickly and easily. Just build and run.
Be careful to vary your port numbers for the embedded services, like the CacheServer, Locators, and the Manager,
especially if you start multiple instances on the same machine. Otherwise, you are likely to run into
a java.net.BindException caused by port conflicts.
|
| See the Running an Apache Geode cluster with Spring Boot from your IDE appendix for more details. |
5.2. Building Locator Applications
In addition to ClientCache, CacheServer, and peer Cache applications, SDG, and by extension SBDG, now supports
Spring Boot Apache Geode Locator applications.
An Apache Geode Locator is a location-based service or, more typically, a standalone process that lets clients locate a cluster of Apache Geode servers to manage data. Many cache clients can connect to the same cluster to share data. Running multiple clients is common in a Microservices architecture where you need to scale-up the number of application instances to satisfy the demand.
An Apache Geode Locator is also used by joining members of an existing cluster to scale-out and increase capacity of the logically pooled system resources (memory, CPU, network and disk). A Locator maintains metadata that is sent to the clients to enable such capabilities as single-hop data access to route data access operations to the data node in the cluster maintaining the data of interests. A Locator also maintains load information for servers in the cluster, which enables the load to be uniformly distributed across the cluster while also providing fail-over services to a redundant member if the primary fails. A Locator provides many more benefits, and we encourage you to read the documentation for more details.
As shown earlier, you can embed a Locator service within either a Spring Boot peer Cache or a CacheServer
application by using the SDG @EnableLocator annotation:
@SpringBootApplication
@CacheServerApplication
@EnableLocator
class SpringBootCacheServerWithEmbeddedLocatorApplication {
	// ...
}
However, it is more common to start standalone Locator JVM processes. This is useful when you want to increase the resiliency of your cluster in the face of network and process failures, which are bound to happen. If a Locator JVM process crashes or gets severed from the cluster due to a network failure or partition, having multiple Locators provides a higher degree of availability (HA) through redundancy.
Even if all Locators in the cluster go down, the cluster still remains intact. You cannot add more peer members (that is, scale-up the number of data nodes in the cluster) or connect any more clients, but the cluster is fine. If all the locators in the cluster go down, it is safe to restart them only after a thorough diagnosis.
| Once a client receives metadata about the cluster of servers, all data-access operations are sent directly to servers in the cluster, not a Locator. Therefore, existing, connected clients remain connected and operable. |
To configure and bootstrap Spring Boot Apache Geode Locator applications as standalone JVM processes, use the following configuration:
@SpringBootApplication
@LocatorApplication
class SpringBootApacheGeodeLocatorApplication {
	// ...
}
Instead of using the @EnableLocator annotation, you now use the @LocatorApplication annotation.
The @LocatorApplication annotation works in the same way as the @PeerCacheApplication and @CacheServerApplication
annotations, bootstrapping an Apache Geode process and overriding the default ClientCache instance provided by SBDG.
If your @SpringBootApplication class is annotated with @LocatorApplication, it must be a Locator and not
a ClientCache, CacheServer, or peer Cache application. If you need the application to function as a peer Cache,
perhaps with embedded CacheServer components and an embedded Locator, you need to follow the approach shown earlier:
using the @EnableLocator annotation with either the @PeerCacheApplication or @CacheServerApplication annotation.
|
With our Spring Boot Apache Geode Locator application, we can connect both Spring Boot configured and bootstrapped
peer members (peer Cache, CacheServer and Locator applications) as well as Gfsh started Locators and servers.
First, we need to start two Locators by using our Spring Boot Apache Geode Locator application class:
@UseLocators
@SpringBootApplication
@LocatorApplication(name = "SpringBootApacheGeodeLocatorApplication")
public class SpringBootApacheGeodeLocatorApplication {

	public static void main(String[] args) {

		new SpringApplicationBuilder(SpringBootApacheGeodeLocatorApplication.class)
			.web(WebApplicationType.NONE)
			.build()
			.run(args);

		System.err.println("Press <enter> to exit!");

		new Scanner(System.in).nextLine();
	}

	@Configuration
	@EnableManager(start = true)
	@Profile("manager")
	@SuppressWarnings("unused")
	static class ManagerConfiguration { }

}
We also need to vary the configuration for each Locator application instance.
Apache Geode requires each peer member in the cluster to be uniquely named. We can set the name of the Locator by using
the spring.data.gemfire.locator.name SDG property set as a JVM System Property in your IDE’s run configuration profile
for the main application class: -Dspring.data.gemfire.locator.name=SpringLocatorOne. We name the second Locator
application instance SpringLocatorTwo.
Additionally, we must vary the port numbers that the Locators use to listen for connections. By default, an Apache Geode
Locator listens on port 10334. We can set the Locator port by using the spring.data.gemfire.locator.port
SDG property.
For our first Locator application instance (SpringLocatorOne), we also enable the "manager" profile so that
we can connect to the Locator by using Gfsh.
Our IDE run configuration profile for our first Locator application instance appears as:
-server -ea -Dspring.profiles.active=manager -Dspring.data.gemfire.locator.name=SpringLocatorOne -Dlogback.log.level=INFO
And our IDE run configuration profile for our second Locator application instance appears as:
-server -ea -Dspring.profiles.active= -Dspring.data.gemfire.locator.name=SpringLocatorTwo -Dspring.data.gemfire.locator.port=11235 -Dlogback.log.level=INFO
You should see log output similar to the following when you start a Locator application instance:
  .   ____          _            __ _ _
 /\\ / ___'_ __ _ _(_)_ __  __ _ \ \ \ \
( ( )\___ | '_ | '_| | '_ \/ _` | \ \ \ \
 \\/  ___)| |_)| | | | | || (_| |  ) ) ) )
  '  |____| .__|_| |_|_| |_\__, | / / / /
 =========|_|==============|___/=/_/_/_/
 :: Spring Boot ::  (v2.2.0.BUILD-SNAPSHOT)

2019-09-01 11:02:48,707  INFO .SpringBootApacheGeodeLocatorApplication:  55 - Starting SpringBootApacheGeodeLocatorApplication on jblum-mbpro-2.local with PID 30077 (/Users/jblum/pivdev/spring-boot-data-geode/spring-geode-docs/out/production/classes started by jblum in /Users/jblum/pivdev/spring-boot-data-geode/spring-geode-docs/build)
2019-09-01 11:02:48,711  INFO .SpringBootApacheGeodeLocatorApplication: 651 - No active profile set, falling back to default profiles: default
2019-09-01 11:02:49,374  INFO xt.annotation.ConfigurationClassEnhancer: 355 - @Bean method LocatorApplicationConfiguration.exclusiveLocatorApplicationBeanFactoryPostProcessor is non-static and returns an object assignable to Spring's BeanFactoryPostProcessor interface. This will result in a failure to process annotations such as @Autowired, @Resource and @PostConstruct within the method's declaring @Configuration class. Add the 'static' modifier to this method to avoid these container lifecycle issues; see @Bean javadoc for complete details.
2019-09-01 11:02:49,919  INFO ode.distributed.internal.InternalLocator: 530 - Starting peer location for Distribution Locator on 10.99.199.24[11235]
2019-09-01 11:02:49,925  INFO ode.distributed.internal.InternalLocator: 498 - Starting Distribution Locator on 10.99.199.24[11235]
2019-09-01 11:02:49,926  INFO distributed.internal.tcpserver.TcpServer: 242 - Locator was created at Sun Sep 01 11:02:49 PDT 2019
2019-09-01 11:02:49,927  INFO distributed.internal.tcpserver.TcpServer: 243 - Listening on port 11235 bound on address 0.0.0.0/0.0.0.0
2019-09-01 11:02:49,928  INFO ternal.membership.gms.locator.GMSLocator: 162 - GemFire peer location service starting.  Other locators: localhost[10334]  Locators preferred as coordinators: true  Network partition detection enabled: true  View persistence file: /Users/jblum/pivdev/spring-boot-data-geode/spring-geode-docs/build/locator11235view.dat
2019-09-01 11:02:49,928  INFO ternal.membership.gms.locator.GMSLocator: 416 - Peer locator attempting to recover from localhost/127.0.0.1:10334
2019-09-01 11:02:49,963  INFO ternal.membership.gms.locator.GMSLocator: 422 - Peer locator recovered initial membership of View[10.99.199.24(SpringLocatorOne:30043:locator)<ec><v0>:41000|0] members: [10.99.199.24(SpringLocatorOne:30043:locator)<ec><v0>:41000]
2019-09-01 11:02:49,963  INFO ternal.membership.gms.locator.GMSLocator: 407 - Peer locator recovered state from LocatorAddress [socketInetAddress=localhost/127.0.0.1:10334, hostname=localhost, isIpString=false]
2019-09-01 11:02:49,965  INFO ode.distributed.internal.InternalLocator: 644 - Starting distributed system
2019-09-01 11:02:50,007  INFO he.geode.internal.logging.LoggingSession:  82 -
---------------------------------------------------------------------------

  Licensed to the Apache Software Foundation (ASF) under one or more
  contributor license agreements.  See the NOTICE file distributed with this
  work for additional information regarding copyright ownership.

  The ASF licenses this file to You under the Apache License, Version 2.0
  (the "License"); you may not use this file except in compliance with the
  License.  You may obtain a copy of the License at

  https://www.apache.org/licenses/LICENSE-2.0

  Unless required by applicable law or agreed to in writing, software
  distributed under the License is distributed on an "AS IS" BASIS, WITHOUT
  WARRANTIES OR CONDITIONS OF ANY KIND, either express or implied.  See the
  License for the specific language governing permissions and limitations
  under the License.

---------------------------------------------------------------------------
Build-Date: 2019-04-19 11:49:13 -0700
Build-Id: onichols 0
Build-Java-Version: 1.8.0_192
Build-Platform: Mac OS X 10.14.4 x86_64
Product-Name: Apache Geode
Product-Version: 1.9.0
Source-Date: 2019-04-19 11:11:31 -0700
Source-Repository: release/1.9.0
Source-Revision: c0a73d1cb84986d432003bd12e70175520e63597
Native version: native code unavailable
Running on: 10.99.199.24/10.99.199.24, 8 cpu(s), x86_64 Mac OS X 10.13.6
Communications version: 100
Process ID: 30077
User: jblum
Current dir: /Users/jblum/pivdev/spring-boot-data-geode/spring-geode-docs/build
Home dir: /Users/jblum
Command Line Parameters:
  -ea
  -Dspring.profiles.active=
  -Dspring.data.gemfire.locator.name=SpringLocatorTwo
  -Dspring.data.gemfire.locator.port=11235
  -Dlogback.log.level=INFO
  -javaagent:/Applications/IntelliJ IDEA 19 CE.app/Contents/lib/idea_rt.jar=51961:/Applications/IntelliJ IDEA 19 CE.app/Contents/bin
  -Dfile.encoding=UTF-8
Class Path:
...
..
.
2019-09-01 11:02:54,112  INFO ode.distributed.internal.InternalLocator: 661 - Locator started on 10.99.199.24[11235]
2019-09-01 11:02:54,113  INFO ode.distributed.internal.InternalLocator: 769 - Starting server location for Distribution Locator on 10.99.199.24[11235]
2019-09-01 11:02:54,134  INFO nt.internal.locator.wan.LocatorDiscovery: 138 - Locator discovery task exchanged locator information 10.99.199.24[11235] with localhost[10334]: {-1=[10.99.199.24[10334]]}.
2019-09-01 11:02:54,242  INFO .SpringBootApacheGeodeLocatorApplication:  61 - Started SpringBootApacheGeodeLocatorApplication in 6.137470354 seconds (JVM running for 6.667)
Press <enter> to exit!
Next, start up the second Locator application instance (you should see log output similar to the preceding list). Then connect to the cluster of Locators by using Gfsh:
$ echo $GEMFIRE
/Users/jblum/pivdev/apache-geode-1.9.0

$ gfsh
    _________________________     __
   / _____/ ______/ ______/ /____/ /
  / /  __/ /___  /_____  / _____  /
 / /__/ / ____/  _____/ / /    / /
/______/_/      /______/_/    /_/    1.9.0

Monitor and Manage Apache Geode

gfsh>connect
Connecting to Locator at [host=localhost, port=10334] ..
Connecting to Manager at [host=10.99.199.24, port=1099] ..
Successfully connected to: [host=10.99.199.24, port=1099]

gfsh>list members
      Name       | Id
---------------- | ------------------------------------------------------------------------
SpringLocatorOne | 10.99.199.24(SpringLocatorOne:30043:locator)<ec><v0>:41000 [Coordinator]
SpringLocatorTwo | 10.99.199.24(SpringLocatorTwo:30077:locator)<ec><v1>:41001
By using our SpringBootApacheGeodeCacheServerApplication main class from the previous section, we can configure
and bootstrap an Apache Geode CacheServer application with Spring Boot and connect it to our cluster of Locators:
@SpringBootApplication
@CacheServerApplication(name = "SpringBootApacheGeodeCacheServerApplication")
@SuppressWarnings("unused")
public class SpringBootApacheGeodeCacheServerApplication {

	public static void main(String[] args) {

		new SpringApplicationBuilder(SpringBootApacheGeodeCacheServerApplication.class)
			.web(WebApplicationType.NONE)
			.build()
			.run(args);
	}

	@Configuration
	@UseLocators
	@Profile("clustered")
	static class ClusteredConfiguration { }

	@Configuration
	@EnableLocator
	@EnableManager(start = true)
	@Profile("!clustered")
	static class LonerConfiguration { }

}
To do so, enable the "clustered" profile by using an IDE run profile configuration similar to:
-server -ea -Dspring.profiles.active=clustered -Dspring.data.gemfire.name=SpringServer -Dspring.data.gemfire.cache.server.port=41414 -Dlogback.log.level=INFO
After the server starts up, you should see the new peer member in the cluster:
CacheServergfsh>list members
Name | Id
---------------- | ------------------------------------------------------------------------
SpringLocatorOne | 10.99.199.24(SpringLocatorOne:30043:locator)<ec><v0>:41000 [Coordinator]
SpringLocatorTwo | 10.99.199.24(SpringLocatorTwo:30077:locator)<ec><v1>:41001
SpringServer | 10.99.199.24(SpringServer:30216)<v2>:41002Finally, we can even start additional Locators and servers connected to this cluster by using Gfsh:
gfsh>start locator --name=GfshLocator --port=12345 --log-level=config
Starting a Geode Locator in /Users/jblum/pivdev/lab/GfshLocator...
......
Locator in /Users/jblum/pivdev/lab/GfshLocator on 10.99.199.24[12345] as GfshLocator is currently online.
Process ID: 30259
Uptime: 5 seconds
Geode Version: 1.9.0
Java Version: 1.8.0_192
Log File: /Users/jblum/pivdev/lab/GfshLocator/GfshLocator.log
JVM Arguments: -Dgemfire.default.locators=10.99.199.24[11235],10.99.199.24[10334] -Dgemfire.enable-cluster-configuration=true -Dgemfire.load-cluster-configuration-from-dir=false -Dgemfire.log-level=config -Dgemfire.launcher.registerSignalHandlers=true -Djava.awt.headless=true -Dsun.rmi.dgc.server.gcInterval=9223372036854775806
Class-Path: /Users/jblum/pivdev/apache-geode-1.9.0/lib/geode-core-1.9.0.jar:/Users/jblum/pivdev/apache-geode-1.9.0/lib/geode-dependencies.jar
gfsh>start server --name=GfshServer --server-port=45454 --log-level=config
Starting a Geode Server in /Users/jblum/pivdev/lab/GfshServer...
...
Server in /Users/jblum/pivdev/lab/GfshServer on 10.99.199.24[45454] as GfshServer is currently online.
Process ID: 30295
Uptime: 2 seconds
Geode Version: 1.9.0
Java Version: 1.8.0_192
Log File: /Users/jblum/pivdev/lab/GfshServer/GfshServer.log
JVM Arguments: -Dgemfire.default.locators=10.99.199.24[11235],10.99.199.24[12345],10.99.199.24[10334] -Dgemfire.start-dev-rest-api=false -Dgemfire.use-cluster-configuration=true -Dgemfire.log-level=config -XX:OnOutOfMemoryError=kill -KILL %p -Dgemfire.launcher.registerSignalHandlers=true -Djava.awt.headless=true -Dsun.rmi.dgc.server.gcInterval=9223372036854775806
Class-Path: /Users/jblum/pivdev/apache-geode-1.9.0/lib/geode-core-1.9.0.jar:/Users/jblum/pivdev/apache-geode-1.9.0/lib/geode-dependencies.jar
gfsh>list members
      Name       | Id
---------------- | ------------------------------------------------------------------------
SpringLocatorOne | 10.99.199.24(SpringLocatorOne:30043:locator)<ec><v0>:41000 [Coordinator]
SpringLocatorTwo | 10.99.199.24(SpringLocatorTwo:30077:locator)<ec><v1>:41001
SpringServer     | 10.99.199.24(SpringServer:30216)<v2>:41002
GfshLocator | 10.99.199.24(GfshLocator:30259:locator)<ec><v3>:41003
GfshServer | 10.99.199.24(GfshServer:30295)<v4>:41004You must be careful to vary the ports and name of your peer members appropriately. Spring, and Spring Boot for Apache Geode (SBDG) in particular, make doing so easy.
5.3. Building Manager Applications
As discussed in the previous sections, you can enable a Spring Boot configured and bootstrapped Apache Geode peer member node in the cluster to function as a Manager.
An Apache Geode Manager is a peer member node in the cluster that runs the management service, letting the cluster be managed and monitored with JMX-based tools, such as Gfsh, JConsole, or JVisualVM. Any tool using the JMX API can connect to and manage an Apache Geode cluster for whatever purpose.
Like Locators, the cluster may have more than one Manager for redundancy. Only server-side, peer member nodes
in the cluster may function Managers. Therefore, a ClientCache application cannot be a Manager.
To create a Manager, use the SDG @EnableManager annotation.
The three primary uses of the @EnableManager annotation to create a Manager are:
1 - CacheServer Manager Application
@SpringBootApplication
@CacheServerApplication(name = "CacheServerManagerApplication")
@EnableManager(start = true)
class CacheServerManagerApplication {
	// ...
}
2 - Peer Cache Manager Application
@SpringBootApplication
@PeerCacheApplication(name = "PeerCacheManagerApplication")
@EnableManager(start = "true")
class PeerCacheManagerApplication {
	// ...
}
3 - Locator Manager Application
@SpringBootApplication
@LocatorApplication(name = "LocatorManagerApplication")
@EnableManager(start = true)
class LocatorManagerApplication {
	// ...
}
#1 creates a peer Cache instance with a CacheServer component that accepts client connections along with
an embedded Manager that lets JMX clients connect.
#2 creates only a peer Cache instance along with an embedded Manager. As a peer Cache with no CacheServer
component, clients are not able to connect to this node. It is merely a server managing data.
#3 creates a Locator instance with an embedded Manager.
In all configuration arrangements, the Manager is configured to start immediately.
See the Javadoc for the
@EnableManager annotation
for additional configuration options.
|
As of Apache Geode 1.11.0, you must include additional Apache Geode dependencies on your Spring Boot application classpath to make your application a proper Apache Geode Manager in the cluster, particularly if you also enable the embedded HTTP service in the Manager.
The required dependencies are:
runtime "org.apache.geode:geode-http-service"
runtime "org.apache.geode:geode-web"
runtime "org.springframework.boot:spring-boot-starter-jetty"
The embedded HTTP service (implemented with the Eclipse Jetty Servlet Container), runs the Management (Admin) REST API, which is used by Apache Geode tooling, such as Gfsh, to connect to an Apache Geode cluster over HTTP. In addition, it also enables the Apache Geode Pulse Monitoring Tool (and Web application) to run.
Even if you do not start the embedded HTTP service, a Manager still requires the geode-http-service, geode-web
and spring-boot-starter-jetty dependencies.
Optionally, you may also include the geode-pulse dependency, as follows:
runtime "org.apache.geode:geode-pulse"The geode-pulse dependency is only required if you want the Manager to automatically start
the Apache Geode Pulse Monitoring Tool. Pulse enables you
to view the nodes of your Apache Geode cluster and monitor them in realtime.
6. Auto-configuration
The following Spring Framework, Spring Data for Apache Geode (SDG) and Spring Session for Apache Geode (SSDG) annotations are implicitly declared by Spring Boot for Apache Geode’s (SBDG) auto-configuration.
-
@ClientCacheApplication -
@EnableGemfireCaching(alternatively, Spring Framework’s@EnableCaching) -
@EnableContinuousQueries -
@EnableGemfireFunctions -
@EnableGemfireFunctionExecutions -
@EnableGemfireRepositories -
@EnableLogging -
@EnablePdx -
@EnableSecurity -
@EnableSsl -
@EnableGemFireHttpSession
This means that you need not explicitly declare any of these annotations on your @SpringBootApplication class,
since they are provided by SBDG already. The only reason you would explicitly declare any of these annotations is to
override Spring Boot’s, and in particular, SBDG’s auto-configuration. Otherwise, doing so is unnecessary.
|
| You should read the chapter in Spring Boot’s reference documentation on auto-configuration. |
| You should review the chapter in Spring Data for Apache Geode’s (SDG) reference documentation on annotation-based configuration. For a quick reference and overview of annotation-based configuration, see the annotations quickstart. |
| See the corresponding sample guide and code to see Spring Boot auto-configuration for Apache Geode in action. |
6.1. Customizing Auto-configuration
You might ask, “How do I customize the auto-configuration provided by SBDG if I do not explicitly declare the annotation?”
For example, you may want to customize the member’s name. You know that the
@ClientCacheApplication annotation
provides the name attribute
so that you can set the client member’s name. However, SBDG has already implicitly declared the @ClientCacheApplication
annotation through auto-configuration on your behalf. What do you do?
In this case, SBDG supplies a few additional annotations.
For example, to set the (client or peer) member’s name, you can use the @UseMemberName annotation:
@UseMemberName@SpringBootApplication
@UseMemberName("MyMemberName")
class SpringBootApacheGeodeClientCacheApplication {
//...
}Alternatively, you could set the spring.application.name or the spring.data.gemfire.name property in Spring Boot
application.properties:
spring.application.name property# Spring Boot application.properties
spring.application.name = MyMemberNamespring.data.gemfire.cache.name property# Spring Boot application.properties
spring.data.gemfire.cache.name = MyMemberName
The spring.data.gemfire.cache.name property is an alias for the spring.data.gemfire.name property. Both
properties do the same thing (set the name of the client or peer member node).
|
In general, there are three ways to customize configuration, even in the context of SBDG’s auto-configuration:
-
Using annotations provided by SBDG for common and popular concerns (such as naming client or peer members with the
@UseMemberNameannotation or enabling durable clients with the@EnableDurableClientannotation). -
Using well-known and documented properties (such as
spring.application.name, orspring.data.gemfire.name, orspring.data.gemfire.cache.name). -
Using configurers (such as
ClientCacheConfigurer).
| For the complete list of documented properties, see Configuration Metadata Reference. |
6.2. Disabling Auto-configuration
Spring Boot’s reference documentation explains how to disable Spring Boot auto-configuration.
Disabling Auto-configuration also explains how to disable SBDG auto-configuration.
In a nutshell, if you want to disable any auto-configuration provided by either Spring Boot or SBDG, declare your intent
in the @SpringBootApplication annotation:
@SpringBootApplication(
  exclude = { DataSourceAutoConfiguration.class, PdxAutoConfiguration.class }
)
class SpringBootApacheGeodeClientCacheApplication {
	// ...
}| Make sure you understand what you are doing when you disable auto-configuration. |
6.3. Overriding Auto-configuration
Overriding explains how to override SBDG auto-configuration.
In a nutshell, if you want to override the default auto-configuration provided by SBDG, you must annotate your
@SpringBootApplication class with your intent.
For example, suppose you want to configure and bootstrap an Apache Geode CacheServer application
(a peer, not a client):
ClientCache Auto-Configuration by configuring & bootstrapping a CacheServer application@SpringBootApplication
@CacheServerApplication
class SpringBootApacheGeodeCacheServerApplication {
// ...
}You can also explicitly declare the @ClientCacheApplication annotation on your @SpringBootApplication class:
@ClientCacheApplication@SpringBootApplication
@ClientCacheApplication
class SpringBootApacheGeodeClientCacheApplication {
// ...
}You are overriding SBDG’s auto-configuration of the ClientCache instance. As a result, you have now also implicitly
consented to being responsible for other aspects of the configuration (such as security).
Why does that happen?
It happens because, in certain cases, such as security, certain aspects of security configuration (such as SSL) must be configured before the cache instance is created. Also, Spring Boot always applies user configuration before auto-configuration partially to determine what needs to be auto-configured in the first place.
| Make sure you understand what you are doing when you override auto-configuration. |
6.4. Replacing Auto-configuration
See the Spring Boot reference documentation on replacing auto-configuration.
6.5. Understanding Auto-configuration
This section covers the SBDG provided auto-configuration classes that correspond to the SDG annotations in more detail.
To review the complete list of SBDG auto-confiugration classes, see Complete Set of Auto-configuration Classes.
6.5.1. @ClientCacheApplication
The SBDG ClientCacheAutoConfiguration class
corresponds to the SDG @ClientCacheApplication annotation.
|
As explained in Getting Started SBDG starts with the opinion that application developers primarily build Apache Geode client applications by using Spring Boot.
Technically, this means building Spring Boot applications with an Apache Geode ClientCache instance connected to
a dedicated cluster of Apache Geode servers that manage the data as part of a
client/server topology.
By way of example, this means that you need not explicitly declare and annotate your @SpringBootApplication class
with SDG’s @ClientCacheApplication annotation, as the following example shows:
@SpringBootApplication
@ClientCacheApplication
class SpringBootApacheGeodeClientCacheApplication {
// ...
}SBDG’s provided auto-configuration class is already meta-annotated with SDG’s @ClientCacheApplication annotation.
Therefore, you need only do:
@SpringBootApplication
class SpringBootApacheGeodeClientCacheApplication {
// ...
}| See SDG’s reference documentation for more details on Apache Geode cache applications and client/server applications in particular. |
6.5.2. @EnableGemfireCaching
The SBDG CachingProviderAutoConfiguration class
corresponds to the SDG @EnableGemfireCaching annotation.
|
If you used the core Spring Framework to configure Apache Geode as a caching provider in Spring’s Cache Abstraction, you need to:
@SpringBootApplication
@EnableCaching
class CachingUsingApacheGeodeConfiguration {
@Bean
GemfireCacheManager cacheManager(GemFireCache cache) {
GemfireCacheManager cacheManager = new GemfireCacheManager();
cacheManager.setCache(cache);
return cacheManager;
}
}If you use Spring Data for Apache Geode’s @EnableGemfireCaching annotation, you can simplify the preceding
configuration:
@SpringBootApplication
@EnableGemfireCaching
class CachingUsingApacheGeodeConfiguration {
}Also, if you use SBDG, you need only do:
@SpringBootApplication
class CachingUsingApacheGeodeConfiguration {
}This lets you focus on the areas in your application that would benefit from caching without having to enable the plumbing. You can then demarcate the service methods in your application that are good candidates for caching:
@Service
class CustomerService {
@Caching("CustomersByName")
Customer findBy(String name) {
// ...
}
}| See documentation on caching for more details. |
6.5.3. @EnableContinuousQueries
The SBDG ContinuousQueryAutoConfiguration class
corresponds to the SDG @EnableContinuousQueries annotation.
|
Without having to enable anything, you can annotate your application (POJO) component method(s) with the SDG
@ContinuousQuery
annotation to register a CQ and start receiving events. The method acts as a CqEvent handler or, in Apache Geode’s
terminology, the method is an implementation of the
CqListener interface.
@Component
class MyCustomerApplicationContinuousQueries {
@ContinuousQuery("SELECT customer.* "
+ " FROM /Customers customers"
+ " WHERE customer.getSentiment().name().equalsIgnoreCase('UNHAPPY')")
public void handleUnhappyCustomers(CqEvent event) {
// ...
}
}As the preceding example shows, you can define the events you are interested in receiving by using an OQL query with a finely tuned query predicate that describes the events of interests and implements the handler method to process the events (such as applying a credit to the customer’s account and following up in email).
| See Continuous Query for more details. |
6.5.4. @EnableGemfireFunctionExecutions & @EnableGemfireFunctions
The SBDG FunctionExecutionAutoConfiguration class
corresponds to both the SDG @EnableGemfireFunctionExecutions
and SDG @EnableGemfireFunctions annotations.
|
Whether you need to execute
or implement a Function, SBDG detects the Function definition
and auto-configures it appropriately for use in your Spring Boot application. You need only define the Function
execution or implementation in a package below the main @SpringBootApplication class:
package example.app.functions;
@OnRegion("Accounts")
interface MyCustomerApplicationFunctions {
void applyCredit(Customer customer);
}Then you can inject the Function execution into any application component and use it:
package example.app.service;
@Service
class CustomerService {
@Autowired
private MyCustomerApplicationFunctions customerFunctions;
void analyzeCustomerSentiment(Customer customer) {
// ...
this.customerFunctions.applyCredit(customer);
// ...
}
}The same pattern basically applies to Function implementations, except in the implementation case, SBDG registers the Function implementation for use (that is, to be called by a Function execution).
Doing so lets you focus on defining the logic required by your application and not worry about how Functions are registered, called, and so on. SBDG handles this concern for you.
| Function implementations are typically defined and registered on the server-side. |
| See Function Implementations & Executions for more details. |
6.5.5. @EnableGemfireRepositories
The SBDG GemFireRepositoriesAutoConfigurationRegistrar class
corresponds to the SDG @EnableGemfireRepositories annotation.
|
As with Functions, you need concern yourself only with the data access operations (such as basic CRUD and simple queries)
required by your application to carry out its operation, not with how to create and perform them (for example,
Region.get(key) and Region.put(key, obj)) or execute them (for example, Query.execute(arguments)).
Start by defining your Spring Data Repository:
package example.app.repo;
interface CustomerRepository extends CrudRepository<Customer, Long> {
List<Customer> findBySentimentEqualTo(Sentiment sentiment);
}Then you can inject the Repository into an application component and use it:
package example.app.sevice;
@Service
class CustomerService {
@Autowired
private CustomerRepository repository;
public void processCustomersWithSentiment(Sentiment sentiment) {
this.repository.findBySentimentEqualTo(sentiment)
.forEach(customer -> { /* ... */ });
// ...
}
}Your application-specific Repository simply needs to be declared in a package below the main @SpringBootApplication
class. Again, you are focusing only on the data access operations and queries required to carry out the operatinons
of your application, nothing more.
| See Spring Data Repositories for more details. |
6.5.6. @EnableLogging
The SBDG LoggingAutoConfiguration class
corresponds to the SDG @EnableLogging annotation.
|
Logging is an essential application concern to understand what is happening in the system along with when and where the events occurred. By default, SBDG auto-configures logging for Apache Geode with the default log-level, “config”.
You can change any aspect of logging, such as the log-level, in Spring Boot application.properties:
# Spring Boot application.properites.
spring.data.gemfire.cache.log-level=debug
The 'spring.data.gemfire.logging.level' property is an alias for spring.data.gemfire.cache.log-level.
|
You can also configure other aspects, such as the log file size and disk space limits for the filesystem location used to store the Apache Geode log files at runtime.
Under the hood, Apache Geode’s logging is based on Log4j. Therefore, you can configure Apache Geode logging to use any
logging provider (such as Logback) and configuration metadata appropriate for that logging provider so long as you
supply the necessary adapter between Log4j and whatever logging system you use. For instance, if you include
org.springframework.boot:spring-boot-starter-logging, you are using Logback and you will need the
org.apache.logging.log4j:log4j-to-slf4j adapter.
6.5.7. @EnablePdx
The SBDG PdxSerializationAutoConfiguration class
corresponds to the SDG @EnablePdx annotation.
|
Any time you need to send an object over the network or overflow or persist an object to disk, your application domain
model object must be serializable. It would be painful to have to implement java.io.Serializable in every one of your
application domain model objects (such as Customer) that would potentially need to be serialized.
Furthermore, using Java Serialization may not be ideal (it may not be the most portable or efficient solution) in all cases or even possible in other cases (such as when you use a third party library over which you have no control).
In these situations, you need to be able to send your object anywhere, anytime without unduly requiring the class type to be serializable and exist on the classpath in every place it is sent. Indeed, the final destination may not even be a Java application. This is where Apache Geode PDX Serialization steps in to help.
However, you need not figure out how to configure PDX to identify the application class types that needs to be serialized. Instead, you can define your class type as follows:
@Region("Customers")
class Customer {
@Id
private Long id;
@Indexed
private String name;
// ...
}SBDG’s auto-configuration handles the rest.
| See Data Serialization with PDX for more details. |
6.5.8. @EnableSecurity
The SBDG ClientSecurityAutoConfiguration class
and PeerSecurityAutoConfiguration class
correspond to the SDG @EnableSecurity annotation,
but they apply security (specifically, authentication and authorization (auth) configuration) for both clients
and servers.
|
Configuring your Spring Boot, Apache Geode ClientCache application to properly authenticate with a cluster of secure
Apache Geode servers is as simple as setting a username and a password in Spring Boot application.properties:
# Spring Boot application.properties
spring.data.gemfire.security.username=Batman
spring.data.gemfire.security.password=r0b!n5ucks| Authentication is even easier to configure in a managed environment, such as PCF when using PCC. You need not do anything. |
Authorization is configured on the server-side and is made simple with SBDG and the help of Apache Shiro. Of course, this assumes you use SBDG to configure and bootstrap your Apache Geode cluster in the first place, which is even easier with SBDG. See Running an Apache Geode cluster with Spring Boot from your IDE.
| See Security for more details. |
6.5.9. @EnableSsl
The SBDG SslAutoConfiguration class
corresponds to the SDG @EnableSsl annotation.
|
Configuring SSL for secure transport (TLS) between your Spring Boot, Apache Geode ClientCache application and an
Apache Geode cluster can be a real problem, especially to get right from the start. So, it is something that SBDG
makes as simple as possible.
You can supply a trusted.keystore file containing the certificates in a well-known location (such as the root of your
application classpath), and SBDG’s auto-configuration steps in to handle the rest.
This is useful during development, but we highly recommend using a more secure procedure (such as integrating with a secure credential store like LDAP, CredHub or Vault) when deploying your Spring Boot application to production.
| See Transport Layer Security using SSL for more details. |
6.5.10. @EnableGemFireHttpSession
The SBDG SpringSessionAutoConfiguration class
corresponds to the SSDG @EnableGemFireHttpSession annotation.
|
Configuring Apache Geode to serve as the (HTTP) session state caching provider by using Spring Session requires that
you only include the correct starter, that is spring-geode-starter-session:
<dependency>
<groupId>org.springframework.geode</groupId>
<artifactId>spring-geode-starter-session</artifactId>
<version>1.6.14</version>
</dependency>
With Spring Session — and specifically Spring Session for Apache Geode (SSDG) — on the classpath of your Spring Boot,
Apache Geode ClientCache Web application, you can manage your (HTTP) session state with Apache Geode. No further
configuration is needed. SBDG auto-configuration detects Spring Session on the application classpath and does the rest.
| See Spring Session for more details. |
6.5.11. RegionTemplateAutoConfiguration
The SBDG RegionTemplateAutoConfiguration class
has no corresponding SDG annotation. However, the auto-configuration of a GemfireTemplate for every Apache Geode
Region defined and declared in your Spring Boot application is still supplied by SBDG.
For example, you can define a Region by using:
@Configuration
class GeodeConfiguration {
@Bean("Customers")
ClientRegionFactoryBean<Long, Customer> customersRegion(GemFireCache cache) {
ClientRegionFactoryBean<Long, Customer> customersRegion =
new ClientRegionFactoryBean<>();
customersRegion.setCache(cache);
customersRegion.setShortcut(ClientRegionShortcut.PROXY);
return customersRegion;
}
}Alternatively, you can define the Customers Region by using @EnableEntityDefinedRegions:
@EnableEntityDefinedRegions@Configuration
@EnableEntityDefinedRegion(basePackageClasses = Customer.class)
class GeodeConfiguration {
}Then SBDG supplies a GemfireTemplate instance that you can use to perform low-level data-access operations
(indirectly) on the Customers Region:
GemfireTemplate to access the "Customers" Region@Repository
class CustomersDao {
@Autowired
@Qualifier("customersTemplate")
private GemfireTemplate customersTemplate;
Customer findById(Long id) {
return this.customerTemplate.get(id);
}
}You need not explicitly configure GemfireTemplates for each Region to which you need low-level data access (such as
when you are not using the Spring Data Repository abstraction).
Be careful to qualify the GemfireTemplate for the Region to which you need data access, especially given that you
probably have more than one Region defined in your Spring Boot application.
| See Data Access with GemfireTemplate for more details. |
7. Declarative Configuration
The primary purpose of any software development framework is to help you be productive as quickly and as easily as possible and to do so in a reliable manner.
As application developers, we want a framework to provide constructs that are both intuitive and familiar so that their behaviors are predictable. This provided convenience not only helps you hit the ground running in the right direction sooner but increases your focus on the application domain so that you can better understand the problem you are trying to solve in the first place. Once the problem domain is well understood, you are more apt to make informed decisions about the design, which leads to better outcomes, faster.
This is exactly what Spring Boot’s auto-configuration provides for you. It enables features, functionality, services and supporting infrastructure for Spring applications in a loosely integrated way by using conventions (such as the classpath) that ultimately help you keep your attention and focus on solving the problem at hand and not on the plumbing.
For example, if you are building a web application, you can include the org.springframework.boot:spring-boot-starter-web
dependency on your application classpath. Not only does Spring Boot enable you to build Spring Web MVC Controllers
appropriate to your application UC (your responsibility), but it also bootstraps your web application in an embedded
Servlet container on startup (Spring Boot’s responsibility).
This saves you from having to handle many low-level, repetitive, and tedious development tasks that are error-prone and easy to get wrong when you are trying to solve problems. You need not care how the plumbing works until you need to customize something. And, when you do, you are better informed and prepared to do so.
It is also equally essential that frameworks, such as Spring Boot, get out of the way quickly when application requirements diverge from the provided defaults. This is the beautiful and powerful thing about Spring Boot and why it is second to none in its class.
Still, auto-configuration does not solve every problem all the time. Therefore, you need to use declarative configuration in some cases, whether expressed as bean definitions, in properties, or by some other means. This is so that frameworks do not leave things to chance, especially when things are ambiguous. The framework gives you choice.
Keeping our goals in mind, this chapter:
-
Refers you to the SDG annotations covered by SBDG’s auto-configuration.
-
Lists all SDG annotations not covered by SBDG’s auto-configuration.
-
Covers the SBDG, SSDG and SDG annotations that you must explicitly declare and that provide the most value and productivity when getting started with Apache Geode in Spring [Boot] applications.
| SDG refers to Spring Data for Apache Geode. SSDG refers to Spring Session for Apache Geode. SBDG refers to Spring Boot for Apache Geode (this project). |
| The list of SDG annotations covered by SBDG’s auto-configuration is discussed in detail in the Appendix, in the Auto-configuration vs. Annotation-based configuration section. |
To be absolutely clear about which SDG annotations we are referring to, we mean the SDG annotations in the
org.springframework.data.gemfire.config.annotation
package.
In subsequent sections, we also cover which annotations are added by SBDG.
7.1. Auto-configuration
We explained auto-configuration in detail in the Auto-configuration chapter.
7.2. Annotations Not Covered by Auto-configuration
The following SDG annotations are not implicitly applied by SBDG’s auto-configuration:
-
@EnableAutoRegionLookup -
@EnableBeanFactoryLocator -
@EnableCacheServer(s) -
@EnableCachingDefinedRegions -
@EnableClusterConfiguration -
@EnableClusterDefinedRegions -
@EnableCompression -
@EnableDiskStore(s) -
@EnableEntityDefinedRegions -
@EnableEviction -
@EnableExpiration -
@EnableGatewayReceiver -
@EnableGatewaySender(s) -
@EnableGemFireAsLastResource -
@EnableGemFireMockObjects -
@EnableHttpService -
@EnableIndexing -
@EnableOffHeap -
@EnableLocator -
@EnableManager -
@EnableMemcachedServer -
@EnablePool(s) -
@EnableRedisServer -
@EnableStatistics -
@UseGemFireProperties
| This content was also covered in Explicit Configuration. |
One reason SBDG does not provide auto-configuration for several of the annotations is because the annotations are server-specific:
-
@EnableCacheServer(s) -
@EnableGatewayReceiver -
@EnableGatewaySender(s). -
@EnableHttpService -
@EnableLocator -
@EnableManager -
@EnableMemcachedServer -
@EnableRedisServer
Also, we already stated that SBDG is opinionated about providing a ClientCache
instance.
Other annotations are driven by need, including:
-
@EnableAutoRegionLookupand@EnableBeanFactoryLocator: Really useful only when mixing configuration metadata formats, such as Spring config with Apache Geodecache.xml. This is usually the case only if you have legacycache.xmlconfig to begin with. Otherwise, you should not use these annotations. -
@EnableCompression: Requires the Snappy Compression Library to be on your application classpath. -
@EnableDiskStore(s)Used only for overflow and persistence. -
@EnableOffHeap: Enables data to be stored in main memory, which is useful only when your application data (that is, objects stored in Apache Geode) are generally uniform in size. -
@EnableGemFireAsLastResource: Needed only in the context of JTA Transactions. -
@EnableStatistics: Useful if you need runtime metrics. However, enabling statistics gathering does consume considerable system resources (CPU & Memory).
Still other annotations require more careful planning:
-
@EnableEviction -
@EnableExpiration -
@EnableIndexing
One annotation is used exclusively for unit testing:
-
@EnableGemFireMockObjects
The bottom-line is that a framework should not auto-configure every possible feature, especially when the features consume additional system resources or require more careful planning (as determined by the use case).
However, all of these annotations are available for the application developer to use when needed.
7.3. Productivity Annotations
This section calls out the annotations we believe to be most beneficial for your application development purposes when using Apache Geode in Spring [Boot] applications.
7.3.1. @EnableClusterAware (SBDG)
The @EnableClusterAware annotation is arguably the most powerful and valuable annotation.
@EnableClusterAware@SpringBootApplication
@EnableClusterAware
class SpringBootApacheGeodeClientCacheApplication { }When you annotate your main @SpringBootApplication class with @EnableClusterAware, your Spring Boot, Apache Geode
ClientCache application is able to seamlessly switch between client/server and local-only topologies with no code
or configuration changes, regardless of the runtime environment (such as local/standalone versus cloud-managed
environments).
When a cluster of Apache Geode servers is detected, the client application sends and receives data to and from the
Apache Geode cluster. If a cluster is not available, the client automatically switches to storing data locally on the
client by using LOCAL Regions.
Additionally, the @EnableClusterAware annotation is meta-annotated with SDG’s
@EnableClusterConfiguration
annotation.
The @EnableClusterConfiguration annotation lets configuration metadata defined on the client (such as Region and Index
definitions, as needed by the application based on requirements and use cases) be sent to the cluster of servers. If
those schema objects are not already present, they are created by the servers in the cluster in such a way that the
servers remember the configuration on restart as well as provide the configuration to new servers that join the cluster
when it is scaled out. This feature is careful not to stomp on any existing Region or Index objects already defined on
the servers, particularly since you may already have critical data stored in the Regions.
The primary motivation for the @EnableClusterAware annotation is to let you switch environments with minimal effort.
It is a common development practice to debug and test your application locally (in your IDE) and then push up to a
production-like (staging) environment for more rigorous integration testing.
By default, the configuration metadata is sent to the cluster by using a non-secure HTTP connection. However, you can configure HTTPS, change the host and port, and configure the data management policy used by the servers when creating Regions.
| See the section in the SDG reference documentation on Configuring Cluster Configuration Push for more details. |
@EnableClusterAware, strictMatch
The strictMatch attribute has been added to the @EnableClusterAware annotation to enable fail-fast behavior.
strictMatch is set to false by default.
Essentially, when you set strictMatch to true, your Spring Boot, Apache Geode ClientCache application requires
an Apache Geode cluster to exist. That is, the application requires a client/server topology to operate, and the
application should fail to start if a cluster is not present. The application should not startup in a local-only
capacity.
When strictMatch is set to true and an Apache Geode cluster is not available, your Spring Boot, Apache Geode
ClientCache application fails to start with a ClusterNotFoundException. The application does not attempt to
start in a local-only capacity.
You can explicitly set the strictMatch attribute programmatically by using the @EnableClusterAware annotation:
@EnableClusterAware.strictMatch@SpringBootApplication
@EnableClusterAware(strictMatch = true)
class SpringBootApacheGeodeClientCacheApplication { }Alternatively, you can set strictMatch attribute by using the corresponding property
in Spring Boot application.properties:
strictMatch using a property# Spring Boot application.properties
spring.boot.data.gemfire.cluster.condition.match.strict=trueThis is convenient when you need to apply this configuration setting conditionally, based on a Spring profile.
When you adjust the log level of the org.springframework.geode.config.annotation.ClusterAwareConfiguration logger
to INFO, you get more details from the @EnableClusterAware functionality when applying the logic to determine
the presence of an Apache Geode cluster, such as which explicitly or implicitly configured connections were successful.
The following example shows typical output:
@EnableClusterAware INFO log output2021-01-20 14:02:28,740 INFO fig.annotation.ClusterAwareConfiguration: 476 - Failed to connect to localhost[40404]
2021-01-20 14:02:28,745 INFO fig.annotation.ClusterAwareConfiguration: 476 - Failed to connect to localhost[10334]
2021-01-20 14:02:28,746 INFO fig.annotation.ClusterAwareConfiguration: 470 - Successfully connected to localhost[57649]
2021-01-20 14:02:28,746 INFO fig.annotation.ClusterAwareConfiguration: 576 - Cluster was found; Auto-configuration made [1] successful connection(s);
2021-01-20 14:02:28,746 INFO fig.annotation.ClusterAwareConfiguration: 586 - Spring Boot application is running in a client/server topology, using a standalone Apache Geode-based cluster
An attempt is always made to connect to localhost on the default Locator port, 10334, and the default
CacheServer port, 40404.
|
You can force a successful match by setting the spring.boot.data.gemfire.cluster.condition.match property
to true in Spring Boot application.properties. This is sometimes useful for testing purposes.
|
7.3.2. @EnableCachingDefinedRegions, @EnableClusterDefinedRegions and @EnableEntityDefinedRegions (SDG)
These annotations are used to create Regions in the cache to manage your application data.
You can create Regions by using Java configuration and the Spring API as follows:
@Configuration
class GeodeConfiguration {
@Bean("Customers")
ClientRegionFactoryBean<Long, Customer> customersRegion(GemFireCache cache) {
ClientRegionFactoryBean<Long, Customer> customers =
new ClientRegionFactoryBean<>();
customers.setCache(cache);
customers.setShortcut(ClientRegionShortcut.PROXY);
return customers;
}
}You can do the same in XML:
<gfe:client-region id="Customers" shorcut="PROXY"/>However, using the provided annotations is far easier, especially during development, when the complete Region configuration may be unknown and you want only to create a Region to persist your application data and move on.
@EnableCachingDefinedRegions
The @EnableCachingDefinedRegions annotation is used when you have application components registered in the Spring
container that are annotated with Spring or JSR-107 JCache
annotations.
Caches that are identified by name in the caching annotations are used to create Regions that hold the data you want cached.
Consider the following example:
@Service
class CustomerService {
@Cacheable(cacheNames = "CustomersByAccountNumber", key = "#account.number")
Customer findBy(Account account) {
// ...
}
}Further consider the following example, in which the main @SpringBootApplication class is annotated with
@EnableCachingDefinedRegions:
@EnableCachingDefinedRegions@SpringBootApplication
@EnableCachingDefineRegions
class SpringBootApacheGeodeClientCacheApplication { }With this setup, SBDG would create a client PROXY Region (or PARTITION_REGION if your application were a peer member
of the Apache Geode cluster) with a name of “CustomersByAccountNumber”, as though you created the Region by using
either the Java configuration or XML approaches shown earlier.
You can use the clientRegionShortcut or serverRegionShortcut attribute to change the data management policy of
the Regions created on the client or servers, respectively.
For client Regions, you can also set the poolName attribute to assign a specific Pool of connections to be used by
the client *PROXY Regions to send data to the cluster.
@EnableEntityDefinedRegions
As with @EnableCachingDefinedRegions, @EnableEntityDefinedRegions lets you create Regions based on the entity
classes you have defined in your application domain model.
For instance, consider an entity class annotated with SDG’s
@Region
mapping annotation:
@Region@Region("Customers")
class Customer {
@Id
private Long id;
@Indexed
private String name;
}For this class, SBDG creates Regions from the name specified in the @Region mapping annotation on the entity class.
In this case, the Customer application-defined entity class results in the creation of a Region named “Customers”
when the main @SpringBootApplication class is annotated with @EnableEntityDefinedRegions:
@EnableEntityDefinedRegions@SpringBootApplication
@EnableEntityDefinedRegions(basePackageClasses = Customer.class,
clientRegionShortcut = ClientRegionShortcut.CACHING_PROXY)
class SpringBootApacheGeodeClientCacheApplication { }As with the @EnableCachingDefinedRegions annotation, you can set the client and server Region data management policy
by using the clientRegionShortcut and serverRegionShortcut attributes, respectively, and set a dedicated Pool
of connections used by client Regions with the poolName attribute.
However, unlike the @EnableCachingDefinedRegions annotation, you must specify either the basePackage attribute
or the type-safe basePackageClasses attribute (recommended) when you use the @EnableEntityDefinedRegions annotation.
Part of the reason for this is that @EnableEntityDefinedRegions performs a component scan for the entity classes
defined by your application. The component scan loads each class to inspect the annotation metadata for that class.
This is not unlike the JPA entity scan when working with JPA providers, such as Hibernate.
Therefore, it is customary to limit the scope of the scan. Otherwise, you end up potentially loading many classes unnecessarily. After all, the JVM uses dynamic linking to load classes only when needed.
Both the basePackages and basePackageClasses attributes accept an array of values. With basePackageClasses, you
need only refer to a single class type in that package and every class in that package as well as classes in the
sub-packages are scanned to determine if the class type represents an entity. A class type is an entity if it is
annotated with the @Region mapping annotation. Otherwise, it is not considered to be an entity.
For example, suppose you had the following structure:
- example.app.crm.model
|- Customer.class
|- NonEntity.class
|- contact
|- Address.class
|- PhoneNumber.class
|- AnotherNonEntity.class
- example.app.accounts.model
|- Account.class
...
..
.Then you could configure the @EnableEntityDefinedRegions as follows:
@EnableEntityDefinedRegions@SpringBootApplication
@EnableEntityDefinedRegions(basePackageClasses = { NonEntity.class, Account.class } )
class SpringBootApacheGeodeClientCacheApplication { }If Customer, Address, PhoneNumber and Account were all entity classes properly annotated with @Region,
the component scan would pick up all these classes and create Regions for them. The NonEntity class serves only as
a marker in this case, to point to where (that is, which package) the scan should begin.
Additionally, the @EnableEntityDefinedRegions annotation provides include and exclude filters, the same as
the core Spring Frameworks @ComponentScan annotation.
| See the SDG reference documentation on Configuring Regions for more details. |
@EnableClusterDefinedRegions
Sometimes, it is ideal or even necessary to pull configuration from the cluster (rather than push configuration to the cluster). That is, you want the Regions defined on the servers to be created on the client and used by your application.
To do so, annotate your main @SpringBootApplication class with @EnableClusterDefinedRegions:
@EnableClusterDefinedRegions@SpringBootApplication
@EnableClusterDefinedRegions
class SpringBootApacheGeodeClientCacheApplication { }Every Region that exists on the servers in the Apache Geode cluster will have a corresponding PROXY Region defined
and created on the client as a bean in your Spring Boot application.
If the cluster of servers defines a Region called “ServerRegion”, you can inject a client PROXY Region with
the same name (“ServerRegion”) into your Spring Boot application:
@Component
class SomeApplicationComponent {
@Resource(name = "ServerRegion")
private Region<Integer, EntityType> serverRegion;
public void someMethod() {
EntityType entity = new EntityType();
this.serverRegion.put(1, entity);
// ...
}
}SBDG auto-configures a GemfireTemplate for the “ServerRegion” Region
(see RegionTemplateAutoConfiguration),
so a better way to interact with the client PROXY Region that corresponds to the “ServerRegion” Region on the server
is to inject the template:
@Component
class SomeApplicationComponent {
@Autowired
@Qualifier("serverRegionTemplate")
private GemfireTemplate serverRegionTemplate;
public void someMethod() {
EntityType entity = new EntityType();
this.serverRegionTemplate.put(1, entity);
//...
}
}| See the SDG reference documentation on Configuring Cluster-defined Regions for more details. |
7.3.3. @EnableIndexing (SDG)
You can also use the @EnableIndexing annotation — but only when you use @EnableEntityDefinedRegions. This is
because @EnableIndexing requires the entities to be scanned and analyzed for mapping metadata (defined on the class
type of the entity). This includes annotations such as the Spring Data Commons @Id annotation and the annotations
provided by SDG, such as @Indexed and @LuceneIndexed.
The @Id annotation identifies the (primary) key of the entity. The @Indexed annotation defines OQL indexes on object
fields, which can be used in the predicates of your OQL queries. The @LuceneIndexed annotation is used to define the
Apache Lucene Indexes required for searches.
Lucene Indexes can only be created on PARTITION Regions, and PARTITION Regions can only be defined on
the server side.
|
You may have noticed that the Customer entity class’s name field was annotated with @Indexed.
Consider the following listing:
@Indexed annotated name field@Region("Customers")
class Customer {
@Id
private Long id;
@Indexed
private String name;
}As a result, when our main @SpringBootApplication class is annotated with @EnableIndexing, an Apache Geode OQL Index
for the Customer.name field is created, allowing OQL queries on customers by name to use this Index:
@EnableIndexing@SpringBootApplication
@EnableEntityDefinedRegions(basePackageClasses = Customer.class)
@EnableIndexing
class SpringBootApacheGeodeClientCacheApplication { }| Keep in mind that OQL Indexes are not persistent between restarts (that is, Apache Geode maintains Indexes in memory only). An OQL Index is always rebuilt when the node is restarted. |
When you combine @EnableIndexing with either @EnableClusterConfiguration or @EnableClusterAware, the Index
definitions are pushed to the server-side Regions where OQL queries are generally executed.
| See the SDG reference documentation on Configuring Indexes for more details. |
7.3.4. @EnableExpiration (SDG)
It is often useful to define both eviction and expiration policies, particularly with a system like Apache Geode, because it primarily keeps data in memory (on the JVM Heap). Your data volume size may far exceed the amount of available JVM Heap memory, and keeping too much data on the JVM Heap can cause Garbage Collection (GC) issues.
You can enable off-heap (or main memory usage) capabilities by declaring SDG’s @EnableOffHeap annotation.
See the SDG reference documentation on
Configuring Off-Heap Memory
for more details.
|
Defining eviction and expiration policies lets you limit what is kept in memory and for how long.
While configuring eviction is easy with SDG, we particularly want to call out expiration since configuring expiration has special support in SDG.
With SDG, you can define the expiration policies associated with a particular application class type on the class type
itself, by using the @Expiration,
@IdleTimeoutExpiration
and @TimeToLiveExpiration
annotations.
| See the Apache Geode User Guide for more details on the different expiration types — that is Idle Timeout (TTI) versus Time-to-Live (TTL). |
For example, suppose we want to limit the number of Customers maintained in memory for a period of time (measured in
seconds) based on the last time a Customer was accessed (for example, the last time a Customer was read). To do so,
we can define an idle timeout expiration (TTI) policy on our Customer class type:
@Region("Customers")
@IdleTimeoutExpiration(action = "INVALIDATE", timeout = "300")
class Customer {
@Id
private Long id;
@Indexed
private String name;
}The Customer entry in the Customers Region is invalidated after 300 seconds (5 minutes).
To enable annotation-based expiration policies, we need to annotate our main @SpringBootApplication class
with @EnableExpiration:
@SpringBootApplication
@EnableExpiration
class SpringBootApacheGeodeApplication { }
Technically, this entity-class-specific annotation-based expiration policy is implemented by using Apache Geode’s
CustomExpiry interface.
|
| See the SDG reference doccumentation for more details on configuring expiration, along with annotation-based data expiration in particular. |
7.3.5. @EnableGemFireMockObjects (STDG)
Software testing in general and unit testing in particular are a very important development tasks to ensure the quality of your Spring Boot applications.
Apache Geode can make testing difficult in some cases, especially when tests have to be written as integration tests to assert the correct behavior. This can be very costly and lengthens the feedback cycle. Fortunately, you can write unit tests as well.
Spring provides a framework for testing Spring Boot applications that use Apache Geode. This is where the Spring Test for Apache Geode (STDG) project can help, particularly with unit testing.
For example, if you do not care what Apache Geode would actually do in certain cases and only care about the “contract”, which is what mocking a collaborator is all about, you could effectively mock Apache Geode objects to isolate the SUT, or “Subject Under Test”, and focus on the interactions or outcomes you expect to happen.
With STDG, you need not change a bit of configuration to enable mock objects in the unit tests for your Spring Boot
applications. You need only annotate the test class with @EnableGemFireMockObjects:
@RunWith(SpringRunner.class)
@SpringBootTest
class MyApplicationTestClass {
@Test
public void someTestCase() {
// ...
}
@Configuration
@EnableGemFireMockObjects
static class GeodeConfiguration { }
}Your Spring Boot configuration of Apache Geode returns mock objects for all Apache Geode objects, such as Regions.
Mocking Apache Geode objects even works for objects created from the productivity annotations discussed in the previous sections.
For example, consider the following Spring Boot, Apache Geode ClientCache application class:
@SpringBootApplication class under test@SpringBootApplication
@EnableEntityDefinedRegions(basePackageClasses = Customer.class)
class SpringBootApacheGeodeClientCacheApplication { }In the preceding example, the "Customers`" Region defined by the `Customer entity class and created by
the @EnableEntityDefinedRegions annotation would be a mock Region and not an actual Region. You can still inject
the Region in your test and assert interactions on the Region based on your application workflows:
@RunWith(SpringRunner.class)
@SpringBootTest
class MyApplicationTestClass {
@Resource(name = "Customers")
private Region<Long, Customer> customers;
@Test
public void someTestCase() {
Customer jonDoe = new Customer(1, "Jon Doe");
// Use the application in some way and test the interaction on the "Customers" Region
assertThat(this.customers).containsValue(jonDoe);
// ...
}
}There are many more things that STDG can do for you in both unit testing and integration testing.
See the documentation on unit testing for more details.
You can write integration tests that use STDG as well. Writing integration tests is an essential concern when you need to assert whether your application OQL queries are well-formed, for instance. There are many other valid cases where integration testing is also applicable.
8. Externalized Configuration
Like Spring Boot itself (see Spring Boot’s documentation), Spring Boot for Apache Geode (SBDG) supports externalized configuration.
By externalized configuration, we mean configuration metadata stored in Spring Boot
application.properties.
You can even separate concerns by addressing each concern in an individual properties file. Optionally, you could also
enable any given property file for only a specific profile.
You can do many other powerful things, such as (but not limited to) using placeholders in properties, encrypting properties, and so on. In this section, we focus particularly on type safety.
Like Spring Boot, Spring Boot for Apache Geode provides a hierarchy of classes that captures configuration for several
Apache Geode features in an associated @ConfigurationProperties annotated class. Again, the configuration metadata is
specified as well-known, documented properties in one or more Spring Boot application.properties files.
For instance, a Spring Boot, Apache Geode ClientCache application might be configured as follows:
application.properties containing Spring Data properties for Apache Geode# Spring Boot application.properties used to configure {geode-name}
spring.data.gemfire.name=MySpringBootApacheGeodeApplication
# Configure general cache properties
spring.data.gemfire.cache.copy-on-read=true
spring.data.gemfire.cache.log-level=debug
# Configure ClientCache specific properties
spring.data.gemfire.cache.client.durable-client-id=123
spring.data.gemfire.cache.client.keep-alive=true
# Configure a log file
spring.data.gemfire.logging.log-file=/path/to/geode.log
# Configure the client's connection Pool to the servers in the cluster
spring.data.gemfire.pool.locators=10.105.120.16[11235],boombox[10334]You can use many other properties to externalize the configuration of your Spring Boot, Apache Geode applications.
See the Javadoc
for specific configuration properties. Specifically, review the enabling annotation attributes.
You may sometimes require access to the configuration metadata (specified in properties) in your Spring Boot
applications themselves, perhaps to further inspect or act on a particular configuration setting. You can access any
property by using Spring’s Environment
abstraction:
Environment@Configuration
class GeodeConfiguration {
void readConfigurationFromEnvironment(Environment environment) {
boolean copyOnRead = environment.getProperty("spring.data.gemfire.cache.copy-on-read",
Boolean.TYPE, false);
}
}While using Environment is a nice approach, you might need access to additional properties or want to access
the property values in a type-safe manner. Therefore, you can now, thanks to SBDG’s auto-configured configuration
processor, access the configuration metadata by using @ConfigurationProperties classes.
To add to the preceding example, you can now do the following:
GemFireProperties@Component
class MyApplicationComponent {
@Autowired
private GemFireProperties gemfireProperties;
public void someMethodUsingGemFireProperties() {
boolean copyOnRead = this.gemfireProperties.getCache().isCopyOnRead();
// do something with `copyOnRead`
}
}Given a handle to GemFireProperties,
you can access any of the configuration properties that are used to configure Apache Geode in a Spring context. You need
only autowire an instance of GemFireProperties into your application component.
See the complete reference for the
SBDG @ConfigurationProperties classes and supporting classes.
8.1. Externalized Configuration of Spring Session
You can access the externalized configuration of Spring Session when you use Apache Geode as your (HTTP) session state caching provider.
In this case, you need only acquire a reference to an instance of the
SpringSessionProperties
class.
As shown earlier in this chapter, you can specify Spring Session for Apache Geode (SSDG) properties as follows:
application.properties for Spring Session using Apache Geode as the (HTTP) session state caching provider# Spring Boot application.properties used to configure {geode-name} as a (HTTP) session state caching provider
# in Spring Session
spring.session.data.gemfire.session.expiration.max-inactive-interval-seconds=300
spring.session.data.gemfire.session.region.name=UserSessionsThen, in your application, you can do something similar to the following example:
SpringSessionProperties@Component
class MyApplicationComponent {
@Autowired
private SpringSessionProperties springSessionProperties;
public void someMethodUsingSpringSessionProperties() {
String sessionRegionName = this.springSessionProperties
.getSession().getRegion().getName();
// do something with `sessionRegionName`
}
}9. Using Geode Properties
As of Spring Boot for Apache Geode (SBDG) 1.3, you can declare Apache Geode properties from gemfire.properties
in Spring Boot application.properties.
| See the User Guide for a complete list of valid Apache Geode properties. |
Note that you can declare only valid Geode properties in gemfire.properties or, alternatively,
gfsecurity.properties.
The following example shows how to declare properties in gemfire.properties:
gemfire.properties# Geode Properties in gemfire.properties
name=ExampleCacheName
log-level=TRACE
enable-time-statistics=true
durable-client-id=123
# ...All of the properties declared in the preceding example correspond to valid Geode properties. It is illegal to declare
properties in gemfire.properties that are not valid Geode properties, even if those properties are prefixed with a
different qualifier (such as spring.*). Apache Geode throws an IllegalArgumentException for invalid properties.
Consider the following gemfire.properties file with an invalid-property:
gemfire.properties# Geode Properties in gemfire.properties
name=ExampleCacheName
invalid-property=TESTApache Geode throws an IllegalArgumentException:
IllegalArgumentException thrown by Apache Geode for Invalid Property (Full Text Omitted)Exception in thread "main" java.lang.IllegalArgumentException: Unknown configuration attribute name invalid-property.
Valid attribute names are: ack-severe-alert-threshold ack-wait-threshold archive-disk-space-limit ...
at o.a.g.internal.AbstractConfig.checkAttributeName(AbstractConfig.java:333)
at o.a.g.distributed.internal.AbstractDistributionConfig.checkAttributeName(AbstractDistributionConfig.java:725)
at o.a.g.distributed.internal.AbstractDistributionConfig.getAttributeType(AbstractDistributionConfig.java:887)
at o.a.g.internal.AbstractConfig.setAttribute(AbstractConfig.java:222)
at o.a.g.distributed.internal.DistributionConfigImpl.initialize(DistributionConfigImpl.java:1632)
at o.a.g.distributed.internal.DistributionConfigImpl.<init>(DistributionConfigImpl.java:994)
at o.a.g.distributed.internal.DistributionConfigImpl.<init>(DistributionConfigImpl.java:903)
at o.a.g.distributed.internal.ConnectionConfigImpl.lambda$new$2(ConnectionConfigImpl.java:37)
at o.a.g.distributed.internal.ConnectionConfigImpl.convert(ConnectionConfigImpl.java:73)
at o.a.g.distributed.internal.ConnectionConfigImpl.<init>(ConnectionConfigImpl.java:36)
at o.a.g.distributed.internal.InternalDistributedSystem$Builder.build(InternalDistributedSystem.java:3004)
at o.a.g.distributed.internal.InternalDistributedSystem.connectInternal(InternalDistributedSystem.java:269)
at o.a.g.cache.client.ClientCacheFactory.connectInternalDistributedSystem(ClientCacheFactory.java:280)
at o.a.g.cache.client.ClientCacheFactory.basicCreate(ClientCacheFactory.java:250)
at o.a.g.cache.client.ClientCacheFactory.create(ClientCacheFactory.java:216)
at org.example.app.ApacheGeodeClientCacheApplication.main(...)It is inconvenient to have to separate Apache Geode properties from other application properties, or to have to declare
only Apache Geode properties in a gemfire.properties file and application properties in a separate properties file,
such as Spring Boot application.properties.
Additionally, because of Apache Geode’s constraint on properties, you cannot use the full power of Spring Boot when you
compose application.properties.
You can include certain properties based on a Spring profile while excluding other properties. This is essential when properties are environment- or context-specific.
Spring Data for Apache Geode already provides a wide range of properties mapping to Apache Geode properties.
For example, the SDG spring.data.gemfire.locators property maps to the gemfire.locators property
(locators in gemfire.properties) from Apache Geode. Likewise, there are a full set of SDG properties that map to
the corresponding Apache Geode properties in the Appendix.
You can express the Geode properties shown earlier as SDG properties in Spring Boot application.properties,
as follows:
# Spring Data for {geode-name} properties in application.properties
spring.data.gemfire.name=ExampleCacheName
spring.data.gemfire.cache.log-level=TRACE
spring.data.gemfire.cache.client.durable-client-id=123
spring.data.gemfire.stats.enable-time-statistics=true
# ...However, some Apache Geode properties have no equivalent SDG property, such as gemfire.groups (groups in
gemfire.properties). This is partly due to the fact that many Apache Geode properties are applicable only when
configured on the server (such as groups or enforce-unique-host).
See the @EnableGemFireProperties annotation
(attributes)
from SDG for a complete list of Apache Geode properties with no corresponding SDG property.
|
Furthermore, many of the SDG properties also correspond to API calls.
For example, spring.data.gemfire.cache.client.keep-alive
translates to the ClientCache.close(boolean keepAlive)
API call.
Still, it would be convenient to be able to declare application and Apache Geode properties together, in a single
properties file, such as Spring Boot application.properties. After all, it is not uncommon to declare JDBC Connection
properties in a Spring Boot application.properties file.
Therefore, as of SBDG 1.3, you can now declare Apache Geode properties in Spring Boot application.properties directly,
as follows:
application.properties# Spring Boot application.properties
server.port=8181
spring.application.name=ExampleApp
gemfire.durable-client-id=123
gemfire.enable-time-statistics=trueThis is convenient and ideal for several reasons:
-
If you already have a large number of Apache Geode properties declared as
gemfire.properties (either ingemfire.propertiesorgfsecurity.properties) or declared on the Java command-line as JVM System properties (such as-Dgemfire.name=ExampleCacheName), you can reuse these property declarations. -
If you are unfamiliar with SDG’s corresponding properties, you can declare Geode properties instead.
-
You can take advantage of Spring features, such as Spring profiles.
-
You can also use property placeholders with Geode properties (such as
gemfire.log-level=${external.log-level.property}).
| We encourage you to use the SDG properties, which cover more than Apache Geode properties. |
However, SBDG requires that the Geode property must have the gemfire. prefix in Spring Boot application.properties.
This indicates that the property belongs to Apache Geode. Without the gemfire. prefix, the property is not
appropriately applied to the Apache Geode cache instance.
It would be ambiguous if your Spring Boot applications integrated with several technologies, including Apache Geode,
and they too had matching properties, such as bind-address or log-file.
SBDG makes a best attempt to log warnings when a Geode property is invalid or is not set. For example, the following Geode property would result in logging a warning:
# Spring Boot application.properties
spring.application.name=ExampleApp
gemfire.non-existing-property=TESTThe resulting warning in the log would read:
[gemfire.non-existing-property] is not a valid Apache Geode propertyIf a Geode Property is not properly set, the following warning is logged:
Apache Geode Property [gemfire.security-manager] was not setWith regards to the third point mentioned earlier, you can now compose and declare Geode properties based on a context (such as your application environment) using Spring profiles.
For example, you might start with a base set of properties in Spring Boot application.properties:
server.port=8181
spring.application.name=ExampleApp
gemfire.durable-client-id=123
gemfire.enable-time-statistics=falseThen you can vary the properties by environment, as the next two listings (for QA and production) show:
# Spring Boot application-qa.properties
server.port=9191
spring.application.name=TestApp
gemfire.enable-time-statistics=true
gemfire.enable-network-partition-detection=true
gemfire.groups=QA
# ...# Spring Boot application-prod.properties
server.port=80
spring.application.name=ProductionApp
gemfire.archive-disk-space-limit=1000
gemfire.archive-file-size-limit=50
gemfire.enforce-unique-host=true
gemfire.groups=PROD
# ...You can then apply the appropriate set of properties by configuring the Spring profile with
-Dspring.profiles.active=prod. You can also enable more than one profile at a time with
-Dspring.profiles.active=profile1,profile2,…,profileN
If both spring.data.gemfire.* properties and the matching Apache Geode properties are declared in Spring Boot
application.properties, the SDG properties take precedence.
If a property is specified more than once, as would potentially be the case when composing multiple Spring Boot
application.properties files and you enable more than one Spring profile at time, the last property declaration wins.
In the example shown earlier, the value for gemfire.groups would be PROD when -Dspring.profiles.active=qa,prod
is configured.
Consider the following Spring Boot application.properties:
# Spring Boot application.properties
gemfire.durable-client-id=123
spring.data.gemfire.cache.client.durable-client-id=987The durable-client-id is 987. It does not matter which order the SDG or Apache Geode properties are declared in
Spring Boot application.properties. The matching SDG property overrides the Apache Geode property when duplicates
are found.
Finally, you cannot refer to Geode properties declared in Spring Boot application.properties with the SBDG
GemFireProperties class (see the Javadoc).
Consider the following example:
application.properties# Spring Boot application.properties
gemfire.name=TestCacheNameGiven the preceding property, the following assertion holds:
import org.springframework.geode.boot.autoconfigure.configuration.GemFireProperties;
@RunWith(SpringRunner.class)
@SpringBootTest
class GemFirePropertiesTestSuite {
@Autowired
private GemFireProperties gemfireProperties;
@Test
public void gemfirePropertiesTestCase() {
assertThat(this.gemfireProperties.getCache().getName()).isNotEqualTo("TestCacheName");
}
}
You can declare application.properties in the @SpringBootTest annotation. For example, you could have declared
gemfire.name in the annotation by setting @SpringBootTest(properties = { "gemfire.name=TestCacheName" })
for testing purposes instead of declaring the property in a separate Spring Boot application.properties file.
|
Only spring.data.gemfire.* prefixed properties are mapped to the SBDG GemFireProperties class hierarchy.
| Prefer SDG properties over Geode properties. See the SDG properties reference in the Appendix. |
10. Caching with Apache Geode
One of the easiest, quickest and least invasive ways to start using Apache Geode in your Spring Boot applications is to use Apache Geode as a caching provider in Spring’s Cache Abstraction. SDG enables Apache Geode to function as a caching provider in Spring’s Cache Abstraction.
| See the Spring Data for Apache Geode Reference Guide for more details on the support and configuration of Apache Geode as a caching provider in Spring’s Cache Abstraction. |
| Make sure you thoroughly understand the concepts behind Spring’s Cache Abstraction before you continue. |
| See also the relevant section on caching in Spring Boot’s reference documentation. Spring Boot even provides auto-configuration support for a few of the simple caching providers. |
Indeed, caching can be an effective software design pattern to avoid the cost of invoking a potentially expensive operation when, given the same input, the operation yields the same output, every time.
Some classic examples of caching include, but are not limited to, looking up a customer by name or account number, looking up a book by ISBN, geocoding a physical address, and caching the calculation of a person’s credit score when the person applies for a financial loan.
If you need the proven power of an enterprise-class caching solution, with strong consistency, high availability, low latency, and multi-site (WAN) capabilities, then you should consider Apache Geode. Alternatively, VMWare, Inc. offers a commercial solution, built on Apache Geode, called VMware Tanzu GemFire.
Spring’s declarative, annotation-based caching makes it simple to get started with caching, which is as easy as annotating your application components with the appropriate Spring cache annotations.
| Spring’s declarative, annotation-based caching also supports JSR-107 JCache annotations. |
For example, suppose you want to cache the results of determining a person’s eligibility when applying for a loan. A person’s financial status is unlikely to change in the time that the computer runs the algorithms to compute a person’s eligibility after all the financial information for the person has been collected, submitted for review and processed.
Our application might consist of a financial loan service to process a person’s eligibility over a given period of time:
@Service
class FinancialLoanApplicationService {
@Cacheable("EligibilityDecisions")
EligibilityDecision processEligibility(Person person, Timespan timespan) {
// ...
}
}Notice the @Cacheable annotation declared on the processEligibility(:Person, :Timespan) method of our service class.
When the FinancialLoanApplicationService.processEligibility(..) method is called, Spring’s caching infrastructure
first consults the "EligibilityDecisions" cache to determine if a decision has already been computed for the given
person within the given span of time. If the person’s eligibility in the given time frame has already been determined,
the existing decision is returned from the cache. Otherwise, the processEligibility(..) method is invoked
and the result of the method is cached when the method returns, before returning the decision to the caller.
Spring Boot for Apache Geode auto-configures Apache Geode as the caching provider when Apache Geode is declared on the application classpath and when no other caching provider (such as Redis) has been configured.
If Spring Boot for Apache Geode detects that another cache provider has already been configured, then Apache Geode will not function as the caching provider for the application. This lets you configure another store, such as Redis, as the caching provider and perhaps use Apache Geode as your application’s persistent store.
The only other requirement to enable caching in a Spring Boot application is for the declared caches (as specified
in Spring’s or JSR-107’s caching annotations) to have been created and already exist, especially before the operation
on which caching was applied is invoked. This means the backend data store must provide the data structure that serves
as the cache. For Apache Geode, this means a cache Region.
To configure the necessary Regions that back the caches declared in Spring’s cache annotations, use Spring Data
for Apache Geode’s @EnableCachingDefinedRegions
annotation.
The following listing shows a complete Spring Boot application:
package example.app;
@SpringBootApplication
@EnableCachingDefinedRegions
class FinancialLoanApplication {
public static void main(String[] args) {
SpringApplication.run(FinancialLoanApplication.class, args);
}
}
The FinancialLoanApplicationService is picked up by Spring’s classpath component scan, since this class
is annotated with Spring’s @Service stereotype annotation.
|
You can set the DataPolicy of the Region created through the @EnableCachingDefinedRegions annotation
by setting the clientRegionShortcut attribute to a valid enumerated value.
|
Spring Boot for Apache Geode does not recognize nor apply the spring.cache.cache-names property. Instead, you
should use SDG’s @EnableCachingDefinedRegions on an appropriate Spring Boot application @Configuration class.
|
10.1. Look-Aside Caching, Near Caching, Inline Caching, and Multi-Site Caching
Four different types of caching patterns can be applied with Spring when using Apache Geode for your application caching needs:
-
Look-aside caching
-
Near caching
-
[Async] Inline caching
-
Multi-site caching
Typically, when most users think of caching, they think of Look-aside caching. This is the default caching pattern applied by Spring’s Cache Abstraction.
In a nutshell, Near caching keeps the data closer to where the data is used, thereby improving on performance due to lower latencies when data is needed (no extra network hops). This also improves application throughput — that is, the amount of work completed in a given period of time.
Within Inline caching_, developers have a choice between synchronous (read/write-through) and asynchronous (write-behind) configurations depending on the application use case and requirements. Synchronous, read/write-through Inline caching is necessary if consistency is a concern. Asynchronous, write-behind Inline caching is applicable if throughput and low-latency are a priority.
Within Multi-site caching, there are active-active and active-passive arrangements. More details on Multi-site caching will be presented in a later release.
10.1.1. Look-Aside Caching
The caching pattern demonstrated in the preceding example is a form of Look-aside caching (or "Cache Aside").
Essentially, the data of interest is searched for in the cache first, before calling a potentially expensive operation, such as an operation that makes an IO- or network-bound request that results in either a blocking or a latency-sensitive computation.
If the data can be found in the cache (stored in-memory to reduce latency), the data is returned without ever invoking the expensive operation. If the data cannot be found in the cache, the operation must be invoked. However, before returning, the result of the operation is cached for subsequent requests when the same input is requested again by another caller, resulting in much improved response times.
The typical Look-aside caching pattern applied in your Spring application code looks similar to the following:
@Service
class CustomerService {
private final CustomerRepository customerRepository;
@Cacheable("Customers")
Customer findByAcccount(Account account) {
// pre-processing logic here
Customer customer = customerRepository.findByAccoundNumber(account.getNumber());
// post-processing logic here
return customer;
}
}In this design, the CustomerRepository is perhaps a JDBC- or JPA/Hibernate-backed implementation that accesses
the external data source (for example, an RDBMS) directly. The @Cacheable annotation wraps, or "decorates",
the findByAccount(:Account):Customer operation (method) to provide caching behavior.
| This operation may be expensive because it may validate the customer’s account before looking up the customer, pull multiple bits of information to retrieve the customer record, and so on — hence the need for caching. |
10.1.2. Near Caching
Near caching is another pattern of caching where the cache is collocated with the application. This is useful when the caching technology is configured in a client/server arrangement.
We already mentioned that Spring Boot for Apache Geode provides
an auto-configured ClientCache instance by default. A ClientCache instance is most effective when the data access
operations, including cache access, are distributed to the servers in a cluster that is accessible to the client and,
in most cases, multiple clients. This lets other cache client applications access the same data. However, this also
means the application incurs a network hop penalty to evaluate the presence of the data in the cache.
To help avoid the cost of this network hop in a client/server topology, a local cache can be established to maintain a subset of the data in the corresponding server-side cache (that is, a Region). Therefore, the client cache contains only the data of interest to the application. This "local" cache (that is, a client-side Region) is consulted before forwarding the lookup request to the server.
To enable Near caching when using Apache Geode, change the Region’s (that is the Cache in Spring’s Cache Abstraction)
data management policy from PROXY (the default) to CACHING_PROXY:
@SpringBootApplication
@EnableCachingDefinedRegions(clientRegionShortcut = ClientRegionShortcut.CACHING_PROXY)
class FinancialLoanApplication {
public static void main(String[] args) {
SpringApplication.run(FinancialLoanApplication.class, args);
}
}
The default client Region data management policy is
ClientRegionShortcut.PROXY.
As a result, all data access operations are immediately forwarded to the server.
|
See also the Apache Geode documentation concerning
client/server event distribution
and, specifically, “Client Interest Registration on the Server,” which applies when you use client CACHING_PROXY
Regions to manage state in addition to the corresponding server-side Region. This is necessary to receive updates on
entries in the Region that might have been changed by other clients that have access to the same data.
|
10.1.3. Inline Caching
The next pattern of caching covered in this chapter is Inline caching.
You can apply two different configurations of Inline caching to your Spring Boot applications when you use the Inline caching pattern: synchronous (read/write-through) and asynchronous (write-behind).
| Asynchronous (currently) offers only write capabilities, from the cache to the external data source. There is no option to asynchronously and automatically load the cache when the value becomes available in the external data source. |
Synchronous Inline Caching
When employing Inline caching and a cache miss occurs, the application service method might not be invoked still, since a cache can be configured to invoke a loader to load the missing entry from an external data source.
With Apache Geode, you can configure the cache (or, to use Apache Geode terminology, the Region) with a
CacheLoader. A CacheLoader is implemented to
retrieve missing values from an external data source when a cache miss occurs. The external data source could be
an RDBMS or any other type of data store (for example, another NoSQL data store, such as Apache Cassandra, MongoDB,
or Neo4j).
| See Apache Geode’s User Guide on data loaders for more details. |
Likewise, you can also configure an Apache Geode Region with a
CacheWriter. A CacheWriter is responsible for
writing an entry that has been put into the Region to the backend data store, such as an RDBMS. This is referred to
as a write-through operation, because it is synchronous. If the backend data store fails to be updated, the entry is
not stored in the Region. This helps to ensure consistency between the backend data store and the Apache Geode Region.
You can also implement Inline caching using asynchronous write-behind operations by registering
an AsyncEventListener
on an AsyncEventQueue attached to
a server-side Region. See Apache Geode’s User Guide for more
details. We cover asynchronous
write-behind Inline caching in the next section.
|
The typical pattern of Inline caching when applied to application code looks similar to the following:
@Service
class CustomerService {
private CustomerRepository customerRepository;
Customer findByAccount(Account account) {
// pre-processing logic here
Customer customer = customerRepository.findByAccountNumber(account.getNumber());
// post-processing logic here.
return customer;
}
}The main difference is that no Spring or JSR-107 caching annotations are applied to the application’s service methods,
and the CustomerRepository accesses Apache Geode directly and the RDBMS indirectly.
Implementing CacheLoaders and CacheWriters for Inline Caching
You can use Spring to configure a CacheLoader or CacheWriter as a bean in the Spring ApplicationContext and then
wire the loader or writer to a Region. Given that the CacheLoader or CacheWriter is a Spring bean like any other
bean in the Spring ApplicationContext, you can inject any DataSource you like into the loader or writer.
While you can configure client Regions with CacheLoaders and CacheWriters, it is more common to configure
the corresponding server-side Region:
@SpringBootApplication
@CacheServerApplication
class FinancialLoanApplicationServer {
public static void main(String[] args) {
SpringApplication.run(FinancialLoanApplicationServer.class, args);
}
@Bean("EligibilityDecisions")
PartitionedRegionFactoryBean<Object, Object> eligibilityDecisionsRegion(
GemFireCache gemfireCache, CacheLoader eligibilityDecisionLoader,
CacheWriter eligibilityDecisionWriter) {
PartitionedRegionFactoryBean<?, EligibilityDecision> eligibilityDecisionsRegion =
new PartitionedRegionFactoryBean<>();
eligibilityDecisionsRegion.setCache(gemfireCache);
eligibilityDecisionsRegion.setCacheLoader(eligibilityDecisionLoader);
eligibilityDecisionsRegion.setCacheWriter(eligibilityDecisionWriter);
eligibilityDecisionsRegion.setPersistent(false);
return eligibilityDecisionsRegion;
}
@Bean
CacheLoader<?, EligibilityDecision> eligibilityDecisionLoader(
DataSource dataSource) {
return new EligibilityDecisionLoader(dataSource);
}
@Bean
CacheWriter<?, EligibilityDecision> eligibilityDecisionWriter(
DataSource dataSource) {
return new EligibilityDecisionWriter(dataSource);
}
@Bean
DataSource dataSource() {
// ...
}
}Then you could implement the CacheLoader
and CacheWriter interfaces, as appropriate:
class EligibilityDecisionLoader implements CacheLoader<?, EligibilityDecision> {
private final DataSource dataSource;
EligibilityDecisionLoader(DataSource dataSource) {
this.dataSource = dataSource;
}
public EligibilityDecision load(LoadHelper<?, EligibilityDecision> helper) {
Object key = helper.getKey();
// Use the configured DataSource to load the EligibilityDecision identified by the key
// from a backend, external data store.
}
}
SBDG provides the org.springframework.geode.cache.support.CacheLoaderSupport @FunctionalInterface to
conveniently implement application CacheLoaders.
|
If the configured CacheLoader still cannot resolve the value, the cache lookup operation results in a cache miss
and the application service method is then invoked to compute the value:
class EligibilityDecisionWriter implements CacheWriter<?, EligibilityDecision> {
private final DataSource dataSource;
EligibilityDecisionWriter(DataSource dataSource) {
this.dataSource = dataSource;
}
public void beforeCreate(EntryEvent<?, EligiblityDecision> entryEvent) {
// Use configured DataSource to save (e.g. INSERT) the entry value into the backend data store
}
public void beforeUpdate(EntryEvent<?, EligiblityDecision> entryEvent) {
// Use the configured DataSource to save (e.g. UPDATE or UPSERT) the entry value into the backend data store
}
public void beforeDestroy(EntryEvent<?, EligiblityDecision> entryEvent) {
// Use the configured DataSource to delete (i.e. DELETE) the entry value from the backend data store
}
// ...
}
SBDG provides the org.springframework.geode.cache.support.CacheWriterSupport interface to conveniently implement
application CacheWriters.
|
Your CacheWriter implementation can use any data access technology to interface with your backend data store
(for example JDBC, Spring’s JdbcTemplate, JPA with Hibernate, and others). It is not limited to using only a
javax.sql.DataSource. In fact, we present another, more useful and convenient approach to implementing Inline caching
in the next section.
|
Inline Caching with Spring Data Repositories
Spring Boot for Apache Geode offers dedicated support to configure Inline caching with Spring Data Repositories.
This is powerful, because it lets you:
-
Access any backend data store supported by Spring Data (such as Redis for key-value or other distributed data structures, MongoDB for documents, Neo4j for graphs, Elasticsearch for search, and so on).
-
Use complex mapping strategies (such as ORM provided by JPA with Hibernate).
We believe that users should store data where it is most easily accessible. If you access and process documents, then MongoDB, Couchbase, or another document store is probably going to be the most logical choice to manage your application’s documents.
However, this does not mean that you have to give up Apache Geode in your application/system architecture. You can use each data store for what it is good at. While MongoDB is excellent at handling documents, Apache Geode is a valuable choice for consistency, high-availability/low-latency, high-throughput, multi-site, scale-out application use cases.
As such, using Apache Geode’s CacheLoader and CacheWriter provides a nice integration point between itself and other
data stores to best serve your application’s use case and requirements.
Suppose you use JPA and Hibernate to access data managed in an Oracle database. Then, you can configure Apache Geode to read/write-through to the backend Oracle database when performing cache (Region) operations by delegating to a Spring Data JPA Repository.
The configuration might look something like:
@SpringBootApplication
@EntityScan(basePackageClasses = Customer.class)
@EnableEntityDefinedRegions(basePackageClasses = Customer.class)
@EnableJpaRepositories(basePackageClasses = CustomerRepository.class)
class SpringBootOracleDatabaseApacheGeodeApplication {
@Bean
InlineCachingRegionConfigurer<Customer, Long> inlineCachingForCustomersRegionConfigurer(
CustomerRepository customerRepository) {
return new InlineCachingRegionConfigurer<>(customerRepository, Predicate.isEqual("Customers"));
}
}SBDG provides the InlineCachingRegionConfigurer<ENTITY, ID> interface.
Given a Predicate to express the criteria used to match the target Region by name and a Spring Data CrudRepository,
the InlineCachingRegionConfigurer configures and adapts the Spring Data CrudRepository as a CacheLoader
and CacheWriter registered on the Region (for example, "Customers") to enable Inline caching functionality.
You need only declare InlineCachingRegionConfigurer as a bean in the Spring ApplicationContext and make
the association between the Region (by name) and the appropriate Spring Data CrudRepository.
In this example, we used JPA and Spring Data JPA to store and retrieve data stored in the cache (Region) to and from a backend database. However, you can inject any Spring Data Repository for any data store (Redis, MongoDB, and others) that supports the Spring Data Repository abstraction.
If you want only to support one-way data access operations when you use Inline caching, you can use either
the RepositoryCacheLoaderRegionConfigurer for reads or the RepositoryCacheWriterRegionConfigurer for writes,
instead of the InlineCachingRegionConfigurer, which supports both reads and writes.
|
To see a similar implementation of Inline caching with a database (an in-memory HSQLDB database) in action, see the
InlineCachingWithDatabaseIntegrationTests
test class from the SBDG test suite. A dedicated sample will be provided in a future release.
|
Asynchronous Inline Caching
| See the corresponding sample guide and code to see asynchronous Inline caching with Apache Geode in action. |
If consistency between the cache and your external data source is not a concern, and you need only write from the cache to the backend data store periodically, you can employ asynchronous (write-behind) Inline caching.
As the term, "write-behind", implies, a write to the backend data store is asynchronous and not strictly tied to the cache operation. As a result, the backend data store is in an "eventually consistent" state, since the cache is primarily used by the application at runtime to access and manage data. In this case, the backend data store is used to persist the state of the cache (and that of the application) at periodic intervals.
If multiple applications are updating the backend data store concurrently, you could combine a CacheLoader
to synchronously read through to the backend data store and keep the cache up-to-date as well as asynchronously
write behind from the cache to the backend data store when the cache is updated to eventually inform other interested
applications of data changes. In this capacity, the backend data store is still the primary System of Record (SoR).
If data processing is not time sensitive, you can gain a performance advantage from quantity-based or time-based batch updates.
Implementing an AsyncEventListener for Inline Caching
If you were to configure asynchronous, write-behind Inline caching by hand, you would need to do the following yourself:
-
Implement an
AsyncEventListenerto write to an external data source on cache events. -
Configure and register the listener with an
AsyncEventQueue(AEQ). -
Create a Region to serve as the source of cache events and attach the AEQ to the Region.
The advantage of this approach is that you have access to and control over low-level configuration details. The disadvantage is that with more moving parts, it is easier to make errors.
Following on from our synchronous, read/write-through, Inline caching examples from the prior sections,
our AsyncEventListener implementation might appear as follows:
AsyncEventListener for Asynchronous, Write-Behind Inline Caching@Component
class ExampleAsyncEventListener implements AsyncEventListener {
private final DataSource dataSource;
ExampleAsyncEventListener(DataSoruce dataSource) {
this.dataSource = dataSource;
}
@Override
public boolean processEvents(List<AsyncEvent> events) {
// Iterate over the ordered AsyncEvents and use the configured DataSource
// to write to the external, backend DataSource
}
}
Instead of directly injecting a DataSource into your AsyncEventListener, you could use JDBC, Spring’s
JdbcTemplate, JPA and Hibernate, or another data access API or framework. Later in this chapter, we show how SBDG
simplifies the AsyncEventListener implementation by using Spring Data Repositories.
|
Then we need to register this listener with an AsyncEventQueue (step 2 from the procedure shown earlier) and attach it
to the target Region that will be the source of the cache events we want to persist asynchronously (step 3):
AsyncEventQueue@Configuration
@PeerCacheApplication
class GeodeConfiguration {
@Bean
DataSource exampleDataSource() {
// Construct and configure a data store specific DataSource
}
@Bean
ExampleAsyncEventListener exampleAsyncEventListener(DataSource dataSource) {
return new ExampleAsyncEventListener(dataSource);
}
@Bean
AsyncEventQueueFactoryBean exampleAsyncEventQueue(Cache peerCache, ExampleAsyncEventListener listener) {
AsyncEventQueueFactoryBean asyncEventQueue = new AsyncEventQueueFactoryBean(peerCache, listener);
asyncEventQueue.setBatchConflationEnabled(true);
asyncEventQueue.setBatchSize(50);
asyncEventQueue.setBatchTimeInterval(15000); // 15 seconds
asyncEventQueue.setMaximumQueueMemory(64); // 64 MB
// ...
return asyncEventQueue;
}
@Bean("Example")
PartitionedRegionFactoryBean<?, ?> exampleRegion(Cache peerCache, AsyncEventQueue queue) {
PartitionedRegionFactoryBean<?, ?> exampleRegion = new PartitionedRegionFactoryBean<>();
exampleRegion.setAsyncEventQueues(ArrayUtils.asArray(queue));
exampleRegion.setCache(peerCache);
// ...
return exampleRegion;
}
}While this approach affords you a lot of control over the low-level configuration, in addition to
your AsyncEventListener implementation, this is a lot of boilerplate code.
See the Javadoc for SDG’s
AsyncEventQueueFactoryBean
for more detail on the configuration of the AEQ.
|
| See Apache Geode’s User Guide for more details on AEQs and listeners. |
Fortunately, with SBDG, there is a better way.
Asynchronous Inline Caching with Spring Data Repositories
The implementation and configuration of the AsyncEventListener as well as the AEQ shown in
the preceding section
can be simplified as follows:
@SpringBootApplication
@EntityScan(basePackageClasses = ExampleEntity.class)
@EnableJpaRepositories(basePackageClasses = ExampleRepository.class)
@EnableEntityDefinedRegions(basePackageClasses = ExampleEnity.class)
class ExampleSpringBootApacheGeodeAsyncInlineCachingApplication {
@Bean
AsyncInlineCachingRegionConfigurer asyncInlineCachingRegionConfigurer(
CrudRepository<ExampleEntity, Long> repository) {
return AsyncInlineCachingRegionConfigurer.create(repository, "Example")
.withQueueBatchConflationEnabled()
.withQueueBatchSize(50)
.withQueueBatchTimeInterval(Duration.ofSeconds(15))
.withQueueMaxMemory(64);
}
}The AsyncInlineCachingRegionConfigurer.create(..) method is overloaded to accept a Predicate in place of the String
to programmatically express more powerful matching logic and identify the target Region (by name) on which to configure
asynchronous Inline caching functionality.
The AsyncInlineCachingRegionConfigurer uses the Builder software design pattern
and withQueue*(..) builder methods to configure the underlying AsyncEventQueue (AEQ) when the queue’s configuration
deviates from the defaults, as specified by Apache Geode.
Under the hood, the AsyncInlineCachingRegionConfigurer constructs a new instance of the RepositoryAsyncEventListener
class initialized with the given Spring Data CrudRepository. The RegionConfigurer then registers the listener with
the AEQ and attaches it to the target Region.
With the power of Spring Boot auto-configuration and SBDG, the configuration is much more concise and intuitive.
About RepositoryAsyncEventListener
The SBDG RepositoryAsyncEventListener class is the magic ingredient behind the integration of the cache with
an external data source.
The listener is a specialized adapter that processes AsyncEvents by
invoking an appropriate CrudRepository method based on the cache operation. The listener requires an instance of
CrudRepository. The listener supports any external data source supported by Spring Data’s Repository abstraction.
Backend data store, data access operations (such as INSERT, UPDATE, DELETE, and so on) triggered by cache events are performed asynchronously from the cache operation. This means the state of the cache and backend data store will be "eventually consistent".
Given the complex nature of "eventually consistent" systems and asynchronous concurrent processing, the
RepositoryAsyncEventListener lets you register a custom AsyncEventErrorHandler to handle the errors that occur
during processing of AsyncEvents, perhaps due to a faulty backend data store data access operation (such as
OptimisticLockingFailureException), in an application-relevant way.
The AsyncEventErrorHandler interface is a java.util.function.Function implementation and @FunctionalInterface
defined as:
@FunctionalInterface
interface AsyncEventErrorHandler implements Function<AsyncEventError, Boolean> { }The AsyncEventError class encapsulates AsyncEvent along with the Throwable that was thrown while processing
the AsyncEvent.
Since the AsyncEventErrorHandler interface implements Function, you should override the apply(:AsyncEventError)
method to handle the error with application-specific actions. The handler returns a Boolean to indicate whether it
was able to handle the error or not:
AsyncEventErrorHandler implementationclass CustomAsyncEventErrorHandler implements AsyncEventErrorHandler {
@Override
public Boolean apply(AsyncEventError error) {
if (error.getCause() instanceof OptimisticLockingFailureException) {
// handle optimistic locking failure if you can
return true; // if error was successfully handled
}
else if (error.getCause() instanceof IncorrectResultSizeDataAccessException) {
// handle no row or too many row update if you can
return true; // if error was successfully handled
}
else {
// ...
}
return false;
}
}You can configure the RepositoryAsyncEventListener with your custom AsyncEventErrorHandler by using the
AsyncInlineCachingRegionConfigurer:
AsyncEventErrorHandler@Configuration
class GeodeConfiguration {
@Bean
CustomAsyncEventErrorHandler customAsyncEventErrorHandler() {
return new CustomAsyncEventErrorHandler();
}
@Bean
AsyncInlineCachingRegionConfigurer asyncInlineCachingRegionConfigurer(
CrudRepository<?, ?> repository,
CustomAsyncEventErrorHandler errorHandler) {
return AsyncInlineCachingRegionConfigurer.create(repository, "Example")
.withAsyncEventErrorHandler(errorHandler);
}
}Also, since AsyncEventErrorHandler implements Function, you can compose
multiple error handlers by using Function.andThen(:Function).
By default, the RepositoryAsyncEventListener handles CREATE, UPDATE, and REMOVE cache event, entry operations.
CREATE and UPDATE translate to CrudRepository.save(entity). The entity is derived from
AsyncEvent.getDeserializedValue().
REMOVE translates to CrudRepository.delete(entity). The entity is derived from
AsyncEvent.getDeserializedValue().
The cache Operation to CrudRepository method is
supported by the AsyncEventOperationRepositoryFunction interface, which implements java.util.function.Function
and is a @FunctionalInterface.
This interface becomes useful if and when you want to implement CrudRepository method invocations for other
AsyncEvent Operations not handled by SBDG’s RepositoryAsyncEventListener.
The AsyncEventOperationRepositoryFunction interface is defined as follows:
@FunctionalInterface
interface AsyncEventOperationRepositoryFunction<T, ID> implements Function<AsyncEvent<ID, T>, Boolean> {
default boolean canProcess(AsyncEvent<ID, T> event) {
return false;
}
}T is the class type of the entity and ID is the class type of the entity’s identifier (ID), possibly declared with
Spring Data’s org.springframework.data.annotation.Id
annotation.
For convenience, SBDG provides the AbstractAsyncEventOperationRepositoryFunction class for extension, where you can
provide implementations for the cacheProcess(:AsyncEvent) and doRepositoryOp(entity) methods.
The AsyncEventOperationRepositoryFunction.apply(:AsyncEvent) method is already implemented in terms of
canProcess(:AsyncEvent), resolveEntity(:AsyncEvent), doRepositoryOp(entity), and catching and handling
any Throwable (errors) by calling the configured AsyncEventErrorHandler.
|
For example, you may want to handle Operation.INVALIDATE
cache events as well, deleting the entity from the backend data store by invoking the CrudRepository.delete(entity)
method:
AsyncEvent, Operation.INVALIDATE@Component
class InvalidateAsyncEventRepositoryFunction
extends RepositoryAsyncEventListener.AbstractAsyncEventOperationRepositoryFunction<?, ?> {
InvalidateAsyncEventRepositoryFunction(RepositoryAsyncEventListener<?, ?> listener) {
super(listener);
}
@Override
public boolean canProcess(AsyncEvent<?, ?> event) {
return event != null && Operation.INVALIDATE.equals(event.getOperation());
}
@Override
protected Object doRepositoryOperation(Object entity) {
getRepository().delete(entity);
return null;
}
}You can then register your user-defined, AsyncEventOperationRepositoryFunction (that is,
InvalidateAsyncEventRepositoryFunction) with the RepositoryAsyncEventListener by using
the AsyncInlineCachingRegionConfigurer:
AsyncEventOperationRepositoryFunctionimport org.springframework.geode.cache.RepositoryAsyncEventListener;
@Configuration
class GeodeConfiguration {
@Bean
AsyncInlineCachingRegionConfigurer asyncInlineCachingRegionConfigurer(
CrudRepository<?, ?> repository,
CustomAsyncEventErrorHandler errorHandler ) {
return AsyncInlineCachingRegionConfigurer.create(repository, "ExampleRegion")
.applyToListener(listener -> {
if (listener instanceof RepositoryAsyncEventListener) {
RepositoryAsyncEventListener<?, ?> repositoryListener =
(RepositoryAsyncEventListener<?, ?>) listener;
repositoryListener.register(new InvalidAsyncEventRepositoryFunction(repositoryListener));
}
return listener;
});
}
}This same technique can be applied to CREATE, UPDATE, and REMOVE cache operations as well, effectively overriding
the default behavior for these cache operations handled by SBDG.
About AsyncInlineCachingRegionConfigurer
As we saw in the previous section, you can intercept and post-process the essential components that are constructed
and configured by the AsyncInlineCachingRegionConfigurer class during initialization.
SBDG’s lets you intercept and post-process the AsyncEventListener (such as RepositoryAsyncEventListener),
the AsyncEventQueueFactory and even the AsyncEventQueue created by the AsyncInlineCachingRegionConfigurer
(a SDG RegionConfigurer)
during Spring ApplicationContext bean initialization.
The AsyncInlineCachingRegionConfigurer class provides the following builder methods to intercept and post-process any
of the following Apache Geode objects:
-
applyToListener(:Function<AsyncEventListener, AsyncEventListener>) -
applyToQueue(:Function<AsyncEventQueue, AsyncEventQueue>) -
applyToQueueFactory(:Function<AsyncEventQueueFactory, AsyncEventQueueFactory>)
All of these apply* methods accept a java.util.function.Function that applies the logic of the Function to
the Apache Geode object (such as AsyncEventListener), returning the object as a result.
The Apache Geode object returned by the Function may be the same object, a proxy, or a completely new object.
Essentially, the returned object can be anything you want. This is the fundamental premise behind Aspect-Oriented
Programming (AOP) and the Decorator software design pattern.
|
The apply* methods and the supplied Function let you decorate, enhance, post-process, or otherwise modify
the Apache Geode objects created by the configurer.
The AsyncInlineCachingRegionConfigurer strictly adheres to
the open/close principle
and is, therefore, flexibly extensible.
10.2. Advanced Caching Configuration
Apache Geode supports additional caching capabilities to manage the entries stored in the cache.
As you can imagine, given that cache entries are stored in-memory, it becomes important to manage and monitor the available memory used by the cache. After all, by default, Apache Geode stores data in the JVM Heap.
You can employ several techniques to more effectively manage memory, such as using eviction, possibly overflowing data to disk, configuring both entry Idle-Timeout_ (TTI) and Time-to-Live_ (TTL) expiration policies, configuring compression, and using off-heap or main memory.
You can use several other strategies as well, as described in Managing Heap and Off-heap Memory.
While this is beyond the scope of this document, know that Spring Data for Apache Geode makes all of these configuration options available to you.
10.3. Disable Caching
There may be cases where you do not want your Spring Boot application to cache application state with Spring’s Cache Abstraction using Apache Geode. In certain cases, you may use another Spring supported caching provider, such as Redis, to cache and manage your application state. In other cases, you may not want to use Spring’s Cache Abstraction at all.
Either way, you can specifically call out your Spring Cache Abstraction provider by using the spring.cache.type
property in application.properties:
#application.properties
spring.cache.type=redis
...If you prefer not to use Spring’s Cache Abstraction to manage your Spring Boot application’s state at all, then set
the spring.cache.type property to "none":
#application.properties
spring.cache.type=none
...See the Spring Boot documentation for more detail.
| You can include multiple caching providers on the classpath of your Spring Boot application. For instance, you might use Redis to cache your application’s state while using Apache Geode as your application’s persistent data store (that is, the System of Record (SOR)). |
Spring Boot does not properly recognize spring.cache.type=[gemfire|geode], even though Spring Boot
for Apache Geode is set up to handle either of these property values (that is, either gemfire or geode).
|
11. Data Access with GemfireTemplate
There are several ways to access data stored in Apache Geode.
For instance, you can use the Region API directly. If you are driven by the application’s domain context, you can use the power of Spring Data Repositories instead.
While the Region API offers flexibility, it couples your application to Apache Geode, which is usually undesirable and unnecessary. While using Spring Data Repositories provides a very powerful and convenient abstraction, you give up the flexibility provided by a lower-level Region API.
A good compromise is to use the Template software design pattern. This pattern is consistently and widely used throughout the entire Spring portfolio.
For example, the Spring Framework provides JdbcTemplate
and JmsTemplate.
Other Spring Data modules, such as Spring Data Redis, offer the
RedisTemplate,
and Spring Data for Apache Geode (SDG) itself offers the
GemfireTemplate.
The GemfireTemplate provides a highly consistent and familiar API to perform data access operations on Apache Geode
cache Regions.
GemfireTemplate offers:
-
A simple and convenient data access API to perform basic CRUD and simple query operations on cache Regions.
-
Use of Spring Framework’s consistent data access Exception hierarchy.
-
Automatic enlistment in the presence of local cache transactions.
-
Consistency and protection from Region API breaking changes.
Given these advantages, Spring Boot for Apache Geode (SBDG) auto-configures GemfireTemplate beans for each Region
present in the Apache Geode cache.
Additionally, SBDG is careful not to create a GemfireTemplate if you have already declared a GemfireTemplate bean
in the Spring ApplicationContext for a given Region.
11.1. Explicitly Declared Regions
Consider an explicitly declared Region bean definition:
-
Explicitly Declared Region Bean Definition
@Configuration
class GeodeConfiguration {
@Bean("Example")
ClientRegionFactoryBean<?, ?> exampleRegion(GemFireCache gemfireCache) {
// ...
}
}SBDG automatically creates a GemfireTemplate bean for the Example Region by using the bean name exampleTemplate.
SBDG names the GemfireTemplate bean after the Region by converting the first letter in the Region’s name to lower case
and appending Template to the bean name.
In a managed Data Access Object (DAO), you can inject the Template:
@Repository
class ExampleDataAccessObject {
@Autowired
@Qualifier("exampleTemplate")
private GemfireTemplate exampleTemplate;
}You should use the @Qualifier annotation to qualify which GemfireTemplate bean you are specifically referring,
especially if you have more than one Region bean definition.
11.2. Entity-defined Regions
SBDG auto-configures GemfireTemplate beans for entity-defined Regions.
Consider the following entity class:
@Region("Customers")
class Customer {
// ...
}Further consider the following configuration:
@Configuration
@EnableEntityDefinedRegions(basePackageClasses = Customer.class)
class GeodeConfiguration {
// ...
}SBDG auto-configures a GemfireTemplate bean for the Customers Region named customersTemplate, which you can then
inject into an application component:
@Service
class CustomerService {
@Bean
@Qualifier("customersTemplate")
private GemfireTemplate customersTemplate;
}Again, be careful to qualify the GemfireTemplate bean injection if you have multiple Regions, whether declared
explicitly or implicitly, such as when you use the @EnableEntityDefineRegions annotation.
11.3. Caching-defined Regions
SBDG auto-configures GemfireTemplate beans for caching-defined Regions.
When you use Spring Framework’s Cache Abstraction backed by Apache Geode, one requirement is to configure Regions for each of the caches specified in the caching annotations of your application service components.
Fortunately, SBDG makes enabling and configuring caching easy and automatic.
Consider the following cacheable application service component:
CustomerService class@Service
class CacheableCustomerService {
@Bean
@Qualifier("customersByNameTemplate")
private GemfireTemplate customersByNameTemplate;
@Cacheable("CustomersByName")
public Customer findBy(String name) {
return toCustomer(customersByNameTemplate.query("name = " + name));
}
}Further consider the following configuration:
@Configuration
@EnableCachingDefinedRegions
class GeodeConfiguration {
@Bean
public CustomerService customerService() {
return new CustomerService();
}
}SBDG auto-configures a GemfireTemplate bean named customersByNameTemplate to perform data access operations on
the CustomersByName (@Cacheable) Region. You can then inject the bean into any managed application component,
as shown in the preceding application service component example.
Again, be careful to qualify the GemfireTemplate bean injection if you have multiple Regions, whether declared
explicitly or implicitly, such as when you use the @EnableCachingDefineRegions annotation.
Autowiring (that is, injecting) GemfireTemplate beans auto-configured by SBDG for caching-defined Regions
into your application components does not always work. This has to do with the Spring container bean creation process.
In those cases, you may need to lazily lookup the GemfireTemplate by using
applicationContext.getBean("customersByNameTemplate", GemfireTemplate.class). This is not ideal, but it works when
autowiring does not.
|
11.4. Native-defined Regions
SBDG even auto-configures GemfireTemplate beans for Regions that have been defined with Apache Geode native
configuration metadata, such as cache.xml.
Consider the following Apache Geode native cache.xml:
cache.xml<?xml version="1.0" encoding="UTF-8"?>
<client-cache xmlns="http://geode.apache.org/schema/cache"
xmlns:xsi="http://www.w3.org/2001/XMLSchema-instance"
xsi:schemaLocation="http://geode.apache.org/schema/cache http://geode.apache.org/schema/cache/cache-1.0.xsd"
version="1.0">
<region name="Example" refid="LOCAL"/>
</client-cache>Further consider the following Spring configuration:
@Configuration
@EnableGemFireProperties(cacheXmlFile = "cache.xml")
class GeodeConfiguration {
// ...
}SBDG auto-configures a GemfireTemplate bean named exampleTemplate after the Example Region defined in cache.xml.
You can inject this template as you would any other Spring-managed bean:
GemfireTemplate@Service
class ExampleService {
@Autowired
@Qualifier("exampleTemplate")
private GemfireTemplate exampleTemplate;
}The rules described earlier apply when multiple Regions are present.
11.5. Template Creation Rules
Fortunately, SBDG is careful not to create a GemfireTemplate bean for a Region if a template by the same name already
exists.
For example, consider the following configuration:
@Configuration
@EnableEntityDefinedRegions(basePackageClasses = Customer.class)
class GeodeConfiguration {
@Bean
public GemfireTemplate customersTemplate(GemFireCache cache) {
return new GemfireTemplate(cache.getRegion("/Customers"));
}
}Further consider the following example:
@Region("Customers")
class Customer {
// ...
}Because you explicitly defined and declared the customersTemplate bean, SBDG does not automatically create a template
for the Customers Region. This applies regardless of how the Region was created, whether by using
@EnableEntityDefinedRegions, @EnableCachingDefinedRegions, explicitly declaring Regions,
or natively defining Regions.
Even if you name the template differently from the Region for which the template was configured, SBDG conserves resources and does not create the template.
For example, suppose you named the GemfireTemplate bean vipCustomersTemplate, even though the Region name
is Customers, based on the @Region annotated Customer class, which specified the Customers Region.
With the following configuration, SBDG is still careful not to create the template:
@Configuration
@EnableEntityDefinedRegions(basePackageClasses = Customer.class)
class GeodeConfiguration {
@Bean
public GemfireTemplate vipCustomersTemplate(GemFireCache cache) {
return new GemfireTemplate(cache.getRegion("/Customers"));
}
}SBDG identifies that your vipCustomersTemplate is the template used with the Customers Region, and SBDG does not
create the customersTemplate bean, which would result in two GemfireTemplate beans for the same Region.
The name of your Spring bean defined in Java configuration is the name of the method if the Spring bean is not
explicitly named by using the name attribute or the value attribute of the @Bean annotation.
|
12. Spring Data Repositories
Using Spring Data Repositories with Apache Geode makes short work of data access operations when you use Apache Geode as your System of Record (SoR) to persist your application’s state.
Spring Data Repositories provide a convenient and powerful way to define basic CRUD and simple query data access operations by specifying the contract of those data access operations in a Java interface.
Spring Boot for Apache Geode auto-configures the Spring Data for Apache Geode Repository extension when either is declared on your application’s classpath. You need not do anything special to enable it. You can start coding your application-specific Repository interfaces.
The following example defines a Customer class to model customers and map it to the Apache Geode Customers Region
by using the SDG @Region
mapping annotation:
Customer entity classpackage example.app.crm.model;
@Region("Customers")
class Customer {
@Id
private Long id;
private String name;
}The following example shows how to declare your Repository (a.k.a. Data Access Object (DAO))
for Customers:
CustomerRepository for peristing and accessing Customerspackage example.app.crm.repo;
interface CustomerRepository extends CrudRepository<Customer, Long> {
List<Customer> findByLastNameLikeOrderByLastNameDescFirstNameAsc(String customerLastNameWildcard);
}Then you can use the CustomerRepository in an application service class:
CustomerRepositorypackage example.app;
@SpringBootApplication
@EnableEntityDefinedRegions(basePackageClasses = Customer.class)
class SpringBootApacheGeodeClientCacheApplication {
public static void main(String[] args) {
SpringApplication.run(SpringBootApacheGeodeClientCacheApplication.class, args);
}
@Bean
ApplicationRunner runner(CustomerRepository customerRepository) {
// Matches Williams, Wilson, etc.
List<Customer> customers =
customerRepository.findByLastNameLikeOrderByLastNameDescFirstNameAsc("Wil%");
// process the list of matching customers...
}
}See Spring Data Commons' Repositories abstraction and Spring Data for Apache Geode’s Repositories extension for more detail.
13. Function Implementations & Executions
This chapter is about using Apache Geode in a Spring context for distributed computing use cases.
13.1. Background
Distributed computing, particularly in conjunction with data access and mutation operations, is a very effective and efficient use of clustered computing resources. This is similar to MapReduce.
A naively conceived query returning potentially hundreds of thousands (or even millions) of rows of data in a result set to the application that queried and requested the data can be very costly, especially under load. Therefore, it is typically more efficient to move the processing and computations on the predicated data set to where the data resides, perform the required computations, summarize the results, and then send the reduced data set back to the client.
Additionally, when the computations are handled in parallel, across the cluster of computing resources, the operation can be performed much more quickly. This typically involves intelligently organizing the data using various partitioning (a.k.a. sharding) strategies to uniformly balance the data set across the cluster.
Apache Geode addresses this very important application concern in its Function execution framework.
Spring Data for Apache Geode builds on this Function execution framework by letting developers implement and execute Apache Geode functions with a simple POJO-based annotation configuration model.
| See the section about implementation versus execution for the difference between Function implementation and execution. |
Taking this a step further, Spring Boot for Apache Geode auto-configures and enables both Function implementation and execution out-of-the-box. Therefore, you can immediately begin writing Functions and invoking them without having to worry about all the necessary plumbing to begin with. You can rest assured that it works as expected.
13.2. Applying Functions
Earlier, when we talked about caching, we described a FinancialLoanApplicationService class
that could process eligibility when someone (represented by a Person object) applied for a financial loan.
This can be a very resource intensive and expensive operation, since it might involve collecting credit and employment history, gathering information on outstanding loans, and so on. We applied caching in order to not have to recompute or redetermine eligibility every time a loan office may want to review the decision with the customer.
But, what about the process of computing eligibility in the first place?
Currently, the application’s FinancialLoanApplicationService class seems to be designed to fetch the data and perform
the eligibility determination in place. However, it might be far better to distribute the processing and even determine
eligibility for a larger group of people all at once, especially when multiple, related people are involved in a single
decision, as is typically the case.
We can implement an EligibilityDeterminationFunction class by using SDG:
@Component
class EligibilityDeterminationFunction {
@GemfireFunction(HA = true, hasResult = true, optimizeForWrite=true)
public EligibilityDecision determineEligibility(FunctionContext functionContext, Person person, Timespan timespan) {
// ...
}
}By using the SDG @GemfireFunction
annotation, we can implement our Function as a POJO method. SDG appropriately handles registering this POJO method
as a proper Function with Apache Geode.
If we now want to call this function from our Spring Boot ClientCache application, we can define
a function execution interface with a method name that matches the function name and that targets the execution
on the EligibilityDecisions Region:
@OnRegion("EligibilityDecisions")
interface EligibilityDeterminationExecution {
EligibilityDecision determineEligibility(Person person, Timespan timespan);
}We can then inject an instance of the EligibilityDeterminationExecution interface into our
FinancialLoanApplicationService, as we would any other object or Spring bean:
@Service
class FinancialLoanApplicationService {
private final EligibilityDeterminationExecution execution;
public LoanApplicationService(EligibilityDeterminationExecution execution) {
this.execution = execution;
}
@Cacheable("EligibilityDecisions")
EligibilityDecision processEligibility(Person person, Timespan timespan) {
return this.execution.determineEligibility(person, timespan);
}
}As with caching, no additional configuration is required to enable and find your application Function implementations and executions. You can simply build and run. Spring Boot for Apache Geode handles the rest.
| It is common to "implement" and register your application Functions on the server and "execute" them from the client. |
14. Continuous Query
Some applications must process a stream of events as they happen and intelligently react in (near) real-time to the countless changes in the data over time. Those applications need frameworks that can make processing a stream of events as they happen as easy as possible.
Spring Boot for Apache Geode does just that, without users having to perform any complex setup or configure any necessary infrastructure components to enable such functionality. Developers can define the criteria for the data of interest and implement a handler (listener) to process the stream of events as they occur.
Continuous Query (CQ) lets you easily define your criteria for the data you need. With CQ, you can express the criteria that match the data you need by specifying a query predicate. Apache Geode implements the Object Query Language (OQL) for defining and executing queries. OQL resembles SQL and supports projections, query predicates, ordering, and aggregates. Also, when used in CQs, they execute continuously, firing events when the data changes in such ways as to match the criteria expressed in the query predicate.
Spring Boot for Apache Geode combines the ease of identifying the data you need by using an OQL query statement with implementing the listener callback (handler) in one easy step.
For example, suppose you want to perform some follow-up action when a customer’s financial loan application is either approved or denied.
First, the application model for our EligibilityDecision class might look something like the following:
@Region("EligibilityDecisions")
class EligibilityDecision {
private final Person person;
private Status status = Status.UNDETERMINED;
private final Timespan timespan;
enum Status {
APPROVED,
DENIED,
UNDETERMINED,
}
}Then we can implement and declare our CQ event handler methods to be notified when an eligibility decision is either
APPROVED or DENIED:
@Component
class EligibilityDecisionPostProcessor {
@ContinuousQuery(name = "ApprovedDecisionsHandler",
query = "SELECT decisions.*
FROM /EligibilityDecisions decisions
WHERE decisions.getStatus().name().equalsIgnoreCase('APPROVED')")
public void processApprovedDecisions(CqEvent event) {
// ...
}
@ContinuousQuery(name = "DeniedDecisionsHandler",
query = "SELECT decisions.*
FROM /EligibilityDecisions decisions
WHERE decisions.getStatus().name().equalsIgnoreCase('DENIED')")
public void processDeniedDecisions(CqEvent event) {
// ...
}
}Thus, when eligibility is processed and a decision has been made, either approved or denied, our application gets
notified, and as an application developer, you are free to code your handler and respond to the event any way you like.
Also, because our Continuous Query (CQ) handler class is a component (or a bean in the Spring ApplicationContext)
you can auto-wire any other beans necessary to carry out the application’s intended function.
This is not unlike Spring’s annotation-driven listener endpoints,
which are used in (JMS) message listeners and handlers, except in Spring Boot for Apache Geode, you need not do anything
special to enable this functionality. You can declare the @ContinuousQuery annotation on any POJO method and go to
work on other things.
15. Using Data
One of the most important tasks during development is ensuring your Spring Boot application handles data correctly. To verify the accuracy, integrity, and availability of your data, your application needs data with which to work.
For those of you already familiar with Spring Boot’s support for SQL database initialization, the approach when using Apache Geode should be easy to understand.
Apache Geode provides built-in support, similar in function to Spring Boot’s SQL database initialization, by using:
-
Gfsh’s import/export data commands.
-
Persistence with disk storage
For example, by enabling persistence with disk storage, you could
backup and restore
persistent DiskStore files from one cluster to another.
Alternatively, using Apache Geode’s Snapshot Service, you can export data contained in targeted Regions from one
cluster during shutdown and import the data into another cluster on startup. The Snapshot Service lets you filter data
while it is being imported and exported.
Finally, you can use Apache Geode shell (Gfsh) commands to export data and import data.
| Spring Data for Apache Geode (SDG) contains dedicated support for persistence and the Snapshot Service. |
In all cases, the files generated by persistence, the Snapshot Service and Gfsh’s export command are in a proprietary
binary format.
Furthermore, none of these approaches are as convenient as Spring Boot’s database initialization automation. Therefore, Spring Boot for Apache Geode (SBDG) offers support to import data from JSON into Apache Geode as PDX.
Unlike Spring Boot, SBDG offers support to export data as well. By default, data is imported and exported in JSON format.
SBDG does not provide an equivalent to Spring Boot’s schema.sql file. The best way to define the data structures
(the Region instances) that manage your data is with SDG’s annotation-based configuration support for defining cache
Region instances from your application’s entity classes
or indirectly from Spring and JSR-107 or JCache caching annotations.
|
| See SBDG’s documentation on the same. |
| While this feature works and many edge cases were thought through and tested thoroughly, there are still some limitations that need to be ironed out. See issue-82 and issue-83 for more details. The Spring team strongly recommends that this feature be used only for development and testing purposes. |
15.1. Importing Data
You can import data into a Region by defining a JSON file that contain the JSON objects you wish to load. The JSON
file must follow a predefined naming convention and be placed in the root of your application classpath:
data-<regionName>.json
<regionName> refers to the lowercase "name" of the Region, as defined by
Region.getName().
|
For example, if you have a Region named "Orders", you would create a JSON file called data-orders.json and place it
in the root of your application classpath (for example, in src/test/resources).
Create JSON files for each Region that is implicitly defined (for example, by using @EnableEntityDefinedRegions)
or explicitly defined (with ClientRegionFactoryBean in Java configuration) in your Spring Boot application
configuration that you want to load with data.
The JSON file that contains JSON data for the "Orders" Region might appear as follows:
data-orders.json[{
"@type": "example.app.pos.model.PurchaseOrder",
"id": 1,
"lineItems": [
{
"@type": "example.app.pos.model.LineItem",
"product": {
"@type": "example.app.pos.model.Product",
"name": "Apple iPad Pro",
"price": 1499.00,
"category": "SHOPPING"
},
"quantity": 1
},
{
"@type": "example.app.pos.model.LineItem",
"product": {
"@type": "example.app.pos.model.Product",
"name": "Apple iPhone 11 Pro Max",
"price": 1249.00,
"category": "SHOPPING"
},
"quantity": 2
}
]
}, {
"@type": "example.app.pos.model.PurchaseOrder",
"id": 2,
"lineItems": [
{
"@type": "example.app.pos.model.LineItem",
"product": {
"@type": "example.app.pos.model.Product",
"name": "Starbucks Vente Carmel Macchiato",
"price": 5.49,
"category": "SHOPPING"
},
"quantity": 1
}
]
}]The application entity classes that matches the JSON data from the JSON file might look something like the following listing:
@Region("Orders")
class PurchaseOrder {
@Id
Long id;
List<LineItem> lineItems;
}
class LineItem {
Product product;
Integer quantity;
}
@Region("Products")
class Product {
String name;
Category category;
BigDecimal price;
}As the preceding listings show, the object model and corresponding JSON can be arbitrarily complex with a hierarchy of objects that have complex types.
15.1.1. JSON metadata
We want to draw your attention to a few other details contained in the object model and JSON shown earlier.
The @type metadata field
First, we declared a @type JSON metadata field. This field does not map to any specific field or property of
the application domain model class (such as PurchaseOrder). Rather, it tells the framework and Apache Geode’s JSON/PDX
converter the type of object the JSON data would map to if you were to request an object (by calling
PdxInstance.getObject()).
Consider the following example:
@Repository
class OrdersRepository {
@Resource(name = "Orders")
Region<Long, PurchaseOrder> orders;
PurchaseOrder findBy(Long id) {
Object value = this.orders.get(id);
return value instanceof PurchaseOrder ? (PurchaseOrder) value
: value instanceof PdxInstance ? ((PdxInstance) value).getObject()
: null;
}
}Basically, the @type JSON metadata field informs the PdxInstance.getObject() method about the type of Java object
to which the JSON object maps. Otherwise, the PdxInstance.getObject() method would silently return a PdxInstance.
It is possible for Apache Geode’s PDX serialization framework to return a PurchaseOrder from Region.get(key) as well,
but it depends on the value of PDX’s read-serialized, cache-level configuration setting, among other factors.
When JSON is imported into a Region as PDX, the
PdxInstance.getClassName()
does not refer to a valid Java class. It is
JSONFormatter.JSON_CLASSNAME.
As a result, Region data access operations, such as Region.get(key), return a PdxInstance and not a Java object.
|
You may need to proxy Region read data access operations (such as Region.get(key)) by setting the SBDG property
spring.boot.data.gemfire.cache.region.advice.enabled to true. When this property is set, Region instances are
proxied to wrap a PdxInstance in a PdxInstanceWrapper to appropriately handle the PdxInstance.getObject() call
in your application code.
|
The id field and the @identifier metadata field
Top-level objects in your JSON must have an identifier, such as an id field. This identifier is used as the identity
and key of the object (or PdxInstance) when stored in the Region (for example, Region.put(key, object)).
You may have noticed that the JSON for the "Orders" Region shown earlier declared an id field as the identifier:
[{
"@type": "example.app.pos.model.PurchaseOrder",
"id": 1,
...This follows the same convention used in Spring Data. Typically, Spring Data mapping infrastructure looks for a POJO
field or property annotated with @Id. If no
field or property is annotated with @Id, the framework falls back to searching for a field or property named id.
In Spring Data for Apache Geode, this @Id-annotated or id-named field or property is used as the identifier
and as the key for the object when storing it into a Region.
However, what happens when an object or entity does not have a surrogate ID defined? Perhaps the application domain model class is appropriately using natural identifiers, which is quite common in practice.
Consider a Book class defined as follows:
@Region("Books")
class Book {
Author author;
@Id
ISBN isbn;
LocalDate publishedDate;
Sring title;
}As declared in the Book class, the identifier for Book is its ISBN, since the isbn field was annotated with
Spring Data’s @Id mapping annotation. However, we cannot know this by searching for an @Id annotation in JSON.
You might be tempted to argue that if the @type metadata field is set, we would know the class type and could load
the class definition to learn about the identifier. That is all fine until the class is not actually on the application
classpath in the first place. This is one of the reasons why SBDG’s JSON support serializes JSON to Apache Geode’s PDX
format. There might not be a class definition, which would lead to a NoClassDefFoundError or ClassNotFoundException.
So, what then?
In this case, SBDG lets you declare the @identifier JSON metadata field to inform the framework what to use as
the identifier for the object.
Consider the following example:
{
"@type": "example.app.books.model.Book",
"@identifier": "isbn",
"author": {
"id": 1,
"name": "Josh Long"
},
"isbn": "978-1-449-374640-8",
"publishedDate": "2017-08-01",
"title": "Cloud Native Java"
}The @identifier JSON metadata field informs the framework that the isbn field is the identifier for a Book.
15.1.2. Conditionally Importing Data
While the Spring team recommends that users should only use this feature when developing and testing their Spring Boot applications with Apache Geode, you may still occasionally use this feature in production.
You might use this feature in production to preload a (REPLICATE) Region with reference data. Reference data is largely static, infrequently changing, and non-transactional. Preloading reference data is particularly useful when you want to warm the cache.
When you use this feature for development and testing purposes, you can put your Region-specific JSON files in
src/test/resources. This ensures that the files are not included in your application artifact (such as a JAR or WAR)
when built and deployed to production.
However, if you must use this feature to preload data in your production environment, you can still conditionally load
data from JSON. To do so, configure the spring.boot.data.gemfire.cache.data.import.active-profiles property set to
the Spring profiles that must be active for the import to take effect.
Consider the following example:
# Spring Boot application.properties
spring.boot.data.gemfire.cache.data.import.active-profiles=DEV, QAFor import to have an effect in this example, you must specifically set the spring.profiles.active property to one of
the valid, active-profiles listed in the import property (such as QA). Only one needs to match.
| There are many ways to conditionally build application artifacts. You might prefer to handle this concern in your Gradle or Maven build. |
15.2. Exporting Data
Certain data stored in your application’s Regions may be sensitive or confidential, and keeping the data secure is of
the utmost concern and priority. Therefore, exporting data is disabled by default.
However, if you use this feature for development and testing purposes, enabling the export capability may be useful to move data from one environment to another. For example, if your QA team finds a bug in the application that uses a particular data set, they can export the data and pass it back to the development team to import in their local development environment to help debug the issue.
To enable export, set the spring.boot.data.gemfire.cache.data.export.enabled property to true:
# Spring Boot application.properties
spring.boot.data.gemfire.cache.data.export.enabled=trueSBDG is careful to export data to JSON in a format that Apache Geode expects on import and includes things such as
@type metadata fields.
The @identifier metadata field is not generated automatically. While it is possible for POJOs stored in a
Region to include an @identifier metadata field when exported to JSON, it is not possible when the Region value
is a PdxInstance that did not originate from JSON. In this case, you must manually ensure that the PdxInstance
includes an @identifier metadata field before it is exported to JSON if necessary (for example, Book.isbn). This is
only necessary if your entity classes do not declare an explicit identifier field, such as with the @Id mapping
annotation, or do not have an id field. This scenario can also occur when inter-operating with native clients
that model the application domain objects differently and then serialize the objects by using PDX, storing them in
Regions on the server that are then later consumed by your Java-based, Spring Boot application.
|
You may need to set the -Dgemfire.disableShutdownHook JVM System property to true before your Spring
Boot application starts up when using export. Unfortunately, this Java runtime shutdown hook is registered and enabled
in Apache Geode by default, which results in the cache and the Regions being closed before the SBDG Export
functionality can export the data, thereby resulting in a CacheClosedException. SBDG
makes a best effort
to disable the Apache Geode JVM shutdown hook when export is enabled, but it is at the mercy of the JVM ClassLoader,
since Apache Geode’s JVM shutdown hook
registration
is declared in a static initializer.
|
15.3. Import/Export API Extensions
The API in SBDG for import and export functionality is separated into the following concerns:
-
Data Format
-
Resource Resolving
-
Resource Reading
-
Resource Writing
By breaking each of these functions apart into separate concerns, a developer can customize each aspect of the import and export functions.
For example, you could import XML from the filesystem and then export JSON to a REST-based Web Service. By default, SBDG imports JSON from the classpath and exports JSON to the filesystem.
However, not all environments expose a filesystem, such as cloud environments like PCF. Therefore, giving users control over each aspect of the import and export processes is essential for performing the functions in any environment.
15.3.1. Data Format
The primary interface to import data into a Region is CacheDataImporter.
CacheDataImporter is a @FunctionalInterface that extends Spring’s
BeanPostProcessor
interface to trigger the import of data after the Region has been initialized.
The interface is defined as follows:
CacheDataImporterinterface CacheDataImporter extends BeanPostProcessor {
Region importInto(Region region);
}You can code the importInto(:Region) method to handle any data format (JSON, XML, and others) you prefer. Register a
bean that implements the CacheDataImporter interface in the Spring container, and the importer does its job.
On the flip side, the primary interface to export data from a Region is the CacheDataExporter.
CacheDataExporter is a @FunctionalInterface that extends Spring’s
DestructionAwareBeanPostProcessor
interface to trigger the export of data before the Region is destroyed.
The interface is defined as follows:
CacheDataExporterinterface CacheDataExporter extends DestructionAwareBeanPostProcessor {
Region exportFrom(Region region);
}You can code the exportFrom(:Region) method to handle any data format (JSON, XML, and others) you prefer. Register a
bean implementing the CacheDataExporter interface in the Spring container, and the exporter does its job.
For convenience, when you want to implement both import and export functionality, SBDG provides the
CacheDataImporterExporter interface, which extends both CacheDataImporter and CacheDataExporter:
CacheDataImporterExporterinterface CacheDataImporterExporter extends CacheDataExporter, CacheDataImporter { }For added support, SBDG also provides the AbstractCacheDataImporterExporter abstract base class to simplify
the implementation of your importer/exporter.
Lifecycle Management
Sometimes, it is necessary to precisely control when data is imported or exported.
This is especially true on import, since different Region instances may be collocated or tied together through a
cache callback, such as a CacheListener. In these cases, the other Region may need to exist before the import
on the dependent Region proceeds, particularly if the dependencies were loosely defined.
Controlling the import is also important when you use SBDG’s @EnableClusterAware annotation to push configuration
metadata from the client to the cluster in order to define server-side Region instances that match the client-side
Region instances, especially client Region instances targeted for import. The matching Region instances on the
server side must exist before data is imported into client (PROXY) Region instances.
In all cases, SBDG provides the LifecycleAwareCacheDataImporterExporter class to wrap your CacheDataImporterExporter
implementation. This class implements Spring’s
SmartLifecycle
interface.
By implementing the SmartLifecycle interface, you can control in which phase of the Spring container the import
occurs. SBDG also exposes two more properties to control the lifecycle:
# Spring Boot application.properties
spring.boot.data.gemfire.cache.data.import.lifecycle=[EAGER|LAZY]
spring.boot.data.gemfire.cache.data.import.phase=1000000EAGER acts immediately, after the Region is initialized (the default behavior). LAZY delays the import until the
start() method is called, which is invoked according to the phase, thereby ordering the import relative to the other
lifecycle-aware components that are registered in the Spring container.
The following example shows how to make your CacheDataImporterExporter lifecycle-aware:
@Configuration
class MyApplicationConfiguration {
@Bean
CacheDataImporterExporter importerExporter() {
return new LifecycleAwareCacheDataImporterExporter(new MyCacheDataImporterExporter());
}
}15.3.2. Resource Resolution
Resolving resources used for import and export results in the creation of a Spring
Resource
handle.
Resource resolution is a vital step to qualifying a resource, especially if the resource requires special logic
or permissions to access it. In this case, specific Resource handles can be returned and used by the reader
and writer of the Resource as appropriate for import or export operation.
SBDG encapsulates the algorithm for resolving Resources in the ResourceResolver
(Strategy) interface:
@FunctionalInterface
interface ResourceResolver {
Optional<Resource> resolve(String location);
default Resouce required(String location) {
// ...
}
}Additionally, SBDG provides the ImportResourceResolver and ExportResourceResolver marker interfaces and the
AbstractImportResourceResolver and AbstractExportResourceResolver abstract base classes for implementing the
resource resolution logic used by both import and export operations.
If you wish to customize the resolution of Resources used for import or export, your CacheDataImporterExporter
implementation can extend the ResourceCapableCacheDataImporterExporter abstract base class, which provides the
aforementioned interfaces and base classes.
As stated earlier, SBDG resolves resources on import from the classpath and resources on export to the filesystem.
You can customize this behavior by providing an implementation of ImportResourceResolver, ExportResourceResolver,
or both interfaces and declare instances as beans in the Spring context:
@Configuration
class MyApplicationConfiguration {
@Bean
ImportResourceResolver importResourceResolver() {
return new MyImportResourceResolver();
}
@Bean
ExportResourceResolver exportResourceResolver() {
return new MyExportResourceResolver();
}
}
If you need to customize the resource resolution process for each location (or Region) on import or export,
you can use the Composite software design pattern.
|
Customize Default Resource Resolution
If you are content with the provided defaults but want to target specific locations on the classpath or filesystem used by the import or export, SBDG additionally provides the following properties:
# Spring Boot application.properties
spring.boot.data.gemfire.cache.data.import.resource.location=...
spring.boot.data.gemfire.cache.data.export.resource.location=...The properties accept any valid resource string, as specified in the Spring documentation (see Table 10. Resource strings).
This means that, even though import defaults from the classpath, you can change the location from classpath to filesystem, or even network (for example, https://) by changing the prefix (or protocol).
Import/export resource location properties can refer to other properties through property placeholders, but SBDG further lets you use SpEL inside the property values.
Consider the following example:
# Spring Boot application.properties
spring.boot.data.gemfire.cache.data.import.resource.location=\
https://#{#env['user.name']}:#{someBean.lookupPassword(#env['user.name'])}@#{host}:#{port}/cache/#{#regionName}/data/importIn this case, the import resource location refers to a rather sophisticated resource string by using a complex SpEL expression.
SBDG populates the SpEL EvaluationContext with three sources of information:
-
Access to the Spring
BeanFactory -
Access to the Spring
Environment -
Access to the current
Region
Simple Java System properties or environment variables can be accessed with the following expression:
#{propertyName}You can access more complex property names (including properties that use dot notation, such as the user.home
Java System property), directly from the Environment by using map style syntax as follows:
#{#env['property.name']}The #env variable is set in the SpEL EvaluationContext to the Spring Environment.
Because the SpEL EvaluationContext is evaluated with the Spring ApplicationContext as the root object, you also have
access to the beans declared and registered in the Spring container and can invoke methods on them, as shown earlier
with someBean.lookupPassword(..). someBean must be the name of the bean as declared and registered in the Spring
container.
Be careful when accessing beans declared in the Spring container with SpEL, particularly when using EAGER
import, as it may force those beans to be eagerly (or even prematurely) initialized.
|
SBDG also sets the #regionName variable in the EvaluationContext to the name of the Region, as determined by
Region.getName(),
targeted for import and export.
This lets you not only change the location of the resource but also change the resource name (such as a filename).
Consider the following example:
#regionName# Spring Boot application.properties
spring.boot.data.gemfire.cache.data.export.resource.location=\
file://#{#env['user.home']}/gemfire/cache/data/custom-filename-for-#{#regionName}.json
By default, the exported file is stored in the working directory (System.getProperty("user.dir"))
of the Spring Boot application process.
|
| See the Spring Framework documentation for more information on SpEL. |
15.3.3. Reading & Writing Resources
The Spring Resource handle
specifies tion of a resource, not how the resource is read or written. Even the Spring
ResourceLoader,
which is an interface for loading Resources, does not specifically read or write any content to the Resource.
SBDG separates these concerns into two interfaces: ResourceReader and ResourceWriter, respectively.
The design follows the same pattern used by Java’s InputStream/OutputStream and Reader/Writer classes
in the java.io package.
The ResourceReader interfaces is defined as:
@FunctionalInterface
interface ResourceReader {
byte[] read(Resource resource);
}The ResourceWriter interfaces is defined as:
@FunctionalInterface
interface ResourceWriter {
void write(Resource resource, byte[] data);
}Both interfaces provide additional methods to compose readers and writers, much like Java’s Consumer and Function
interfaces in the java.util.function package. If a particular reader or writer is used in a composition and is unable
to handle the given Resource, it should throw a UnhandledResourceException to let the next reader or writer in the
composition try to read from or write to the Resource.
The reader or writer are free to throw a ResourceReadException or ResourceWriteException to break the chain of
reader and writer invocations in the composition.
To override the default export/import reader and writer used by SBDG, you can implement the ResourceReader
or ResourceWriter interfaces as appropriate and declare instances of these classes as beans in the Spring container:
ResourceReader & ResourceWriter beans@Configuration
class MyApplicationConfiguration {
@Bean
ResourceReader myResourceReader() {
return new MyResourceReader()
.thenReadFrom(new MyOtherResourceReader());
}
@Bean
ResourceWriter myResourceWriter() {
return new MyResourceWriter();
}
}16. Data Serialization with PDX
Anytime data is overflowed or persisted to disk, transferred between clients and servers, transferred between peers in a cluster or between different clusters in a multi-site WAN topology, all data stored in Apache Geode must be serializable.
To serialize objects in Java, object types must implement the java.io.Serializable interface. However, if you have a
large number of application domain object types that currently do not implement java.io.Serializable, refactoring
hundreds or even thousands of class types to implement java.io.Serializable would be a tedious task just to store
and manage those objects in Apache Geode.
Additionally, it is not only your application domain object types you necessarily need to consider. If you used third-party libraries in your application domain model, any types referred to by your application domain object types stored in Apache Geode must also be serializable. This type explosion may bleed into class types for which you may have no control over.
Furthermore, Java serialization is not the most efficient format, given that metadata about your types is stored with the data itself. Therefore, even though Java serialized bytes are more descriptive, it adds a great deal of overhead.
Then, along came serialization using Apache Geode’s PDX format. PDX stands for Portable Data Exchange and achieves four goals:
-
Separates type metadata from the data itself, streamlining the bytes during transfer. Apache Geode maintains a type registry that stores type metadata about the objects serialized with PDX.
-
Supports versioning as your application domain types evolve. It is common to have old and new versions of the same application deployed to production, running simultaneously, sharing data, and possibly using different versions of the same domain types. PDX lets fields be added or removed while still preserving interoperability between old and new application clients without loss of data.
-
Enables objects stored as PDX to be queried without being de-serialized. Constant serialization and deserialization of data is a resource-intensive task that adds to the latency of each data request when redundancy is enabled. Since data is replicated across peers in the cluster to preserve High Availability (HA) and must be serialized to be transferred, keeping data serialized is more efficient when data is updated frequently, since it is likely the data will need to be transferred again in order to maintain consistency in the face of redundancy and availability.
-
Enables interoperability between native language clients (such as C, C++ and C#) and Java language clients, with each being able to access the same data set regardless from where the data originated.
However, PDX does have limitations.
For instance, unlike Java serialization, PDX does not handle cyclic dependencies. Therefore, you must be careful how you structure and design your application domain object types.
Also, PDX cannot handle field type changes.
Furthermore, while Apache Geode’s general Data Serialization handles Deltas, this is not achievable without de-serializing the object, since it involves a method invocation, which defeats one of the key benefits of PDX: preserving format to avoid the cost of serialization and deserialization.
However, we think the benefits of using PDX outweigh the limitations and, therefore, have enabled PDX by default.
You need do nothing special. You can code your domain types and rest assured that objects of those domain types are properly serialized when overflowed and persisted to disk, transferred between clients and servers, transferred between peers in a cluster, and even when data is transferred over the network when you use Apache Geode’s multi-site WAN topology.
@Region("EligibilityDecisions")
class EligibilityDecision {
// ...
}| Apache Geode does support the standard Java Serialization format. |
16.1. SDG MappingPdxSerializer vs. Apache Geode’s ReflectionBasedAutoSerializer
Under-the-hood, Spring Boot for Apache Geode enables
and uses Spring Data for Apache Geode’s
MappingPdxSerializer
to serialize your application domain objects with PDX.
See the SDG Reference Guide for more details
on the MappingPdxSerializer class.
|
The MappingPdxSerializer class offers several advantages above and beyond Apache Geode’s own
ReflectionBasedAutoSerializer class.
See Apache Geode’s User Guide
for more details about the ReflectionBasedAutoSerializer.
|
The SDG MappingPdxSerializer class offers the following benefits and capabilities:
-
PDX serialization is based on Spring Data’s powerful mapping infrastructure and metadata.
-
Includes support for both
includesandexcludeswith first-class type filtering. Additionally, you can implement type filters by using Java’sjava.util.function.Predicateinterface as opposed to the limited regex capabilities provided by Apache Geode’sReflectionBasedAutoSerializerclass. By default,MappingPdxSerializerexcludes all types in the following packages:java,org.apache.geode,org.springframeworkandcom.gemstone.gemfire. -
Handles transient object fields and properties when either Java’s
transientkeyword or Spring Data’s@Transientannotation is used. -
Handles read-only object properties.
-
Automatically determines the identifier of your entities when you annotate the appropriate entity field or property with Spring Data’s
@Idannotation. -
Lets additional
o.a.g.pdx.PdxSerializersbe registered to customize the serialization of nested entity/object field and property types.
The support for includes and excludes deserves special attention, since the MappingPdxSerializer excludes all Java,
Spring, and Apache Geode types, by default. However, what happens when you need to serialize one of those types?
For example, suppose you need to serialize objects of type java.security.Principal. Then you can override the excludes
by registering an include type filter:
package example.app;
import java.security.Principal;
@SpringBootApplication
@EnablePdx(serializerBeanName = "myCustomMappingPdxSerializer")
class SpringBootApacheGeodeClientCacheApplication {
public static void main(String[] args) {
SpringApplication.run(SpringBootApacheGeodeClientCacheApplication.class, args);
}
@Bean
MappingPdxSerializer myCustomMappingPdxSerializer() {
MappingPdxSerializer customMappingPdxSerializer =
MappingPdxSerializer.newMappginPdxSerializer();
customMappingPdxSerializer.setIncludeTypeFilters(
type -> Principal.class.isAssignableFrom(type));
return customMappingPdxSerializer;
}
}
Normally, you need not explicitly declare SDG’s @EnablePdx annotation to enable and configure PDX. However,
if you want to override auto-configuration, as we have demonstrated above, you must do this.
|
17. Logging
Apache Geode 1.9.2 was modularized to separate its use of the Apache Log4j API to log output in Apache Geode code
from the underlying implementation of logging, which uses Apache Log4j as the logging provider by default.
Prior to 1.9.2, the Apache Log4j API (log4j-api) and the Apache Log4j service provider (log4j-core)
were automatically pulled in by Apache Geode core (org.apache.geode:geode-core), thereby making it problematic
to change logging providers when using Apache Geode in Spring Boot applications.
However, now, in order to get any log output from Apache Geode whatsoever, Apache Geode requires a logging provider
declared on your Spring Boot application classpath. Consequently, this also means the old Apache Geode Properties
(such as log-level) no longer have any effect, regardless of whether the property is specified in gemfire.properties,
in Spring Boot application.properties, or even as a JVM System Property (-Dgemfire.log-level).
See Apache Geode’s documentation for a complete list
of valid Properties, including the Properties used to configure logging.
|
Unfortunately, this also means the Spring Data for Apache Geode
@EnableLogging
annotation no longer has any effect on Apache Geode logging either. Consequently, it has been
deprecated. The reason @EnableLogging no longer has any effect on logging
is because this annotation’s attributes and associated SDG properties indirectly set the corresponding Apache Geode
properties, which, again, are useless from Apache Geode 1.9.2 onward.
By way of example, and to make this concrete, none of the following approaches have any effect on Apache Geode logging:
$ java -classpath ...:/path/to/MySpringBootApacheGeodeClientCacheApplication.jar -Dgemfire.log-level=DEBUG
example.app.MySpringBootApacheGeodeClientCacheApplicationgemfire.properties# {geode-name} only/specific properties
log-level=INFOapplication.propertiesspring.data.gemfire.cache.log-level=DEBUG
spring.data.gemfire.logging.level=DEBUG@EnableLogging annotation@SpringBootApplication
@EnableLogging(logLevel = "DEBUG")
class MySpringBootApacheGeodeClientApplication {
}None of the preceding approaches have any effect without the new SBDG logging starter.
17.1. Configure Apache Geode Logging
So, how do you configure logging for Apache Geode?
Three things are required to get Apache Geode to log output:
-
You must declare a logging provider (such as Logback, or Log4j) on your Spring Boot application classpath.
-
(optional) You can declare an adapter (a bridge JAR) between Log4j and your logging provider if your declared logging provider is not Apache Log4j.
For example, if you use the SLF4J API to log output from your Spring Boot application and use Logback as your logging provider or implementation, you must include the
org.apache.logging.log4j.log4j-to-slf4jadapter or bridge JAR as well.Internally, Apache Geode uses the Apache Log4j API to log output from Geode components. Therefore, you must bridge Log4j to any other logging provider (such as Logback) that is not Log4j (
log4j-core). If you use Log4j as your logging provider, you need not declare an adapter or bridge JAR on your Spring Boot application classpath. -
Finally, you must supply logging provider configuration to configure Loggers, Appenders, log levels, and other details.
For example, when you use Logback, you must provide a
logback.xmlconfiguration file on your Spring Boot application classpath or in the filesystem. Alternatively, you can use other means to configure your logging provider and get Apache Geode to log output.
Apache Geode’s geode-log4j module covers the required configuration for steps 1-3 above and uses Apache Log4j
(org.apache.logging.log4j:log4j-core) as the logging provider. The geode-log4j module even provides a default
log4j2.xml configuration file to configure Loggers, Appenders, and log levels for Apache Geode.
|
If you declare Spring Boot’s own org.springframework.boot:spring-boot-starter-logging on your application
classpath, it covers steps 1 and 2 above.
The spring-boot-starter-logging dependency declares Logback as the logging provider and automatically adapts (bridges)
java.util.logging (JUL) and Apache Log4j to SLF4J. However, you still need to supply logging provider configuration
(such as a logback.xml file for Logback) to configure logging not only for your Spring Boot application but for
Apache Geode as well.
If no user-specified logging configuration is supplied, Logback will apply default configuration
using the BasicConfigurator. See Logback documentation
for complete details.
|
SBDG has simplified the setup of Apache Geode logging. You need only declare the
org.springframework.geode:spring-geode-starter-logging dependency on your Spring Boot application classpath.
Unlike Apache Geode’s default Log4j XML configuration file (log4j2.xml from geode-log4j), SBDG’s provided
logback.xml configuration file is properly parameterized, letting you adjust log levels, add Appenders
as well as adjust other logging settings.
In addition, SBDG’s provided Logback configuration uses templates so that you can compose your own logging configuration while still including snippets from SBDG’s provided logging configuration, such as Loggers and Appenders.
17.1.1. Configuring Log Levels
One of the most common logging tasks is to adjust the log level of one or more Loggers or the ROOT Logger. However, you may want to only adjust the log level for specific components of your Spring Boot application, such as for Apache Geode, by setting the log level for only the Logger that logs Apache Geode events.
SBDG’s Logback configuration defines three Loggers to control the log output from Apache Geode:
<comfiguration>
<logger name="com.gemstone.gemfire" level="${spring.boot.data.gemfire.log.level:-INFO}"/>
<logger name="org.apache.geode" level="${spring.boot.data.gemfire.log.level:-INFO}"/>
<logger name="org.jgroups" level="${spring.boot.data.gemfire.jgroups.log.level:-WARN}"/>
</comfiguration>The com.gemstone.gemfire Logger covers old GemFire components that are still present in Apache Geode for backwards
compatibility. By default, it logs output at INFO. This Logger’s use should be mostly unnecessary.
The org.apache.geode Logger is the primary Logger used to control log output from all Apache Geode components
during the runtime operation of Apache Geode. By default, it logs output at INFO.
The org.jgroups Logger is used to log output from Apache Geode’s message distribution and membership system.
Apache Geode uses JGroups for membership and message distribution between peer members (nodes) in the cluster
(distributed system). By default, JGroups logs output at WARN.
You can configure the log level for the com.gemstone.gemfire and org.apache.geode Loggers by setting
the spring.boot.data.gemfire.log.level property. You can independently configure the org.jgroups Logger by setting
the spring.boot.data.gemfire.jgroups.log.level property.
You can set the SBDG logging properties on the command line as JVM System properties when you run your Spring Boot application:
$ java -classpath ...:/path/to/MySpringBootApplication.jar -Dspring.boot.data.gemfire.log.level=DEBUG
package.to.MySpringBootApplicationClass
Setting JVM System properties by using
$ java -jar MySpringBootApplication.jar -Dspring.boot.data.gemfire.log.level=DEBUG
is not supported by the Java Runtime Environment (JRE).
|
Alternatively, you can configure and control Apache Geode logging in Spring Boot application.properties:
application.propertiesspring.boot.data.gemfire.log.level=DEBUGFor backwards compatibility, SBDG additionally supports the Spring Data for Apache Geode (SDG) logging properties as well, by using either of the following properties:
spring.data.gemfire.cache.log-level=DEBUG
spring.data.gemfire.logging.level=DEBUGIf you previously used either of these SDG-based logging properties, they continue to work as designed in SBDG 1.3
or later.
17.1.2. Composing Logging Configuration
As mentioned earlier, SBDG lets you compose your own logging configuration from SBDG’s default Logback configuration metadata.
SBDG conveniently bundles the Properties, Loggers and Appenders from SBDG’s logging starter into several template files that you can include into your own custom Logback XML configuration file.
The Logback configuration template files are broken down into:
-
org/springframework/geode/logging/slf4j/logback/properties-include.xml -
org/springframework/geode/logging/slf4j/logback/loggers-include.xml -
org/springframework/geode/logging/slf4j/logback/appenders-include.xml
As of SBDG 2.6, the logback-include.xml file has been deprecated.
|
The properties-include.xml defines Logback "local" scoped properties or variables common to SBDG’s configuration
of Apache Geode logging.
<?xml version="1.0" encoding="UTF-8"?>
<included>
<property name="SPRING_BOOT_LOG_CHARSET" value="${SPRING_BOOT_LOG_CHARSET:-${file.encoding:-UTF-8}}"/>
<property name="SPRING_BOOT_LOG_PATTERN" value="${SPRING_BOOT_LOG_PATTERN:-%d %5p %40.40c:%4L - %msg%n}"/>
<property name="APACHE_GEODE_LOG_CHARSET" value="${APACHE_GEODE_LOG_CHARSET:-${file.encoding:-UTF-8}}"/>
<property name="APACHE_GEODE_LOG_PATTERN" value="${APACHE_GEODE_LOG_PATTERN:-[%level{lowerCase=true} %date{yyyy/MM/dd HH:mm:ss.SSS z} <%thread>] %message%n%throwable%n}"/>
</included>The loggers-include.xml file defines the Loggers used to log output from Apache Geode components.
<?xml version="1.0" encoding="UTF-8"?>
<included>
<logger name="com.gemstone.gemfire" level="${spring.boot.data.gemfire.log.level:-INFO}" additivity="false">
<appender-ref ref="${spring.geode.logging.appender-ref:-CONSOLE}"/>
<appender-ref ref="delegate"/>
</logger>
<logger name="org.apache.geode" level="${spring.boot.data.gemfire.log.level:-INFO}" additivity="false">
<appender-ref ref="${spring.geode.logging.appender-ref:-CONSOLE}"/>
<appender-ref ref="delegate"/>
</logger>
<logger name="org.jgroups" level="${spring.boot.data.gemfire.jgroups.log.level:-WARN}" additivity="false">
<appender-ref ref="${spring.geode.logging.appender-ref:-CONSOLE}"/>
<appender-ref ref="delegate"/>
</logger>
</included>The appenders-include.xml file defines Appenders to send the log output to. If Spring Boot is on the application
classpath, then Spring Boot logging configuration will define the "CONSOLE" Appender, otherwise, SBDG will provide
a default definition.
The "geode" Appender defines the Apache Geode logging pattern as seen in Apache Geode’s Log4j configuration.
<?xml version="1.0" encoding="UTF-8"?>
<included>
<if condition='property("bootPresent").equals("false")'>
<then>
<appender name="CONSOLE" class="ch.qos.logback.core.ConsoleAppender">
<encoder>
<charset>${SPRING_BOOT_LOG_CHARSET}</charset>
<pattern>${SPRING_BOOT_LOG_PATTERN}</pattern>
</encoder>
</appender>
</then>
</if>
<appender name="delegate" class="org.springframework.geode.logging.slf4j.logback.DelegatingAppender"/>
<appender name="geode" class="ch.qos.logback.core.ConsoleAppender">
<encoder>
<charset>${APACHE_GEODE_LOG_CHARSET}</charset>
<pattern>${APACHE_GEODE_LOG_PATTERN}</pattern>
</encoder>
</appender>
</included>Then you can include any of SBDG’S Logback configuration metadata files as needed in your application-specific Logback XML configuration file, as follows:
<?xml version="1.0" encoding="UTF-8"?>
<configuration>
<include resource="org/springframework/geode/logging/slf4j/logback/properties-include.xml"/>
<include resource="org/springframework/geode/logging/slf4j/logback/appender-include.xml"/>
<logger name="org.apache.geode" level="INFO" additivity="false">
<appender-ref ref="geode"/>
</logger>
<root level="${logback.root.log.level:-INFO}">
<appender-ref ref="CONSOLE"/>
<appender-ref ref="delegate"/>
</root>
</configuration>17.1.3. Customizing Logging Configuration
It is now possible to customize the configuration of Apache Geode logging using properties defined in
a spring-geode-logging.properties file included on the Spring Boot application classpath.
Any of the properties defined in org/springframework/geode/logging/slf4j/logback/properties-include.xml (shown above),
such as APACHE_GEODE_LOG_PATTERN, or the spring.geode.logging.appender-ref property, can be set.
For instance, and by default, Apache Geode components log output using the Spring Boot log pattern. However, if you
prefer the fine-grained details of Apache Geode’s logging behavior, you can change the Appender used by
the Apache Geode Logger’s to use the pre-defined "geode" Appender instead. Simply set
the spring-geode.logging.appender-ref property to "geode" in a spring-geode-logging.properties file
on your Spring Boot application classpath, as follows:
# spring-geode-logging.properties
spring.geode.logging.appender-ref=geodeAlternatively, if you want to configure the log output of your entire Spring Boot application, including log output
from all Apache Geode components, then you can set the SPRING_BOOT_LOG_PATTERN property, or Spring Boot’s
CONSOLE_LOG_PATTERN property, in spring-geode-logging.properties, as follows:
# spring-geode-logging.properties
CONSOLE_LOG_PATTERN=TEST - %msg%n
The spring-geode-logging.properties file is only recognized when the spring-geode-starter-logging module
is used.
|
17.2. SLF4J and Logback API Support
SBDG provides additional support when working with the SLF4J and Logback APIs. This support is available when you
declare the org.springframework.geode:spring-geode-starter-logging dependency on your Spring Boot application
classpath.
One of the main supporting classes from the spring-geode-starter-logger
is the org.springframework.geode.logging.slf4j.logback.LogbackSupport class. This class provides methods to:
-
Resolve a reference to the Logback
LoggingContext. -
Resolve the SLF4J ROOT
Loggeras a LogbackLogger. -
Look up
Appendersby name and required type. -
Add or remove
AppenderstoLoggers. -
Reset the state of the Logback logging system, which can prove to be most useful during testing.
LogbackSupport can even suppress the auto-configuration of Logback performed by Spring Boot on startup, which is
another useful utility during automated testing.
In addition to the LogbackSupport class, SBDG also provides some custom Logback Appenders.
17.2.1. CompositeAppender
The org.springframework.geode.logging.slf4j.logback.CompositeAppender class is an implementation of the Logback
Appender interface and the Composite software design pattern.
CompositeAppender lets developers compose multiple Appenders and use them as if they were a single Appender.
For example, you could compose both the Logback ConsoleAppender and FileAppender into one Appender:
Appendersclass LoggingConfiguration {
Appender<ILoggingEvent> compositeAppender() {
ConsoleAppender<ILoggingEvent> consoleAppender = new ConsoleAppender<>();
FileAppender<ILoggingEvent> fileAppender = new FileApender<>();
Appender<ILoggingEvent> compositeAppender = CompositeAppender.compose(consoleAppender, fileAppender);
return compositeAppender;
}
}
// do something with the compositeAppenderYou could then add the CompositeAppender to a named Logger:
CompositeAppender on "named" Loggerclass LoggerConfiguration {
void registerAppenderOnLogger() {
Logger namedLogger = LoggerFactory.getLogger("loggerName");
LogbackSupport.toLogbackLogger(namedLogger)
.ifPresent(it -> LogbackSupport.addAppender(it, compositeAppender));
}
}In this case, the named Logger logs events (or log messages) to both the console and file Appenders.
You can compose an array or Iterable of Appenders by using either the
CompositeAppender.compose(:Appender<T>[]) method or the CompositeAppender.compose(:Iterable<Appender<T>>) method.
17.2.2. DelegatingAppender
The org.springframework.geode.logging.slf4j.logback.DelegatingAppender is a pass-through Logback Appender
implementation that wraps another Logback Appender or collection of Appenders, such as the ConsoleAppender,
a FileAppender, a SocketAppender, or others. By default, the DelegatingAppender delegates to the NOPAppender,
thereby doing no actual work.
By default, SBDG registers the org.springframework.geode.logging.slfj4.logback.DelegatingAppender with the ROOT
Logger, which can be useful for testing purposes.
With a reference to a DelegatingAppender, you can add any Appender (even a CompositeAppender) as the delegate:
ConsoleAppender as the "delegate" for the DelegatingAppenderclass LoggerConfiguration {
void setupDelegation() {
ConsoleAppender consoleAppender = new ConsoleAppender();
LogbackSupport.resolveLoggerContext().ifPresent(consoleAppender::setContext);
consoleAppender.setImmediateFlush(true);
consoleAppender.start();
LogbackSupport.resolveRootLogger()
.flatMap(LogbackSupport::toLogbackLogger)
.flatMap(rootLogger -> LogbackSupport.resolveAppender(rootLogger,
LogbackSupport.DELEGATE_APPENDER_NAME, DelegatingAppender.class))
.ifPresent(delegateAppender -> delegateAppender.setAppender(consoleAppender));
}
}17.2.3. StringAppender
The org.springframework.geode.logging.slf4j.logback.StringAppender stores a log message in-memory, appended to
a String.
The StringAppender is useful for testing purposes. For instance, you can use the StringAppender to assert that
a Logger used by certain application components logged messages at the appropriately configured log level
while other log messages were not logged.
Consider the following example:
StringAppender in Actionclass ApplicationComponent {
private final Logger logger = LoggerFactory.getLogger(getClass());
public void someMethod() {
logger.debug("Some debug message");
// ...
}
public void someOtherMethod() {
logger.info("Some info message");
}
}
// Assuming the ApplicationComponent Logger was configured with log-level 'INFO', then...
class ApplicationComponentUnitTests {
private final ApplicationComponent applicationComponent = new ApplicationComponent();
private final Logger logger = LoggerFactory.getLogger(ApplicationComponent.class);
private StringAppender stringAppender;
@Before
public void setup() {
LogbackSupport.toLogbackLogger(logger)
.map(Logger::getLevel)
.ifPresent(level -> assertThat(level).isEqualTo(Level.INFO));
stringAppender = new StringAppender.Builder()
.applyTo(logger)
.build();
}
@Test
public void someMethodDoesNotLogDebugMessage() {
applicationComponent.someMethod();
assertThat(stringAppender.getLogOutput).doesNotContain("Some debug message");
}
@Test
public void someOtherMethodLogsInfoMessage() {
applicationComponent.someOtherMethod();
assertThat(stringAppender.getLogOutput()).contains("Some info message");
}
}There are many other uses for the StringAppender and you can use it safely in a multi-Threaded context by calling
StringAppender.Builder.useSynchronization().
When combined with other SBDG provided Appenders in conjunction with the LogbackSupport class, you have a lot of
power both in application code as well as in your tests.
18. Security
This chapter covers security configuration for Apache Geode, which includes both authentication and authorization (collectively, auth) as well as Transport Layer Security (TLS) using SSL.
| Securing data at rest is not supported by Apache Geode. |
18.1. Authentication and Authorization
Apache Geode employs username- and password-based authentication and role-based authorization to secure your client to server data exchanges and operations.
Spring Data for Apache Geode provides first-class support
for Apache Geode’s Security framework, which is based on the
SecurityManager interface.
Additionally, Apache Geode’s Security framework is integrated with Apache Shiro.
| SBDG will eventually provide support for and integration with Spring Security. |
When you use Spring Boot for Apache Geode, which builds Spring Data for Apache Geode, it makes short work of enabling auth in both your clients and servers.
18.1.1. Auth for Servers
The easiest and most standard way to enable auth in the servers of your cluster is to simply define one or more
Apache Shiro Realms as beans in the Spring ApplicationContext.
Consider the following example:
@Configuration
class ApacheGeodeSecurityConfiguration {
@Bean
DefaultLdapRealm ldapRealm() {
return new DefaultLdapRealm();
}
// ...
}When an Apache Shiro Realm (such as DefaultLdapRealm) is declared and registered in the Spring ApplicationContext
as a Spring bean, Spring Boot automatically detects this Realm bean (or Realm beans if more than one is configured),
and the servers in the Apache Geode cluster are automatically configured with authentication and authorization enabled.
Alternatively, you can provide a custom, application-specific implementation of Apache Geode’s
SecurityManager interface,
declared and registered as a bean in the Spring ApplicationContext:
SecurityManager@Configuration
class ApacheGeodeSecurityConfiguration {
@Bean
CustomSecurityManager customSecurityManager() {
return new CustomSecurityManager();
}
// ...
}Spring Boot discovers your custom, application-specific SecurityManager implementation and configures the servers
in the Apache Geode cluster with authentication and authorization enabled.
The Spring team recommends that you use Apache Shiro to manage the authentication and authorization of your
servers over implementing Apache Geode’s SecurityManager interface.
|
18.1.2. Auth for Clients
When servers in an Apache Geode cluster have been configured with authentication and authorization enabled, clients must authenticate when connecting.
Spring Boot for Apache Geode makes this easy, regardless of whether you run your Spring Boot ClientCache applications
in a local, non-managed environment or run in a cloud-managed environment.
Non-Managed Auth for Clients
To enable auth for clients that connect to a secure Apache Geode cluster, you need only set a username and password
in Spring Boot application.properties:
application.properties for the client# Spring Boot client application.properties
spring.data.gemfire.security.username = jdoe
spring.data.gemfire.security.password = p@55w0rdSpring Boot for Apache Geode handles the rest.
Managed Auth for Clients
Enabling auth for clients that connect to a VMware Tanzu GemFire for VMs service instance (PCC) in VMware Tanzu Application Service (TAS) (PCF) is even easier: You need do nothing.
If your Spring Boot application uses SBDG and is bound to PCC, when you deploy (that is, cf push) your application
to PCF, Spring Boot for Apache Geode extracts the required auth credentials from the environment that you set up when
you provisioned a PCC service instance in your PCF organization and space. PCC automatically assigns two users with
roles of cluster_operator and developer, respectively, to any Spring Boot application bound to the PCC service
instance.
By default, SBDG auto-configures your Spring Boot application to run with the user that has the cluster_operator role.
This ensures that your Spring Boot application has the necessary permission (authorization) to perform all data access
operations on the servers in the PCC cluster, including, for example, pushing configuration metadata from the client
to the servers in the PCC cluster.
See the Running Spring Boot applications as a specific user section in the Pivotal CloudFoundry chapter for additional details on user authentication and authorization.
See the chapter (titled “Pivotal CloudFoundry”) for more general details.
See the Pivotal Cloud Cache documentation for security details when you use PCC and PCF.
18.2. Transport Layer Security using SSL
Securing data in motion is also essential to the integrity of your Spring [Boot] applications.
For instance, it would not do much good to send usernames and passwords over plain text socket connections between your clients and servers nor to send other sensitive data over those same connections.
Therefore, Apache Geode supports SSL between clients and servers, between JMX clients (such as Gfsh) and the Manager, between HTTP clients when you use the Developer REST API or Pulse, between peers in the cluster, and when you use the WAN Gateway to connect multiple sites (clusters).
Spring Data for Apache Geode provides first-class support for configuring and enabling SSL as well. Still, Spring Boot makes it even easier to configure and enable SSL, especially during development.
Apache Geode requires certain properties to be configured. These properties translate to the appropriate
javax.net.ssl.* properties required by the JRE to create secure socket connections by using
JSSE.
However, ensuring that you have set all the required SSL properties correctly is an error prone and tedious task. Therefore, Spring Boot for Apache Geode applies some basic conventions for you.
You can create a trusted.keystore as a JKS-based KeyStore file and place it in one of three well-known locations:
-
In your application JAR file at the root of the classpath.
-
In your Spring Boot application’s working directory.
-
In your user home directory (as defined by the
user.homeJava System property).
When this file is named trusted.keystore and is placed in one of these three well-known locations, Spring Boot
for Apache Geode automatically configures your client to use SSL socket connections.
If you use Spring Boot to configure and bootstrap an Apache Geode server:
@SpringBootApplication
@CacheServerApplication
class SpringBootApacheGeodeCacheServerApplication {
	// ...
}Then Spring Boot also applies the same procedure to enable SSL on the servers (between peers).
During development, it is convenient to not set a trusted.keystore password when accessing the keys in the JKS
file. However, it is highly recommended that you secure the trusted.keystore file when deploying your application to
a production environment.
|
If your trusted.keystore file is secured with a password, you need to additionally specify the following property:
trusted.keystore# Spring Boot application.properties
spring.data.gemfire.security.ssl.keystore.password=p@55w0rd!You can also configure the location of the keystore and truststore files, if they are separate and have not been placed in one of the default, well-known locations searched by Spring Boot:
trusted.keystore by location# Spring Boot application.properties
spring.data.gemfire.security.ssl.keystore = /absolute/file/system/path/to/keystore.jks
spring.data.gemfire.security.ssl.keystore.password = keystorePassword
spring.data.gemfire.security.ssl.truststore = /absolute/file/system/path/to/truststore.jks
spring.data.gemfire.security.ssl.truststore.password = truststorePasswordSee the SDG EnableSsl
annotation for all the configuration attributes and the corresponding properties expressed in application.properties.
18.3. Securing Data at Rest
Currently, neither Apache Geode nor Spring Boot nor Spring Data for Apache Geode offer any support for securing your data while at rest (for example, when your data has been overflowed or persisted to disk).
To secure data at rest when using Apache Geode, with or without Spring, you must employ third-party solutions, such as disk encryption, which is usually highly contextual and technology-specific.
For example, to secure data at rest when you use Amazon EC2, see Instance Store Encryption.
19. Testing
Spring Boot for Apache Geode (SBDG), with help from Spring Test for Apache Geode (STDG), offers first-class support for both unit and integration testing with Apache Geode in your Spring Boot applications.
| See the Spring Test for Apache Geode (STDG) documentation for more details. |
19.1. Unit Testing
Unit testing with Apache Geode using mock objects in a Spring Boot Test requires only that you declare the STDG
@EnableGemFireMockObjects annotation in your test configuration:
@SpringBootTest
@RunWith(SpringRunner.class)
public class SpringBootApacheGeodeUnitTest extends IntegrationTestsSupport {
@Autowired
private UserRepository userRepository;
@Test
public void saveAndFindUserIsSuccessful() {
User jonDoe = User.as("jonDoe");
assertThat(this.userRepository.save(jonDoe)).isNotNull();
User jonDoeFoundById = this.userRepository.findById(jonDoe.getName()).orElse(null);
assertThat(jonDoeFoundById).isEqualTo(jonDoe);
}
@SpringBootApplication
@EnableGemFireMockObjects
@EnableEntityDefinedRegions(basePackageClasses = User.class)
static class TestConfiguration { }
}
@Getter
@ToString
@EqualsAndHashCode
@RequiredArgsConstructor(staticName = "as")
@Region("Users")
class User {
@Id
@lombok.NonNull
private String name;
}
interface UserRepository extends CrudRepository<User, String> { }This test class is not a “pure” unit test, particularly since it bootstraps an actual Spring ApplicationContext
using Spring Boot. However, it does mock all Apache Geode objects, such as the Users Region declared by the User
application entity class, which was annotated with SDG’s @Region mapping annotation.
This test class conveniently uses Spring Boot’s auto-configuration to auto-configure an Apache Geode ClientCache
instance. In addition, SDG’s @EnableEntityDefinedRegions annotation was used to conveniently create the Apache Geode
"Users` Region to store instances of User.
Finally, Spring Data’s Repository abstraction was used to conveniently perform basic CRUD (such as save) and simple
(OQL) query (such as findById) data access operations on the Users Region.
Even though the Apache Geode objects (such as the Users Region) are “mock objects”, you can still perform many of
the data access operations required by your Spring Boot application’s components in an Apache Geode API-agnostic way — that is, by using Spring’s powerful programming model and constructs.
By extending STDG’s org.springframework.data.gemfire.tests.integration.IntegrationTestSupport class, you ensure
that all Apache Geode mock objects and resources are properly released after the test class runs, thereby preventing
any interference with downstream tests.
|
While STDG tries to mock the functionality and behavior for many Region
operations, it is not pragmatic to mock them all. For example, it would not be practical to mock Region query
operations involving complex OQL statements that have sophisticated predicates.
If such functional testing is required, the test might be better suited as an integration test. Alternatively, you can follow the advice in this section about unsupported Region operations.
In general, STDG provides the following capabilities when mocking Apache Geode objects:
| See the documentation on Unit Testing with STDG for more details. |
19.2. Integration Testing
Integration testing with Apache Geode in a Spring Boot Test is as simple as not declaring STDG’s
@EnableGemFireMockObjects annotation in your test configuration. You may then want to use SBDG’s @EnableClusterAware
annotation to conditionally detect the presence of a Apache Geode cluster:
@EnableClusterAware in test configuration@SpringBootApplication
@EnableClusterAware
@EnableEntityDefinedRegions(basePackageClasses = User.class)
static class TestConfiguration { }The SBDG @EnableClusterAware annotation conveniently toggles your auto-configured ClientCache instance between
local-only mode and client/server. It even pushes configuration metadata (such as Region definitions) up to
the servers in the cluster that are required by the application to store data.
In most cases, in addition to testing with “live” Apache Geode objects (such as Regions), we also want to test in a client/server capacity. This unlocks the full capabilities of the Apache Geode data management system in a Spring context and gets you as close as possible to production from the comfort of your IDE.
Building on our example from the section on Unit Testing, you can modify the test to use “live” Apache Geode objects in a client/server topology as follows:
@ActiveProfiles("client")
@RunWith(SpringRunner.class)
@SpringBootTest(properties = "spring.data.gemfire.management.use-http=false")
public class SpringBootApacheGeodeIntegrationTest extends ForkingClientServerIntegrationTestsSupport {
@BeforeClass
public static void startGeodeServer() throws IOException {
startGemFireServer(TestGeodeServerConfiguration.class);
}
@Autowired
private UserRepository userRepository;
@Test
public void saveAndFindUserIsSuccessful() {
User jonDoe = User.as("jonDoe");
assertThat(this.userRepository.save(jonDoe)).isNotNull();
User jonDoeFoundById = this.userRepository.findById(jonDoe.getName()).orElse(null);
assertThat(jonDoeFoundById).isEqualTo(jonDoe);
assertThat(jonDoeFoundById).isNotSameAs(jonDoe);
}
@SpringBootApplication
@EnableClusterAware
@EnableEntityDefinedRegions(basePackageClasses = User.class)
@Profile("client")
static class TestGeodeClientConfiguration { }
@CacheServerApplication
@Profile("server")
static class TestGeodeServerConfiguration {
public static void main(String[] args) {
new SpringApplicationBuilder(TestGeodeServerConfiguration.class)
.web(WebApplicationType.NONE)
.profiles("server")
.build()
.run(args);
}
}
}
@Getter
@ToString
@EqualsAndHashCode
@RequiredArgsConstructor(staticName = "as")
@Region("Users")
class User {
@Id
@lombok.NonNull
private String name;
}
interface UserRepository extends CrudRepository<User, String> { }The application client/server-based integration test class extend STDG’s
org.springframework.data.gemfire.tests.integration.ForkingClientServerIntegrationTestsSupport class.
This ensures that all Apache Geode objects and resources are properly cleaned up after the test class runs. In addition,
it coordinates the client and server components of the test (for example connecting the client to the server using a
random port).
The Apache Geode server is started in a @BeforeClass setup method:
class SpringBootApacheGeodeIntegrationTest extends ForkingClientServerIntegrationTestsSupport {
@BeforeClass
public static void startGeodeServer() throws IOException {
startGemFireServer(TestGeodeServerConfiguration.class);
}
}STDG lets you configure the Apache Geode server with Spring configuration, specified in
the TestGeodeServerConfiguration class. The Java class needs to provide a main method. It uses
the SpringApplicationBuilder to bootstrap the Apache Geode CacheServer application:
@CacheServerApplication
@Profile("server")
static class TestGeodeServerConfiguration {
public static void main(String[] args) {
new SpringApplicationBuilder(TestGeodeServerConfiguration.class)
.web(WebApplicationType.NONE)
.profiles("server")
.build()
.run(args);
}
}In this case, we provide minimal configuration, since the configuration is determined and pushed up to the server
by the client. For example, we do not need to explicitly create the Users Region on the server since it is
implicitly handled for you by the SBDG/STDG frameworks from the client.
We take advantage of Spring profiles in the test setup to distinguish between the client and server configuration. Keep in mind that the test is the “client” in this arrangement.
The STDG framework does what the supporting class demands: “forking” the Spring Boot-based, Apache Geode CacheServer
application in a separate JVM process. Subsequently, the STDG framework stops the server upon completion of the tests
in the test class.
You are free to start your servers or cluster however you choose. STDG provides this capability as a convenience for you, since it is a common concern.
This test class is simple. STDG can handle much more complex test scenarios.
| Review SBDG’s test suite to witness the full power and functionality of the STDG framework for yourself. |
| See the documentation on Integration Testing with STDG for more details. |
20. Apache Geode API Extensions
When using the Spring programming model and abstractions, it should not be necessary to use Apache Geode APIs at all — for example, when using the Spring Cache Abstraction for caching or the Spring Data Repository abstraction for DAO development. There are many more examples.
For certain use cases, users may require low level access to fine-grained functionally. Spring Boot for Apache Geode’s
org.springframework.geode:apache-geode-extensions module and library builds on Apache Geode’s APIs by including
several extensions with enhanced functionality to offer an experience familiar to Spring users inside a Spring context.
| Spring Data for Apache Geode (SDG) also includes additional extensions to Apache Geode’s APIs. |
20.1. SimpleCacheResolver
In some cases, it is necessary to acquire a reference to the cache instance in your application components at runtime.
For example, you might want to create a temporary Region on the fly to aggregate data for analysis.
Typically, you already know the type of cache your application is using, since you must declare your application to be
either a client (ClientCache) in the client/server topology,
or a peer member or node (Cache) in
the cluster on startup. This is expressed in configuration when creating the cache instance required to interact with
the Apache Geode data management system. In most cases, your application will be a client. SBDG makes this decision easy,
since it auto-configures a ClientCache instance, by default.
In a Spring context, the cache instance created by the framework is a managed bean in the Spring container. You can inject a reference to the Singleton cache bean into any other managed application component:
@Service
class CacheMonitoringService {
@Autowired
ClientCache clientCache;
// use the clientCache object reference to monitor the cache as necessary
}However, in cases where your application component or class is not managed by Spring and you need a reference to the
cache instance at runtime, SBDG provides the abstract org.springframework.geode.cache.SimpleCacheResolver class
(see its Javadoc).
SimpleCacheResolver APIpackage org.springframework.geode.cache;
abstract class SimpleCacheResolver {
<T extends GemFireCache> T require() { }
<T extends GemFireCache> Optional<T> resolve() { }
Optional<ClientCache> resolveClientCache() { }
Optional<Cache> resolvePeerCache() { }
}SimpleCacheResolver adheres to SOLID OO Principles. This class is abstract
and extensible so that you can change the algorithm used to resolve client or peer cache instances as well as mock
its methods in unit tests.
Additionally, each method is precise. For example, resolveClientCache() resolves a reference to a cache only if
the cache instance is a “client.” If a cache exists but is a “peer” cache instance, resolveClientCache()
returns Optional.EMPTY. The behavior of resolvePeerCache() is similar.
require() returns a non-Optional reference to a cache instance and throws an IllegalStateException if a cache
is not present.
20.2. CacheUtils
Under the hood, SimpleCacheResolver delegates some of its functions to the
CacheUtils
abstract utility class, which provides additional, convenient capabilities when you use a cache.
While there are utility methods to determine whether a cache instance (that is, a GemFireCache) or Region is a client
or a peer, one of the more useful functions is to extract all the values from a Region.
To extract all the values stored in a Region, call CacheUtils.collectValues(:Region<?, T>). This method returns a
Collection<T> that contains all the values stored in the given Region. The method is smart and knows how to handle
the Region appropriately regardless of whether the Region is a client or a peer. This distinction is important,
since client PROXY Regions store no values.
Caution is advised when you get all values from a Region. While getting filtered reference values from a
non-transactional, reference data only [REPLICATE] Region is quite useful, getting all values from a transactional,
[PARTITION] Region can prove quite detrimental, especially in production. Getting all values from a Region can be
useful during testing.
|
20.3. MembershipListenerAdapter and MembershipEvent
Another useful API hidden by Apache Geode is the membership events and listener interface. This API is especially useful on the server side when your Spring Boot application serves as a peer member of an Apache Geode distributed system.
When a peer member is disconnected from the distributed system, perhaps due to a network failure, the member is forcibly
removed from the cluster. This node immediately enters a reconnecting state, trying to establish a connection back to
the cluster. Once reconnected, the peer member must rebuild all cache objects (Cache, Region instances, Index
instances, DiskStore instances, and so on). All previous cache objects are now invalid, and their references are stale.
In a Spring context, this is particularly problematic since most Apache Geode objects are Singleton beans declared in
and managed by the Spring container. Those beans may be injected and used in other framework and application components.
For instance, Region instances are injected into SDG’s GemfireTemplate, Spring Data Repositories and possibly
application-specific data access objects (DAOs).
If references to those cache objects become stale on a forced disconnect event, there is no way to auto-wire fresh
object references into the dependent application or framework components when the peer member is reconnected, unless the
Spring ApplicationContext is “refreshed”. In fact, there is no way to even know that this event has occurred, since
the Apache Geode MembershipListener API and corresponding events are “internal”.
The Spring team explored the idea of creating proxies for all types of cache objects (Cache, Region, Index,
DiskStore, AsyncEventQueue, GatewayReceiver, GatewaySender, and others) used by Spring. The proxies would know
how to obtain a fresh reference on a reconnect event. However, this turns out to be more problematic than it is worth.
It is easier to “refresh” the Spring ApplicationContext, although doing so is no less expensive. Neither way is
ideal. See SGF-921 and SGF-227
for further details.
|
In the case where membership events are useful to the Spring Boot application, SBDG provides the following API:
The abstract MembershipListenerAdapter class implements Apache Geode’s org.apache.geode.distributed.internal.MembershipListener
interface to simplify the event handler method signatures by using an appropriate MembershipEvent type to encapsulate
the actors in the event.
The abstract MembershipEvent class is further subclassed to represent specific membership event types that occur
within the Apache Geode system:
The API is depicted in the following UML diagram:
The membership event type is further categorized with an appropriate enumerated value,
MembershipEvent.Type,
as a property of the MembershipEvent itself (see getType()).
The type hierarchy is useful in instanceof expressions, while the Enum is useful in switch statements.
You can see one particular implementation of the MembershipListenerAdapter with the
ApplicationContextMembershipListener class,
which does exactly as we described earlier, handling forced-disconnect/auto-reconnect membership events inside a
Spring container in order to refresh the Spring ApplicationContext.
20.4. PDX
Apache Geode’s PDX serialization framework is yet another API that falls short of a complete stack.
For instance, there is no easy or direct way to serialize an object as PDX bytes. It is also not possible to modify an
existing PdxInstance by adding or removing fields, since doing so would require a new PDX type. In this case, you must
create a new PdxInstance and copy from an existing PdxInstance. Unfortunately, the Apache Geode API offers no help
in this regard. It is also not possible to use PDX in a client, local-only mode without a server, since the PDX type
registry is only available and managed on servers in a cluster.
20.4.1. PdxInstanceBuilder
In such cases, SBDG conveniently provides the
PdxInstanceBuilder class,
appropriately named after the Builder software design pattern.
The PdxInstanceBuilder also offers a fluent API for constructing PdxInstances:
PdxInstanceBuilder APIclass PdxInstanceBuilder {
PdxInstanceFactory copy(PdxInstance pdx);
Factory from(Object target);
}For example, you could serialize an application domain object as PDX bytes with the following code:
@Component
class CustomerSerializer {
PdxInstance serialize(Customer customer) {
return PdxInstanceBuilder.create()
.from(customer)
.create();
}
}You could then modify the PdxInstance by copying from the original:
PdxInstance@Component
class CustomerDecorator {
@Autowired
CustomerSerializer serializer;
PdxIntance decorate(Customer customer) {
PdxInstance pdxCustomer = serializer.serialize(customer);
return PdxInstanceBuilder.create()
.copy(pdxCustomer)
.writeBoolean("vip", isImportant(customer))
.create();
}
}20.4.2. PdxInstanceWrapper
SBDG also provides the PdxInstanceWrapper
class to wrap an existing PdxInstance in order to provide more control during the conversion from PDX to JSON and from
JSON back into a POJO. Specifically, the wrapper gives you more control over the configuration of Jackson’s
ObjectMapper.
The ObjectMapper constructed by Apache Geode’s own PdxInstance implementation (PdxInstanceImpl) is not
configurable, nor was it configured correctly. Unfortunately, since PdxInstance is not extensible, the getObject()
method fails when converting the JSON generated from PDX back into a POJO for any practical application domain model
type.
The following example wraps an existing PdxInstance:
PdxInstancePdxInstanceWrapper wrapper = PdxInstanceWrapper.from(pdxInstance);For all operations on PdxInstance except getObject(), the wrapper delegates to the underlying PdxInstance method
implementation called by the user.
In addition to the decorated getObject() method, the PdxInstanceWrapper provides a thorough implementation of the
toString() method. The state of the PdxInstance is output in a JSON-like String.
Finally, the PdxInstanceWrapper class adds a getIdentifier() method. Rather than put the burden on the user to have
to iterate the field names of the PdxInstance to determine whether a field is the identity field and then call
getField(name) with the field name to get the ID (value) — assuming an identity field was marked in the first place — the PdxInstanceWrapper class provides the getIdentifier() method to return the ID of the PdxInstance directly.
The getIdentifier() method is smart in that it first iterates the fields of the PdxInstance, asking each field if it
is the identity field. If no field was marked as the identity field, the algorithm searches for a field named id. If
no field with the name id exists, the algorithm searches for a metadata field called @identifier, which refers to
the field that is the identity field of the PdxInstance.
The @identifier metadata field is useful in cases where the PdxInstance originated from JSON and the application
domain object uses a natural identifier, rather than a surrogate ID, such as Book.isbn.
Apache Geode’s JSONFormatter class is not capable of marking the identity field of a PdxInstance originating
from JSON.
|
It is not currently possible to implement the PdxInstance interface and store instances of this type as a
value in a Region. Apache Geode assumes all PdxInstance objects are an implementation created by Apache Geode itself
(that is, PdxInstanceImpl), which has a tight coupling to the PDX type registry. An Exception is thrown if you try
to store instances of your own PdxInstance implementation.
|
20.4.3. ObjectPdxInstanceAdapter
In rare cases, you may need to treat an Object as a PdxInstance, depending on the context without incurring
the overhead of serializing an Object to PDX. For such cases, SBDG offers the ObjectPdxInstanceAdapter class.
This might be true when calling a method with a parameter expecting an argument of, or returning an instance of,
type PdxInstance, particularly when Apache Geode’s read-serialized PDX configuration property is set to true
and only an object is available in the current context.
Under the hood, SBDG’s ObjectPdxInstanceAdapter class uses Spring’s
BeanWrapper class along with Java’s
introspection and reflection functionality to adapt the given Object and access it with the full
PdxInstance API. This includes the use of the
WritablePdxInstance API, obtained from
PdxInstance.createWriter(), to modify
the underlying Object as well.
Like the PdxInstanceWrapper class, ObjectPdxInstanceAdapter contains special logic to resolve the identity field
and ID of the PdxInstance, including consideration for Spring Data’s
@Id mapping annotation,
which can be introspected in this case, given that the underlying Object backing the PdxInstance is a POJO.
The ObjectPdxInstanceAdapter.getObject() method returns the wrapped Object used to construct
the ObjectPdxInstanceAdapter and is, therefore, automatically deserializable, as determined by the
PdxInstance.isDeseriable() method,
which always returns true.
You can adapt any Object as a PdxInstance:
Object as a PdxInstanceclass OfflineObjectToPdxInstanceConverter {
@NonNull PdxInstance convert(@NonNull Object target) {
return ObjectPdxInstanceAdapter.from(target);
}
}Once the Adapter is created, you can use it to access data
on the underlying Object.
Consider the following example of a Customer class:
Customer class@Region("Customers")
class Customer {
@Id
private Long id;
String name;
// constructors, getters and setters omitted
}Then you can access an instance of Customer by using the PdxInstance API:
Object using the PdxInstance APIclass ObjectPdxInstanceAdapterTest {
@Test
public void getAndSetObjectProperties() {
Customer jonDoe = new Customer(1L, "Jon Doe");
PdxInstance adapter = ObjectPdxInstanceAdapter.from(jonDoe);
assertThat(jonDoe.getName()).isEqualTo("Jon Doe");
assertThat(adapter.getField("name")).isEqualTo("Jon Doe");
adapter.createWriter().setField("name", "Jane Doe");
assertThat(adapter.getField("name")).isEqualTo("Jane Doe");
assertThat(jonDoe.getName()).isEqualTo("Jane Doe");
}
}20.5. Security
For testing purposes, SBDG provides a test implementation of
Apache Geode’s SecurityManager interface,
which expects the password to match the username (case-sensitive) when authenticating.
By default, all operations are authorized.
To match the expectations of SBDG’s TestSecurityManager, SBDG additionally provides a test implementation of
Apache Geode’s AuthInitialize interface,
which supplies matching credentials for both the username and password.
21. Spring Boot Actuator
Spring Boot for Apache Geode (SBDG) adds Spring Boot Actuator support
and dedicated HealthIndicators for Apache Geode. Equally, the provided HealthIndicators even work with Tanzu Cache
(which is backed by VMware Tanzu GemFire) when you push your Spring Boot applications using Apache Geode
to {VMware Tanzu Application Service (TAS)} platform.
Spring Boot HealthIndicators provide details about the runtime operation and behavior of your Apache Geode-based
Spring Boot applications. For instance, by querying the right HealthIndicator endpoint, you can get the current
hit/miss count for your Region.get(key) data access operations.
In addition to vital health information, SBDG provides basic, pre-runtime configuration metadata about the Apache Geode components that are monitored by Spring Boot Actuator. This makes it easier to see how the application was configured all in one place, rather than in properties files, Spring configuration, XML, and so on.
The provided Spring Boot HealthIndicators fall into three categories:
-
Base
HealthIndicatorsthat apply to all Apache Geode, Spring Boot applications, regardless of cache type, such asRegions,Indexes, andDiskStores. -
Peer
Cache-basedHealthIndicatorsthat apply only to peerCacheapplications, such asAsyncEventQueues,CacheServers,GatewayReceivers, andGatewaySenders. -
ClientCache-basedHealthIndicatorsthat apply only toClientCacheapplications, such asContinuousQueryand connectionPools.
The following sections give a brief overview of all the available Spring Boot HealthIndicators provided for
Apache Geode.
21.1. Base HealthIndicators
This section covers Spring Boot HealthIndicators that apply to both Apache Geode peer Cache and ClientCache,
Spring Boot applications. That is, these HealthIndicators are not specific to the cache type.
In Apache Geode, the cache instance is either a peer Cache instance (which makes your Spring Boot application
part of a Apache Geode cluster) or, more commonly, a ClientCache instance (which talks to an existing cluster).
Your Spring Boot application can only be one cache type or the other and can only have a single instance of
that cache type.
21.1.1. GeodeCacheHealthIndicator
GeodeCacheHealthIndicator provides essential details about the (single) cache instance (client or peer)
and the underlying DistributedSystem, the DistributedMember and configuration details of the ResourceManager.
When your Spring Boot application creates an instance of a peer Cache,
the DistributedMember object represents
your application as a peer member or node of the DistributedSystem.
The distributed system (that is, the cluster) is formed from a collection of connected peers, to which your application
also has access — indirectly,
through the cache instance.
This is no different for a ClientCache even though the client is technically not part of the peer/server cluster.
However, it still creates instances of the DistributedSystem and DistributedMember objects, respectively.
Each object has the following configuration metadata and health details:
| Name | Description |
|---|---|
geode.cache.name |
Name of the member in the distributed system. |
geode.cache.closed |
Determines whether the cache has been closed. |
geode.cache.cancel-in-progress |
Indicates whether cancellation of operations is in progress. |
| Name | Description |
|---|---|
geode.distributed-member.id |
|
geode.distributed-member.name |
Name of the member in the distributed system. |
geode.distributed-members.groups |
Configured groups to which the member belongs. |
geode.distributed-members.host |
Name of the machine on which the member is running. |
geode.distributed-members.process-id |
Identifier of the JVM process (PID). |
| Name | Description |
|---|---|
geode.distributed-system.connected |
Indicates whether the member is currently connected to the cluster. |
geode.distributed-system.member-count |
Total number of members in the cluster (1 for clients). |
geode.distributed-system.reconnecting |
Indicates whether the member is in a reconnecting state, which happens when a network partition occurs and the member gets disconnected from the cluster. |
geode.distributed-system.properties-location |
Location of the standard configuration properties. |
geode.distributed-system.security-properties-location |
Location of the security configuration properties. |
| Name | Description |
|---|---|
geode.resource-manager.critical-heap-percentage |
Percentage of heap at which the cache is in danger of becoming inoperable. |
geode.resource-manager.critical-off-heap-percentage |
Percentage of off-heap at which the cache is in danger of becoming inoperable. |
geode.resource-manager.eviction-heap-percentage |
Percentage of heap at which eviction begins on Regions configured with a heap LRU eviction policy. |
geode.resource-manager.eviction-off-heap-percentage |
Percentage of off-heap at which eviction begins on Regions configured with a heap LRU eviction policy. |
21.1.2. GeodeRegionsHealthIndicator
GeodeRegionsHealthIndicator provides details about all the configured and known Regions in the cache.
If the cache is a client, details include all LOCAL, PROXY, and CACHING_PROXY Regions. If the cache is a peer
then details include all LOCAL, PARTITION, and REPLICATE Region instances.
The following table describes the essential details and basic performance metrics:
| Name | Description |
|---|---|
geode.cache.regions.<name>.cloning-enabled |
Whether Region values are cloned on read (for example, |
geode.cache.regions.<name>.data-policy |
Policy used to manage data in the Region ( |
geode.cache.regions.<name>.initial-capacity |
Initial number of entries that can be held by a Region before it needs to be resized. |
geode.cache.regions.<name>.load-factor |
Load factor used to determine when to resize the Region when it nears capacity. |
geode.cache.regions.<name>.key-constraint |
Type constraint for Region keys. |
geode.cache.regions.<name>.off-heap |
Determines whether this Region stores values in off-heap memory (NOTE: Keys are always kept on the JVM heap). |
geode.cache.regions.<name>.pool-name |
If this Region is a client Region, this property determines
the configured connection |
geode.cache.regions.<name>.pool-name |
Determines the |
geode.cache.regions.<name>.value-constraint |
Type constraint for Region values. |
The following details also apply when the Region is a peer Cache PARTITION Region:
| Name | Description |
|---|---|
geode.cache.regions.<name>.partition.collocated-with |
Indicates whether this Region is collocated with
another |
geode.cache.regions.<name>.partition.local-max-memory |
Total amount of heap memory allowed to be used by this Region on this node. |
geode.cache.regions.<name>.partition.redundant-copies |
Number of replicas for this |
geode.cache.regions.<name>.partition.total-max-memory |
Total amount of heap memory allowed to be used by this Region across all nodes in the cluster hosting this Region. |
geode.cache.regions.<name>.partition.total-number-of-buckets |
Total number of buckets (shards) into which this Region is divided (defaults to 113). |
Finally, when statistics are enabled (for example, when you use @EnableStatistics — (see doc for more details),
the following metadata is available:
| Name | Description |
|---|---|
geode.cache.regions.<name>.statistics.hit-count |
Number of hits for a region entry. |
geode.cache.regions.<name>.statistics.hit-ratio |
Ratio of hits to the number of |
geode.cache.regions.<name>.statistics.last-accessed-time |
For an entry, indicates the last time it was accessed
with |
geode.cache.regions.<name>.statistics.last-modified-time |
For an entry, indicates the time when a Region’s entry value was last modified. |
geode.cache.regions.<name>.statistics.miss-count |
Returns the number of times that a |
21.1.3. GeodeIndexesHealthIndicator
GeodeIndexesHealthIndicator provides details about the configured Region Indexes used by OQL query data access
operations.
The following details are covered:
| Name | Description |
|---|---|
geode.index.<name>.from-clause |
Region from which data is selected. |
geode.index.<name>.indexed-expression |
Region value fields and properties used in the Index expression. |
geode.index.<name>.projection-attributes |
For |
geode.index.<name>.region |
Region to which the Index is applied. |
Additionally, when statistics are enabled (for example, when you use @EnableStatistics — see Configuring Statistics for more details),
the following metadata is available:
| Name | Description |
|---|---|
geode.index.<name>.statistics.number-of-bucket-indexes |
Number of bucket Indexes created in a PARTITION Region. |
geode.index.<name>.statistics.number-of-keys |
Number of keys in this Index. |
geode.index.<name>.statistics.number-of-map-indexed-keys |
Number of keys in this Index at the highest level. |
geode.index.<name>.statistics.number-of-values |
Number of values in this Index. |
geode.index.<name>.statistics.number-of-updates |
Number of times this Index has been updated. |
geode.index.<name>.statistics.read-lock-count |
Number of read locks taken on this Index. |
geode.index.<name>.statistics.total-update-time |
Total amount of time (ns) spent updating this Index. |
geode.index.<name>.statistics.total-uses |
Total number of times this Index has been accessed by an OQL query. |
21.1.4. GeodeDiskStoresHealthIndicator
The GeodeDiskStoresHealthIndicator provides details about the configured DiskStores in the system or application.
Remember, DiskStores are used to overflow and persist data to disk, including type metadata tracked by PDX when the
values in the Regions have been serialized with PDX and the Regions are persistent.
Most of the tracked health information pertains to configuration:
| Name | Description |
|---|---|
geode.disk-store.<name>.allow-force-compaction |
Indicates whether manual compaction of the DiskStore is allowed. |
geode.disk-store.<name>.auto-compact |
Indicates whether compaction occurs automatically. |
geode.disk-store.<name>.compaction-threshold |
Percentage at which the oplog becomes compactible. |
geode.disk-store.<name>.disk-directories |
Location of the oplog disk files. |
geode.disk-store.<name>.disk-directory-sizes |
Configured and allowed sizes (MB) for the disk directory that stores the disk files. |
geode.disk-store.<name>.disk-usage-critical-percentage |
Critical threshold of disk usage proportional to the total disk volume. |
geode.disk-store.<name>.disk-usage-warning-percentage |
Warning threshold of disk usage proportional to the total disk volume. |
geode.disk-store.<name>.max-oplog-size |
Maximum size (MB) allowed for a single oplog file. |
geode.disk-store.<name>.queue-size |
Size of the queue used to batch writes that are flushed to disk. |
geode.disk-store.<name>.time-interval |
Time to wait (ms) before writes are flushed to disk from the queue if the size limit has not be reached. |
geode.disk-store.<name>.uuid |
Universally unique identifier for the DiskStore across a distributed system. |
geode.disk-store.<name>.write-buffer-size |
Size the of write buffer the DiskStore uses to write data to disk. |
21.2. ClientCache HealthIndicators
The ClientCache-based HealthIndicators provide additional details specifically for Spring Boot, cache client
applications. These HealthIndicators are available only when the Spring Boot application creates a ClientCache
instance (that is, the application is a cache client), which is the default.
21.2.1. GeodeContinuousQueriesHealthIndicator
GeodeContinuousQueriesHealthIndicator provides details about registered client Continuous Queries (CQs). CQs let
client applications receive automatic notification about events that satisfy some criteria. That criteria can be easily
expressed by using the predicate of an OQL query (for example, SELECT * FROM /Customers c WHERE c.age > 21).
When data is inserted or updated and the data matches the criteria specified in the OQL query predicate
(data of interests), an event is sent to the registered client.
The following details are covered for CQs by name:
| Name | Description |
|---|---|
geode.continuous-query.<name>.oql-query-string |
OQL query constituting the CQ. |
geode.continuous-query.<name>.closed |
Indicates whether the CQ has been closed. |
geode.continuous-query.<name>.closing |
Indicates whether the CQ is in the process of closing. |
geode.continuous-query.<name>.durable |
Indicates whether the CQ events are remembered between client sessions. |
geode.continuous-query.<name>.running |
Indicates whether the CQ is currently running. |
geode.continuous-query.<name>.stopped |
Indicates whether the CQ has been stopped. |
In addition, the following CQ query and statistical data is covered:
| Name | Description |
|---|---|
geode.continuous-query.<name>.query.number-of-executions |
Total number of times the query has been executed. |
geode.continuous-query.<name>.query.total-execution-time |
Total amount of time (ns) spent executing the query. |
| Name | Description |
|---|---|
geode.continuous-query.<name>.statistics.number-of-deletes |
Number of delete events qualified by this CQ. |
geode.continuous-query.<name>.statistics.number-of-events |
Total number of events qualified by this CQ. |
geode.continuous-query.<name>.statistics.number-of-inserts |
Number of insert events qualified by this CQ. |
geode.continuous-query.<name>.statistics.number-of-updates |
Number of update events qualified by this CQ. |
The Apache Geode Continuous Query system is also tracked with the following additional details on the client:
| Name | Description |
|---|---|
geode.continuous-query.count |
Total count of CQs. |
geode.continuous-query.number-of-active |
Number of currently active CQs (if available). |
geode.continuous-query.number-of-closed |
Total number of closed CQs (if available). |
geode.continuous-query.number-of-created |
Total number of created CQs (if available). |
geode.continuous-query.number-of-stopped |
Number of currently stopped CQs (if available). |
geode.continuous-query.number-on-client |
Number of CQs that are currently active or stopped (if available). |
21.2.2. GeodePoolsHealthIndicator
GeodePoolsHealthIndicator provides details about all the configured client connection Pools. This HealthIndicator
primarily provides configuration metadata for all the configured Pools.
The following details are covered:
| Name | Description |
|---|---|
geode.pool.count |
Total number of client connection pools. |
geode.pool.<name>.destroyed |
Indicates whether the pool has been destroyed. |
geode.pool.<name>.free-connection-timeout |
Configured amount of time to wait for a free connection from the Pool. |
geode.pool.<name>.idle-timeout |
The amount of time to wait before closing unused, idle connections, not exceeding the configured number of minimum required connections. |
geode.pool.<name>.load-conditioning-interval |
How frequently the Pool checks to see whether a connection to a given server should be moved to a different server to improve the load balance. |
geode.pool.<name>.locators |
List of configured Locators. |
geode.pool.<name>.max-connections |
Maximum number of connections obtainable from the Pool. |
geode.pool.<name>.min-connections |
Minimum number of connections contained by the Pool. |
geode.pool.<name>.multi-user-authentication |
Determines whether the Pool can be used by multiple authenticated users. |
geode.pool.<name>.online-locators |
Returns a list of living Locators. |
geode.pool.<name>.pending-event-count |
Approximate number of pending subscription events maintained at the server for this durable client Pool at the time it (re)connected to the server. |
geode.pool.<name>.ping-interval |
How often to ping the servers to verify they are still alive. |
geode.pool.<name>.pr-single-hop-enabled |
Whether the client acquires a direct connection to the server. |
geode.pool.<name>.read-timeout |
Number of milliseconds to wait for a response from a server before timing out the operation and trying another server (if any are available). |
geode.pool.<name>.retry-attempts |
Number of times to retry a request after a timeout or an exception. |
geode.pool.<name>.server-group |
All servers must belong to the same group, and this value sets the name of that group. |
geode.pool.<name>.servers |
List of configured servers. |
geode.pool.<name>.socket-buffer-size |
Socket buffer size for each connection made in this pool. |
geode.pool.<name>.statistic-interval |
How often to send client statistics to the server. |
geode.pool.<name>.subscription-ack-interval |
Interval in milliseconds to wait before sending acknowledgements to the cache server for events received from the server subscriptions. |
geode.pool.<name>.subscription-enabled |
Enabled server-to-client subscriptions. |
geode.pool.<name>.subscription-message-tracking-timeout |
Time-to-Live (TTL) period (ms) for subscription events the client has received from the server. |
geode.pool.<name>.subscription-redundancy |
Redundancy level for this Pool’s server-to-client subscriptions, which is used to ensure clients do not miss potentially important events. |
geode.pool.<name>.thread-local-connections |
Thread local connection policy for this Pool. |
21.3. Peer Cache HealthIndicators
The peer Cache-based HealthIndicators provide additional details specifically for Spring Boot peer cache member
applications. These HealthIndicators are available only when the Spring Boot application creates a peer Cache
instance.
The default cache instance created by Spring Boot for Apache Geode is a ClientCache instance.
|
To control what type of cache instance is created, such as a “peer”, you can explicitly declare either the
@PeerCacheApplication or, alternatively, the @CacheServerApplication annotation on your
@SpringBootApplication-annotated class.
|
21.3.1. GeodeCacheServersHealthIndicator
The GeodeCacheServersHealthIndicator provides details about the configured Apache Geode CacheServer instances.
CacheServer instances are required to enable clients to connect to the servers in the cluster.
This HealthIndicator captures basic configuration metadata and the runtime behavior and characteristics of
the configured CacheServer instances:
| Name | Description |
|---|---|
geode.cache.server.count |
Total number of configured |
geode.cache.server.<index>.bind-address |
IP address of the NIC to which the |
geode.cache.server.<index>.hostname-for-clients |
Name of the host used by clients to connect to the |
geode.cache.server.<index>.load-poll-interval |
How often (ms) to query the load probe on the |
geode.cache.server.<index>.max-connections |
Maximum number of connections allowed to this |
geode.cache.server.<index>.max-message-count |
Maximum number of messages that can be put in a client queue. |
geode.cache.server.<index>.max-threads |
Maximum number of threads allowed in this |
geode.cache.server.<index>.max-time-between-pings |
Maximum time between client pings. |
geode.cache.server.<index>.message-time-to-live |
Time (seconds) in which the client queue expires. |
geode.cache.server.<index>.port |
Network port to which the CacheServer |
geode.cache.server.<index>.running |
Determines whether this |
geode.cache.server.<index>.socket-buffer-size |
Configured buffer size of the socket connection used by this CacheServer. |
geode.cache.server.<index>.tcp-no-delay |
Configures the TCP/IP |
In addition to the configuration settings shown in the preceding table, the ServerLoadProbe of the CacheServer
tracks additional details about the runtime characteristics of the CacheServer:
| Name | Description |
|---|---|
geode.cache.server.<index>.load.connection-load |
Load on the server due to client-to-server connections. |
geode.cache.server.<index>.load.load-per-connection |
Estimate of how much load each new connection adds to this server. |
geode.cache.server.<index>.load.subscription-connection-load |
Load on the server due to subscription connections. |
geode.cache.server.<index>.load.load-per-subscription-connection |
Estimate of how much load each new subscriber adds to this server. |
geode.cache.server.<index>.metrics.client-count |
Number of connected clients. |
geode.cache.server.<index>.metrics.max-connection-count |
Maximum number of connections made to this
|
geode.cache.server.<index>.metrics.open-connection-count |
Number of open connections to this |
geode.cache.server.<index>.metrics.subscription-connection-count |
Number of subscription connections to this
|
21.3.2. GeodeAsyncEventQueuesHealthIndicator
GeodeAsyncEventQueuesHealthIndicator provides details about the configured AsyncEventQueues. AEQs can be attached to
Regions to configure asynchronous write-behind behavior.
This HealthIndicator captures configuration metadata and runtime characteristics for all AEQs:
| Name | Description |
|---|---|
geode.async-event-queue.count |
Total number of configured AEQs. |
geode.async-event-queue.<id>.batch-conflation-enabled |
Indicates whether batch events are conflated when sent. |
geode.async-event-queue.<id>.batch-size |
Size of the batch that gets delivered over this AEQ. |
geode.async-event-queue.<id>.batch-time-interval |
Maximum time interval that can elapse before a batch is sent. |
geode.async-event-queue.<id>.disk-store-name |
Name of the disk store used to overflow and persist events. |
geode.async-event-queue.<id>.disk-synchronous |
Indicates whether disk writes are synchronous or asynchronous. |
geode.async-event-queue.<id>.dispatcher-threads |
Number of threads used to dispatch events. |
geode.async-event-queue.<id>.forward-expiration-destroy |
Indicates whether expiration destroy operations
are forwarded to |
geode.async-event-queue.<id>.max-queue-memory |
Maximum memory used before data needs to be overflowed to disk. |
geode.async-event-queue.<id>.order-policy |
Order policy followed while dispatching the events to
|
geode.async-event-queue.<id>.parallel |
Indicates whether this queue is parallel (higher throughput) or serial. |
geode.async-event-queue.<id>.persistent |
Indicates whether this queue stores events to disk. |
geode.async-event-queue.<id>.primary |
Indicates whether this queue is primary or secondary. |
geode.async-event-queue.<id>.size |
Number of entries in this queue. |
21.3.3. GeodeGatewayReceiversHealthIndicator
GeodeGatewayReceiversHealthIndicator provides details about the configured (WAN) GatewayReceivers,
which are capable of receiving events from remote clusters when using Apache Geode’s
multi-site, WAN topology.
This HealthIndicator captures configuration metadata along with the running state for each GatewayReceiver:
| Name | Description |
|---|---|
geode.gateway-receiver.count |
Total number of configured |
geode.gateway-receiver.<index>.bind-address |
IP address of the NIC to which the |
geode.gateway-receiver.<index>.end-port |
End value of the port range from which the port of
the |
geode.gateway-receiver.<index>.host |
IP address or hostname that Locators tell clients (that is,
|
geode.gateway-receiver.<index>.max-time-between-pings |
Maximum amount of time between client pings. |
geode.gateway-receiver.<index>.port |
Port on which this |
geode.gateway-receiver.<index>.running |
Indicates whether this |
geode.gateway-receiver.<index>.socket-buffer-size |
Configured buffer size for the socket connections used by
this |
geode.gateway-receiver.<index>.start-port |
Start value of the port range from which the port of
the |
21.3.4. GeodeGatewaySendersHealthIndicator
The GeodeGatewaySendersHealthIndicator provides details about the configured GatewaySenders. GatewaySender
instances are attached to Regions in order to send Region events to remote clusters in Apache Geode’s
multi-site, WAN topology.
This HealthIndicator captures essential configuration metadata and runtime characteristics for each GatewaySender:
| Name | Description |
|---|---|
geode.gateway-sender.count |
Total number of configured |
geode.gateway-sender.<id>.alert-threshold |
Alert threshold (ms) for entries in this
|
geode.gateway-sender.<id>.batch-conflation-enabled |
Indicates whether batch events are conflated when sent. |
geode.gateway-sender.<id>.batch-size |
Size of the batches sent. |
geode.gateway-sender.<id>.batch-time-interval |
Maximum time interval that can elapse before a batch is sent. |
geode.gateway-sender.<id>.disk-store-name |
Name of the |
geode.gateway-sender.<id>.disk-synchronous |
Indicates whether disk writes are synchronous or asynchronous. |
geode.gateway-sender.<id>.dispatcher-threads |
Number of threads used to dispatch events. |
geode.gateway-sender.<id>.max-parallelism-for-replicated-region |
|
geode.gateway-sender.<id>.max-queue-memory |
Maximum amount of memory (MB) usable for this
|
geode.gateway-sender.<id>.order-policy |
Order policy followed while dispatching the events
to |
geode.gateway-sender.<id>.parallel |
Indicates whether this |
geode.gateway-sender.<id>.paused |
Indicates whether this |
geode.gateway-sender.<id>.persistent |
Indicates whether this |
geode.gateway-sender.<id>.remote-distributed-system-id |
Identifier for the remote distributed system. |
geode.gateway-sender.<id>.running |
Indicates whether this |
geode.gateway-sender.<id>.socket-buffer-size |
Configured buffer size for the socket connections
between this |
geode.gateway-sender.<id>.socket-read-timeout |
Amount of time (ms) that a socket read between this
sending |
22. Spring Session
This chapter covers auto-configuration of Spring Session for Apache Geode to manage (HTTP) session state in a reliable (consistent), highly available (replicated), and clustered manner.
Spring Session provides an API and several implementations for managing a user’s session
information. It has the ability to replace the javax.servlet.http.HttpSession in an application container-neutral way
and provide session IDs in HTTP headers to work with RESTful APIs.
Furthermore, Spring Session provides the ability to keep the HttpSession alive even when working with WebSockets
and reactive Spring WebFlux WebSessions.
A complete discussion of Spring Session is beyond the scope of this document. You can learn more by reading the docs and reviewing the samples.
Spring Boot for Apache Geode provides auto-configuration support to configure Apache Geode as the session management provider and store when Spring Session for Apache Geode is on your Spring Boot application’s classpath.
| You can learn more about Spring Session for Apache Geode in the docs. |
22.1. Configuration
You need do nothing special to use Apache Geode as a Spring Session provider implementation, managing the (HTTP) session state of your Spring Boot application.
To do so, include the appropriate Spring Session dependency on your Spring Boot application’s classpath:
<dependency>
<groupId>org.springframework.session</groupId>
<artifactId>spring-session-data-geode</artifactId>
<version>2.6.3</version>
</dependency>Alternatively, you may declare the provided spring-geode-starter-session dependency in your Spring Boot application
Maven POM (shown here) or Gradle build file:
<dependency>
    <groupId>org.springframework.geode</groupId>
    <artifactId>spring-geode-starter-session</artifactId>
    <version>1.6.14</version>
</dependency>After declaring the required Spring Session dependency, you can begin your Spring Boot application as you normally would:
@SpringBootApplication
public class MySpringBootApplication {

  public static void main(String[] args) {
    SpringApplication.run(MySpringBootApplication.class, args);
  }

  // ...
}
You can then create application-specific Spring Web MVC Controllers to interact with the HttpSession as needed
by your application:
Controller using HttpSession@Controller
class MyApplicationController {
@GetRequest("...")
public String processGet(HttpSession session) {
// interact with HttpSession
}
}The HttpSession is replaced by a Spring managed Session that is stored in Apache Geode.
22.2. Custom Configuration
By default, Spring Boot for Apache Geode (SBDG) applies reasonable and sensible defaults when configuring Apache Geode as the provider in Spring Session.
For instance, by default, SBDG sets the session expiration timeout to 30 minutes. It also uses a
ClientRegionShortcut.PROXY as the data management policy for the Apache Geode client Region that managing the (HTTP)
session state when the Spring Boot application is using a ClientCache, which it does
by default.
However, what if the defaults are not sufficient for your application requirements?
In that case, see the next section.
22.2.1. Custom Configuration using Properties
Spring Session for Apache Geode publishes well-known configuration properties for each of the various Spring Session configuration options when you use Apache Geode as the (HTTP) session state management provider.
You can specify any of these properties in Spring Boot application.properties to adjust Spring Session’s configuration
when using Apache Geode.
In addition to the properties provided in and by Spring Session for Apache Geode, Spring Boot for Apache Geode also
recognizes and respects the spring.session.timeout property and the server.servlet.session.timeout property, as
discussed the Spring Boot documentation.
spring.session.data.gemfire.session.expiration.max-inactive-interval-seconds takes precedence over
spring.session.timeout, which takes precedence over server.servlet.session.timeout when any combination of
these properties have been simultaneously configured in the Spring Environment of your application.
|
22.2.2. Custom Configuration using a Configurer
Spring Session for Apache Geode also provides the
SpringSessionGemFireConfigurer
callback interface, which you can declare in your Spring ApplicationContext to programmatically control
the configuration of Spring Session when you use Apache Geode.
The SpringSessionGemFireConfigurer, when declared in the Spring ApplicationContext, takes precedence over any of
the Spring Session (for Apache Geode) configuration properties and effectively overrides them when both are present.
More information on using the SpringSessionGemFireConfigurer can be found in the
docs.
22.3. Disabling Session State Caching
There may be cases where you do not want your Spring Boot application to manage (HTTP) session state by using Apache Geode.
In certain cases, you may be using another Spring Session provider implementation, such as Redis, to cache and manage
your Spring Boot application’s (HTTP) session state. In other cases, you do not want to use Spring Session to manage
your (HTTP) session state at all. Rather, you prefer to use your Web Server’s (such as Tomcat’s) built-in HttpSession
state management capabilities.
Either way, you can specifically call out your Spring Session provider implementation by using
the spring.session.store-type property in Spring Boot application.properties:
#application.properties
spring.session.store-type=redis
...If you prefer not to use Spring Session to manage your Spring Boot application’s (HTTP) session state at all, you can do the following:
#application.properties
spring.session.store-type=none
...Again, see the Spring Boot documentation for more detail.
| You can include multiple provider implementations on the classpath of your Spring Boot application. For instance, you might use Redis to cache your application’s (HTTP) session state while using Apache Geode as your application’s transactional persistent store (System of Record). |
Spring Boot does not properly recognize spring.session.store-type=[gemfire|geode] even though
Spring Boot for Apache Geode is set up to handle either of these property values
(that is, either gemfire or geode).
|
22.4. Using Spring Session with VMware Tanzu GemFire for VMs (PCC)
Whether you use Spring Session in a Spring Boot, Apache Geode ClientCache application to connect to an standalone,
externally managed cluster of Apache Geode servers or to connect to a cluster of servers in a VMware Tanzu GemFire for VMs service
instance managed by a VMware Tanzu Application Service (TAS) environment, the setup is the same.
Spring Session for Apache Geode expects there to be a cache Region in the cluster that can store and manage (HTTP)
session state when your Spring Boot application is a ClientCache application in the client/server topology.
By default, the cache Region used to store and manage (HTTP) session state is called ClusteredSpringSessions.
We recommend that you configure the cache Region name by using the well-known and documented property
in Spring Boot application.properties:
spring.session.data.gemfire.session.region.name=MySessionsAlternatively, you can set the name of the cache Region used to store and manage (HTTP) session state by explicitly
declaring the @EnableGemFireHttpSession annotation on your main @SpringBootApplication class:
@SpringBootApplication
@EnableGemFireHttpSession(regionName = "MySessions")
class MySpringBootSpringSessionApplication {
// ...
}Once you decide on the cache Region name used to store and manage (HTTP) sessions, you must create the cache Region in the cluster somehow.
On the client, doing so is simple, since SBDG’s auto-configuration automatically creates the client PROXY Region
that is used to send and receive (HTTP) session state between the client and server for you when either Spring Session
is on the application classpath (for example, spring-geode-starter-session) or you explicitly declare
the @EnableGemFireHttpSession annotation on your main @SpringBootApplication class.
However, on the server side, you currently have a couple of options.
First, you can manually create the cache Region by using Gfsh:
gfsh> create region --name=MySessions --type=PARTITION --entry-idle-time-expiration=1800
--entry-idle-time-expiration-action=INVALIDATEYou must create the cache Region with the appropriate name and an expiration policy.
In this case, we created an idle expiration policy with a timeout of 1800 seconds (30 minutes), after which the entry
(session object) is invalidated.
| Session expiration is managed by the Expiration Policy set on the cache Region that is used to store session state. The Servlet container’s (HTTP) session expiration configuration is not used, since Spring Session replaces the Servlet container’s session management capabilities with its own, and Spring Session delegates this behavior to the individual providers, such as Apache Geode. |
Alternatively, you could send the definition for the cache Region from your Spring Boot ClientCache application
to the cluster by using the SBDG @EnableClusterAware annotation,
which is meta-annotated with SDG’s @EnableClusterConfiguration annotation:
@EnableClusterAware@SpringBootApplication
@EnableClusterAware
class MySpringBootSpringSessionApacheGeodeApplication {
// ...
}
See the Javadoc
on the @EnableClusterConfiguration annotation and the documentation
for more detail.
|
However, you cannot currently send expiration policy configuration metadata to the cluster. Therefore, you must manually alter the cache Region to set the expiration policy:
gfsh> alter region --name=MySessions --entry-idle-time-expiration=1800
--entry-idle-time-expiration-action=INVALIDATENow your Spring Boot ClientCache application that uses Spring Session in a client/server topology is configured to
store and manage user (HTTP) session state in the cluster. This works for either standalone, externally managed
Apache Geode clusters or when you use PCC running in a VMware Tanzu Application Service (TAS) environment.
23. Pivotal CloudFoundry
| As of the VMware, Inc. acquisition of Pivotal Software, Inc., Pivotal CloudFoundry (PCF) is now known as VMware Tanzu Application Service (TAS) for VMs. Also, Pivotal Cloud Cache (PCC) has been rebranded as VMware Tanzu GemFire for VMS. This documentation will eventually be updated to reflect the rebranding. |
In most cases, when you deploy (that is, cf push) your Spring Boot applications to Pivotal CloudFoundry (PCF), you bind
your application to one or more instances of the Pivotal Cloud Cache (PCC) service.
In a nutshell, Pivotal Cloud Cache (PCC) is a managed version of VMware Tanzu GemFire that runs in Pivotal CloudFoundry (PCF). When running in or across cloud environments (such as AWS, Azure, GCP, or PWS), PCC with PCF offers several advantages over trying to run and manage your own standalone Apache Geode clusters. It handles many of the infrastructure-related, operational concerns so that you need not do so.
23.1. Running a Spring Boot application as a specific user
By default, Spring Boot applications run as a cluster_operator role-based user in Pivotal CloudFoundry when the application
is bound to a Pivotal Cloud Cache service instance.
A cluster_operator has full system privileges (that is, authorization) to do whatever that user wishes to involving
the PCC service instance. A cluster_operator has read and write access to all the data, can modify the schema (for
example, create and destroy Regions, add and remove Indexes, change eviction or expiration policies, and so on), start
and stop servers in the PCC cluster, or even modify permissions.
However…
With great power comes great responsibility. - Uncle Ben
Not all Spring Boot applications using PCC need to change the schema or even modify data. Rather, certain applications
may need only read access. Therefore, it is ideal to be able to configure your Spring Boot applications to run with
a different user at runtime other than the auto-configured cluster_operator, by default.
A prerequisite for running a Spring Boot application in PCC with a specific user is to create a user with restricted permissions by using Pivotal CloudFoundry AppsManager while provisioning the PCC service instance to which the Spring Boot application is bound.
Configuration metadata for the PCC service instance might appear as follows:
{
"p-cloudcache":[{
"credentials": {
"distributed_system_id": "0",
"locators": [ "localhost[55221]" ],
"urls": {
"gfsh": "https://cloudcache-12345.services.cf.pws.com/gemfire/v1",
"pulse": "https://cloudcache-12345.services.cf.pws.com/pulse"
},
"users": [{
"password": "*****",
"roles": [ "cluster_operator" ],
"username": "cluster_operator_user"
}, {
"password": "*****",
"roles": [ "developer" ],
"username": "developer_user"
}, {
"password": "*****",
"roles": [ "read-only-user" ],
"username": "guest"
}],
"wan": {
"sender_credentials": {
"active": {
"password": "*****",
"username": "gateway-sender-user"
}
}
}
},
"name": "jblum-pcc",
"plan": "small",
"tags": [ "gemfire", "cloudcache", "database", "pivotal" ]
}]
}In the PCC service instance configuration metadata shown in the preceding example, we see a guest user with
the read-only-user role. If the read-only-user role is properly configured with read-only permissions as the name
implies, we could configure our Spring Boot application to run as guest with read-only access:
# Spring Boot application.properties for PCF when using PCC
spring.data.gemfire.security.username=guest
The spring.data.gemfire.security.username property corresponds directly to the SDG @EnableSecurity annotation’s
securityUsername attribute. See the
Javadoc
for more details.
|
The spring.data.gemfire.security.username property is the same property used by Spring Data for Apache Geode (SDG) to
configure the runtime user of your Spring Data application when you connect to an externally managed Apache Geode
cluster.
In this case, SBDG uses the configured username to look up the authentication credentials of the user to set
the username and password used by the Spring Boot ClientCache application when connecting to PCC while running in PCF.
If the username is not valid, an IllegalStateException is thrown.
By using Spring profiles, it would be a simple matter to configure the Spring Boot application to run with a different user depending on environment.
See the Pivotal Cloud Cache documentation on security for configuring users with assigned roles and permissions.
23.1.1. Overriding Authentication Auto-configuration
It should be understood that auto-configuration for client authentication is available only for managed environments, such as Pivotal CloudFoundry. When running in externally managed environments, you must explicitly set a username and password to authenticate, as described in Non-Managed Auth for Clients.
To completely override the auto-configuration of client authentication, you can set both a username and a password:
# Spring Boot application.properties
spring.data.gemfire.security.username=MyUser
spring.data.gemfire.security.password=MyPasswordIn this case, SBDG’s auto-configuration for authentication is effectively disabled and security credentials are not extracted from the environment.
23.2. Targeting Specific Pivotal Cloud Cache Service Instances
It is possible to provision multiple instances of the Pivotal Cloud Cache service in your Pivotal CloudFoundry environment. You can then bind multiple PCC service instances to your Spring Boot application.
However, Spring Boot for Apache Geode (SBDG) only auto-configures one PCC service instance for your Spring Boot application. This does not mean that it is not possible to use multiple PCC service instances with your Spring Boot application, just that SBDG only auto-configures one service instance for you.
You must select which PCC service instance your Spring Boot application automatically auto-configures for you when you have multiple instances and want to target a specific PCC service instance to use.
To do so, declare the following SBDG property in Spring Boot application.properties:
# Spring Boot application.properties
spring.boot.data.gemfire.cloud.cloudfoundry.service.cloudcache.name=pccServiceInstanceTwoThe spring.boot.data.gemfire.cloud.cloudfoundry.service.cloudcache.name property tells SBDG which PCC service instance
to auto-configure.
If the PCC service instance identified by the property does not exist, SBDG throws an IllegalStateException
stating the PCC service instance by name could not be found.
If you did not set the property and your Spring Boot application is bound to multiple PCC service instances, SBDG auto-configures the first PCC service instance it finds by name, alphabetically.
If you did not set the property and no PCC service instance is found, SBDG logs a warning.
23.3. Using Multiple Pivotal Cloud Cache Service Instances
If you want to use multiple PCC service instances with your Spring Boot application, you need to configure multiple
connection Pools connected to each PCC service instance used by your Spring Boot application.
The configuration would be similar to the following:
@Configuration
@EnablePools(pools = {
@EnablePool(name = "PccOne"),
@EnablePool(name = "PccTwo"),
...,
@EnablePool(name = "PccN")
})
class PccConfiguration {
// ...
}You would then externalize the configuration for the individually declared Pools in Spring Boot
application.properties:
# Spring Boot `application.properties`
spring.data.gemfire.pool.pccone.locators=pccOneHost1[port1], pccOneHost2[port2], ..., pccOneHostN[portN]
spring.data.gemfire.pool.pcctwo.locators=pccTwoHost1[port1], pccTwoHost2[port2], ..., pccTwoHostN[portN]
Though less common, you can also configure the Pool of connections to target specific servers in the cluster
by setting the spring.data.gemfire.pool.<named-pool>.severs property.
|
Keep in mind that properties in Spring Boot application.properties can refer to other properties:
property=${otherProperty}. This lets you further externalize properties by using Java System properties
or environment variables.
|
A client Region is then assigned the Pool of connections that are used to send data to and from the specific PCC service instance (cluster):
@Configuration
class GeodeConfiguration {
@Bean("Example")
ClientRegionFactoryBean exampleRegion(GemFireCache gemfireCache,
@Qualifier("PccTwo") Pool poolForPccTwo) {
ClientRegionFactoryBean exampleRegion = new ClientRegionFactoryBean();
exampleRegion.setCache(gemfireCache);
exampleRegion.setPool(poolForPccTwo);
exampleRegion.setShortcut(ClientRegionShortcut.PROXY);
return exampleRegion;
}
}You can configure as many Pools and client Regions as your application needs. Again, the Pool determines
the Pivotal Cloud Cache service instance and cluster in which the data for the client Region resides.
By default, SBDG configures all Pools declared in a Spring Boot ClientCache application to connect to
and use a single PCC service instance. This may be a targeted PCC service instance when you use the
spring.boot.data.gemfire.cloud.cloudfoundry.service.cloudcache.name property
as discussed earlier.
|
23.4. Hybrid Pivotal CloudFoundry and Apache Geode Spring Boot Applications
Sometimes, it is desirable to deploy (that is, cf push) and run your Spring Boot applications in Pivotal CloudFoundry
but still connect your Spring Boot applications to an externally managed, standalone Apache Geode cluster.
Spring Boot for Apache Geode (SBDG) makes this a non-event and honors its "little to no code or configuration changes necessary" goal. Regardless of your runtime choice, it should just work!
To help guide you through this process, we cover the following topics:
-
Install and Run PCFDev.
-
Start an Apache Geode cluster.
-
Create a User-Provided Service (CUPS).
-
Push and Bind a Spring Boot application.
-
Run the Spring Boot application.
23.4.1. Running PCFDev
For this exercise, we use PCF Dev.
PCF Dev, much like PCF, is an elastic application runtime for deploying, running, and managing your Spring Boot applications. However, it does so in the confines of your local development environment — that is, your workstation.
Additionally, PCF Dev provides several services, such as MySQL, Redis, and RabbitMQ. You Spring Boot application can bind to and use these services to accomplish its tasks.
However, PCF Dev lacks the Pivotal Cloud Cache service that is available in PCF. This is actually ideal for this exercise since we are trying to build and run Spring Boot applications in a PCF environment but connect to an externally managed, standalone Apache Geode cluster.
As a prerequisite, you need to follow the steps outlined in the tutorial to get PCF Dev set up and running on your workstation.
To run PCF Dev, execute the following cf CLI command, replacing the path to the TGZ file with the file you acquired
from the download:
$ cf dev start -f ~/Downloads/Pivotal/CloudFoundry/Dev/pcfdev-v1.2.0-darwin.tgzYou should see output similar to the following:
Downloading Network Helper...
Progress: |====================>| 100.0%
Installing cfdevd network helper (requires administrator privileges)...
Password:
Setting up IP aliases for the BOSH Director & CF Router (requires administrator privileges)
Downloading Resources...
Progress: |====================>| 100.0%
Setting State...
WARNING: PCF Dev requires 8192 MB of RAM to run. This machine may not have enough free RAM.
Creating the VM...
Starting VPNKit...
Waiting for the VM...
Deploying the BOSH Director...
Deploying PAS...
Done (14m34s)
Deploying Apps-Manager...
Done (1m41s)
██████╗ ██████╗███████╗██████╗ ███████╗██╗ ██╗
██╔══██╗██╔════╝██╔════╝██╔══██╗██╔════╝██║ ██║
██████╔╝██║ █████╗ ██║ ██║█████╗ ██║ ██║
██╔═══╝ ██║ ██╔══╝ ██║ ██║██╔══╝ ╚██╗ ██╔╝
██║ ╚██████╗██║ ██████╔╝███████╗ ╚████╔╝
╚═╝ ╚═════╝╚═╝ ╚═════╝ ╚══════╝ ╚═══╝
is now running!
To begin using PCF Dev, please run:
cf login -a https://api.dev.cfdev.sh --skip-ssl-validation
Admin user => Email: admin / Password: admin
Regular user => Email: user / Password: pass
To access Apps Manager, navigate here: https://apps.dev.cfdev.sh
To deploy a particular service, please run:
cf dev deploy-service <service-name> [Available services: mysql,redis,rabbitmq,scs]To use the cf CLI tool, you must login to the PCF Dev environment:
cf CLI$ cf login -a https://api.dev.cfdev.sh --skip-ssl-validationYou can also access the PCF Dev Apps Manager tool from your Web browser at the following URL:
Apps Manager provides a nice UI to manage your org, space, services and apps. It lets you push and update apps, create services, bind apps to the services, and start and stop your deployed applications, among many other things.
23.4.2. Running an Apache Geode Cluster
Now that PCF Dev is set up and running, you need to start an external, standalone Apache Geode cluster to which our Spring Boot application connects and uses to manage its data.
You need to install a distribution of Apache Geode on your computer. Then you must
set the $GEODE environment variable. It is also convenient to add $GEODE/bin to your system $PATH.
Afterward, you can launch the Geode Shell (Gfsh) tool:
$ echo $GEODE
/Users/jblum/pivdev/apache-geode-1.6.0
$ gfsh
_________________________ __
/ _____/ ______/ ______/ /____/ /
/ / __/ /___ /_____ / _____ /
/ /__/ / ____/ _____/ / / / /
/______/_/ /______/_/ /_/ 1.6.0
Monitor and Manage Apache Geode
gfsh>We have provided the Gfsh shell script that you can use to start the Apache Geode cluster:
#!/bin/gfsh
# Gfsh shell script to configure and bootstrap an Apache Geode cluster.
start locator --name=LocatorOne --log-level=config --classpath=@project-dir@/apache-geode-extensions/build/libs/apache-geode-extensions-@[email protected] --J=-Dgemfire.security-manager=org.springframework.geode.security.TestSecurityManager --J=-Dgemfire.http-service-port=8080
start server --name=ServerOne --log-level=config --user=admin --password=admin --classpath=@project-dir@/apache-geode-extensions/build/libs/apache-geode-extensions-@[email protected]The start-cluster.gfsh shell script starts one Geode Locator and one Geode server.
A Locator is used by clients to discover and connect to servers in a cluster to manage its data. A Locator is also used by new servers that join a cluster as peer members, which lets the cluster be elastically scaled out (or scaled down, as needed). A Geode server stores the data for the application.
You can start as many Locators or servers as necessary to meet the availability and load demands of your application. The more Locators and servers your cluster has, the more resilient it is to failure. However, you should size your cluster accordingly, based on your application’s needs, since there is overhead relative to the cluster size.
You see output similar to the following when starting the Locator and server:
gfsh>start locator --name=LocatorOne --log-level=config --classpath=/Users/jblum/pivdev/spring-boot-data-geode/apache-geode-extensions/build/libs/apache-geode-extensions-1.1.0.BUILD-SNAPSHOT.jar --J=-Dgemfire.security-manager=org.springframework.geode.security.TestSecurityManager --J=-Dgemfire.http-service-port=8080
Starting a Geode Locator in /Users/jblum/pivdev/lab/LocatorOne...
..
Locator in /Users/jblum/pivdev/lab/LocatorOne on 10.99.199.24[10334] as LocatorOne is currently online.
Process ID: 14358
Uptime: 1 minute 1 second
Geode Version: 1.6.0
Java Version: 1.8.0_192
Log File: /Users/jblum/pivdev/lab/LocatorOne/LocatorOne.log
JVM Arguments: -Dgemfire.enable-cluster-configuration=true -Dgemfire.load-cluster-configuration-from-dir=false -Dgemfire.log-level=config -Dgemfire.security-manager=org.springframework.geode.security.TestSecurityManager -Dgemfire.http-service-port=8080 -Dgemfire.launcher.registerSignalHandlers=true -Djava.awt.headless=true -Dsun.rmi.dgc.server.gcInterval=9223372036854775806
Class-Path: /Users/jblum/pivdev/apache-geode-1.6.0/lib/geode-core-1.6.0.jar:/Users/jblum/pivdev/spring-boot-data-geode/apache-geode-extensions/build/libs/apache-geode-extensions-1.1.0.BUILD-SNAPSHOT.jar:/Users/jblum/pivdev/apache-geode-1.6.0/lib/geode-dependencies.jar
Security Manager is enabled - unable to auto-connect. Please use "connect --locator=10.99.199.24[10334] --user --password" to connect Gfsh to the locator.
Authentication required to connect to the Manager.
gfsh>connect
Connecting to Locator at [host=localhost, port=10334] ..
Connecting to Manager at [host=10.99.199.24, port=1099] ..
user: admin
password: *****
Successfully connected to: [host=10.99.199.24, port=1099]
gfsh>start server --name=ServerOne --log-level=config --user=admin --password=admin --classpath=/Users/jblum/pivdev/spring-boot-data-geode/apache-geode-extensions/build/libs/apache-geode-extensions-1.1.0.BUILD-SNAPSHOT.jar
Starting a Geode Server in /Users/jblum/pivdev/lab/ServerOne...
....
Server in /Users/jblum/pivdev/lab/ServerOne on 10.99.199.24[40404] as ServerOne is currently online.
Process ID: 14401
Uptime: 3 seconds
Geode Version: 1.6.0
Java Version: 1.8.0_192
Log File: /Users/jblum/pivdev/lab/ServerOne/ServerOne.log
JVM Arguments: -Dgemfire.default.locators=10.99.199.24[10334] -Dgemfire.security-username=admin -Dgemfire.start-dev-rest-api=false -Dgemfire.security-password=******** -Dgemfire.use-cluster-configuration=true -Dgemfire.log-level=config -XX:OnOutOfMemoryError=kill -KILL %p -Dgemfire.launcher.registerSignalHandlers=true -Djava.awt.headless=true -Dsun.rmi.dgc.server.gcInterval=9223372036854775806
Class-Path: /Users/jblum/pivdev/apache-geode-1.6.0/lib/geode-core-1.6.0.jar:/Users/jblum/pivdev/spring-boot-data-geode/apache-geode-extensions/build/libs/apache-geode-extensions-1.1.0.BUILD-SNAPSHOT.jar:/Users/jblum/pivdev/apache-geode-1.6.0/lib/geode-dependencies.jarOnce the cluster has been started successfully, you can list the members:
gfsh>list members
Name | Id
---------- | -----------------------------------------------------------------
LocatorOne | 10.99.199.24(LocatorOne:14358:locator)<ec><v0>:1024 [Coordinator]
ServerOne | 10.99.199.24(ServerOne:14401)<v1>:1025Currently, we have not defined any Regions in which to store our application’s data:
gfsh>list regions
No Regions FoundThis is deliberate, since we are going to let the application drive its schema structure, both on the client (application) as well as on the server-side (cluster). We cover this in more detail later in this chapter.
23.4.3. Creating a User-Provided Service
Now that we have PCF Dev and a small Apache Geode cluster up and running, it is time to create a user-provided service to the external, standalone Apache Geode cluster that we started in step 2.
As mentioned, PCF Dev offers MySQL, Redis and RabbitMQ services (among others). However, to use Apache Geode in the same capacity as you would Pivotal Cloud Cache when running in a production-grade PCF environment, you need to create a user-provided service for the standalone Apache Geode cluster.
To do so, run the following cf CLI command:
$ cf cups <service-name> -t "gemfire, cloudcache, database, pivotal" -p '<service-credentials-in-json>'
It is important that you specify the tags (gemfire, cloudcache, database, pivotal) exactly as shown
in the preceding cf CLI command.
|
The argument passed to the -p command-line option is a JSON document (object) containing the credentials for our
user-provided service.
The JSON object is as follows:
{
"locators": [ "<hostname>[<port>]" ],
"urls": { "gfsh": "https://<hostname>/gemfire/v1" },
"users": [{ "password": "<password>", "roles": [ "cluster_operator" ], "username": "<username>" }]
}The complete cf CLI command would be similar to the following:
cf cups commandcf cups apacheGeodeService -t "gemfire, cloudcache, database, pivotal" \
-p '{ "locators": [ "10.99.199.24[10334]" ], "urls": { "gfsh": "https://10.99.199.24/gemfire/v1" }, "users": [{ "password": "admin", "roles": [ "cluster_operator" ], "username": "admin" }] }'We replaced the <hostname> placeholder with the IP address of our standalone Apache Geode Locator. You can find
the IP address in the Gfsh start locator command output shown in the preceding example.
Additionally, the <port> placeholder has been replaced with the default Locator port, 10334,
Finally, we set the username and password accordingly.
Spring Boot for Apache Geode (SBDG) provides template files in the /opt/jenkins/data/workspace/spring-boot-data-geode_1.6.x/spring-geode-docs/src/main/resources directory.
|
Once the service has been created, you can query the details of the service from the cf CLI:
$ cf services
Getting services in org cfdev-org / space cfdev-space as admin...
name service plan bound apps last operation broker
apacheGeodeService user-provided boot-pcc-demo
$ cf service apacheGeodeService
Showing info of service apacheGeodeService in org cfdev-org / space cfdev-space as admin...
name: apacheGeodeService
service: user-provided
tags: gemfire, cloudcache, database, pivotal
bound apps:
name binding name status message
boot-pcc-demo create succeededYou can also view the "apacheGeodeService" from Apps Manager, starting from the Service tab in your org and space:
By clicking on the "apacheGeodeService" service entry in the table, you can get all the service details, such as the bound apps:
You can also view and set the configuration:
This brief section did not cover all the capabilities of the Apps Manager. We suggest you explore its UI to see all that is possible.
| You can learn more about CUPS in the PCF documentation. |
23.4.4. Push and Bind a Spring Boot application
Now it is time to push a Spring Boot application to PCF Dev and bind the application to the apacheGeodeService.
Any Spring Boot ClientCache application that uses SBDG works for this purpose. For this example, we use the
PCCDemo application, which is available in GitHub.
After cloning the project to your computer, you must run a build to produce the artifact to push to PCF Dev:
$ mvn clean packageThen you can push the application to PCF Dev with the following cf CLI command:
$ cf push boot-pcc-demo -u none --no-start -p target/client-0.0.1-SNAPSHOT.jarOnce the application has been successfully deployed to PCF Dev, you can get the application details:
$ cf apps
Getting apps in org cfdev-org / space cfdev-space as admin...
OK
name requested state instances memory disk urls
boot-pcc-demo stopped 0/1 768M 1G boot-pcc-demo.dev.cfdev.sh
$ cf app boot-pcc-demo
Showing health and status for app boot-pcc-demo in org cfdev-org / space cfdev-space as admin...
name: boot-pcc-demo
requested state: stopped
routes: boot-pcc-demo.dev.cfdev.sh
last uploaded: Tue 02 Jul 00:34:09 PDT 2019
stack: cflinuxfs3
buildpacks: https://github.com/cloudfoundry/java-buildpack.git
type: web
instances: 0/1
memory usage: 768M
state since cpu memory disk details
#0 down 2019-07-02T21:48:25Z 0.0% 0 of 0 0 of 0
type: task
instances: 0/0
memory usage: 256M
There are no running instances of this process.You can bind the PPCDemo application to the apacheGeodeService using the cf CLI command:
apacheGeodeService using CLIcf bind-service boot-pcc-demo apacheGeodeServiceAlternatively, you can create a YAML file (manifest.yml in src/main/resources) that contains
the deployment descriptor:
\---
applications:
- name: boot-pcc-demo
memory: 768M
instances: 1
path: ./target/client-0.0.1-SNAPSHOT.jar
services:
- apacheGeodeService
buildpacks:
- https://github.com/cloudfoundry/java-buildpack.gitYou can also use Apps Manager to view application details and bind and unbind additional services.
Start by navigating to the App tab under your org and space:
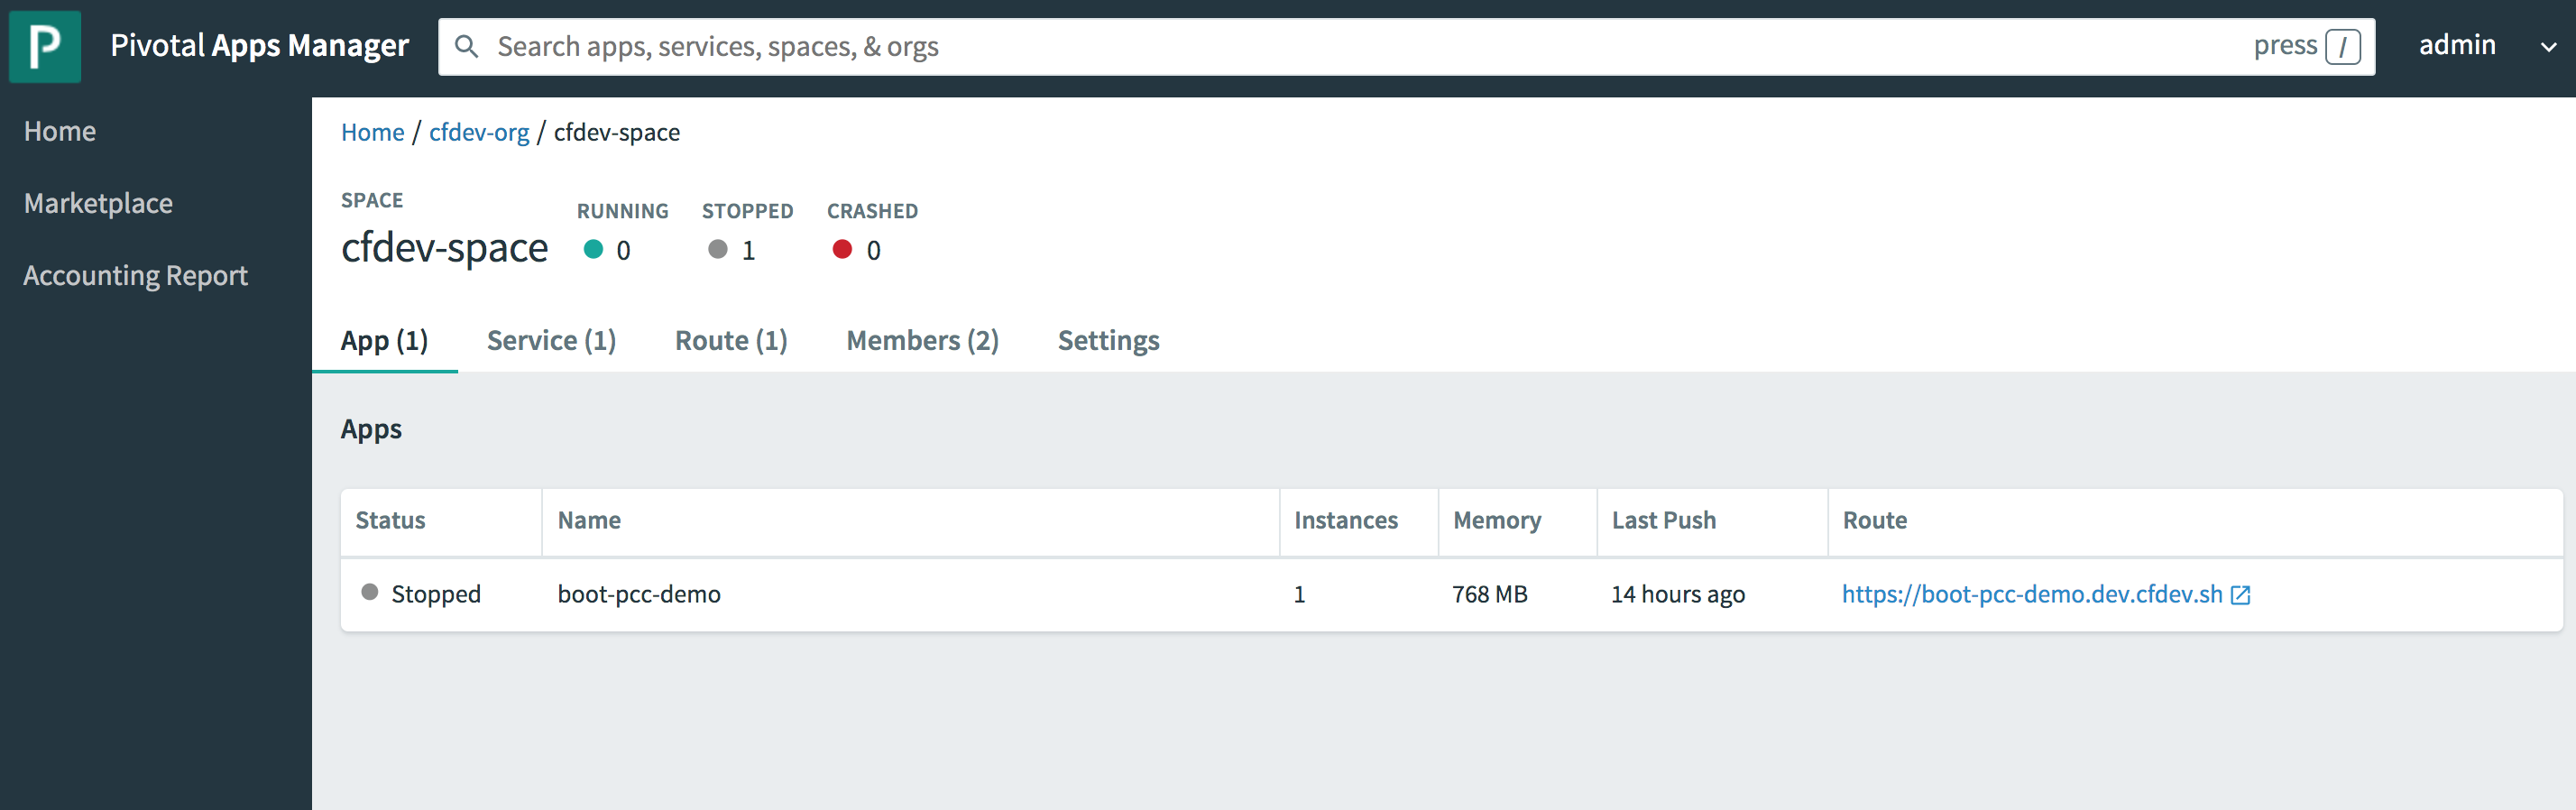
From there, you can click on the desired application and navigate to the Overview:
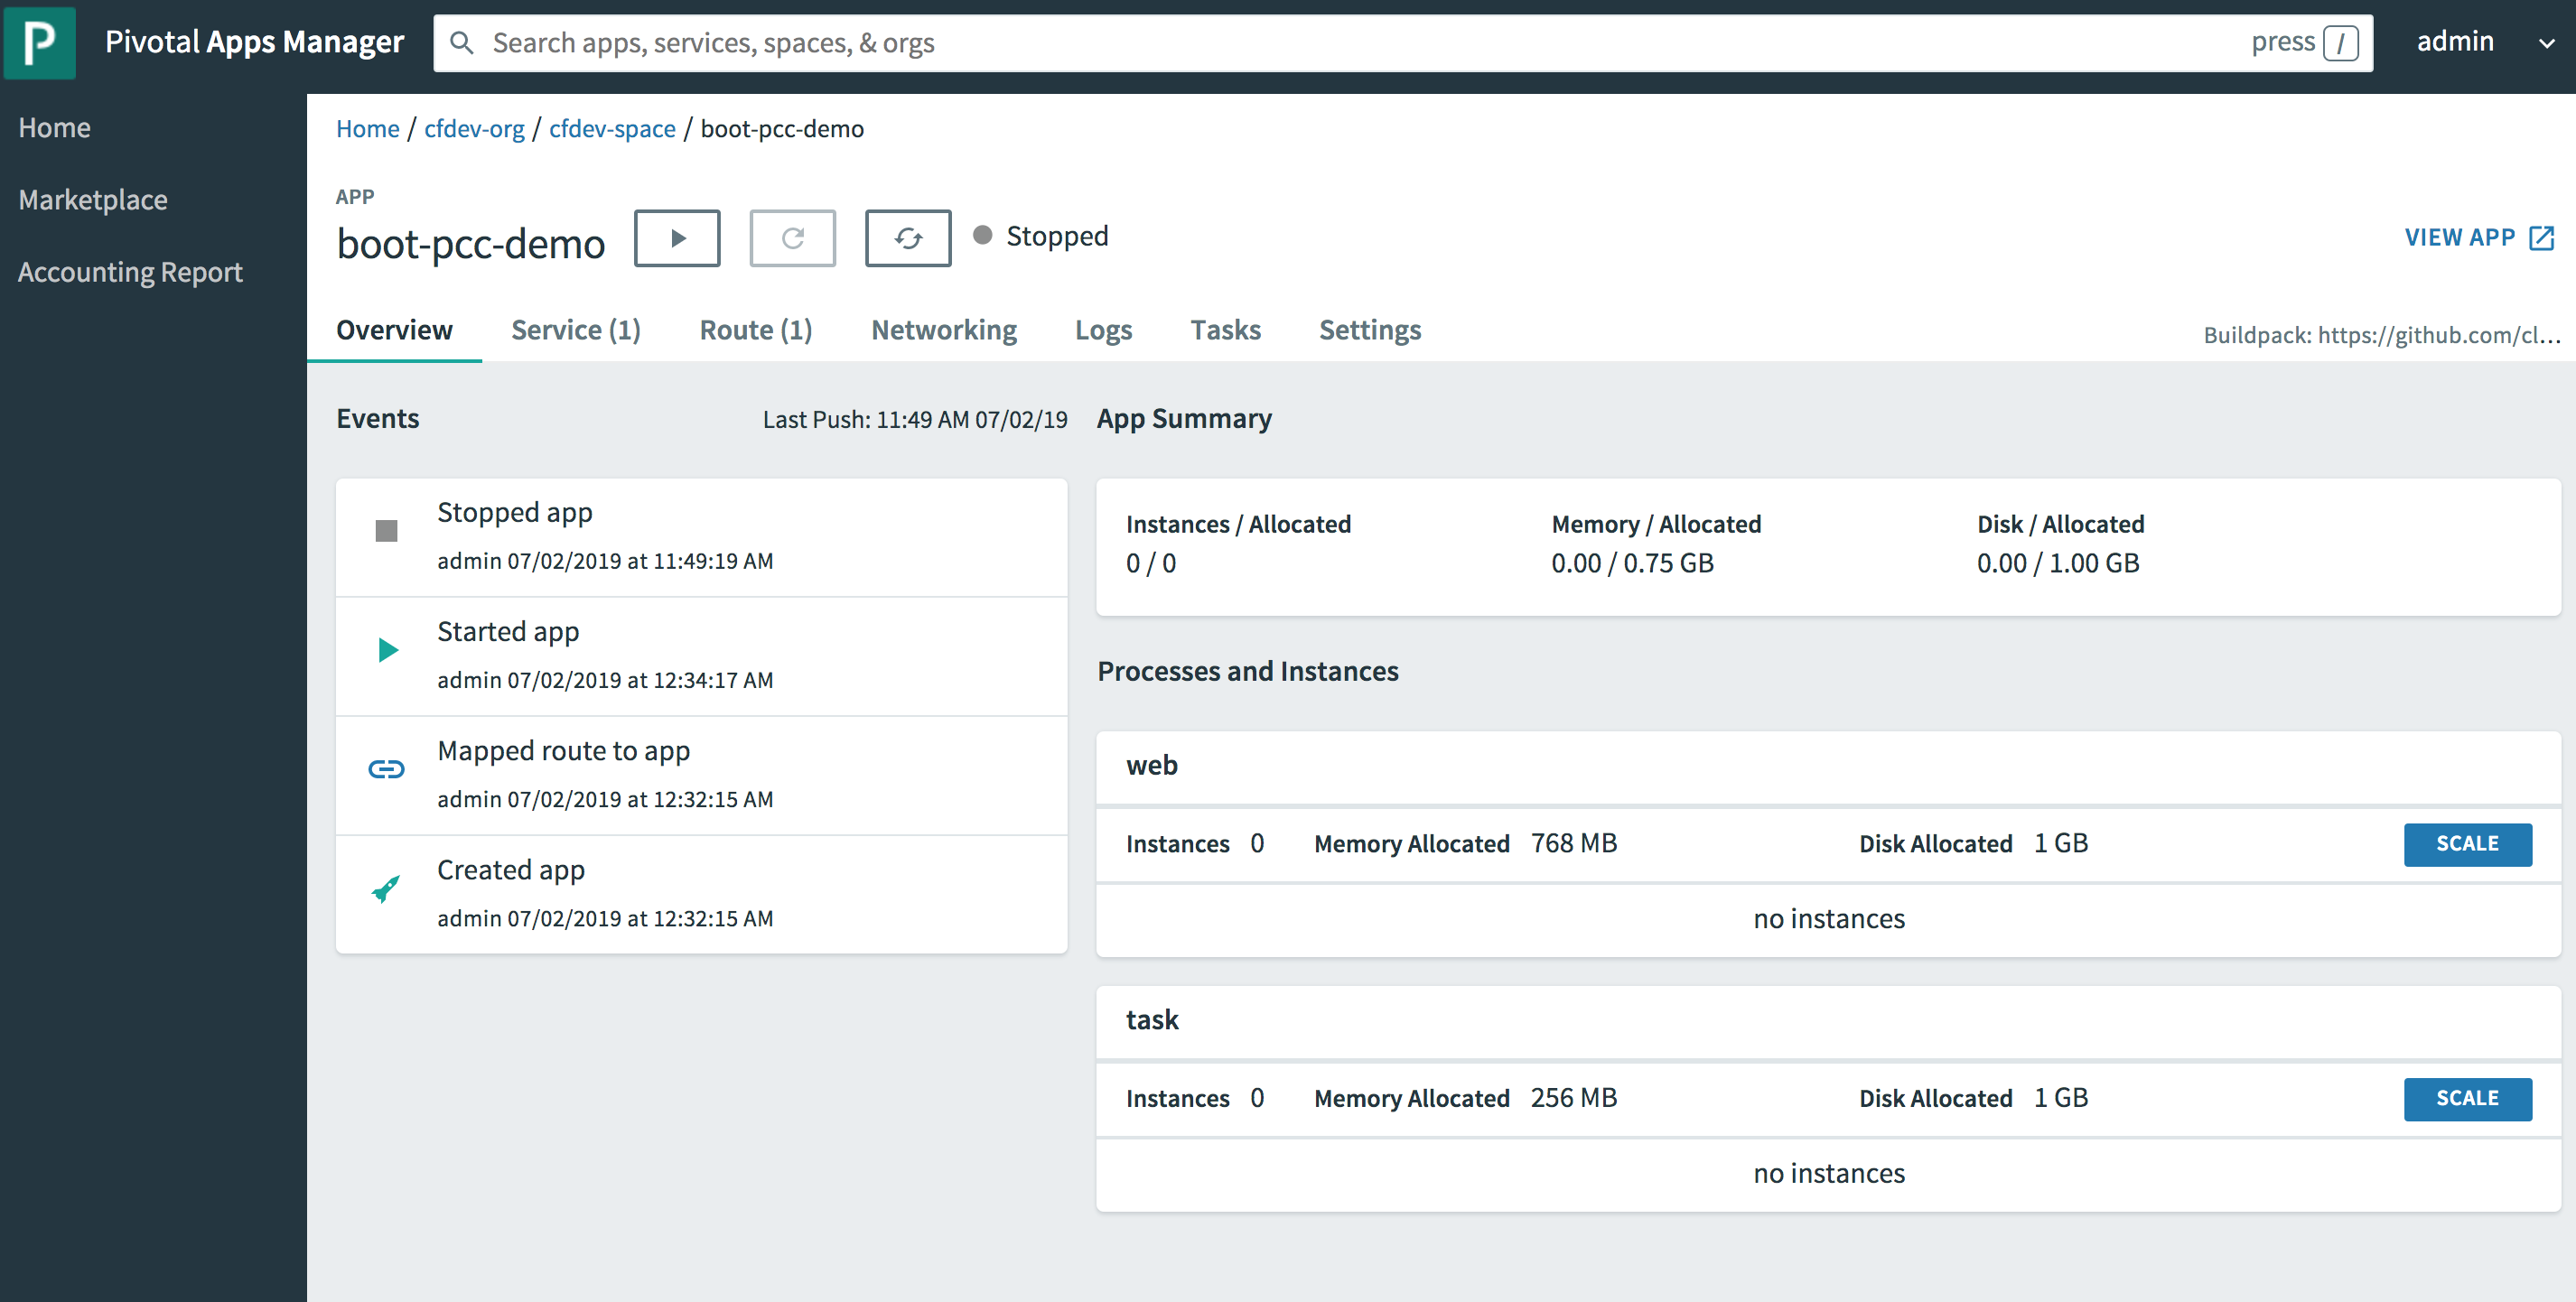
You can also review the application Settings. Specifically, we are looking at the configuration of the applicatinon
once it is bound to the apacheGeodeService, as seen in the VCAP_SERVICES environment variable:
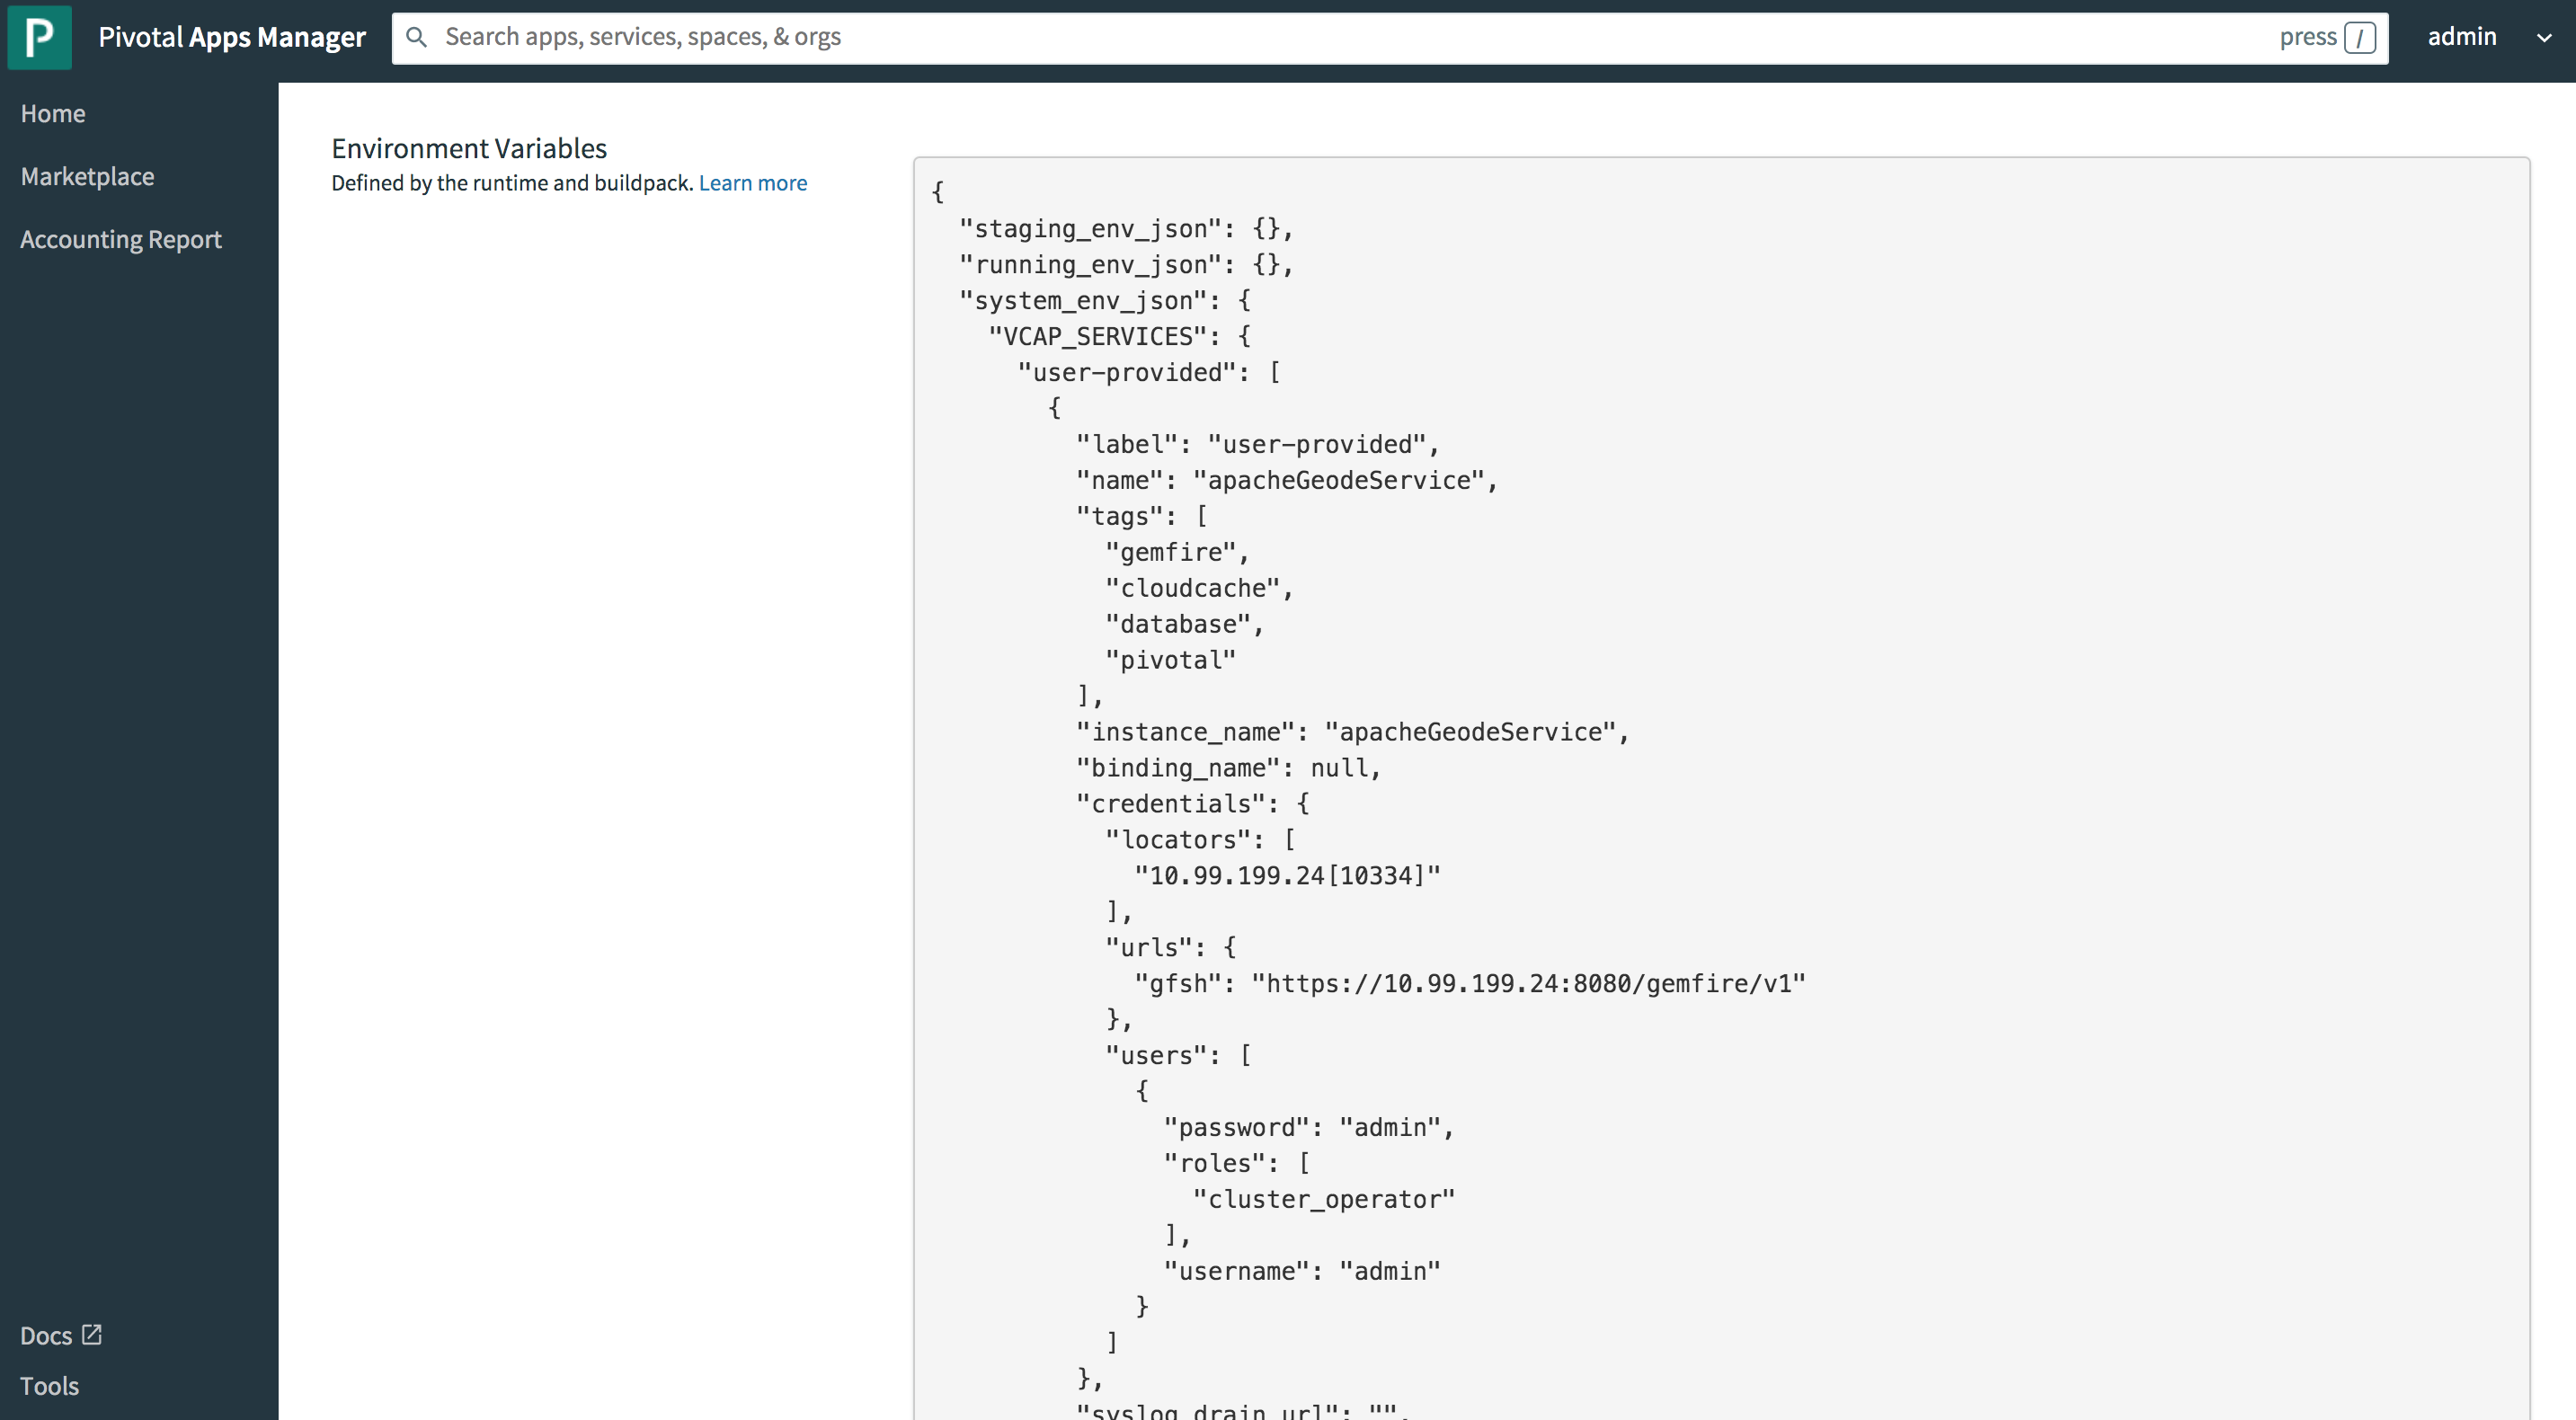
This JSON document structure is not unlike the configuration used to bind your Spring Boot ClientCache application
to the Pivotal Cloud Cache service when deploying the same application to Pivotal CloudFoundry. This is actually key if you want to
minimize the amount of boilerplate code and configuration changes when you migrate between different CloudFoundry
environments, even Open Source CloudFoundry.
Again, SBDG’s goal is to simply the effort for you to build, run, and manage your application, in whatever context your application lands, even if it changes later. If you follow the steps in this documentation, you can realize that goal.
23.4.5. Running the Spring Boot application
All that is left to do now is run the application.
You can start the PCCDemo application from the cf CLI by using the following command:
$ cf start boot-pcc-demoAlternatively, you can also start the application from Apps Manager. This is convenient, since you can then tail and monitor the application log file.
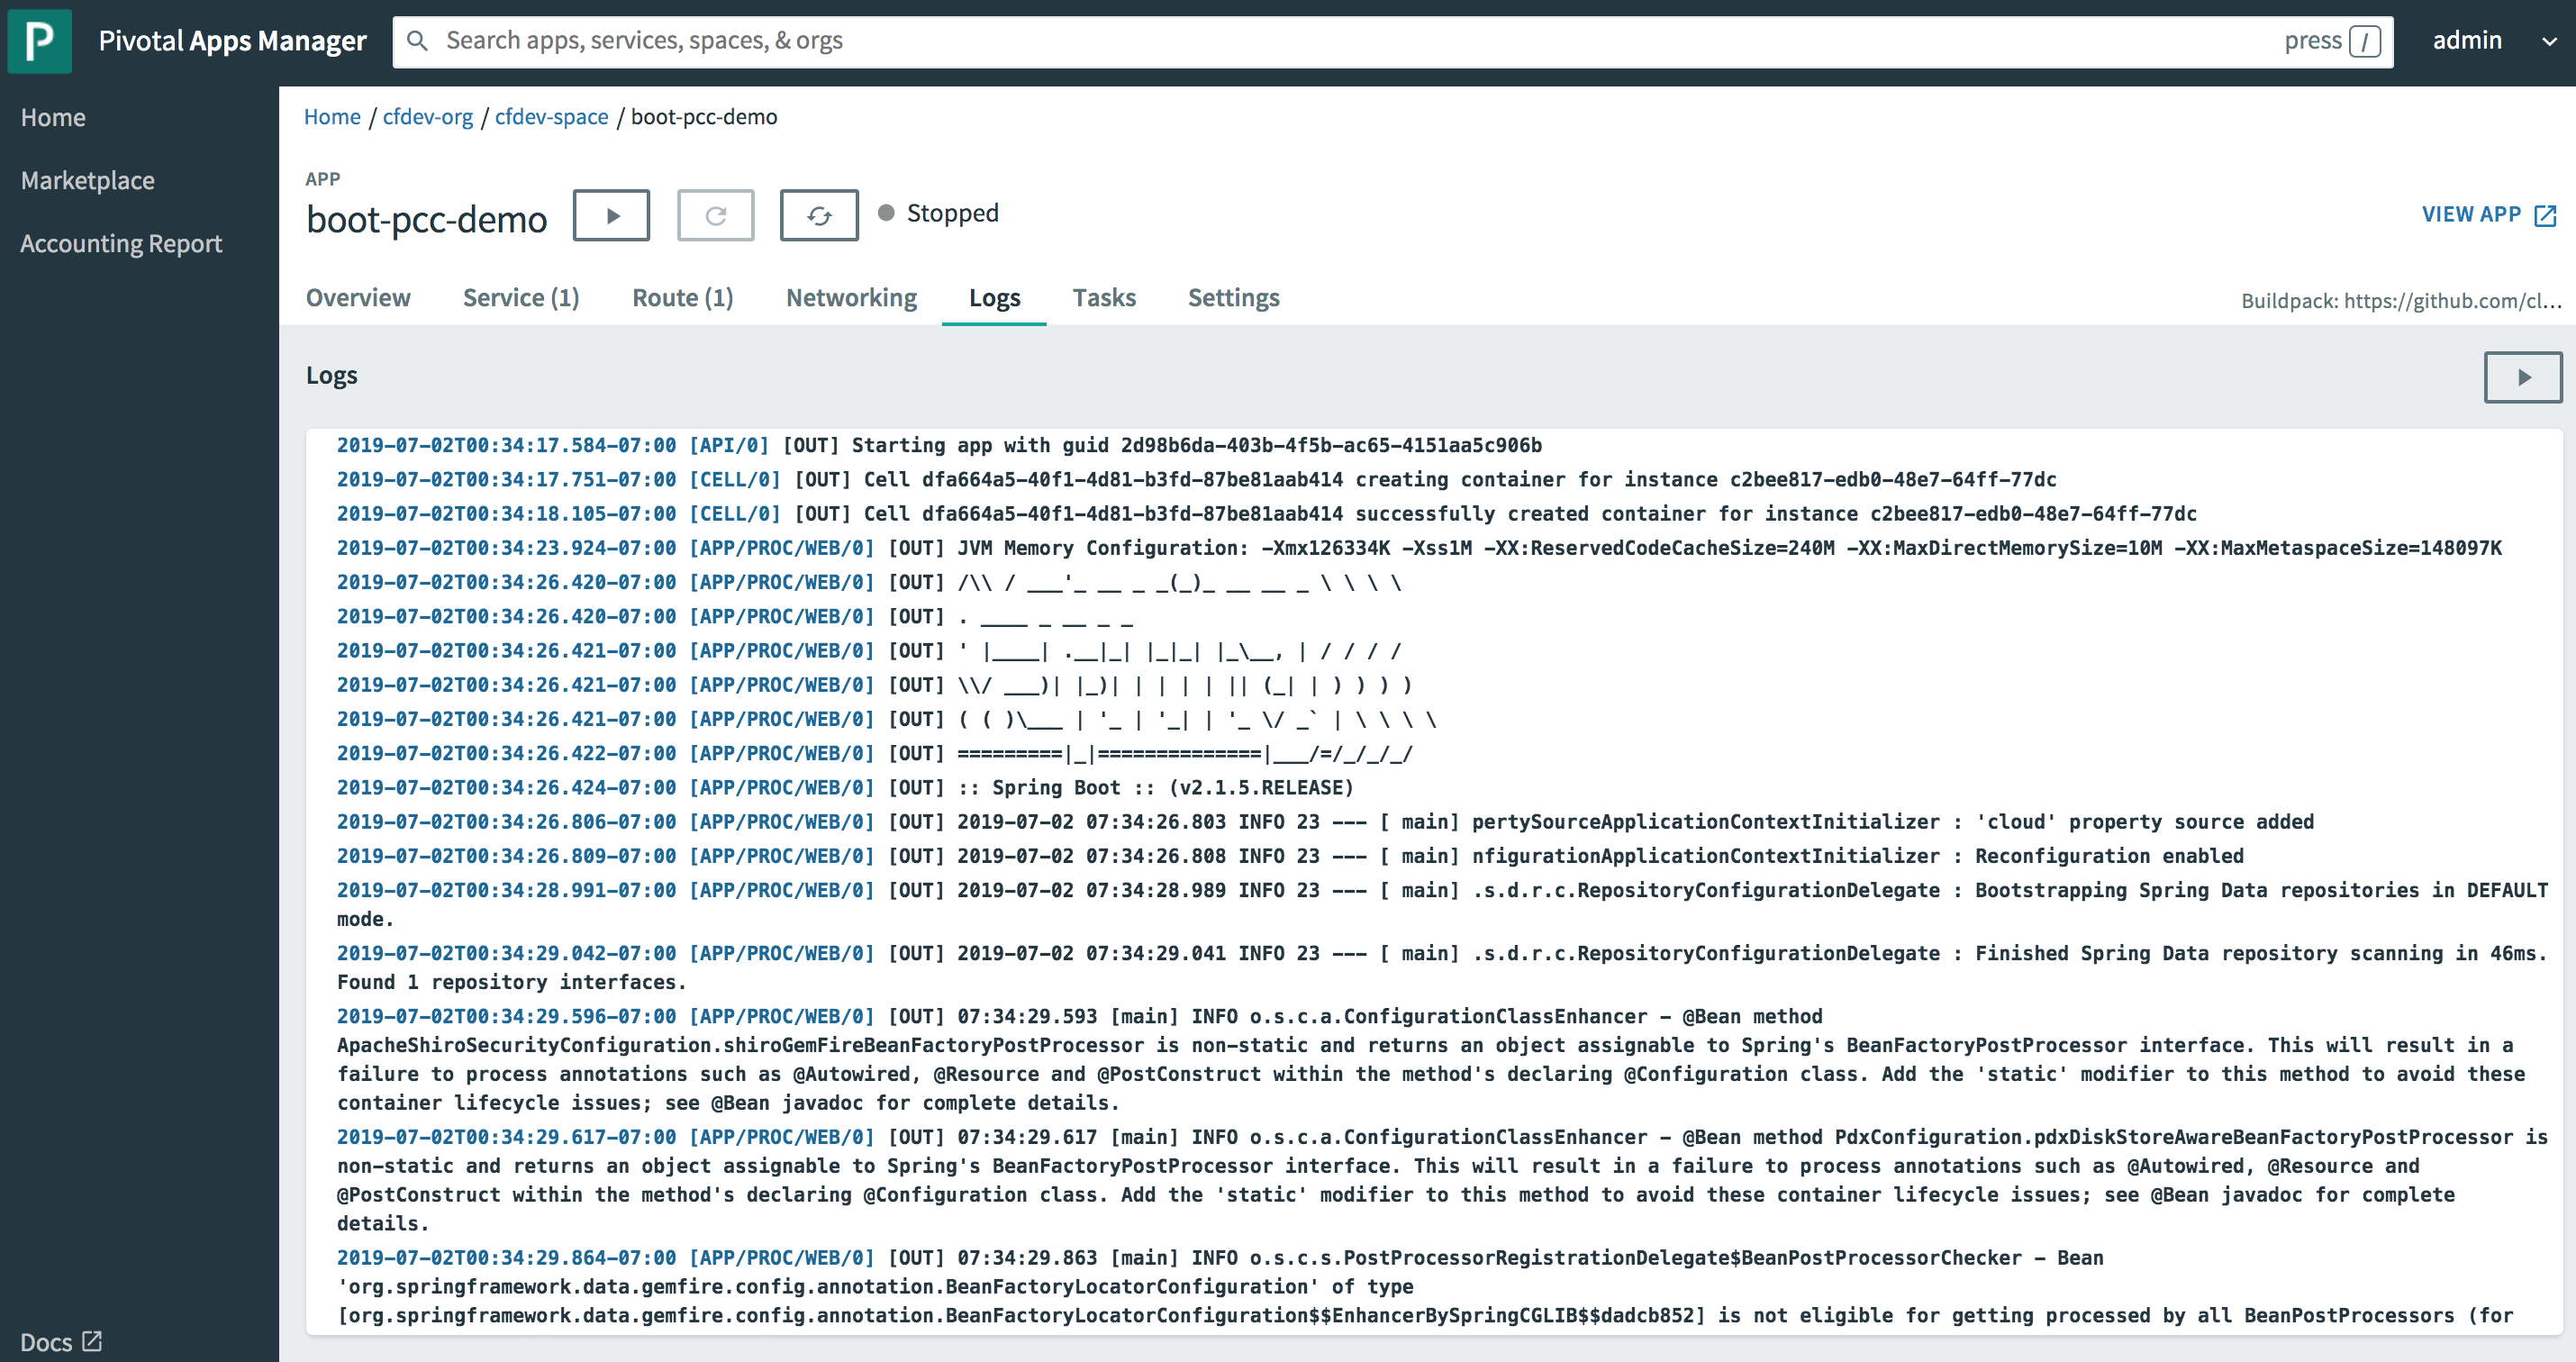
Once the application has started, you can click the VIEW APP link
in the upper right corner of the APP screen.
You can navigate to any of the application Web Service, Controller endpoints. For example, if you know the ISBN of a book, you can access it from your Web browser:

You can also access the same data from the Gfsh command-line tool. However, the first thing to observe is that our
application informed the cluster that it needed a Region called Books:
gfsh>list regions
List of regions
---------------
Books
gfsh>describe region --name=/Books
..........................................................
Name : Books
Data Policy : partition
Hosting Members : ServerOne
Non-Default Attributes Shared By Hosting Members
Type | Name | Value
------ | ----------- | ---------
Region | size | 1
| data-policy | PARTITIONThe PCCDemo app creates fake data on startup, which we can query in Gfsh:
gfsh>query --query="SELECT book.isbn, book.title FROM /Books book"
Result : true
Limit : 100
Rows : 1
isbn | title
------------- | ---------------------
1235432BMF342 | The Torment of Others23.5. Summary
The ability to deploy Spring Boot, Apache Geode ClientCache applications to Pivotal CloudFoundry yet connect your application to
an externally managed, standalone Apache Geode cluster is powerful.
Indeed, this is a useful arrangement and stepping stone for many users as they begin their journey towards Cloud-Native platforms such as Pivotal CloudFoundry and using services such as Pivotal Cloud Cache.
Later, when you need to work with real (rather than sample) applications, you can migrate your Spring Boot applications to a fully managed and production-grade Pivotal CloudFoundry environment, and SBDG figures out what to do, leaving you to focus entirely on your application.
24. Docker
The state of modern software application development is moving towards containerization. Containers offer a controlled environment to predictably build (compile, configure and package), run, and manage your applications in a reliable and repeatable manner, regardless of context. In many situations, the intrinsic benefit of using containers is obvious.
Understandably, Docker’s popularity took off like wildfire, given its highly powerful and simplified model for creating, using and managing containers to run packaged applications.
Docker’s ecosystem is also quite impressive, with the advent of Testcontainers and Spring Boot’s now dedicated support to create packaged Spring Boot applications in Docker images that are then later run in a Docker container.
| See also “Deploying to Containers” to learn more. |
Apache Geode can also run in a controlled, containerized environment. The goal of this chapter is to get you started running Apache Geode in a container and interfacing to a containerized Apache Geode cluster from your Spring Boot, Apache Geode client applications.
This chapter does not cover how to run your Spring Boot, Apache Geode client applications in a container, since that is already covered by Spring Boot (again, see the Spring Boot documentation for Docker images and container deployment, along with Docker’s documentation). Instead, our focus is on how to run an Apache Geode cluster in a container and connect to it from a Spring Boot, Apache Geode client application, regardless of whether the application runs in a container or not.
24.1. Acquiring the Apache Geode Docker Image
To run an Apache Geode cluster inside a Docker container, you must first acquire the Docker image. You can get the Apache Geode Docker image from Docker Hub.
While Apache Geode’s official documentation is less than clear on how to use Apache Geode in Docker, we find a bit of relief in the Wiki. However, for a complete and comprehensive write up, see the instructions in the README from this GitHub Repo.
| You must have Docker installed on your computer to complete the following steps. |
Effectively, the high-level steps are as follows:
1) Acquire the Apache Geode Docker image from Docker Hub by using the docker pull command (shown with typical output)
from the command-line:
$ docker pull apachegeode/geode
Using default tag: latest
latest: Pulling from apachegeode/geode
Digest: sha256:6a6218f22a2895bb706175727c7d76f654f9162acac22b2d950d09a2649f9cf4
Status: Image is up to date for apachegeode/geode:latest
docker.io/apachegeode/geode:latestInstead of pulling from the nightly tag as suggested, the Spring team highly recommends that you pull from
the latest tag, which pulls a stable, production-ready Apache Geode Docker image based on the latest Apache Geode
GA version.
2) Verify that the Apache Geode Docker image was downloaded and installed successfully:
$ docker image ls
REPOSITORY TAG IMAGE ID CREATED SIZE
apachegeode/geode latest a2e210950712 2 months ago 224MB
cloudfoundry/run base-cnb 3a7d172559c2 8 weeks ago 71.2MB
open-liberty 19.0.0.9-webProfile8 dece75feff1a 3 months ago 364MB
tomee 11-jre-8.0.0-M3-webprofile 0d03e4d395e6 3 months ago 678MB
...Now you are ready to run Apache Geode in a Docker container.
24.2. Running Apache Geode in a Docker Container
Now that you have acquired the Apache Geode Docker image, you can run Apache Geode in a Docker container.
Use the following docker run command to start Apache Geode in a Docker container:
$ docker run -it -p 10334:10334 -p 40404:40404 -p 1099:1099 -p 7070:7070 -p 7575:7575 apachegeode/geode
_________________________ __
/ _____/ ______/ ______/ /____/ /
/ / __/ /___ /_____ / _____ /
/ /__/ / ____/ _____/ / / / /
/______/_/ /______/_/ /_/ 1.12.0
Monitor and Manage Apache Geode
gfsh>Since the Apache Geode Docker container was started in interactive mode, you must open a separate command-line shell to verify that the Apache Geode Docker container is in fact running:
$ docker container ls
CONTAINER ID IMAGE COMMAND CREATED STATUS PORTS NAMES
3b30b9ffc5dc apachegeode/geode "gfsh" 44 seconds ago Up 43 seconds 0.0.0.0:1099->1099/tcp, 0.0.0.0:7070->7070/tcp, 0.0.0.0:7575->7575/tcp, 0.0.0.0:10334->10334/tcp, 0.0.0.0:40404->40404/tcp, 8080/tcp awesome_khoranaYou know that the Apache Geode Docker container is running since we ended up at a Gfsh command prompt in the interactive shell.
We also mapped ports between the Docker container and the host system, exposing well-known ports used by Apache Geode server-side cluster processes, such as Locators and CacheServers:
| Process | Port |
|---|---|
HTTP |
7070 |
Locator |
10334 |
Manager |
1099 |
Server |
40404 |
It is unfortunate that the Apache Geode Docker image gives you only a Gfsh command prompt, leaving you with the task of provisioning a cluster. It would have been more useful to provide preconfigured Docker images with different Apache Geode cluster configurations, such as one Locator and one server or two Locators and four servers, and so on. However, we can start the cluster ourselves.
24.3. Start an Apache Geode Cluster in Docker
From inside the Apache Geode Docker container, we can start a Locator and a server:
gfsh>start locator --name=LocatorOne --log-level=config --hostname-for-clients=localhost
Starting a Geode Locator in /LocatorOne...
.........
Locator in /LocatorOne on 3b30b9ffc5dc[10334] as LocatorOne is currently online.
Process ID: 167
Uptime: 9 seconds
Geode Version: 1.12.0
Java Version: 1.8.0_212
Log File: /LocatorOne/LocatorOne.log
JVM Arguments: -Dgemfire.enable-cluster-configuration=true -Dgemfire.load-cluster-configuration-from-dir=false -Dgemfire.log-level=config -Dgemfire.launcher.registerSignalHandlers=true -Djava.awt.headless=true -Dsun.rmi.dgc.server.gcInterval=9223372036854775806
Class-Path: /geode/lib/geode-core-1.12.0.jar:/geode/lib/geode-dependencies.jar
Successfully connected to: JMX Manager [host=3b30b9ffc5dc, port=1099]
Cluster configuration service is up and running.
gfsh>start server --name=ServerOne --log-level=config --hostname-for-clients=localhost
Starting a Geode Server in /ServerOne...
.......
Server in /ServerOne on 3b30b9ffc5dc[40404] as ServerOne is currently online.
Process ID: 267
Uptime: 7 seconds
Geode Version: 1.12.0
Java Version: 1.8.0_212
Log File: /ServerOne/ServerOne.log
JVM Arguments: -Dgemfire.default.locators=172.17.0.2[10334] -Dgemfire.start-dev-rest-api=false -Dgemfire.use-cluster-configuration=true -Dgemfire.log-level=config -Dgemfire.launcher.registerSignalHandlers=true -Djava.awt.headless=true -Dsun.rmi.dgc.server.gcInterval=9223372036854775806
Class-Path: /geode/lib/geode-core-1.12.0.jar:/geode/lib/geode-dependencies.jar
gfsh>list members
Member Count : 2
Name | Id
---------- | --------------------------------------------------------------
LocatorOne | 172.17.0.2(LocatorOne:167:locator)<ec><v0>:41000 [Coordinator]
ServerOne | 172.17.0.2(ServerOne:267)<v1>:41001
gfsh>describe member --name=LocatorOne
Name : LocatorOne
Id : 172.17.0.2(LocatorOne:167:locator)<ec><v0>:41000
Host : 3b30b9ffc5dc
Regions :
PID : 167
Groups :
Used Heap : 50M
Max Heap : 443M
Working Dir : /LocatorOne
Log file : /LocatorOne/LocatorOne.log
Locators : 172.17.0.2[10334]
gfsh>describe member --name=ServerOne
Name : ServerOne
Id : 172.17.0.2(ServerOne:267)<v1>:41001
Host : 3b30b9ffc5dc
Regions :
PID : 267
Groups :
Used Heap : 77M
Max Heap : 443M
Working Dir : /ServerOne
Log file : /ServerOne/ServerOne.log
Locators : 172.17.0.2[10334]
Cache Server Information
Server Bind :
Server Port : 40404
Running : true
Client Connections : 0We now have an Apache Geode cluster running with one Locator and one server inside a Docker container. We deliberately started the cluster with a minimal configuration. For example, we have no Regions in which to store data:
gfsh>list regions
No Regions FoundHowever, that is OK. Once more, we want to show the full power of SBDG and let the Spring Boot application drive the configuration of the Apache Geode cluster that runs in the Docker container, as required by the application.
Let’s have a quick look at our Spring Boot application.
24.4. Spring Boot, Apache Geode Client Application Explained
The Spring Boot, Apache Geode ClientCache application we use to connect to our Apache Geode cluster that runs in
the Docker container appears as follows:
@SpringBootApplication
@EnableClusterAware
@EnableEntityDefinedRegions(basePackageClasses = Customer.class)
@UseMemberName("SpringBootApacheGeodeDockerClientCacheApplication")
public class SpringBootApacheGeodeDockerClientCacheApplication {
public static void main(String[] args) {
SpringApplication.run(SpringBootApacheGeodeDockerClientCacheApplication.class, args);
}
@Bean
@SuppressWarnings("unused")
ApplicationRunner runner(GemFireCache cache, CustomerRepository customerRepository) {
return args -> {
assertClientCacheAndConfigureMappingPdxSerializer(cache);
assertThat(customerRepository.count()).isEqualTo(0);
Customer jonDoe = Customer.newCustomer(1L, "Jon Doe");
log("Saving Customer [%s]...%n", jonDoe);
jonDoe = customerRepository.save(jonDoe);
assertThat(jonDoe).isNotNull();
assertThat(jonDoe.getId()).isEqualTo(1L);
assertThat(jonDoe.getName()).isEqualTo("Jon Doe");
assertThat(customerRepository.count()).isEqualTo(1);
log("Querying for Customer [SELECT * FROM /Customers WHERE name LIKE '%s']...%n", "%Doe");
Customer queriedJonDoe = customerRepository.findByNameLike("%Doe");
assertThat(queriedJonDoe).isEqualTo(jonDoe);
log("Customer was [%s]%n", queriedJonDoe);
};
}
private void assertClientCacheAndConfigureMappingPdxSerializer(GemFireCache cache) {
assertThat(cache).isNotNull();
assertThat(cache.getName())
.isEqualTo(SpringBootApacheGeodeDockerClientCacheApplication.class.getSimpleName());
assertThat(cache.getPdxSerializer()).isInstanceOf(MappingPdxSerializer.class);
MappingPdxSerializer serializer = (MappingPdxSerializer) cache.getPdxSerializer();
serializer.setIncludeTypeFilters(type -> Optional.ofNullable(type)
.map(Class::getPackage)
.map(Package::getName)
.filter(packageName -> packageName.startsWith(this.getClass().getPackage().getName()))
.isPresent());
}
private void log(String message, Object... args) {
System.err.printf(message, args);
System.err.flush();
}
}Our Customer application domain model object type is defined as:
Customer class@Region("Customers")
class Customer {
@Id
private Long id;
private String name;
}Also, we define a Spring Data CRUD Repository to persist and access Customers stored in the /Customers Region:
CustomerRepository interfaceinterface CustomerRepository extends CrudRepository<Customer, Long> {
Customer findByNameLike(String name);
}Our main class is annotated with @SpringBootApplication, making it be a proper Spring Boot application.
We additionally annotate the main class with SBDG’s @EnableClusterAware annotation to automatically detect
the Apache Geode cluster that runs in the Docker container and to push cluster configuration metadata from
the application to the cluster as required by the application.
Specifically, the application requires that a Region called “Customers”, as defined by the @Region mapping
annotation on the Customer application domain model class, exists on the servers in the cluster, to store Customer
data.
We use the SDG @EnableEntityDefinedRegions annotation to define the matching client PROXY “Customers” Region.
Optionally, we have also annotated our main class with SBDG’s @UseMemberName annotation to give the ClientCache
a name, which we assert in the assertClientCacheAndConfigureMappingPdxSerializer(:ClientCache) method.
The primary work performed by this application is done in the Spring Boot ApplicationRunner bean definition. We create
a Customer instance (Jon Doe), save it to the “Customers” Region that is managed by the server in the cluster,
and then query for Jon Doe using OQL, asserting that the result is equal to what we expect.
We log the output from the application’s operations to see the application in action.
24.5. Running the Spring Boot, Apache Geode client application
When you run the Spring Boot, Apache Geode client application, you should see output similar to the following:
/Library/Java/JavaVirtualMachines/jdk1.8.0_241.jdk/Contents/Home/bin/java ...
org.springframework.geode.docs.example.app.docker.SpringBootApacheGeodeDockerClientCacheApplication
. ____ _ __ _ _
/\\ / ___'_ __ _ _(_)_ __ __ _ \ \ \ \
( ( )\___ | '_ | '_| | '_ \/ _` | \ \ \ \
\\/ ___)| |_)| | | | | || (_| | ) ) ) )
' |____| .__|_| |_|_| |_\__, | / / / /
=========|_|==============|___/=/_/_/_/
:: Spring Boot :: (v2.3.0.RELEASE)
Saving Customer [Customer(name=Jon Doe)]...
Querying for Customer [SELECT * FROM /Customers WHERE name LIKE '%Doe']...
Customer was [Customer(name=Jon Doe)]
Process finished with exit code 0When we review the configuration of the cluster, we see that the /Customers Region was created when the application
ran:
gfsh>list regions
List of regions
---------------
Customers
gfsh>describe region --name=/Customers
Name : Customers
Data Policy : partition
Hosting Members : ServerOne
Non-Default Attributes Shared By Hosting Members
Type | Name | Value
------ | ----------- | ---------
Region | size | 1
| data-policy | PARTITIONOur /Customers Region contains a value (Jon Doe), and we can verify this by running the following OQL Query
with Gfsh:
/Customers Regiongfsh>query --query="SELECT customer.name FROM /Customers customer"
Result : true
Limit : 100
Rows : 1
Result
-------
Jon DoeOur application ran successfully.
24.6. Conclusion
In this chapter, we saw how to connect a Spring Boot, Apache Geode ClientCache application to an Apache Geode cluster
that runs in a Docker container.
Later, we provide more information on how to scale up, or rather scale out, our Apache Geode cluster that runs in Docker. Additionally, we provide details on how you can use Apache Geode’s Docker image with Testcontainers when you write integration tests, which formally became part of the Spring Test for Apache Geode (STDG) project.
25. Samples
This section contains working examples that show how to use Spring Boot for Apache Geode (SBDG) effectively.
Some examples focus on specific use cases (such as (HTTP) session state caching), while other examples show how SBDG works under the hood, to give you a better understanding of what is actually happening and how to debug problems with your Spring Boot Apache Geode applications.
| Guide | Description | Source |
|---|---|---|
Explains how to get started quickly, easily, and reliably building Apache Geode powered applications with Spring Boot. |
||
Explains what auto-configuration is provided by SBDG and what the auto-configuration does. |
||
Explains how to use Spring Boot Actuator for Apache Geode and how it works. |
||
Explains how to configure auth and TLS with SSL when you use Apache Geode in your Spring Boot applications. |
||
Look-Aside Caching with Spring’s Cache Abstraction and Apache Geode |
Explains how to enable and use Spring’s Cache Abstraction with Apache Geode as the caching provider for look-aside caching. |
|
Inline Caching with Spring’s Cache Abstraction and Apache Geode |
Explains how to enable and use Spring’s Cache Abstraction with Apache Geode as the caching provider for inline caching. This sample builds on the look-aside caching sample. |
|
Asynchronous Inline Caching with Spring’s Cache Abstraction and Apache Geode |
Explains how to enable and use Spring’s Cache Abstraction with Apache Geode as the caching provider for asynchronous inline caching. This sample builds on the look-aside and inline caching samples. |
|
Near Caching with Spring’s Cache Abstraction and Apache Geode |
Explains how to enable and use Spring’s Cache Abstraction with Apache Geode as the caching provider for near caching. This sample builds on the look-aside caching sample. |
|
Multi-Site Caching with Spring’s Cache Abstraction and Apache Geode |
Explains how to enable and use Spring’s Cache Abstraction with Apache Geode as the caching provider for multi-site caching. This sample builds on the look-aside caching sample. |
|
Explains how to enable and use Spring Session with Apache Geode to manage HTTP session state. |
26. Appendix
The following appendices provide additional help while developing Spring Boot applications backed by Apache Geode:
Auto-configuration vs. Annotation-based configuration
The question most often asked is, “What Spring Data for Apache Geode (SDG) annotations can I use, or must I use, when developing Apache Geode applications with Spring Boot?”
This section answers this question and more.
See the complementary sample, Spring Boot Auto-configuration for Apache Geode, which shows the auto-configuration provided by Spring Boot for Apache Geode in action.
Background
To help answer this question, you must start by reviewing the complete collection of available Spring Data for
Apache Geode (SDG) annotations. These annotations are provided in the
org.springframework.data.gemfire.config.annotation
package. Most of the essential annotations begin with @Enable…, except for the base annotations:
@ClientCacheApplication, @PeerCacheApplication and @CacheServerApplication.
By extension, Spring Boot for Apache Geode (SBDG) builds on SDG’s annotation-based configuration model to implement auto-configuration and apply Spring Boot’s core concepts, such as “convention over configuration”, letting Apache Geode applications be built with Spring Boot reliably, quickly, and easily.
SDG provides this annotation-based configuration model to, first and foremost, give application developers “choice” when building Spring applications with Apache Geode. SDG makes no assumptions about what application developers are trying to create and fails fast anytime the configuration is ambiguous, giving users immediate feedback.
Second, SDG’s annotations were meant to get application developers up and running quickly and reliably with ease. SDG accomplishes this by applying sensible defaults so that application developers need not know, or even have to learn, all the intricate configuration details and tooling provided by Apache Geode to accomplish simple tasks, such as building a prototype.
So, SDG is all about “choice” and SBDG is all about “convention”. Together these frameworks provide application developers with convenience and ease to move quickly and reliably.
To learn more about the motivation behind SDG’s annotation-based configuration model, see the Reference Documentation.
Conventions
Currently, SBDG provides auto-configuration for the following features:
-
ClientCache -
Caching with Spring’s Cache Abstraction
-
Continuous Query
-
Function Execution and Implementation
-
Logging
-
PDX
-
GemfireTemplate -
Spring Data Repositories
-
Security (Client/server auth and SSL)
-
Spring Session
This means the following SDG annotations are not required to use the features above:
-
@ClientCacheApplication -
@EnableGemfireCaching(or by using Spring Framework’s@EnableCachingannotation) -
@EnableContinuousQueries -
@EnableGemfireFunctionExecutions -
@EnableGemfireFunctions -
@EnableLogging -
@EnablePdx -
@EnableGemfireRepositories -
@EnableSecurity -
@EnableSsl -
@EnableGemFireHttpSession
Since SBDG auto-configures these features for you, the above annotations are not strictly required. Typically, you would only declare one of these annotations when you want to “override” Spring Boot’s conventions, as expressed in auto-configuration, and “customize” the behavior of the feature.
Overriding
In this section, we cover a few examples to make the behavior when overriding more apparent.
Caches
By default, SBDG provides you with a ClientCache instance. SBDG accomplishes this by annotating an auto-configuration
class with @ClientCacheApplication internally.
By convention, we assume most application developers' are developing Spring Boot applications by using Apache Geode as “client” applications in Apache Geode’s client/server topology. This is especially true as users migrate their applications to a managed cloud environment.
Still, you can “override” the default settings (convention) and declare your Spring applications to be actual peer
Cache members (nodes) of a Apache Geode cluster, instead:
Cache Application@SpringBootApplication
@CacheServerApplication
class SpringBootApacheGeodePeerCacheServerApplication { }By declaring the @CacheServerApplication annotation, you effectively override the SBDG default. Therefore, SBDG
does not provide you with a ClientCache instance by default, because you have informed SBDG of exactly what you want:
a peer Cache instance hosting an embedded CacheServer that allows client connections.
However, you then might ask, “Well, how do I customize the ClientCache instance when developing client applications
without explicitly declaring the @ClientCacheApplication annotation?”
First, you can “customize” the ClientCache instance by explicitly declaring the @ClientCacheApplication annotation
in your Spring Boot application configuration and setting specific attributes as needed. However, you should be aware
that, by explicitly declaring this annotation, (or, by default, any of the other auto-configured annotations), you
assume all the responsibility that comes with it, since you have effectively overridden the auto-configuration. One
example of this is security, which we touch on more later.
The most ideal way to “customize” the configuration of any feature is by way of the well-known and documented
properties, specified in Spring Boot application.properties (the “convention”),
or by using a Configurer.
See the Reference Guide for more detail.
Security
As with the @ClientCacheApplication annotation, the @EnableSecurity annotation is not strictly required, unless you
want to override and customize the defaults.
Outside a managed environment, the only security configuration required is specifying a username and password. You do
this by using the well-known and documented SDG username and password properties in Spring Boot application.properties:
spring.data.gemfire.security.username=MyUser
spring.data.gemfire.security.password=SecretYou need not explicitly declare the @EnableSecurity annotation just to specify security configuration (such as
username and password).
Inside a managed environment, such as the VMware Tanzu Application Service (TAS) when using VMware Tanzu GemFire, SBDG is able to introspect the environment and configure security (auth) completely without the need to specify any configuration, usernames and passwords, or otherwise. This is due, in part, because TAS supplies the security details in the VCAP environment when the application is deployed to TAS and bound to services (such as VMware Tanzu GemFire).
So, in short, you need not explicitly declare the @EnableSecurity annotation (or @ClientCacheApplication).
However, if you do explicitly declare the @ClientCacheApplication or @EnableSecurity annotations, you are now
responsible for this configuration, and SBDG’s auto-configuration no longer applies.
While explicitly declaring @EnableSecurity makes more sense when “overriding” the SBDG security auto-configuration,
explicitly declaring the @ClientCacheApplication annotation most likely makes less sense with regard to its impact
on security configuration.
This is entirely due to the internals of Apache Geode, because, in certain cases (such as security), not even Spring is able to completely shield you from the nuances of Apache Geode’s configuration. No framework can.
You must configure both auth and SSL before the cache instance (whether a ClientCache or a peer Cache) is created.
This is because security is enabled and configured during the “construction” of the cache. Also,, the cache pulls
the configuration from JVM System properties that must be set before the cache is constructed.
Structuring the “exact” order of the auto-configuration classes provided by SBDG when the classes are triggered, is no
small feat. Therefore, it should come as no surprise to learn that the security auto-configuration classes in SBDG must
be triggered before the ClientCache auto-configuration class, which is why a ClientCache instance cannot “auto”
authenticate properly in PCC when the @ClientCacheApplication is explicitly declared without some assistance. In other
words you must also explicitly declare the @EnableSecurity annotation in this case, since you overrode the
auto-configuration of the cache, and implicitly security, as well.
Again, this is due to the way security (auth) and SSL metadata must be supplied to Apache Geode on startup.
See the Reference Guide for more details.
Extension
Most of the time, many of the other auto-configured annotations for CQ, Functions, PDX, Repositories, and so on need not ever be declared explicitly.
Many of these features are enabled automatically by having SBDG or other libraries (such as Spring Session) on
the application classpath or are enabled based on other annotations applied to beans in the Spring ApplicationContext.
We review a few examples in the following sections.
Caching
It is rarely, if ever, necessary to explicitly declare either the Spring Framework’s @EnableCaching or the
SDG-specific @EnableGemfireCaching annotation in Spring configuration when you use SBDG. SBDG automatically
enables caching and configures the SDG GemfireCacheManager for you.
You need only focus on which application service components are appropriate for caching:
@Service
class CustomerService {
@Autowired
private CustomerRepository customerRepository;
@Cacheable("CustomersByName")
public Customer findBy(String name) {
return customerRepository.findByName(name);
}
}You need to create Apache Geode Regions that back the caches declared in your application service components
(CustomersByName in the preceding example) by using Spring’s caching annotations (such as @Cacheable),
or alternatively, JSR-107 JCache annotations (such as @CacheResult).
You can do that by defining each Region explicitly or, more conveniently, you can use the following approach:
@SpringBootApplication
@EnableCachingDefinedRegions
class Application { }@EnableCachingDefinedRegions is optional, provided for convenience, and complementary to caching when used rather than
being necessary.
See the Reference Guide for more detail.
Continuous Query
It is rarely, if ever, necessary to explicitly declare the SDG @EnableContinuousQueries annotation. Instead, you
should focus on defining your application queries and worry less about the plumbing.
Consider the following example:
@Component
public class TemperatureMonitor extends AbstractTemperatureEventPublisher {
@ContinuousQuery(name = "BoilingTemperatureMonitor",
query = "SELECT * FROM /TemperatureReadings WHERE temperature.measurement >= 212.0")
public void boilingTemperatureReadings(CqEvent event) {
publish(event, temperatureReading -> new BoilingTemperatureEvent(this, temperatureReading));
}
@ContinuousQuery(name = "FreezingTemperatureMonitor",
query = "SELECT * FROM /TemperatureReadings WHERE temperature.measurement <= 32.0")
public void freezingTemperatureReadings(CqEvent event) {
publish(event, temperatureReading -> new FreezingTemperatureEvent(this, temperatureReading));
}
}Apache Geode CQ applies only to clients.
See the Reference Guide for more detail.
Functions
You rarely, if ever, need to explicitly declare either the @EnableGemfireFunctionExecutions
or @EnableGemfireFunctions annotations. SBDG provides auto-configuration for both Function implementations
and executions.
You need to define the implementation:
@Component
class GeodeFunctions {
@GemfireFunction
Object exampleFunction(Object arg) {
// ...
}
}Then you need to define the execution:
@OnRegion(region = "Example")
interface GeodeFunctionExecutions {
Object exampleFunction(Object arg);
}SBDG automatically finds, configures, and registers Function implementations (POJOs) in Apache Geode as proper
Functions and creates execution proxies for the interfaces, which can then be injected into application service
components to invoke the registered Functions without needing to explicitly declare the enabling annotations.
The application Function implementations (POJOs) and executions (interfaces) should exist below
the @SpringBootApplication annotated main class.
See the Reference Guide for more detail.
PDX
You rarely, if ever, need to explicitly declare the @EnablePdx annotation, since SBDG auto-configures PDX by default.
SBDG also automatically configures the SDG MappingPdxSerializer as the default PdxSerializer.
It is easy to customize the PDX configuration by setting the appropriate properties
(search for “PDX”) in Spring Boot application.properties.
See the Reference Guide for more detail.
Spring Data Repositories
You rarely, if ever, need to explicitly declare the @EnableGemfireRepositories annotation, since SBDG auto-configures
Spring Data (SD) Repositories by default.
You need only define your Repositories:
interface CustomerRepository extends CrudRepository<Customer, Long> {
Customer findByName(String name);
}SBDG finds the Repository interfaces defined in your application, proxies them, and registers them as beans in
the Spring ApplicationContext. The Repositories can be injected into other application service components.
It is sometimes convenient to use the @EnableEntityDefinedRegions along with Spring Data Repositories to identify
the entities used by your application and define the Regions used by the Spring Data Repository infrastructure to
persist the entity’s state. The @EnableEntityDefinedRegions annotation is optional, provided for convenience,
and complementary to the @EnableGemfireRepositories annotation.
See the Reference Guide for more detail.
Explicit Configuration
Most of the other annotations provided in SDG are focused on particular application concerns or enable certain Apache Geode features, rather than being a necessity, including:
-
@EnableAutoRegionLookup -
@EnableBeanFactoryLocator -
@EnableCacheServer(s) -
@EnableCachingDefinedRegions -
@EnableClusterConfiguration -
@EnableClusterDefinedRegions -
@EnableCompression -
@EnableDiskStore(s) -
@EnableEntityDefinedRegions -
@EnableEviction -
@EnableExpiration -
@EnableGatewayReceiver -
@EnableGatewaySender(s) -
@EnableGemFireAsLastResource -
@EnableHttpService -
@EnableIndexing -
@EnableOffHeap -
@EnableLocator -
@EnableManager -
@EnableMemcachedServer -
@EnablePool(s) -
@EnableRedisServer -
@EnableStatistics -
@UseGemFireProperties
None of these annotations are necessary and none are auto-configured by SBDG. They are at your disposal when and if you need them. This also means that none of these annotations are in conflict with any SBDG auto-configuration.
Summary
In conclusion, you need to understand where SDG ends and SBDG begins. It all begins with the auto-configuration provided by SBDG.
If a feature or function is not covered by SBDG’s auto-configuration, you are responsible for enabling and configuring
the feature appropriately, as needed by your application (for example, @EnableRedisServer).
In other cases, you might also want to explicitly declare a complimentary annotation
(such as @EnableEntityDefinedRegions) for convenience, since SBDG provides no convention or opinion.
In all remaining cases, it boils down to understanding how Apache Geode works under the hood. While we go to great lengths to shield you from as many details as possible, it is not feasible or practical to address all matters, such as cache creation and security.
Configuration Metadata Reference
The following reference sections cover documented and well-known properties recognized and processed by Spring Data for Apache Geode (SDG) and Spring Session for Apache Geode (SSDG).
These properties may be used in Spring Boot application.properties or as JVM System properties, to configure different
aspects of or enable individual features of Apache Geode in a Spring application. When combined with the power of
Spring Boot, they give you the ability to quickly create an application that uses Apache Geode.
Spring Data Based Properties
The following properties all have a spring.data.gemfire.* prefix. For example, to set the cache copy-on-read
property, use spring.data.gemfire.cache.copy-on-read in Spring Boot application.properties.
| Name | Description | Default | From |
|---|---|---|---|
|
Name of the Apache Geode. |
|
|
|
Comma-delimited list of Locator endpoints formatted as: |
[] |
|
|
Enable the SDG |
|
| Name | Description | Default | From |
|---|---|---|---|
|
Configure whether a copy of an object returned from |
|
|
|
Percentage of heap at or above which the cache is considered in danger of becoming inoperable. |
||
|
Percentage of off-heap at or above which the cache is considered in danger of becoming inoperable. |
||
|
Whether to lookup Regions configured in Apache Geode native configuration and declare them as Spring beans. |
|
|
|
Percentage of heap at or above which the eviction should begin on Regions configured for HeapLRU eviction. |
||
|
Percentage of off-heap at or above which the eviction should begin on Regions configured for HeapLRU eviction. |
||
|
Configure the log-level of an Apache Geode cache. |
|
|
|
Alias for |
|
|
|
Name of a Spring bean that implements |
||
|
Comma-delimited list of Region names for which compression is configured. |
|
|
cache.off-heap.memory-size |
Determines the size of off-heap memory used by Apache Geode in megabytes (m) or gigabytes (g) — for example, |
||
|
Comma-delimited list of Region names for which off-heap is configured. |
|
| Name | Description | Default | From |
|---|---|---|---|
|
Used only for clients in a client/server installation. If set, this indicates that the client is durable and identifies the client. The ID is used by servers to reestablish any messaging that was interrupted by client downtime. |
||
|
Used only for clients in a client/server installation. Number of seconds this client can remain disconnected from its server and have the server continue to accumulate durable events for it. |
|
|
|
Whether the server should keep the durable client’s queues alive for the timeout period. |
|
| Name | Description | Default | From |
|---|---|---|---|
|
Whether a member (a Locator or Server) try to reconnect and reinitialize the cache after it has been forced out of the cluster by a network partition event or has otherwise been shunned by other members. |
|
|
|
The length, in seconds, of distributed lock leases obtained by this cache. |
|
|
|
The number of seconds a cache operation waits to obtain a distributed lock lease. |
|
|
|
The frequency (in seconds) at which a message is sent by the primary cache-server to all the secondary cache-server nodes to remove the events that have already been dispatched from the queue. |
|
|
|
The number of seconds a cache get operation can spend searching for a value. |
|
|
|
Whether this cache member node pulls its configuration metadata from the cluster-based cluster configuration service. |
|
| Name | Description | Default | From |
|---|---|---|---|
|
Whether the |
|
|
|
The IP address or hostname on which this cache server listens. |
||
|
The IP address or hostname that server locators tell to clients to indicate the IP address on which the cache server listens. |
||
|
The frequency in milliseconds at which to poll the load probe on this cache server. |
|
|
|
The maximum client connections. |
|
|
|
The maximum number of messages that can be in a client queue. |
|
|
|
The maximum number of threads allowed in this cache server to service client requests. |
||
|
The maximum amount of time between client pings. |
|
|
|
The time (in seconds) after which a message in the client queue expires. |
|
|
|
The port on which this cache server listens for clients. |
|
|
|
The buffer size of the socket connection to this |
|
|
|
The capacity of the client queue. |
|
|
|
The name of the disk store for client subscription queue overflow. |
||
|
The eviction policy that is executed when the capacity of the client subscription queue is reached. |
|
|
|
The outgoing socket connection tcp-no-delay setting. |
|
CacheServer properties can be further targeted at specific CacheServer instances by using an optional bean name
of the CacheServer bean defined in the Spring ApplicationContext. Consider the following example:
spring.data.gemfire.cache.server.[<cacheServerBeanName>].bind-address=...| Name | Description | Default | From |
|---|---|---|---|
|
Specifies the data management policy used when creating Regions on the servers in the cluster. |
| Name | Description | Default | From |
|---|---|---|---|
|
Whether to allow |
|
|
|
Whether to cause the disk files to be automatically compacted. |
|
|
|
The threshold at which an oplog becomes compactible. |
|
|
|
The system directory where the |
|
|
|
The amount of disk space allowed to store disk store (oplog) files. |
|
|
|
The critical threshold for disk usage as a percentage of the total disk volume. |
|
|
|
The warning threshold for disk usage as a percentage of the total disk volume. |
|
|
|
The maximum size (in megabytes) a single oplog (operation log) can be. |
|
|
|
The maximum number of operations that can be asynchronously queued. |
||
|
The number of milliseconds that can elapse before data written asynchronously is flushed to disk. |
|
|
|
Configures the write buffer size in bytes. |
|
DiskStore properties can be further targeted at specific DiskStore instances by setting the
DiskStore.name property.
For example, you can specify directory location of the files for a specific, named DiskStore by using:
spring.data.gemfire.disk.store.Example.directory.location=/path/to/geode/disk-stores/Example/The directory location and size of the DiskStore files can be further divided into multiple locations and size
using array syntax:
spring.data.gemfire.disk.store.Example.directory[0].location=/path/to/geode/disk-stores/Example/one
spring.data.gemfire.disk.store.Example.directory[0].size=4096000
spring.data.gemfire.disk.store.Example.directory[1].location=/path/to/geode/disk-stores/Example/two
spring.data.gemfire.disk.store.Example.directory[1].size=8192000Both the name and array index are optional, and you can use any combination of name and array index. Without a name,
the properties apply to all DiskStore instances. Without array indexes, all named DiskStore files are stored in
the specified location and limited to the defined size.
| Name | Description | Default | From |
|---|---|---|---|
|
Comma-delimited list of package names indicating the start points for the entity scan. |
| Name | Description | Default | From |
|---|---|---|---|
|
The IP address or hostname of the system NIC to which the embedded Locator is bound to listen for connections. |
||
locator.port |
The network port to which the embedded Locator will listen for connections. |
|
| Name | Description | Default | From |
|---|---|---|---|
|
The log level of an Apache Geode cache. Alias for 'spring.data.gemfire.cache.log-level'. |
|
|
|
The amount of disk space allowed to store log files. |
||
|
The pathname of the log file used to log messages. |
||
|
The maximum size of a log file before the log file is rolled. |
| Name | Description | Default | From |
|---|---|---|---|
|
Whether to use the HTTP protocol to communicate with an Apache Geode Manager. |
|
|
|
The IP address or hostname of the Apache Geode Manager that runs the HTTP service. |
||
|
The port used by the Apache Geode Manager’s HTTP service to listen for connections. |
|
| Name | Description | Default | From |
|---|---|---|---|
|
The access control list (ACL) file used by the Manager to restrict access to the JMX MBeans by the clients. |
||
manager.bind-address |
The IP address or hostname of the system NIC used by the Manager to bind and listen for JMX client connections. |
||
|
The hostname given to JMX clients to ask the Locator for the location of the Manager. |
||
|
By default, the JMX Manager lets clients without credentials connect. If this property is set to the name of a file, only clients that connect with credentials that match an entry in this file are allowed. |
||
|
The port used by the Manager to listen for JMX client connections. |
|
|
|
Whether to start the Manager service at runtime. |
|
|
|
The rate, in milliseconds, at which this member pushes updates to any JMX Managers. |
|
| Name | Description | Default | From |
|---|---|---|---|
|
The name of the |
||
|
Whether PDX ignores fields that were unread during deserialization. |
|
|
|
Whether PDX persists type metadata to disk. |
|
|
|
Whether a Region entry is returned as a |
|
|
|
The name of a custom Spring bean that implements |
| Name | Description | Default | From |
|---|---|---|---|
|
The timeout used to acquire a free connection from a Pool. |
|
|
|
The amount of time a connection can be idle before expiring (and closing) the connection. |
|
|
|
The interval for how frequently the Pool checks to see if a connection to a given server should be moved to a different server to improve the load balance. |
|
|
|
Comma-delimited list of locator endpoints in the format of |
||
|
The maximum number of client to server connections that a Pool will create. |
||
|
The minimum number of client to server connections that a Pool maintains. |
|
|
|
Whether the created Pool can be used by multiple authenticated users. |
|
|
|
How often to ping servers to verify that they are still alive. |
|
|
|
Whether to perform single-hop data access operations between the client and servers. When |
|
|
|
The number of milliseconds to wait for a response from a server before timing out the operation and trying another server (if any are available). |
|
|
|
Whether to signal the server that the client is prepared and ready to receive events. |
|
|
|
The number of times to retry a request after timeout/exception. |
||
|
The group that all servers to which a Pool connects must belong. |
||
|
Comma-delimited list of |
||
|
The socket buffer size for each connection made in all Pools. |
|
|
|
How often to send client statistics to the server. |
||
pool.subscription-ack-interval |
The interval in milliseconds to wait before sending acknowledgements to the |
|
|
|
Whether the created Pool has server-to-client subscriptions enabled. |
|
|
|
The |
|
|
|
The redundancy level for all Pools server-to-client subscriptions. |
||
|
The thread local connections policy for all Pools. |
|
| Name | Description | Default | From |
|---|---|---|---|
|
The name of the user used to authenticate with the servers. |
||
|
The user password used to authenticate with the servers. |
||
|
The system pathname to a properties file that contains security credentials. |
||
|
X |
X |
|
|
The callback that should be invoked in the post-operation phase, which is when the operation has completed on the server but before the result is sent to the client. |
||
|
Static creation method that returns an |
||
|
Static creation method that returns an |
||
|
Used for authentication. For secure transmission of sensitive credentials (such as passwords), you can encrypt the credentials by using the Diffie-Hellman key-exchange algorithm. You can do so by setting the |
||
|
The pathname to a log file used for security log messages. |
||
|
The log level for security log messages. |
||
|
The name of a class that implements |
||
|
Static creation method that returns an |
||
|
Static creation method that returns an |
||
security.peer.verify-member-timeout |
The timeout in milliseconds used by a peer to verify membership of an unknown authenticated peer requesting a secure connection. |
||
|
The name of a class that implements the |
||
|
The Apache Geode System property that refers to the location of an Apache Shiro INI file that configures the Apache Shiro Security Framework in order to secure Apache Geode. |
| Name | Description | Default | From |
|---|---|---|---|
|
The alias to the stored SSL certificate used by the cluster to secure communications. |
||
|
The default alias to the stored SSL certificate used to secure communications across the entire Apache Geode system. |
||
|
The alias to the stored SSL certificate used by the WAN Gateway Senders/Receivers to secure communications. |
||
|
The alias to the stored SSL certificate used by the Manager’s JMX-based JVM MBeanServer and JMX clients to secure communications. |
||
|
The alias to the stored SSL certificate used by the Locator to secure communications. |
||
|
The alias to the stored SSL certificate used by clients and servers to secure communications. |
||
|
The alias to the stored SSL certificate used by the embedded HTTP server to secure communications (HTTPS). |
||
|
Comma-separated list of SSL ciphers or |
||
|
Comma-delimited list of Apache Geode components (for example, WAN) to be configured for SSL communication. |
||
|
The system pathname to the Java KeyStore file storing certificates for SSL. |
||
|
The password used to access the Java KeyStore file. |
||
|
The password used to access the Java KeyStore file (for example, JKS). |
||
|
Comma-separated list of SSL protocols or |
||
|
Whether two-way authentication is required. |
||
|
The system pathname to the trust store (Java KeyStore file) that stores certificates for SSL. |
||
|
The password used to access the trust store (Java KeyStore file). |
||
|
The password used to access the trust store (Java KeyStore file — for example, JKS). |
||
|
Whether two-way HTTP authentication is required. |
|
| Name | Description | Default | From |
|---|---|---|---|
|
The IP address or hostname of the system NIC used by the embedded HTTP server to bind and listen for HTTP(S) connections. |
||
|
The port used by the embedded HTTP server to listen for HTTP(S) connections. |
|
|
|
Whether two-way HTTP authentication is required. |
|
|
|
Whether to start the Developer REST API web service. A full installation of Apache Geode is required, and you must set the |
|
|
|
The port of the embedded Memcached server (service). |
|
|
|
The protocol used by the embedded Memcached server (service). |
|
|
|
The IP address or hostname of the system NIC used by the embedded Redis server to bind and listen for connections. |
||
|
The port used by the embedded Redis server to listen for connections. |
|
Spring Session Based Properties
The following properties all have a spring.session.data.gemfire.* prefix. For example, to set the session Region name,
set spring.session.data.gemfire.session.region.name in Spring Boot application.properties.
| Name | Description | Default | From |
|---|---|---|---|
|
Name of the pool used to send data access operations between the client and servers. |
|
|
|
The |
||
|
The |
||
|
The names of session attributes for which an Index is created. |
|
|
|
Configures the number of seconds in which a session can remain inactive before it expires. |
|
|
|
The name of the (client/server) Region used to manage (HTTP) session state. |
|
|
|
The name of a Spring bean that implements |
Apache Geode Properties
While we do not recommend using Apache Geode properties directly in your Spring applications, SBDG does not prevent you from doing so. See the complete reference to the Apache Geode specific properties.
Apache Geode is very strict about the properties that may be specified in a gemfire.properties file.
You cannot mix Spring properties with gemfire.* properties in an Apache Geode gemfire.properties file.
|
Disabling Auto-configuration
If you would like to disable the auto-configuration of any feature provided by Spring Boot for Apache Geode, you
can specify the auto-configuration class in the exclude attribute of the @SpringBootApplication annotation:
@SpringBootApplication(exclude = PdxSerializationAutoConfiguration.class)
public class MySpringBootApplication {
public static void main(String[] args) {
SpringApplication.run(MySpringBootApplication.class, args);
}
}You can disable more than one auto-configuration class at a time by specifying each class in the exclude attribute
using array syntax:
@SpringBootApplication(exclude = { PdxSerializationAutoConfiguration.class, SslAutoConfiguration.class })
public class MySpringBootApplication {
public static void main(String[] args) {
SpringApplication.run(MySpringBootApplication.class, args);
}
}Complete Set of Auto-configuration Classes
The current set of auto-configuration classes in Spring Boot for Apache Geode includes:
-
CacheNameAutoConfiguration -
CachingProviderAutoConfiguration -
ClientCacheAutoConfiguration -
ClientSecurityAutoConfiguration -
ContinuousQueryAutoConfiguration -
FunctionExecutionAutoConfiguration -
GemFirePropertiesAutoConfiguration -
LoggingAutoConfiguration -
PdxSerializationAutoConfiguration -
PeerSecurityAutoConfiguration -
RegionTemplateAutoConfiguration -
RepositoriesAutoConfiguration -
SpringSessionAutoConfiguration -
SpringSessionPropertiesAutoConfiguration -
SslAutoConfiguration
Switching from Apache Geode to VMware Tanzu GemFire or VMware Tanzu GemFire for VMs
Spring Boot for Apache Geode (SBDG) stopped providing support for VMware Tanzu GemFire after SBDG 1.3. SBDG 1.3 was the last version to support both Apache Geode and VMware Tanzu GemFire. If you need support for VMware Tanzu GemFire in Spring Boot, then you will need to downgrade to SBDG 1.3.
This section is now deprecated. Spring Boot for Apache Geode (SBDG) no longer provides the
spring-gemfire-starter or related starter modules. As of SBDG 1.4, SBDG is based on Apache Geode 1.13. Standalone
GemFire bits based on Apache Geode are no longer being released by VMware, Inc. after GemFire 9.10. GemFire 9.10
was based on Apache Geode 1.12, and SBDG can no longer properly support standalone GemFire bits (version ⇐ 9.10).
|
| What was Pivotal GemFire has now been rebranded as VMware Tanzu GemFire and what was Pivotal Cloud Cache (PCC) running on Pivotal CloudFoundry (PCF) has been rebranded as VMware Tanzu GemFire for VMs and VMware Tanzu Application Service (TAS) (TAS), respectively. |
Running an Apache Geode cluster with Spring Boot from your IDE
As described in Building ClientCache Applications, you can configure and run a small Apache Geode cluster from inside
your IDE using Spring Boot. This is extremely helpful during development because it enables you to manually run, test,
and debug your applications quickly and easily.
Spring Boot for Apache Geode includes such a class:
@SpringBootApplication
@CacheServerApplication(name = "SpringBootApacheGeodeCacheServerApplication")
@SuppressWarnings("unused")
public class SpringBootApacheGeodeCacheServerApplication {
public static void main(String[] args) {
new SpringApplicationBuilder(SpringBootApacheGeodeCacheServerApplication.class)
.web(WebApplicationType.NONE)
.build()
.run(args);
}
@Configuration
@UseLocators
@Profile("clustered")
static class ClusteredConfiguration { }
@Configuration
@EnableLocator
@EnableManager(start = true)
@Profile("!clustered")
static class LonerConfiguration { }
}This class is a proper Spring Boot application that you can use to configure and bootstrap multiple Apache Geode servers and join them together to form a small cluster. You only need to modify the runtime configuration of this class to startup multiple servers.
Initially, you will need to start a single (primary) server with an embedded Locator and Manager.
The Locator enables members in the cluster to locate one another and lets new members join the cluster as a peer. The Locator also lets clients connect to the servers in the cluster. When the cache client’s connection pool is configured to use Locators, the pool of connections can intelligently route data requests directly to the server hosting the data (a.k.a. single-hop access), especially when the data is partitioned/sharded across multiple servers in the cluster. Locator-based connection pools include support for load balancing connections and handling automatic fail-over in the event of failed connections, among other things.
The Manager lets you connect to this server using Gfsh (Apache Geode’s command-line shell tool).
To start your primary server, create a run configuration in your IDE for the SpringBootApacheGeodeCacheServerApplication
class using the following, recommended JRE command-line options:
-server -ea -Dspring.profiles.active=Run the class. You should see output similar to the following:
/Library/Java/JavaVirtualMachines/jdk1.8.0_152.jdk/Contents/Home/bin/java -server -ea -Dspring.profiles.active= "-javaagent:/Applications/IntelliJ IDEA 17 CE.app/Contents/lib/idea_rt.jar=62866:/Applications/IntelliJ IDEA 17 CE.app/Contents/bin" -Dfile.encoding=UTF-8 -classpath /Library/Java/JavaVirtualMachines/jdk1.8.0_152.jdk/Contents/Home/jre/lib/charsets.jar:/Library/Java/JavaVirtualMachines/jdk1.8.0_152.jdk/Contents/Home/jre/lib/deploy.jar:/Library/Java/JavaVirtualMachines/jdk1.8.0_152.jdk/Contents/Home/jre/lib/ext/cldrdata.jar:/Library/Java/JavaVirtualMachines/jdk1.8.0_152.jdk/Contents/Home/jre/lib/ext/dnsns.jar:/Library/Java/JavaVirtualMachines/jdk1.8.0_152.jdk/Contents/Home/jre/lib/ext/jaccess.jar:/Library/Java/JavaVirtualMachines/jdk1.8.0_152.jdk/Contents/Home/jre/lib/ext/jfxrt.jar:/Library/Java/JavaVirtualMachines/jdk1.8.0_152.jdk/Contents/Home/jre/lib/ext/localedata.jar:/Library/Java/JavaVirtualMachines/jdk1.8.0_152.jdk/Contents/Home/jre/lib/ext/nashorn.jar:/Library/Java/JavaVirtualMachines/jdk1.8.0_152.jdk/Contents/Home/jre/lib/ext/sunec.jar:/Library/Java/JavaVirtualMachines/jdk1.8.0_152.jdk/Contents/Home/jre/lib/ext/sunjce_provider.jar:/Library/Java/JavaVirtualMachines/jdk1.8.0_152.jdk/Contents/Home/jre/lib/ext/sunpkcs11.jar:/Library/Java/JavaVirtualMachines/jdk1.8.0_152.jdk/Contents/Home/jre/lib/ext/zipfs.jar:/Library/Java/JavaVirtualMachines/jdk1.8.0_152.jdk/Contents/Home/jre/lib/javaws.jar:/Library/Java/JavaVirtualMachines/jdk1.8.0_152.jdk/Contents/Home/jre/lib/jce.jar:/Library/Java/JavaVirtualMachines/jdk1.8.0_152.jdk/Contents/Home/jre/lib/jfr.jar:/Library/Java/JavaVirtualMachines/jdk1.8.0_152.jdk/Contents/Home/jre/lib/jfxswt.jar:/Library/Java/JavaVirtualMachines/jdk1.8.0_152.jdk/Contents/Home/jre/lib/jsse.jar:/Library/Java/JavaVirtualMachines/jdk1.8.0_152.jdk/Contents/Home/jre/lib/management-agent.jar:/Library/Java/JavaVirtualMachines/jdk1.8.0_152.jdk/Contents/Home/jre/lib/plugin.jar:/Library/Java/JavaVirtualMachines/jdk1.8.0_152.jdk/Contents/Home/jre/lib/resources.jar:/Library/Java/JavaVirtualMachines/jdk1.8.0_152.jdk/Contents/Home/jre/lib/rt.jar:/Library/Java/JavaVirtualMachines/jdk1.8.0_152.jdk/Contents/Home/lib/ant-javafx.jar:/Library/Java/JavaVirtualMachines/jdk1.8.0_152.jdk/Contents/Home/lib/dt.jar:/Library/Java/JavaVirtualMachines/jdk1.8.0_152.jdk/Contents/Home/lib/javafx-mx.jar:/Library/Java/JavaVirtualMachines/jdk1.8.0_152.jdk/Contents/Home/lib/jconsole.jar:/Library/Java/JavaVirtualMachines/jdk1.8.0_152.jdk/Contents/Home/lib/packager.jar:/Library/Java/JavaVirtualMachines/jdk1.8.0_152.jdk/Contents/Home/lib/sa-jdi.jar:/Library/Java/JavaVirtualMachines/jdk1.8.0_152.jdk/Contents/Home/lib/tools.jar:/Users/jblum/pivdev/spring-boot-data-geode/spring-geode-docs/build/classes/main:/Users/jblum/pivdev/spring-boot-data-geode/spring-geode-docs/build/resources/main:/Users/jblum/pivdev/spring-boot-data-geode/spring-geode-autoconfigure/build/classes/main:/Users/jblum/pivdev/spring-boot-data-geode/spring-geode-autoconfigure/build/resources/main:/Users/jblum/pivdev/spring-boot-data-geode/spring-geode/build/classes/main:/Users/jblum/.gradle/caches/modules-2/files-2.1/org.springframework.boot/spring-boot-starter/2.0.3.RELEASE/ffaa050dbd36b0441645598f1a7ddaf67fd5e678/spring-boot-starter-2.0.3.RELEASE.jar:/Users/jblum/.gradle/caches/modules-2/files-2.1/org.springframework.boot/spring-boot-autoconfigure/2.0.3.RELEASE/11bc4cc96b08fabad2b3186755818fa0b32d83f/spring-boot-autoconfigure-2.0.3.RELEASE.jar:/Users/jblum/.gradle/caches/modules-2/files-2.1/org.springframework.boot/spring-boot/2.0.3.RELEASE/b874870d915adbc3dd932e19077d3d45c8e54aa0/spring-boot-2.0.3.RELEASE.jar:/Users/jblum/.gradle/caches/modules-2/files-2.1/javax.annotation/javax.annotation-api/1.3.2/934c04d3cfef185a8008e7bf34331b79730a9d43/javax.annotation-api-1.3.2.jar:/Users/jblum/.gradle/caches/modules-2/files-2.1/org.springframework.data/spring-data-geode/2.0.8.RELEASE/9e0a3cd2805306d355c77537aea07c281fc581b/spring-data-geode-2.0.8.RELEASE.jar:/Users/jblum/.gradle/caches/modules-2/files-2.1/org.springframework/spring-context-support/5.0.7.RELEASE/e8ee4902d9d8bfbb21bc5e8f30cfbb4324adb4f3/spring-context-support-5.0.7.RELEASE.jar:/Users/jblum/.gradle/caches/modules-2/files-2.1/org.springframework/spring-context/5.0.7.RELEASE/243a23f8968de8754d8199d669780d683ab177bd/spring-context-5.0.7.RELEASE.jar:/Users/jblum/.gradle/caches/modules-2/files-2.1/org.springframework/spring-tx/5.0.7.RELEASE/4ca59b21c61162adb146ad1b40c30b60d8dc42b8/spring-tx-5.0.7.RELEASE.jar:/Users/jblum/.gradle/caches/modules-2/files-2.1/org.springframework/spring-web/5.0.7.RELEASE/2e04c6c2922fbfa06b5948be14a5782db168b6ec/spring-web-5.0.7.RELEASE.jar:/Users/jblum/.gradle/caches/modules-2/files-2.1/org.springframework.data/spring-data-commons/2.0.8.RELEASE/5c19af63b5acb0eab39066684e813d5ecd9d03b7/spring-data-commons-2.0.8.RELEASE.jar:/Users/jblum/.gradle/caches/modules-2/files-2.1/org.springframework/spring-aop/5.0.7.RELEASE/fdd0b6aa3c9c7a188c3bfbf6dfd8d40e843be9ef/spring-aop-5.0.7.RELEASE.jar:/Users/jblum/.gradle/caches/modules-2/files-2.1/org.springframework/spring-beans/5.0.7.RELEASE/c1196cb3e56da83e3c3a02ef323699f4b05feedc/spring-beans-5.0.7.RELEASE.jar:/Users/jblum/.gradle/caches/modules-2/files-2.1/org.springframework/spring-expression/5.0.7.RELEASE/ca01fb473f53dd0ee3c85663b26d5dc325602057/spring-expression-5.0.7.RELEASE.jar:/Users/jblum/.gradle/caches/modules-2/files-2.1/org.springframework/spring-core/5.0.7.RELEASE/54b731178d81e66eca9623df772ff32718208137/spring-core-5.0.7.RELEASE.jar:/Users/jblum/.gradle/caches/modules-2/files-2.1/org.yaml/snakeyaml/1.19/2d998d3d674b172a588e54ab619854d073f555b5/snakeyaml-1.19.jar:/Users/jblum/.gradle/caches/modules-2/files-2.1/org.springframework/spring-jcl/5.0.7.RELEASE/699016ddf454c2c167d9f84ae5777eccadf54728/spring-jcl-5.0.7.RELEASE.jar:/Users/jblum/.gradle/caches/modules-2/files-2.1/org.apache.geode/geode-lucene/1.2.1/3d22a050bd4eb64bd8c82a74677f45c070f102d5/geode-lucene-1.2.1.jar:/Users/jblum/.gradle/caches/modules-2/files-2.1/org.apache.geode/geode-core/1.2.1/fe853317e33dd2a1c291f29cee3c4be549f75a69/geode-core-1.2.1.jar:/Users/jblum/.gradle/caches/modules-2/files-2.1/org.apache.geode/geode-cq/1.2.1/69873d6b956ba13b55c894a13e72106fb552e840/geode-cq-1.2.1.jar:/Users/jblum/.gradle/caches/modules-2/files-2.1/org.apache.geode/geode-wan/1.2.1/df0dd8516e1af17790185255ff21a54b56d94344/geode-wan-1.2.1.jar:/Users/jblum/.gradle/caches/modules-2/files-2.1/antlr/antlr/2.7.7/83cd2cd674a217ade95a4bb83a8a14f351f48bd0/antlr-2.7.7.jar:/Users/jblum/.gradle/caches/modules-2/files-2.1/org.apache.shiro/shiro-spring/1.3.2/281a6b565f6cf3aebd31ddb004632008d7106f2d/shiro-spring-1.3.2.jar:/Users/jblum/.gradle/caches/modules-2/files-2.1/org.aspectj/aspectjweaver/1.8.13/ad94df2a28d658a40dc27bbaff6a1ce5fbf04e9b/aspectjweaver-1.8.13.jar:/Users/jblum/.gradle/caches/modules-2/files-2.1/com.fasterxml.jackson.core/jackson-databind/2.9.6/cfa4f316351a91bfd95cb0644c6a2c95f52db1fc/jackson-databind-2.9.6.jar:/Users/jblum/.gradle/caches/modules-2/files-2.1/com.fasterxml.jackson.core/jackson-annotations/2.9.0/7c10d545325e3a6e72e06381afe469fd40eb701/jackson-annotations-2.9.0.jar:/Users/jblum/.gradle/caches/modules-2/files-2.1/org.apache.shiro/shiro-web/1.3.2/725be023e1c65a0fd70c01b8c0c13a2936c23315/shiro-web-1.3.2.jar:/Users/jblum/.gradle/caches/modules-2/files-2.1/org.apache.shiro/shiro-core/1.3.2/b5dede9d890f335998a8ebf479809fe365b927fc/shiro-core-1.3.2.jar:/Users/jblum/.gradle/caches/modules-2/files-2.1/org.slf4j/slf4j-api/1.7.25/da76ca59f6a57ee3102f8f9bd9cee742973efa8a/slf4j-api-1.7.25.jar:/Users/jblum/.gradle/caches/modules-2/files-2.1/com.github.stephenc.findbugs/findbugs-annotations/1.3.9-1/a6b11447635d80757d64b355bed3c00786d86801/findbugs-annotations-1.3.9-1.jar:/Users/jblum/.gradle/caches/modules-2/files-2.1/org.jgroups/jgroups/3.6.10.Final/fc0ff5a8a9de27ab62939956f705c2909bf86bc2/jgroups-3.6.10.Final.jar:/Users/jblum/.gradle/caches/modules-2/files-2.1/commons-io/commons-io/2.5/2852e6e05fbb95076fc091f6d1780f1f8fe35e0f/commons-io-2.5.jar:/Users/jblum/.gradle/caches/modules-2/files-2.1/commons-lang/commons-lang/2.6/ce1edb914c94ebc388f086c6827e8bdeec71ac2/commons-lang-2.6.jar:/Users/jblum/.gradle/caches/modules-2/files-2.1/it.unimi.dsi/fastutil/7.1.0/9835253257524c1be7ab50c057aa2d418fb72082/fastutil-7.1.0.jar:/Users/jblum/.gradle/caches/modules-2/files-2.1/javax.resource/javax.resource-api/1.7/ae40e0864eb1e92c48bf82a2a3399cbbf523fb79/javax.resource-api-1.7.jar:/Users/jblum/.gradle/caches/modules-2/files-2.1/net.java.dev.jna/jna/4.5.1/65bd0cacc9c79a21c6ed8e9f588577cd3c2f85b9/jna-4.5.1.jar:/Users/jblum/.gradle/caches/modules-2/files-2.1/net.sf.jopt-simple/jopt-simple/5.0.3/cdd846cfc4e0f7eefafc02c0f5dce32b9303aa2a/jopt-simple-5.0.3.jar:/Users/jblum/.gradle/caches/modules-2/files-2.1/org.apache.logging.log4j/log4j-core/2.10.0/c90b597163cd28ab6d9687edd53db601b6ea75a1/log4j-core-2.10.0.jar:/Users/jblum/.gradle/caches/modules-2/files-2.1/org.apache.logging.log4j/log4j-api/2.10.0/fec5797a55b786184a537abd39c3fa1449d752d6/log4j-api-2.10.0.jar:/Users/jblum/.gradle/caches/modules-2/files-2.1/commons-beanutils/commons-beanutils/1.9.3/c845703de334ddc6b4b3cd26835458cb1cba1f3d/commons-beanutils-1.9.3.jar:/Users/jblum/.gradle/caches/modules-2/files-2.1/io.github.lukehutch/fast-classpath-scanner/2.0.11/ae34a7a5e6de8ad1f86e12f6f7ae1869fcfe9987/fast-classpath-scanner-2.0.11.jar:/Users/jblum/.gradle/caches/modules-2/files-2.1/org.apache.geode/geode-common/1.2.1/9db253081d33f424f6e3ce0cde4b306e23e3420b/geode-common-1.2.1.jar:/Users/jblum/.gradle/caches/modules-2/files-2.1/org.apache.geode/geode-json/1.2.1/bdb4c262e4ce6bb3b22e0f511cfb133a65fa0c04/geode-json-1.2.1.jar:/Users/jblum/.gradle/caches/modules-2/files-2.1/org.apache.lucene/lucene-analyzers-common/6.4.1/c6f0f593503080204e9d33189cdc59320f55db37/lucene-analyzers-common-6.4.1.jar:/Users/jblum/.gradle/caches/modules-2/files-2.1/org.apache.lucene/lucene-queryparser/6.4.1/1fc5795a072770a2c47dce11a3c85a80f3437af6/lucene-queryparser-6.4.1.jar:/Users/jblum/.gradle/caches/modules-2/files-2.1/org.apache.lucene/lucene-queries/6.4.1/6de41d984c16185a244b52c4d069b00f5b2b120f/lucene-queries-6.4.1.jar:/Users/jblum/.gradle/caches/modules-2/files-2.1/org.apache.lucene/lucene-core/6.4.1/2a18924b9e0ed86b318902cb475a0b9ca4d7be5b/lucene-core-6.4.1.jar:/Users/jblum/.gradle/caches/modules-2/files-2.1/com.fasterxml.jackson.core/jackson-core/2.9.6/4e393793c37c77e042ccc7be5a914ae39251b365/jackson-core-2.9.6.jar:/Users/jblum/.gradle/caches/modules-2/files-2.1/javax.transaction/javax.transaction-api/1.2/d81aff979d603edd90dcd8db2abc1f4ce6479e3e/javax.transaction-api-1.2.jar:/Users/jblum/.gradle/caches/modules-2/files-2.1/commons-logging/commons-logging/1.2/4bfc12adfe4842bf07b657f0369c4cb522955686/commons-logging-1.2.jar:/Users/jblum/.gradle/caches/modules-2/files-2.1/commons-collections/commons-collections/3.2.2/8ad72fe39fa8c91eaaf12aadb21e0c3661fe26d5/commons-collections-3.2.2.jar:/Users/jblum/.gradle/caches/modules-2/files-2.1/org.springframework.shell/spring-shell/1.2.0.RELEASE/d94047721f292bd5334b5654e8600cef4b845049/spring-shell-1.2.0.RELEASE.jar:/Users/jblum/.gradle/caches/modules-2/files-2.1/com.google.guava/guava/17.0/9c6ef172e8de35fd8d4d8783e4821e57cdef7445/guava-17.0.jar:/Users/jblum/.gradle/caches/modules-2/files-2.1/jline/jline/2.12/ce9062c6a125e0f9ad766032573c041ae8ecc986/jline-2.12.jar org.springframework.geode.docs.example.app.server.SpringBootApacheGeodeCacheServerApplication
SLF4J: Failed to load class "org.slf4j.impl.StaticLoggerBinder".
SLF4J: Defaulting to no-operation (NOP) logger implementation
SLF4J: See https://www.slf4j.org/codes.html#StaticLoggerBinder for further details.
. ____ _ __ _ _
/\\ / ___'_ __ _ _(_)_ __ __ _ \ \ \ \
( ( )\___ | '_ | '_| | '_ \/ _` | \ \ \ \
\\/ ___)| |_)| | | | | || (_| | ) ) ) )
' |____| .__|_| |_|_| |_\__, | / / / /
=========|_|==============|___/=/_/_/_/
:: Spring Boot :: (v2.0.3.RELEASE)
[info 2018/06/24 21:42:28.183 PDT <main> tid=0x1] Starting SpringBootApacheGeodeCacheServerApplication on jblum-mbpro-2.local with PID 41795 (/Users/jblum/pivdev/spring-boot-data-geode/spring-geode-docs/build/classes/main started by jblum in /Users/jblum/pivdev/spring-boot-data-geode/spring-geode-docs/build)
[info 2018/06/24 21:42:28.186 PDT <main> tid=0x1] No active profile set, falling back to default profiles: default
[info 2018/06/24 21:42:28.278 PDT <main> tid=0x1] Refreshing org.springframework.context.annotation.AnnotationConfigApplicationContext@6fa51cd4: startup date [Sun Jun 24 21:42:28 PDT 2018]; root of context hierarchy
[warn 2018/06/24 21:42:28.962 PDT <main> tid=0x1] @Bean method PdxConfiguration.pdxDiskStoreAwareBeanFactoryPostProcessor is non-static and returns an object assignable to Spring's BeanFactoryPostProcessor interface. This will result in a failure to process annotations such as @Autowired, @Resource and @PostConstruct within the method's declaring @Configuration class. Add the 'static' modifier to this method to avoid these container lifecycle issues; see @Bean javadoc for complete details.
[info 2018/06/24 21:42:30.036 PDT <main> tid=0x1]
---------------------------------------------------------------------------
Licensed to the Apache Software Foundation (ASF) under one or more
contributor license agreements. See the NOTICE file distributed with this
work for additional information regarding copyright ownership.
The ASF licenses this file to You under the Apache License, Version 2.0
(the "License"); you may not use this file except in compliance with the
License. You may obtain a copy of the License at
https://www.apache.org/licenses/LICENSE-2.0
Unless required by applicable law or agreed to in writing, software
distributed under the License is distributed on an "AS IS" BASIS, WITHOUT
WARRANTIES OR CONDITIONS OF ANY KIND, either express or implied. See the
License for the specific language governing permissions and limitations
under the License.
---------------------------------------------------------------------------
Build-Date: 2017-09-16 07:20:46 -0700
Build-Id: abaker 0
Build-Java-Version: 1.8.0_121
Build-Platform: Mac OS X 10.12.3 x86_64
Product-Name: Apache Geode
Product-Version: 1.2.1
Source-Date: 2017-09-08 11:57:38 -0700
Source-Repository: release/1.2.1
Source-Revision: 0b881b515eb1dcea974f0f5c1b40da03d42af9cf
Native version: native code unavailable
Running on: /10.0.0.121, 8 cpu(s), x86_64 Mac OS X 10.10.5
Communications version: 65
Process ID: 41795
User: jblum
Current dir: /Users/jblum/pivdev/spring-boot-data-geode/spring-geode-docs/build
Home dir: /Users/jblum
Command Line Parameters:
-ea
-Dspring.profiles.active=
-javaagent:/Applications/IntelliJ IDEA 17 CE.app/Contents/lib/idea_rt.jar=62866:/Applications/IntelliJ IDEA 17 CE.app/Contents/bin
-Dfile.encoding=UTF-8
Class Path:
/Library/Java/JavaVirtualMachines/jdk1.8.0_152.jdk/Contents/Home/jre/lib/charsets.jar
...
Library Path:
/Users/jblum/Library/Java/Extensions
/Library/Java/Extensions
/Network/Library/Java/Extensions
/System/Library/Java/Extensions
/usr/lib/java
.
System Properties:
PID = 41795
...
[info 2018/06/24 21:42:30.045 PDT <main> tid=0x1] Startup Configuration:
### GemFire Properties defined with api ###
disable-auto-reconnect=true
jmx-manager=true
jmx-manager-port=1099
jmx-manager-start=true
jmx-manager-update-rate=2000
log-level=config
mcast-port=0
name=SpringBootApacheGeodeCacheServerApplication
start-locator=localhost[10334]
use-cluster-configuration=false
### GemFire Properties using default values ###
ack-severe-alert-threshold=0
...
[info 2018/06/24 21:42:30.090 PDT <main> tid=0x1] Starting peer location for Distribution Locator on localhost/127.0.0.1
[info 2018/06/24 21:42:30.093 PDT <main> tid=0x1] Starting Distribution Locator on localhost/127.0.0.1
[info 2018/06/24 21:42:30.094 PDT <main> tid=0x1] Locator was created at Sun Jun 24 21:42:30 PDT 2018
[info 2018/06/24 21:42:30.094 PDT <main> tid=0x1] Listening on port 10334 bound on address localhost/127.0.0.1
...
[info 2018/06/24 21:42:30.685 PDT <main> tid=0x1] Initializing region _monitoringRegion_10.0.0.121<v0>1024
[info 2018/06/24 21:42:30.688 PDT <main> tid=0x1] Initialization of region _monitoringRegion_10.0.0.121<v0>1024 completed
...
[info 2018/06/24 21:42:31.570 PDT <main> tid=0x1] CacheServer Configuration: port=40404 max-connections=800 max-threads=0 notify-by-subscription=true socket-buffer-size=32768 maximum-time-between-pings=60000 maximum-message-count=230000 message-time-to-live=180 eviction-policy=none capacity=1 overflow directory=. groups=[] loadProbe=ConnectionCountProbe loadPollInterval=5000 tcpNoDelay=true
[info 2018/06/24 21:42:31.588 PDT <main> tid=0x1] Started SpringBootApacheGeodeCacheServerApplication in 3.77 seconds (JVM running for 5.429)You can now connect to this server by using Gfsh:
$ echo $GEMFIRE
/Users/jblum/pivdev/apache-geode-1.2.1
jblum-mbpro-2:lab jblum$
jblum-mbpro-2:lab jblum$ gfsh
_________________________ __
/ _____/ ______/ ______/ /____/ /
/ / __/ /___ /_____ / _____ /
/ /__/ / ____/ _____/ / / / /
/______/_/ /______/_/ /_/ 1.2.1
Monitor and Manage Apache Geode
gfsh>connect
Connecting to Locator at [host=localhost, port=10334] ..
Connecting to Manager at [host=10.0.0.121, port=1099] ..
Successfully connected to: [host=10.0.0.121, port=1099]
gfsh>list members
Name | Id
------------------------------------------- | --------------------------------------------------------------------------
SpringBootApacheGeodeCacheServerApplication | 10.0.0.121(SpringBootApacheGeodeCacheServerApplication:41795)<ec><v0>:1024
gfsh>describe member --name=SpringBootApacheGeodeCacheServerApplication
Name : SpringBootApacheGeodeCacheServerApplication
Id : 10.0.0.121(SpringBootApacheGeodeCacheServerApplication:41795)<ec><v0>:1024
Host : 10.0.0.121
Regions :
PID : 41795
Groups :
Used Heap : 184M
Max Heap : 3641M
Working Dir : /Users/jblum/pivdev/spring-boot-data-geode/spring-geode-docs/build
Log file : /Users/jblum/pivdev/spring-boot-data-geode/spring-geode-docs/build
Locators : localhost[10334]
Cache Server Information
Server Bind :
Server Port : 40404
Running : true
Client Connections : 0Now you can run additional servers to scale-out your cluster.
To do so, you must vary the name of the members you add to your cluster as peers. Apache Geode requires members in a cluster to be named and for the names of each member in the cluster to be unique.
Additionally, since we are running multiple instances of our SpringBootApacheGeodeCacheServerApplication class,
which also embeds a CacheServer component enabling cache clients to connect. Therefore, you must vary the ports
used by the embedded services.
Fortunately, you do not need to run another embedded Locator or Manager (you need only one of each in this case).
Therefore, you can switch profiles from non-clustered to using the Spring "clustered" profile, which includes different
configuration (the ClusterConfiguration class) to connect another server as a peer member in the cluster,
which currently has only one member, as shown in Gfsh with the list members command (shown earlier).
To add another server, set the member name and CacheServer port to different values with the following
run configuration:
-server -ea -Dspring.profiles.active=clustered -Dspring.data.gemfire.name=ServerTwo -Dspring.data.gemfire.cache.server.port=41414Notice that we explicitly activated the "clustered" Spring profile, which enables the configuration provided in
the nested ClusteredConfiguration class while disabling the configuration provided in the LonerConfiguration class.
The ClusteredConfiguration class is also annotated with @UseLocators, which sets the Apache Geode locators
property to "localhost[10334]". By default, it assumes that the Locator runs on localhost, listening on the default
Locator port of 10334. You can adjust your locators connection endpoint if your Locators run elsewhere in your network
by using the locators attribute of the @UseLocators annotation.
| In production environments, it is common to run multiple Locators in separate processes. Running multiple Locators provides redundancy in case a Locator fails. If all Locators in your cluster fail, then your cluster will continue to run, but no other members will be able to join the cluster, which is important when scaling out the cluster. Clients also will not be able to connect. Restart the Locators if this happens. |
Also, we set the spring.data.gemfire.name property to ServerTwo, adjusting the name of our member when it joins
the cluster as a peer.
Finally, we set the spring.data.gemfire.cache.server.port property to 41414 to vary the CacheServer port used by
ServerTwo. The default CacheServer port is 40404. If we had not set this property before starting ServerTwo,
we would have encounter a java.net.BindException.
Both spring.data.gemfire.name and spring.data.gemfire.cache.server.port are well-known properties used by SDG
to dynamically configure Apache Geode with a Spring Boot application.properties file or by using Java System
properties. You can find these properties in the annotation Javadoc in SDG’s annotation-based configuration model.
For example, see the Javadoc for the
spring.data.gemfire.cache.server.port property.
Most SDG annotations include corresponding properties that can be defined in Spring Boot application.properties,
which is explained in detail in the documentation.
|
After starting our second server, ServerTwo, we should see output similar to the following at the command-line
and in Gfsh when we again list members and describe member:
gfsh>list members
Name | Id
------------------------------------------- | --------------------------------------------------------------------------
SpringBootApacheGeodeCacheServerApplication | 10.0.0.121(SpringBootApacheGeodeCacheServerApplication:41795)<ec><v0>:1024
ServerTwo | 10.0.0.121(ServerTwo:41933)<v1>:1025
gfsh>describe member --name=ServerTwo
Name : ServerTwo
Id : 10.0.0.121(ServerTwo:41933)<v1>:1025
Host : 10.0.0.121
Regions :
PID : 41933
Groups :
Used Heap : 165M
Max Heap : 3641M
Working Dir : /Users/jblum/pivdev/spring-boot-data-geode/spring-geode-docs/build
Log file : /Users/jblum/pivdev/spring-boot-data-geode/spring-geode-docs/build
Locators : localhost[10334]
Cache Server Information
Server Bind :
Server Port : 41414
Running : true
Client Connections : 0When we list the members of the cluster, we see ServerTwo, and when we describe ServerTwo, we see that its
CacheServer port is appropriately set to 41414.
We can add one more server, ServerThree, by using the following run configuration:
-server -ea -Dspring.profiles.active=clustered -Dspring.data.gemfire.name=ServerThree -Dspring.data.gemfire.cache.server.port=42424We again see similar output at the command-line and in Gfsh:
gfsh>list members
Name | Id
------------------------------------------- | --------------------------------------------------------------------------
SpringBootApacheGeodeCacheServerApplication | 10.0.0.121(SpringBootApacheGeodeCacheServerApplication:41795)<ec><v0>:1024
ServerTwo | 10.0.0.121(ServerTwo:41933)<v1>:1025
ServerThree | 10.0.0.121(ServerThree:41965)<v2>:1026
gfsh>describe member --name=ServerThree
Name : ServerThree
Id : 10.0.0.121(ServerThree:41965)<v2>:1026
Host : 10.0.0.121
Regions :
PID : 41965
Groups :
Used Heap : 180M
Max Heap : 3641M
Working Dir : /Users/jblum/pivdev/spring-boot-data-geode/spring-geode-docs/build
Log file : /Users/jblum/pivdev/spring-boot-data-geode/spring-geode-docs/build
Locators : localhost[10334]
Cache Server Information
Server Bind :
Server Port : 42424
Running : true
Client Connections : 0Congratulations. You have just started a small Apache Geode cluster with 3 members by using Spring Boot from inside your IDE.
Now you can build and run a Spring Boot, Apache Geode ClientCache application that connects to this cluster. To do so,
include and use Spring Boot for Apache Geode.
Testing
Spring Test for Apache Geode (STDG) is a relatively new project to help you write both unit and integration tests when you use Apache Geode in a Spring context. In fact, the entire test suite in Spring Boot for Apache Geode is based on this project.
All Spring projects that integrate with Apache Geode will use this new test framework for all their testing needs, making this new test framework for Apache Geode a proven and reliable solution for all your Apache Geode application testing needs when using Spring as well.
In future versions, this reference guide will include an entire chapter on testing along with samples. In the meantime, look to the STDG README.
Examples
The definitive source of truth on how to best use Spring Boot for Apache Geode is to refer to the samples.
See also the Temperature Service, Spring Boot application that implements a temperature sensor and monitoring, Internet of Things (IOT) example. The example uses SBDG to showcase Apache Geode CQ, function implementations and executions, and positions Apache Geode as a caching provider in Spring’s Cache Abstraction. It is a working, sophisticated, and complete example, and we highly recommend it as a good starting point for real-world use cases.
See the Boot example from the contact application reference implementation (RI) for Spring Data for Apache Geode (SDG) as yet another example.
References
-
Spring Framework Reference Guide | Javadoc
-
Spring Boot Reference Guide | Javadoc
-
Spring Data Commons Reference Guide | Javadoc
-
Spring Data for Apache Geode Reference Guide | Javadoc
-
Spring Session for Apache Geode Reference Guide | Javadoc
-
Spring Test for Apache Geode README
-
Apache Geode User Guide | Javadoc