Provision SAP HANA Cloud trial account
Below are the steps to provision SAP Hana Database using a trial account
Let’s start with creating a temporary email for registration purposes
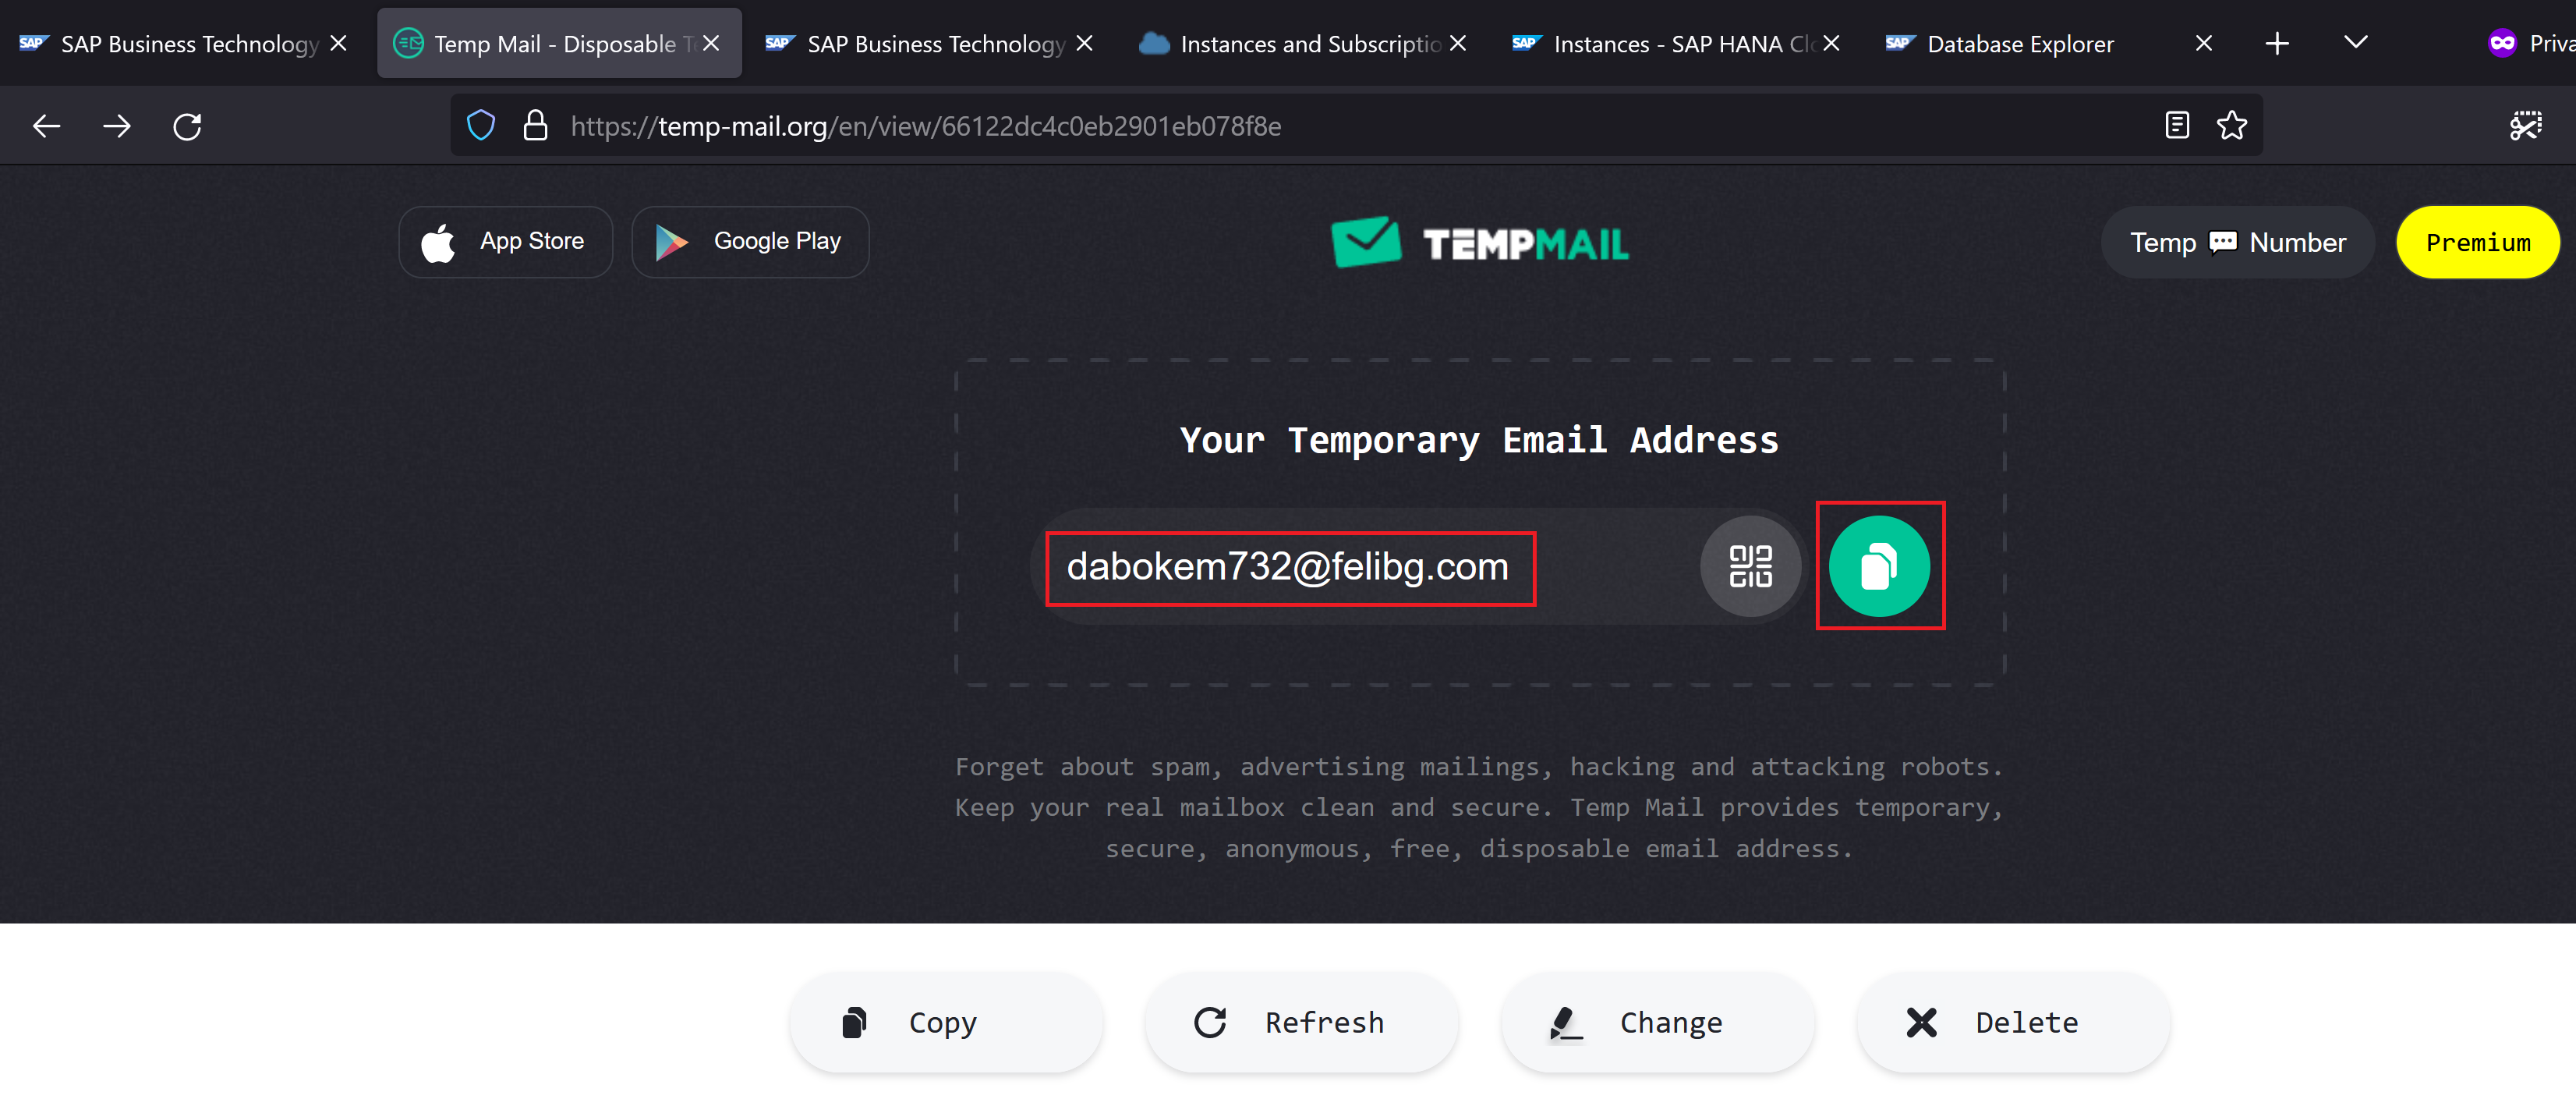
| Don’t close the above window, otherwise a new email id would get generated. |
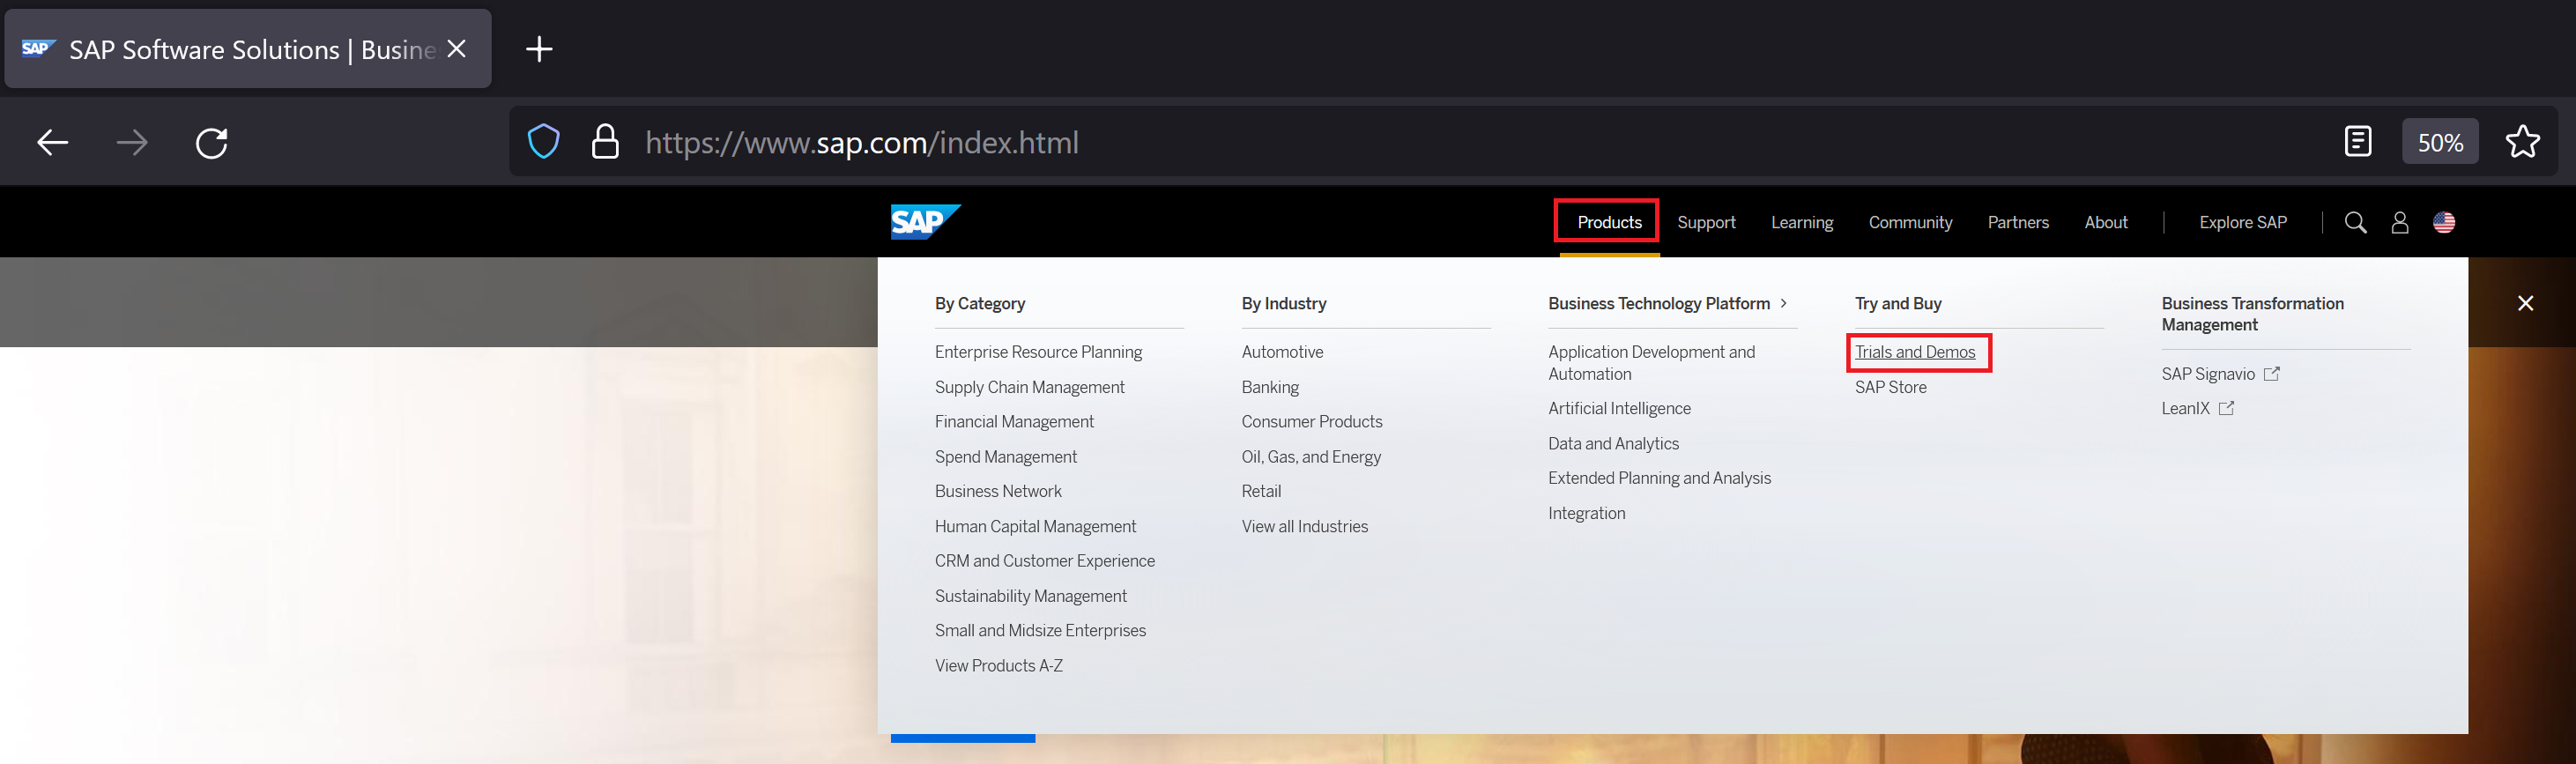
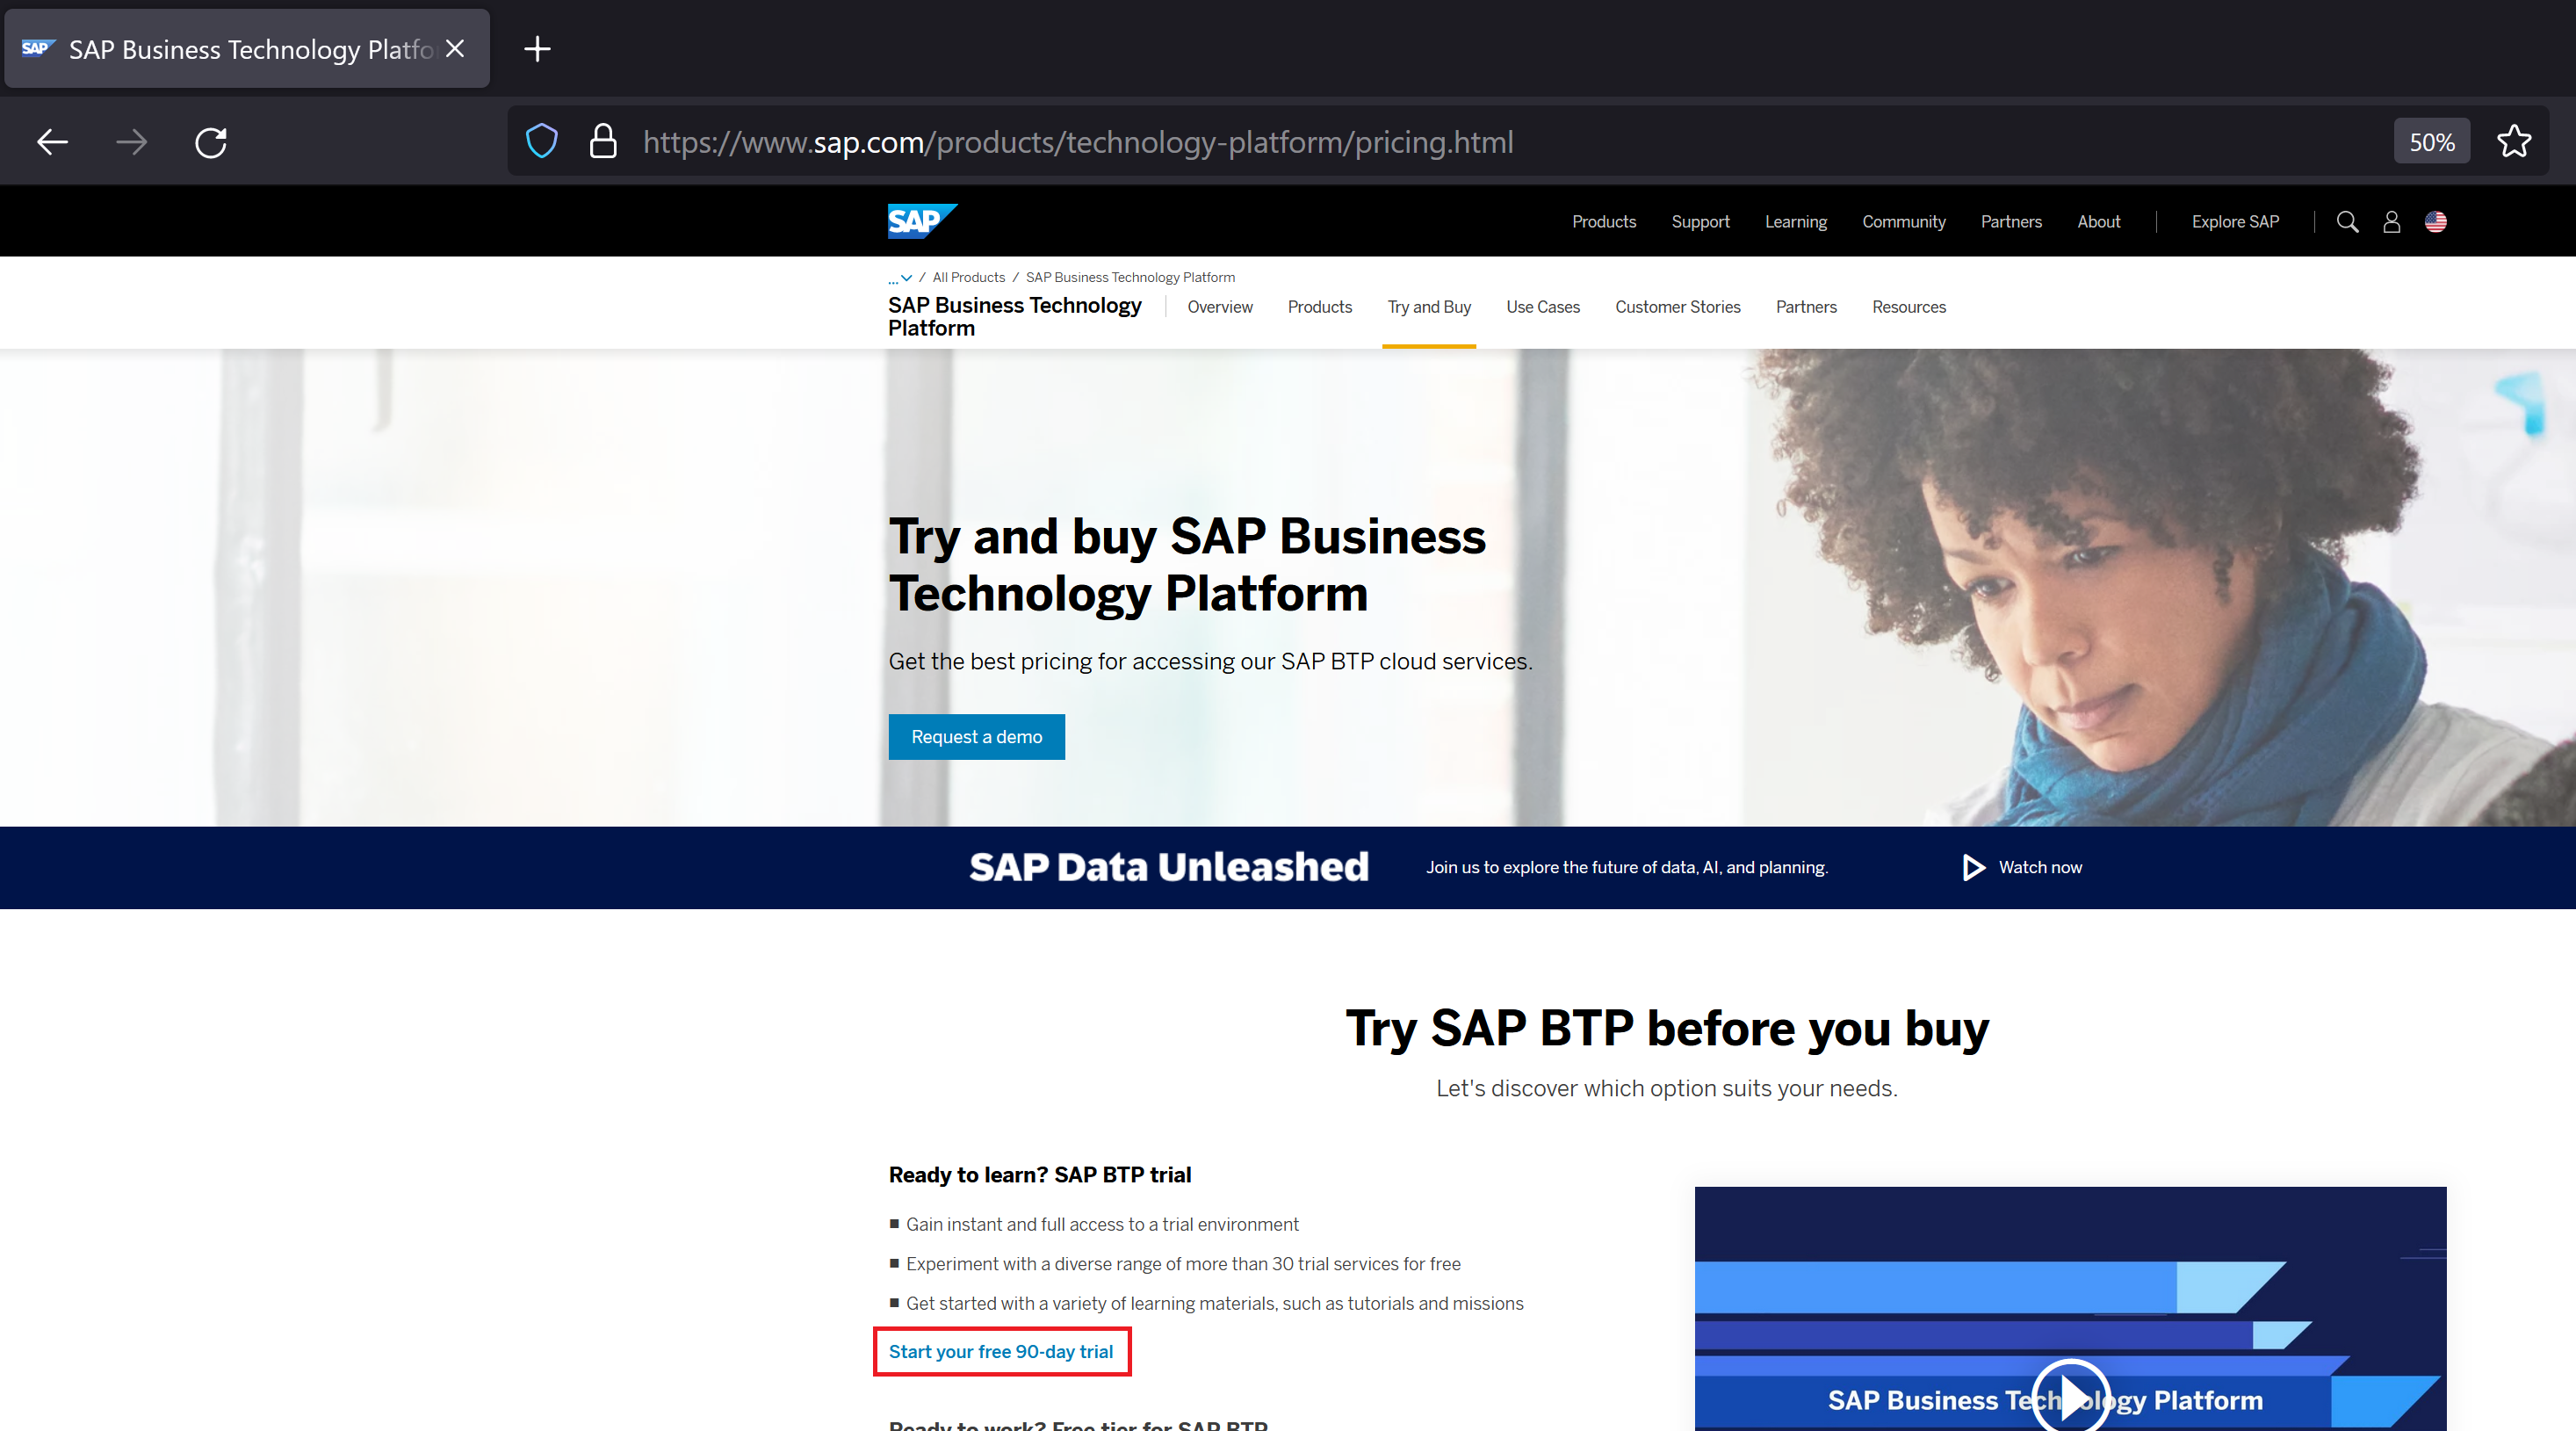
Go to sap.com and navigate to products → Trials and Demos
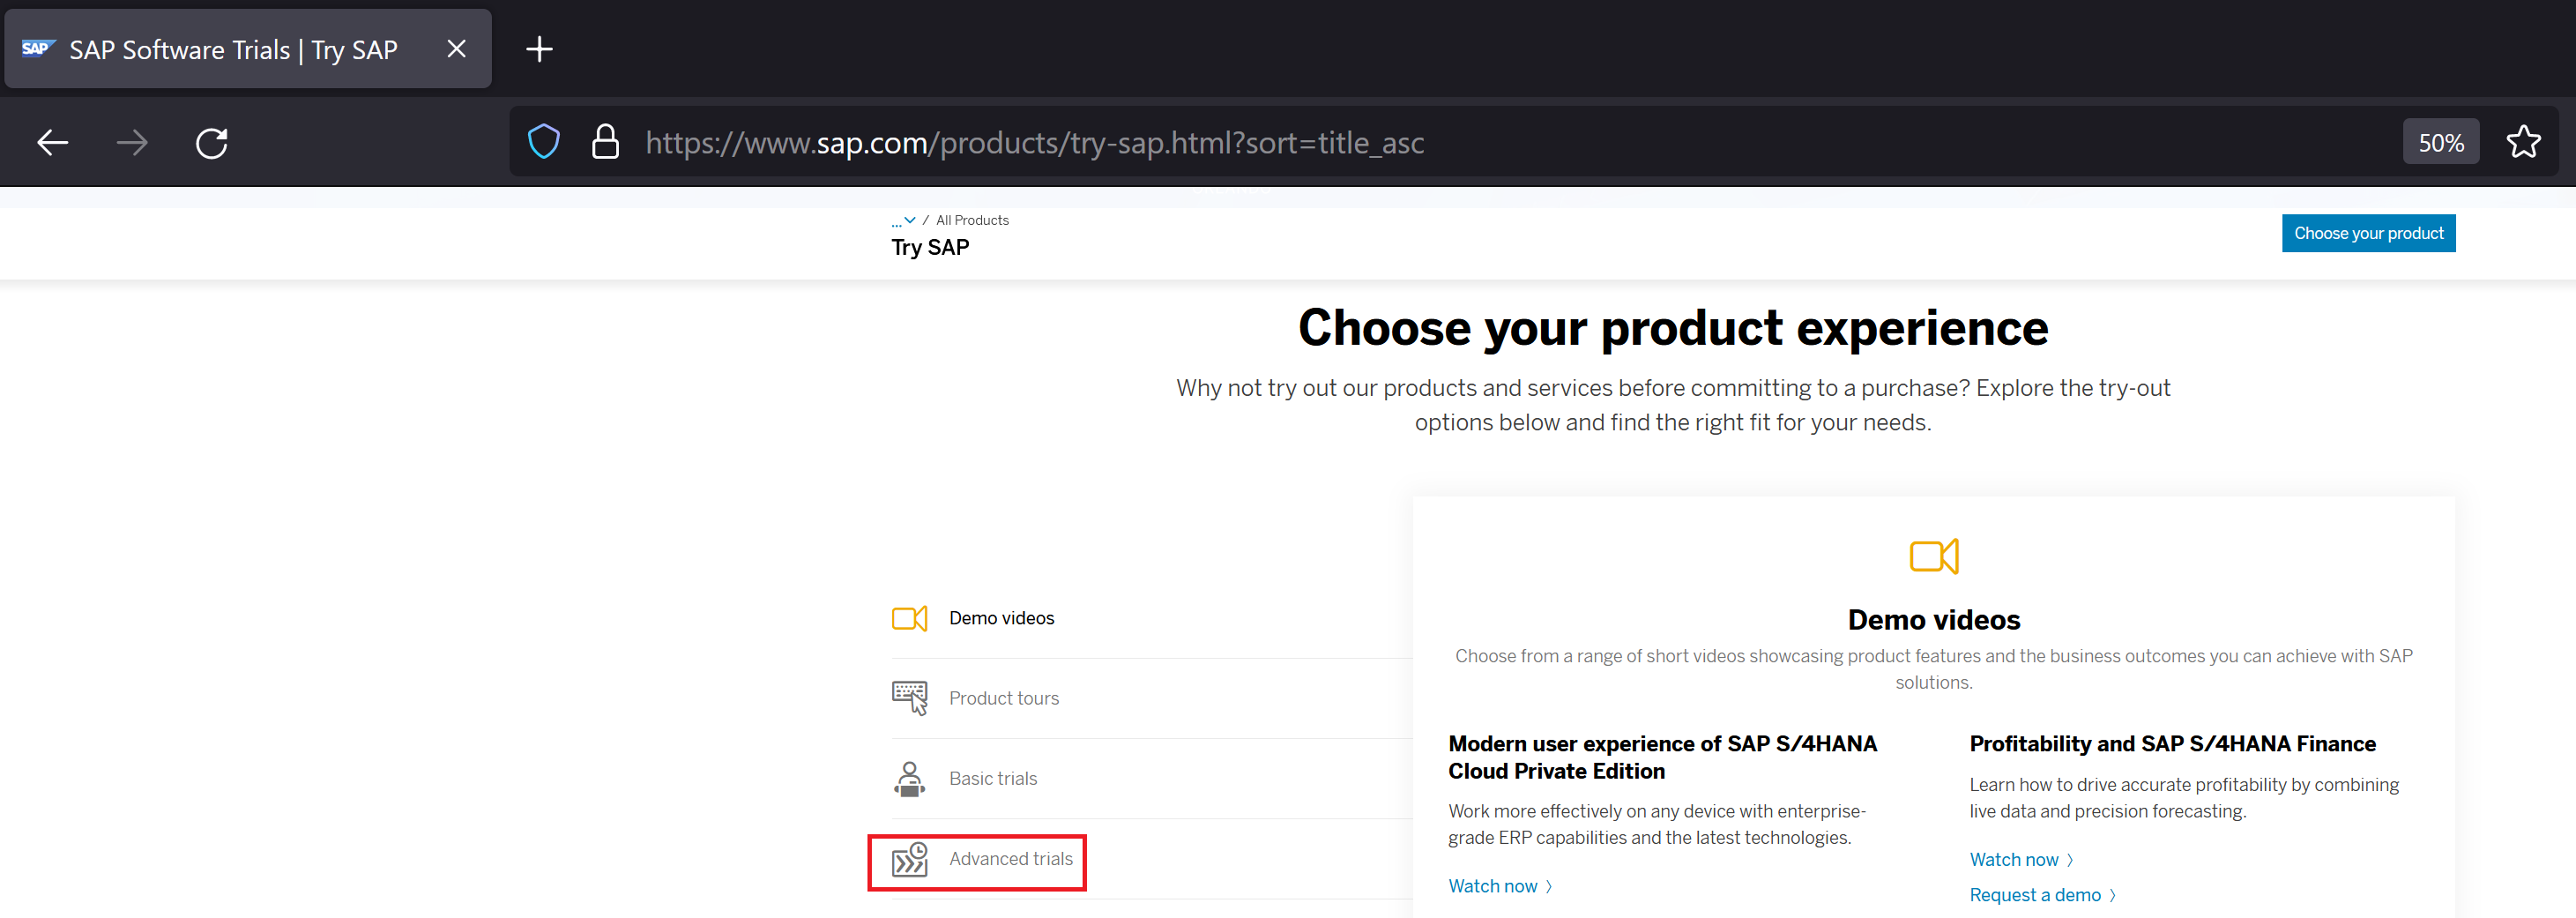
Click Advanced Trials
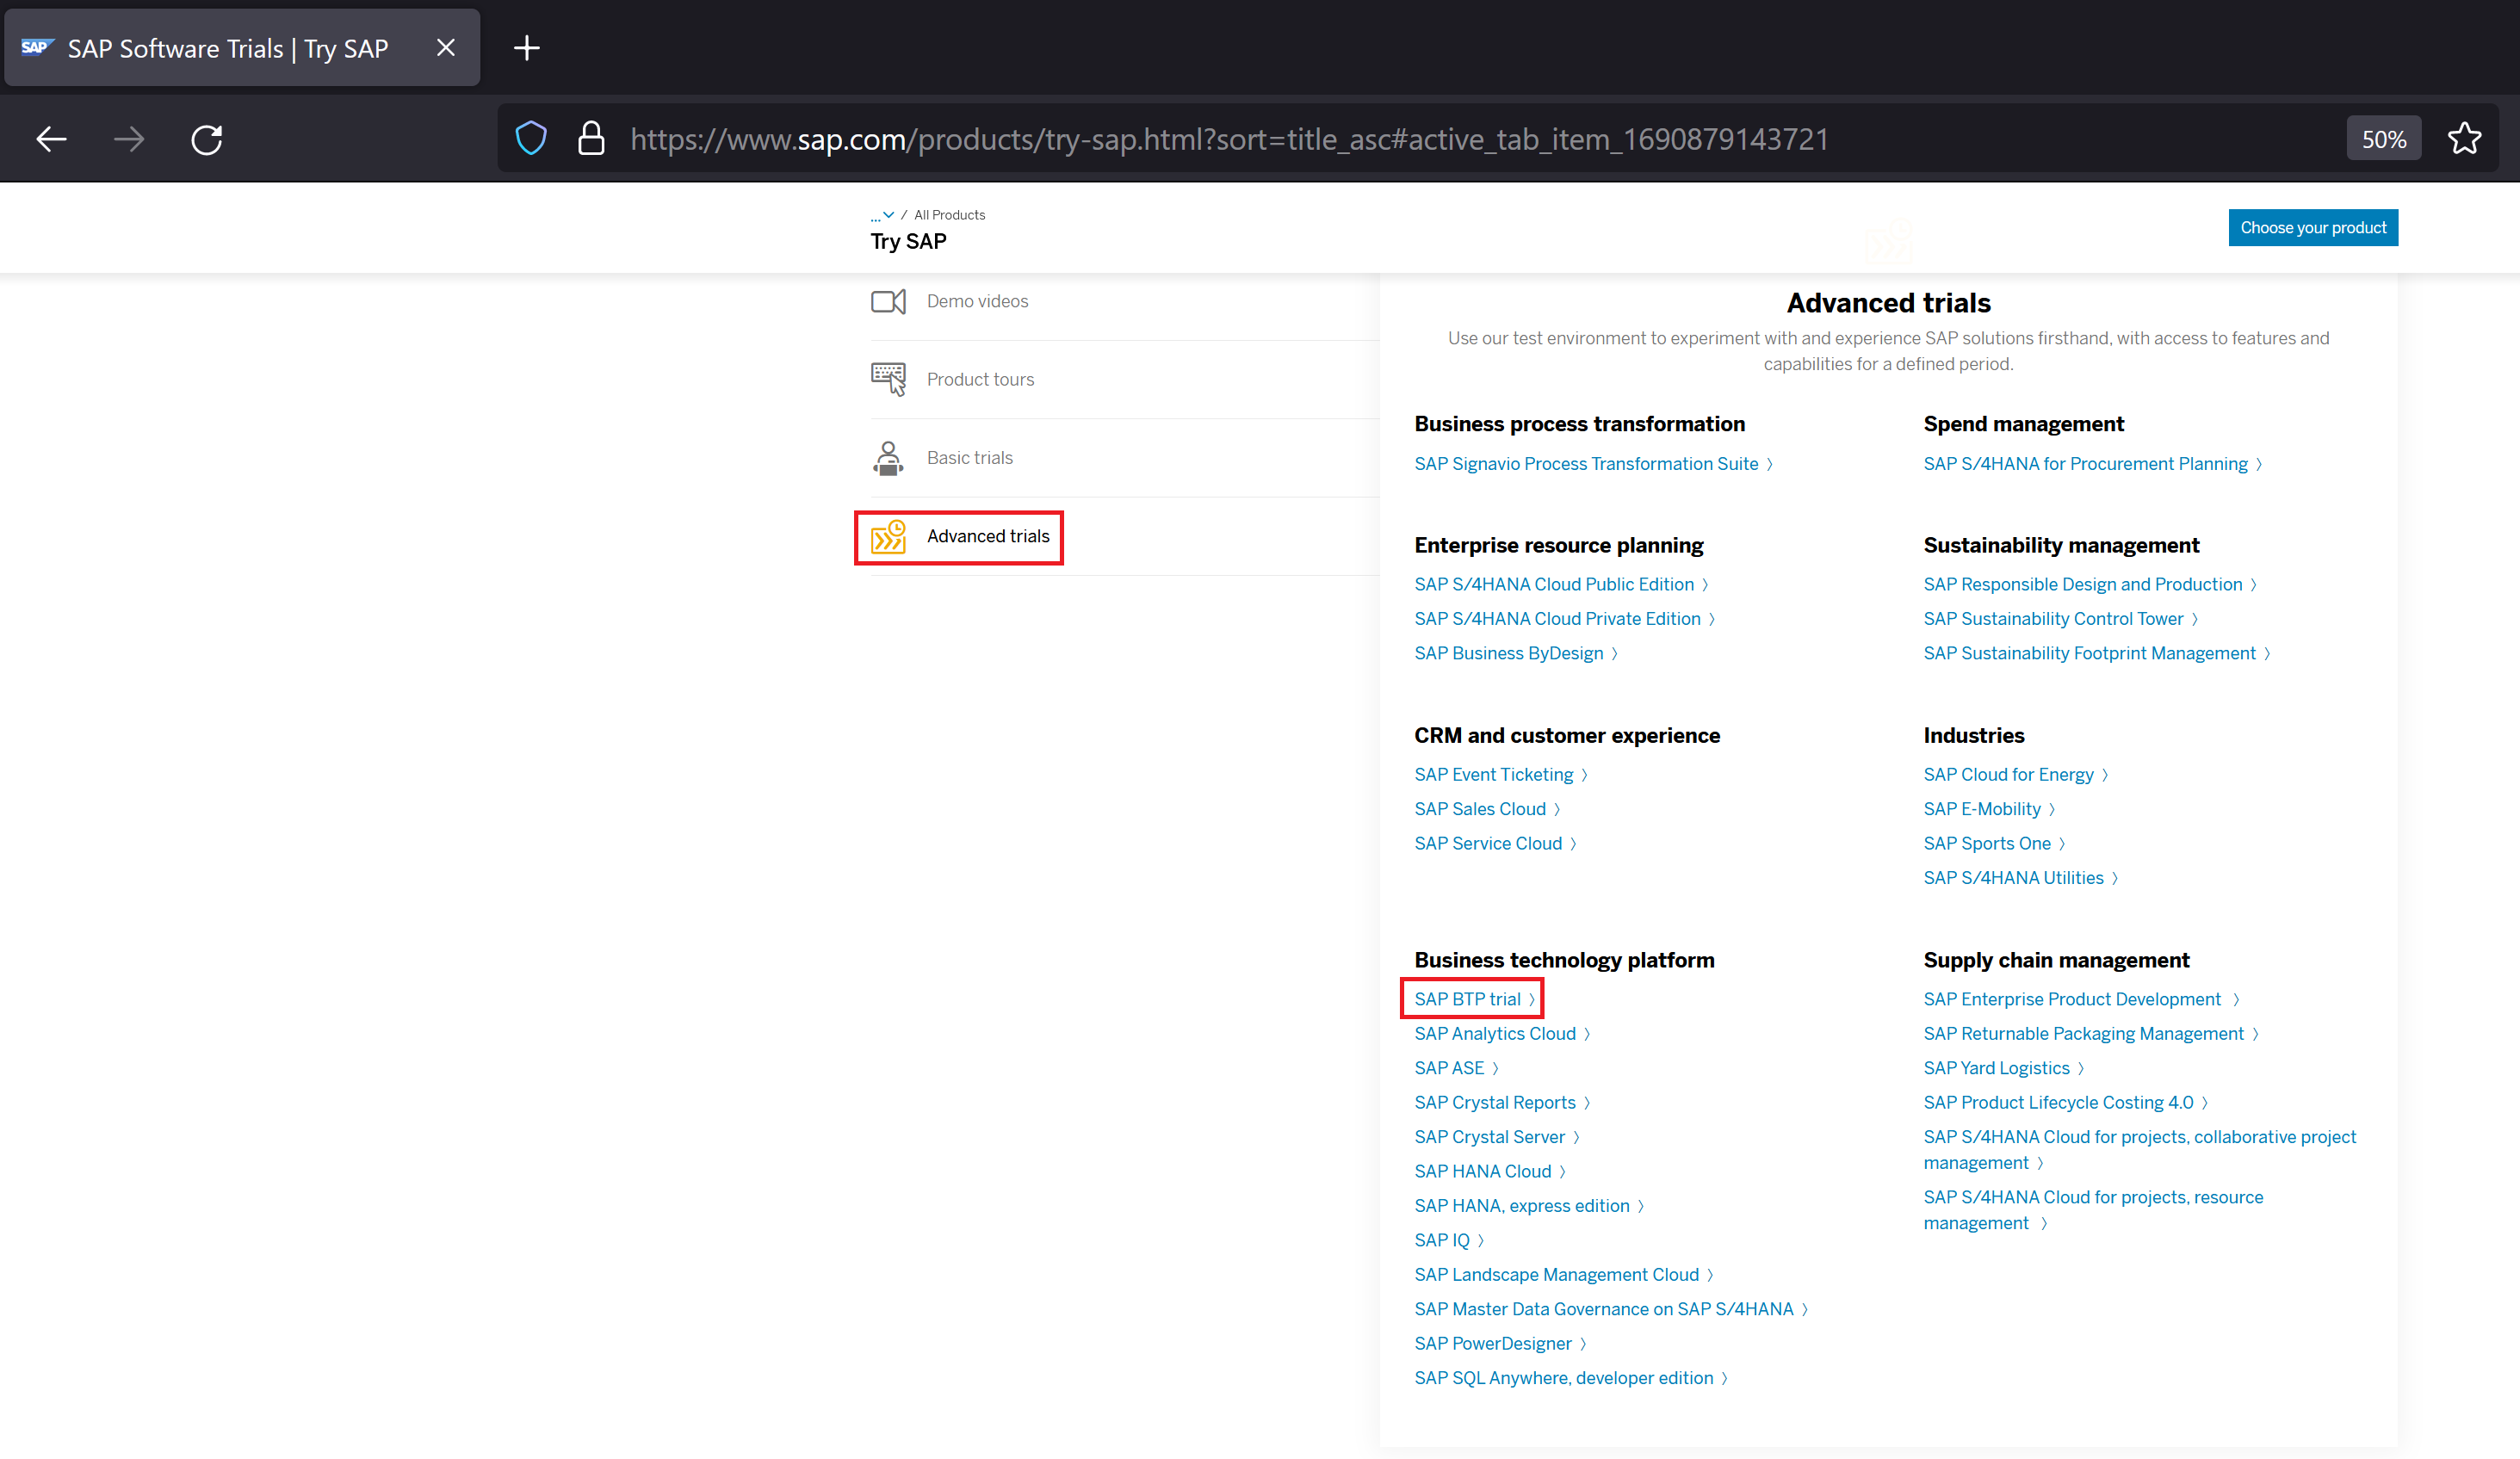
Click SAP BTP Trial
Click Start your free 90-day trial
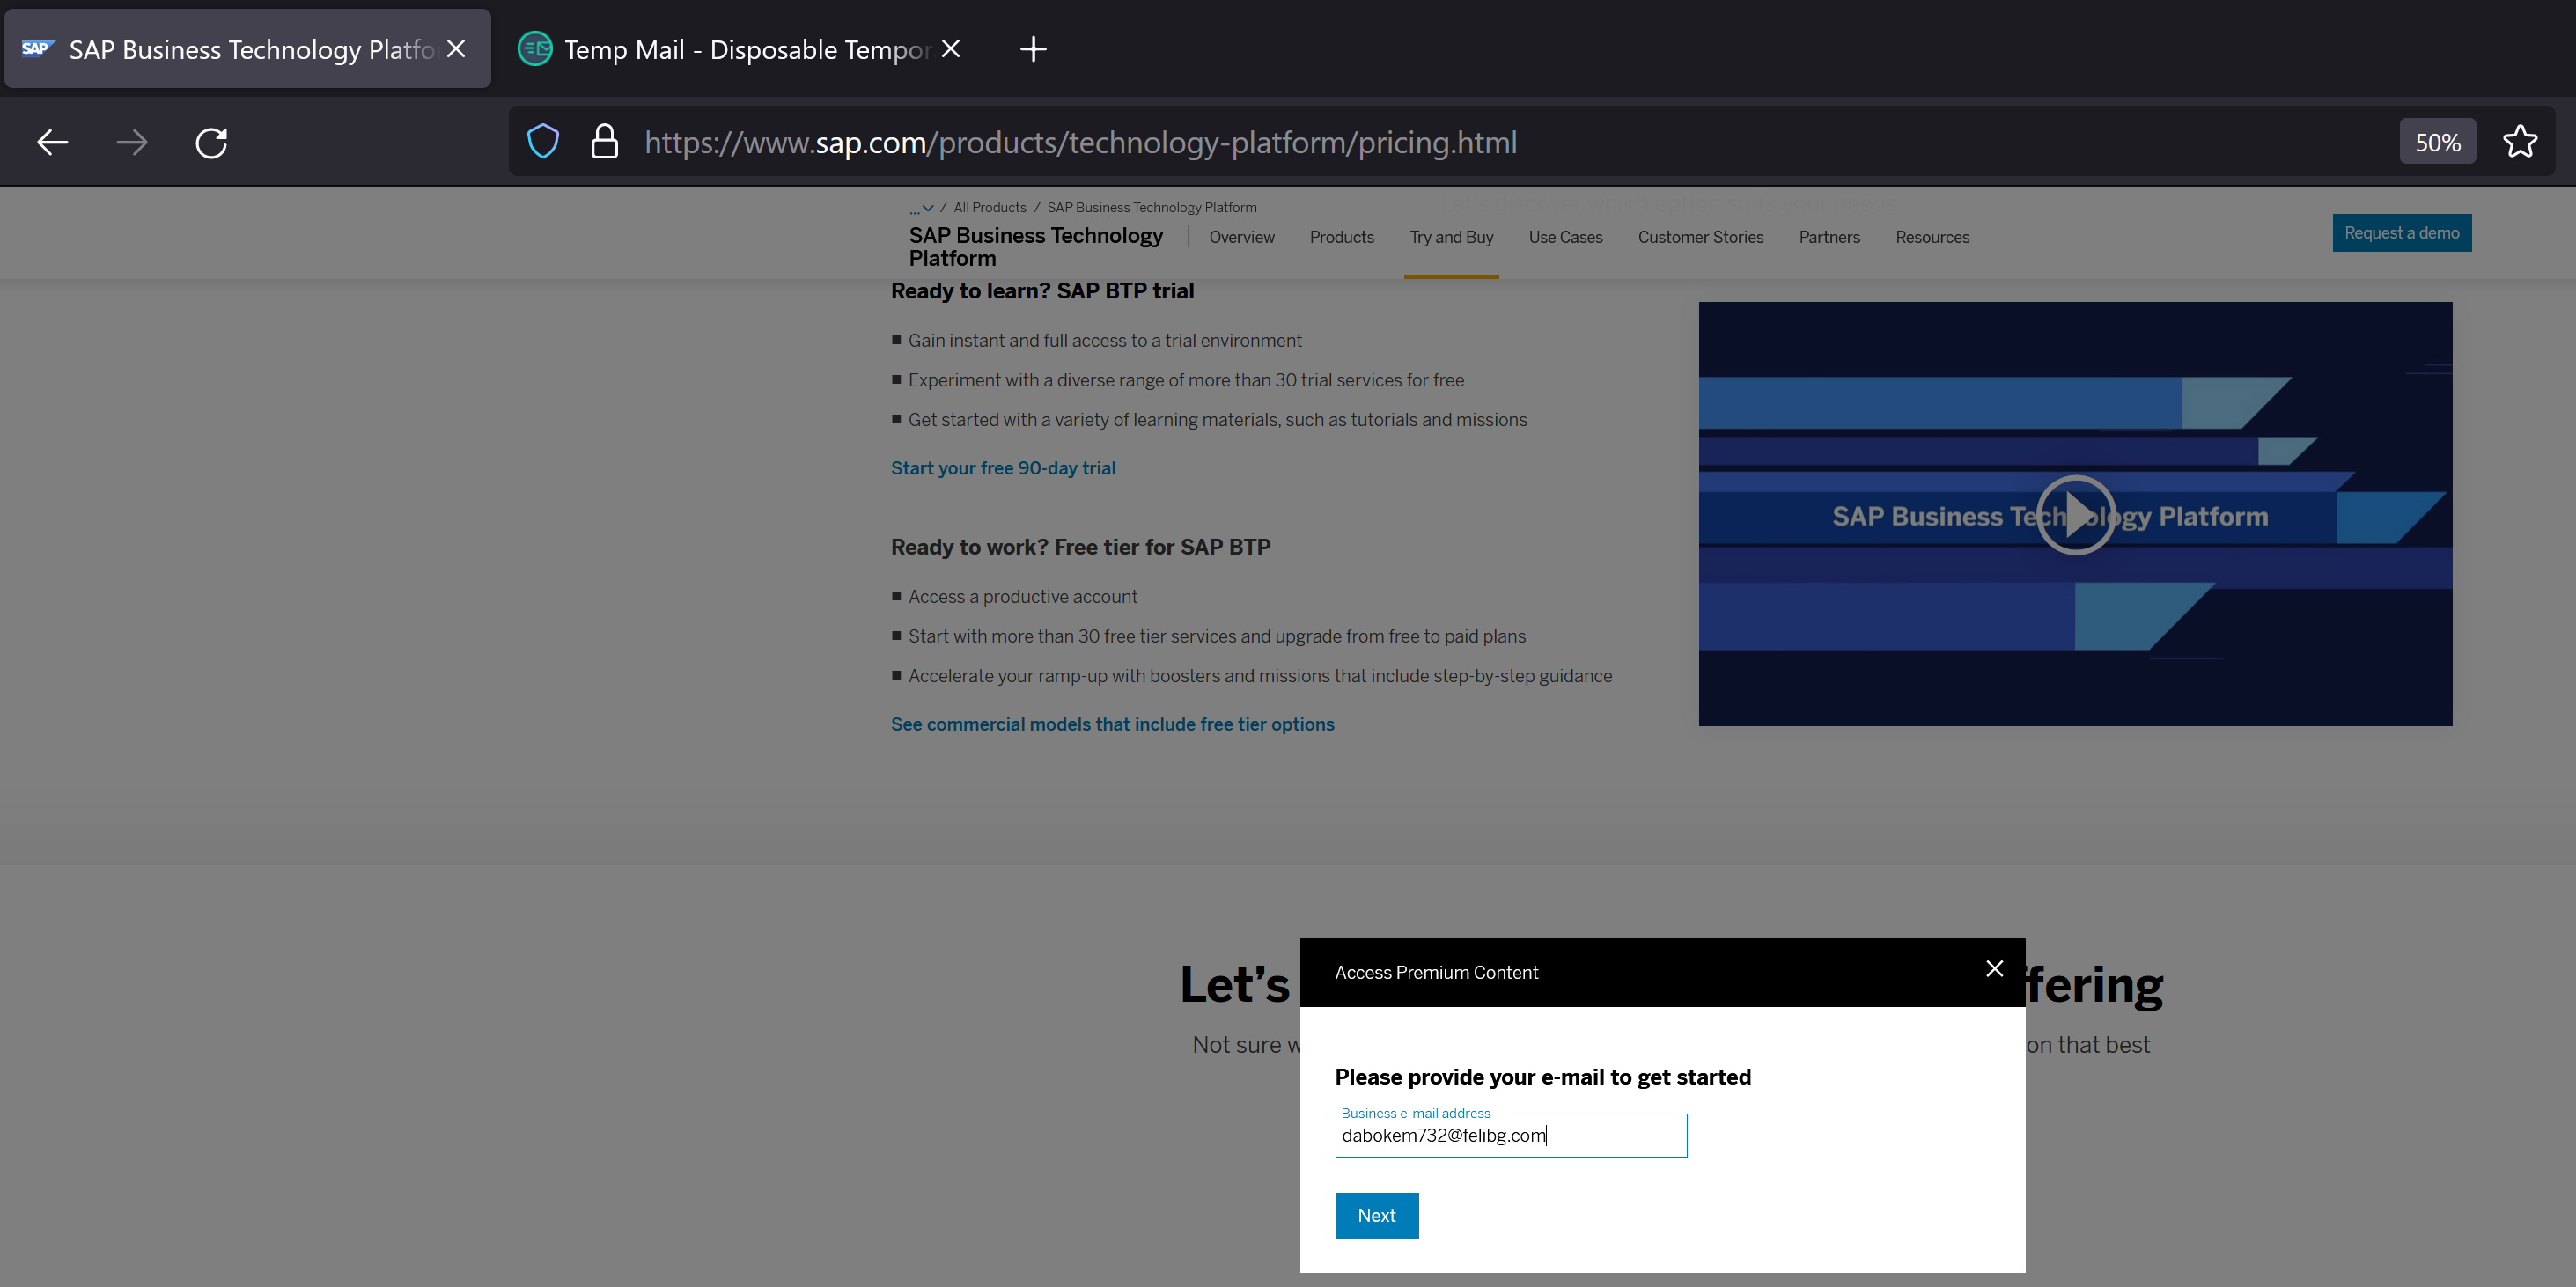
Paste the temporary email id that we created in the first step, and click Next
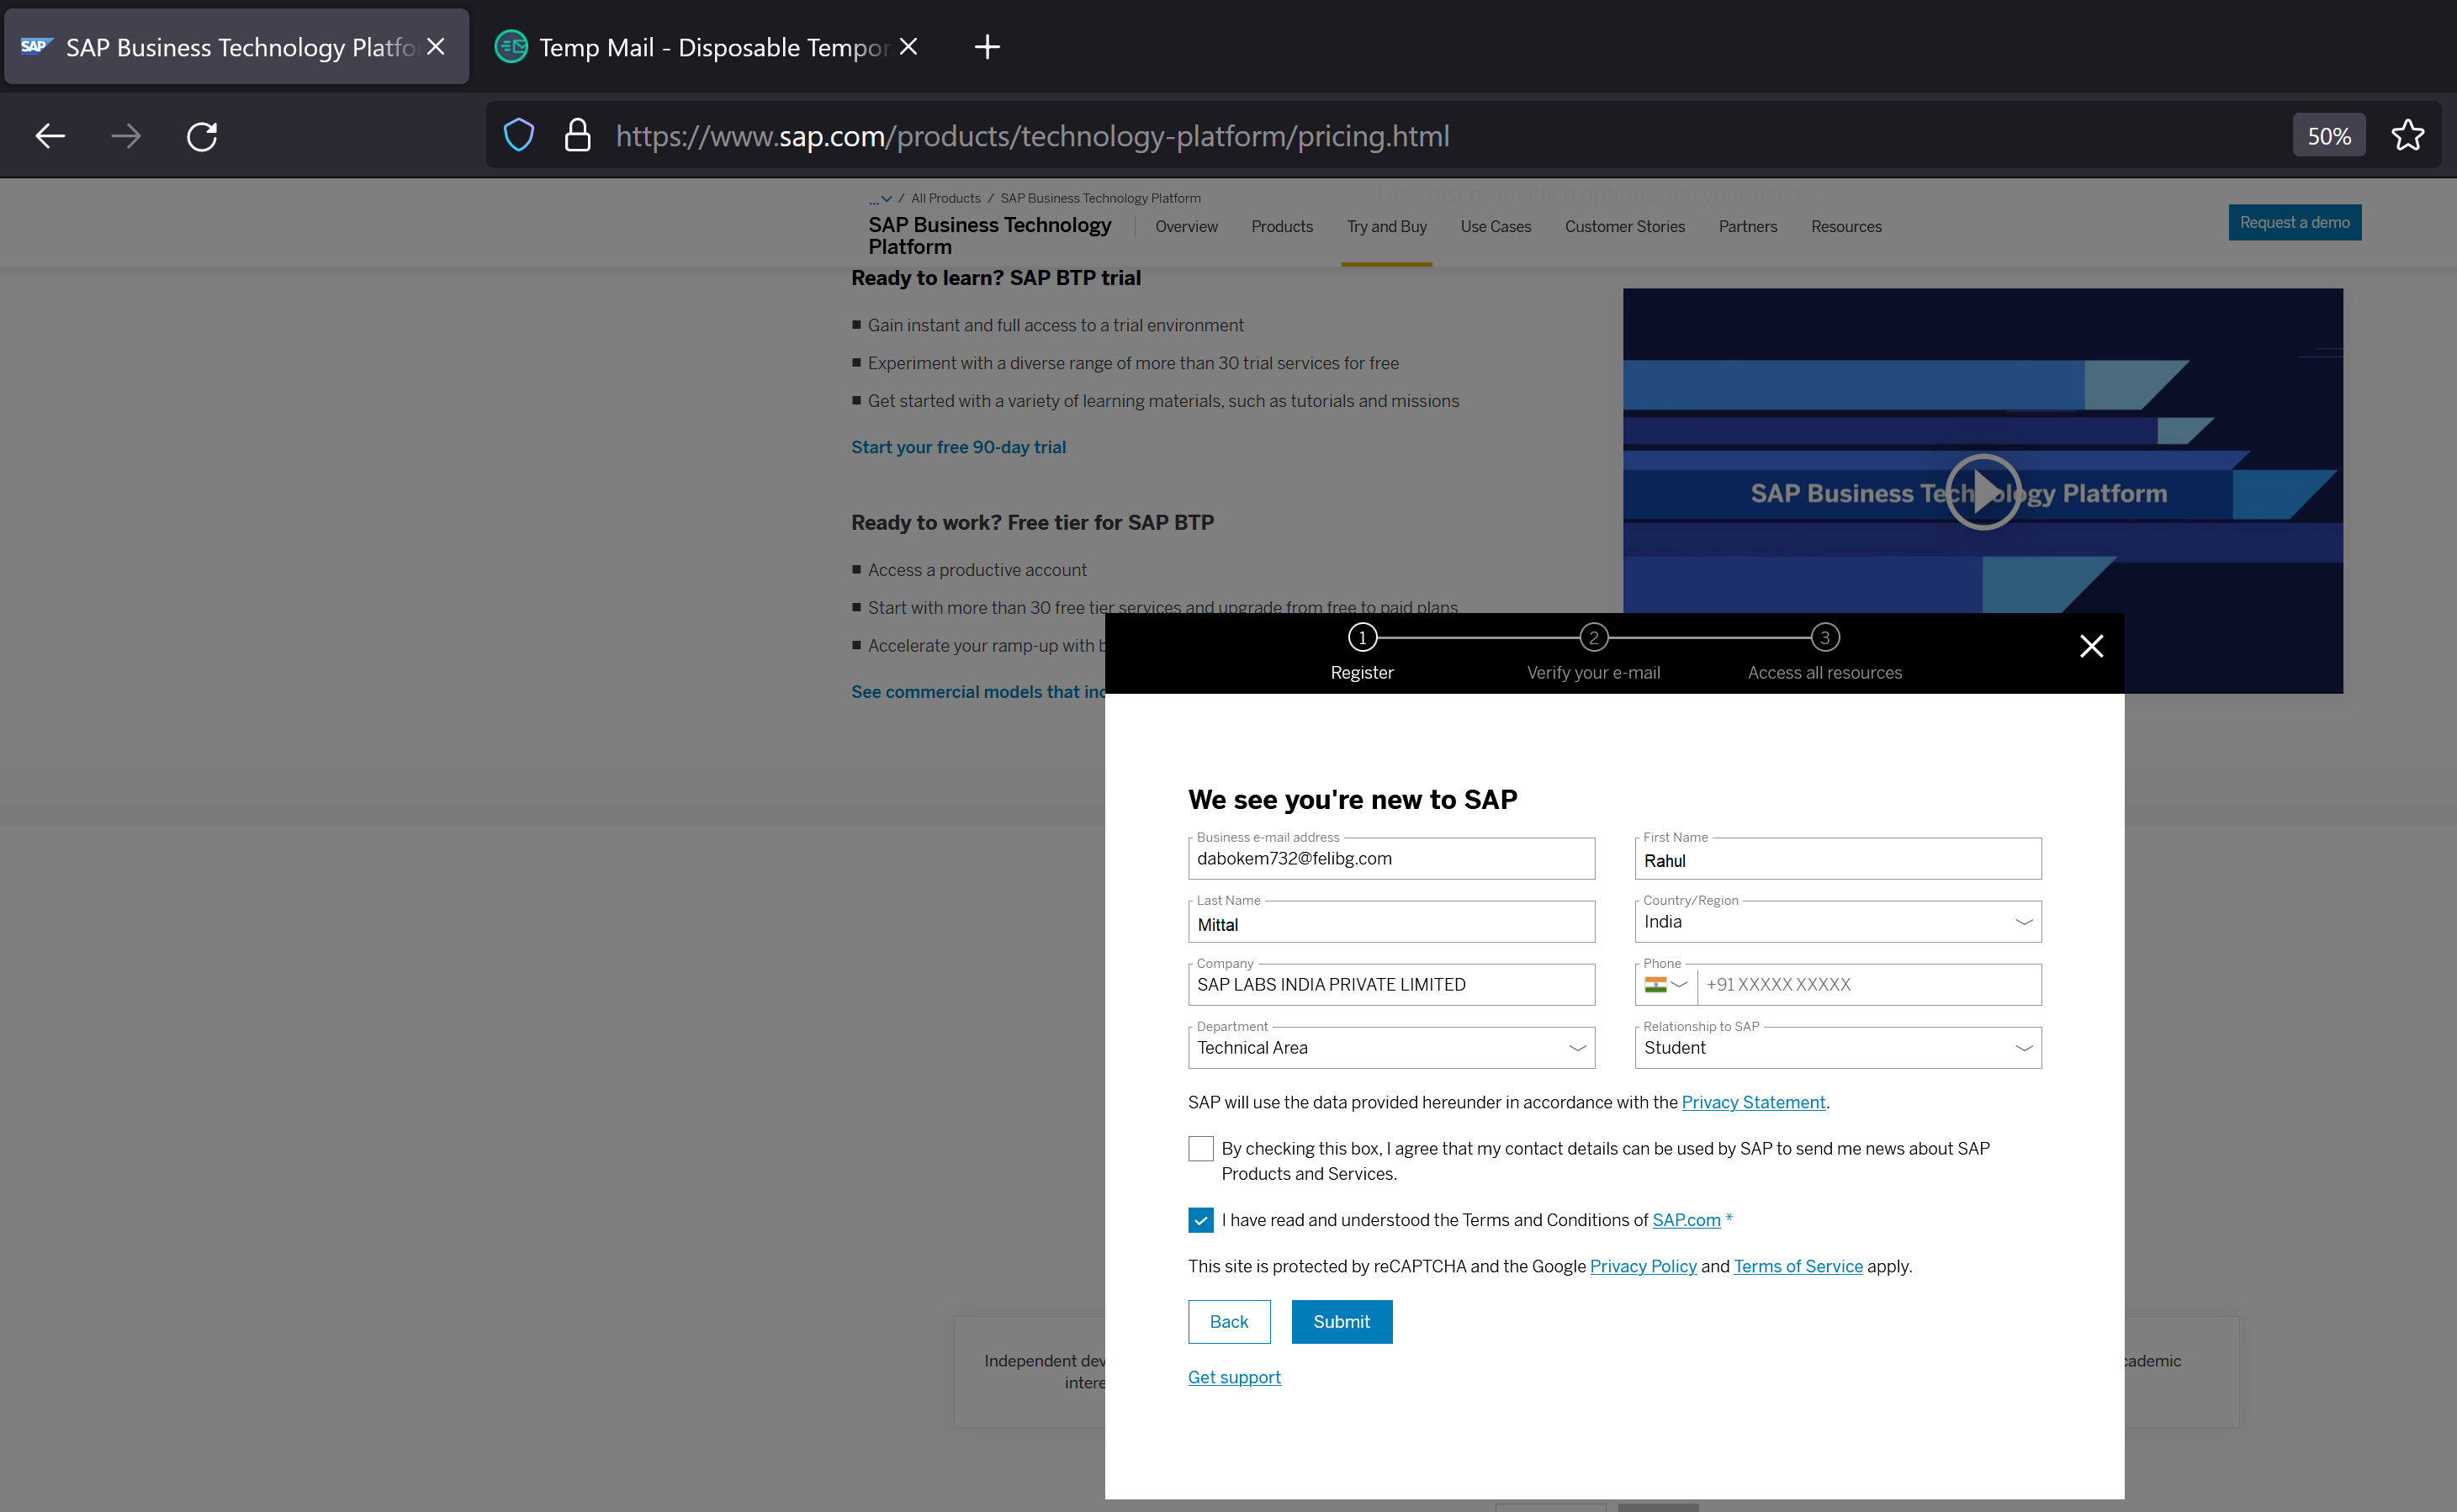
We fill in our details and click Submit
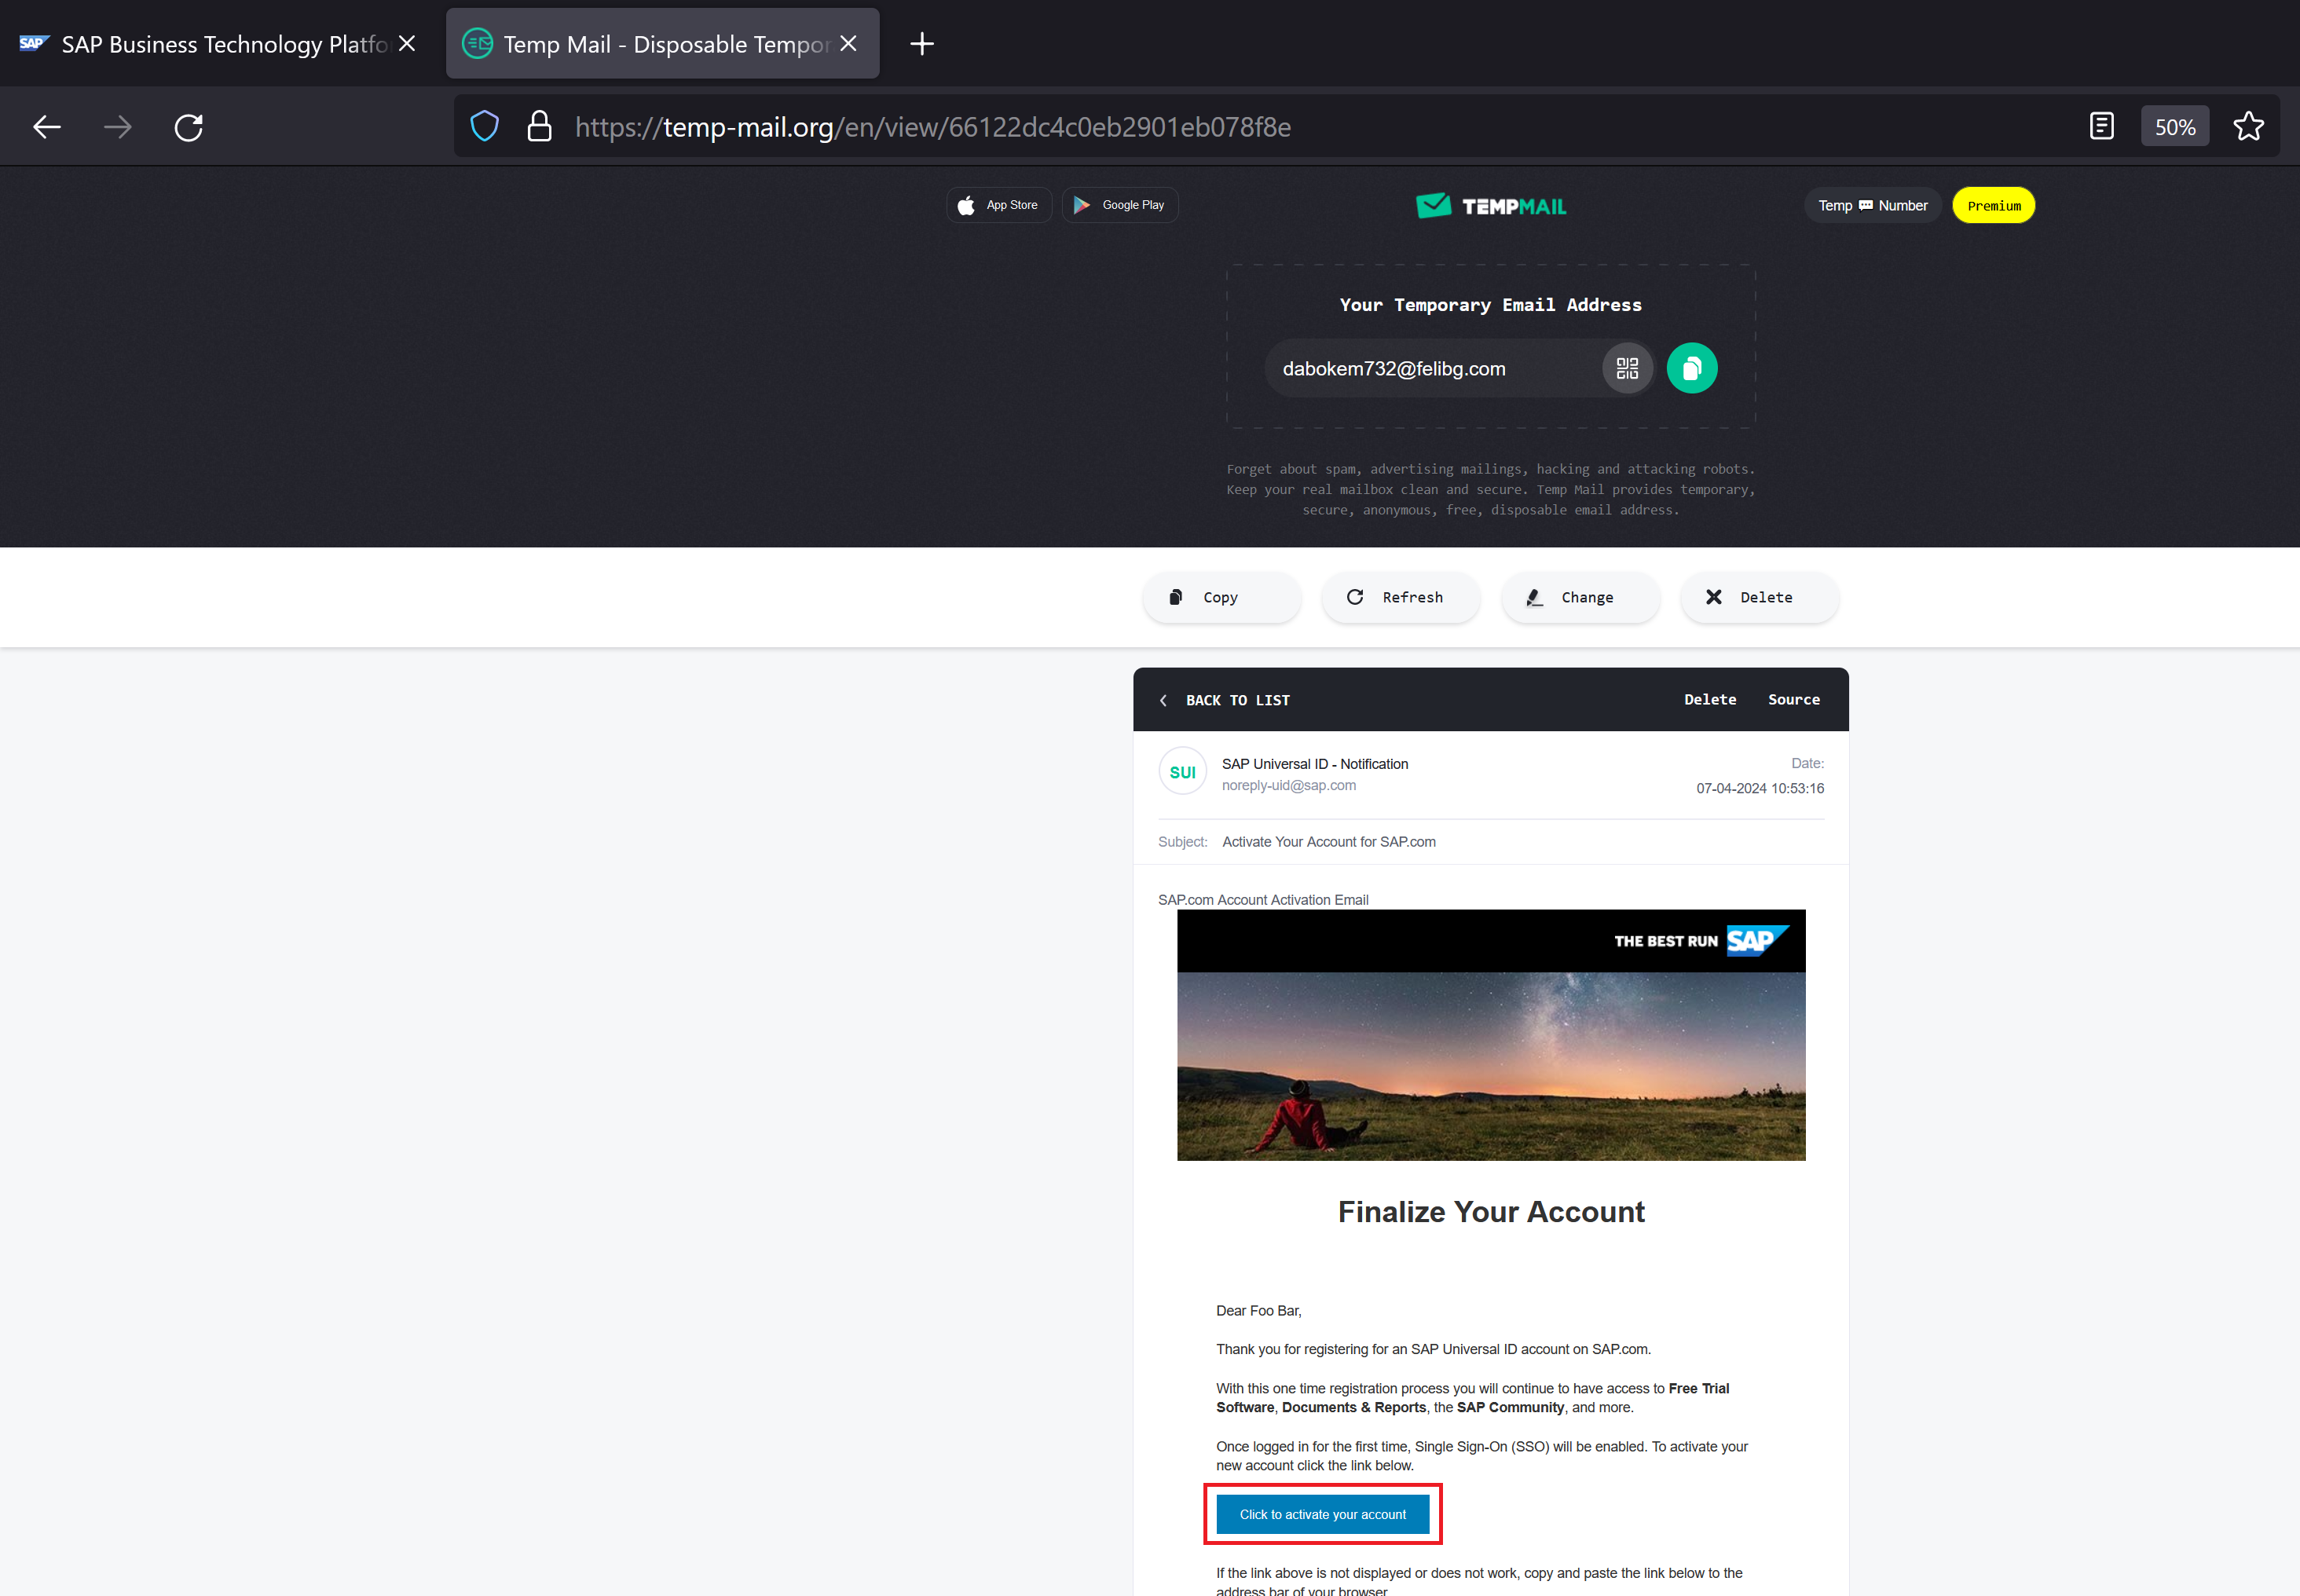
It’s time to check the inbox of our temporary email account

Notice that there is an email received in our temporary email account

Open the email and click to activate the trial account
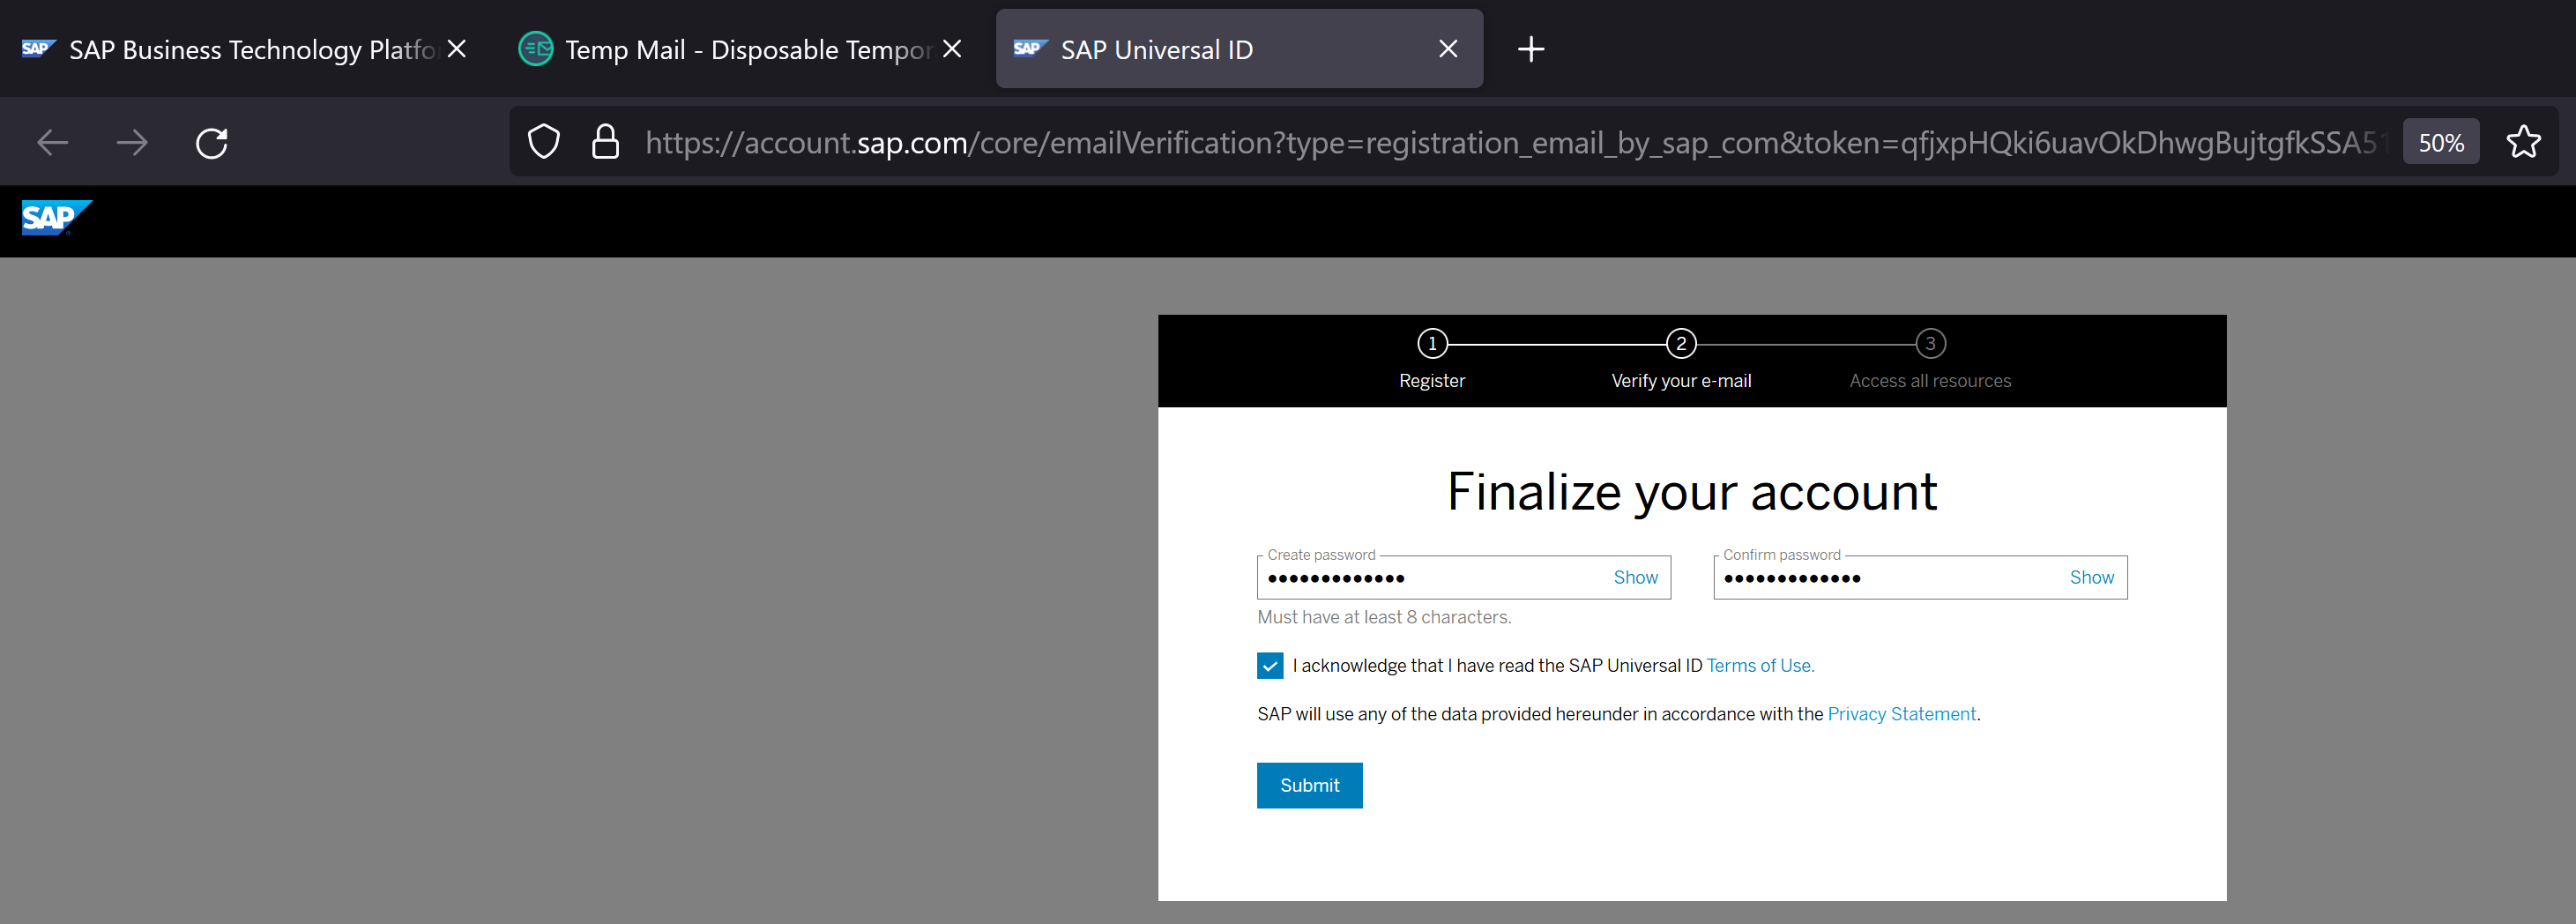
It will prompt to create a password. Provide a password and click Submit
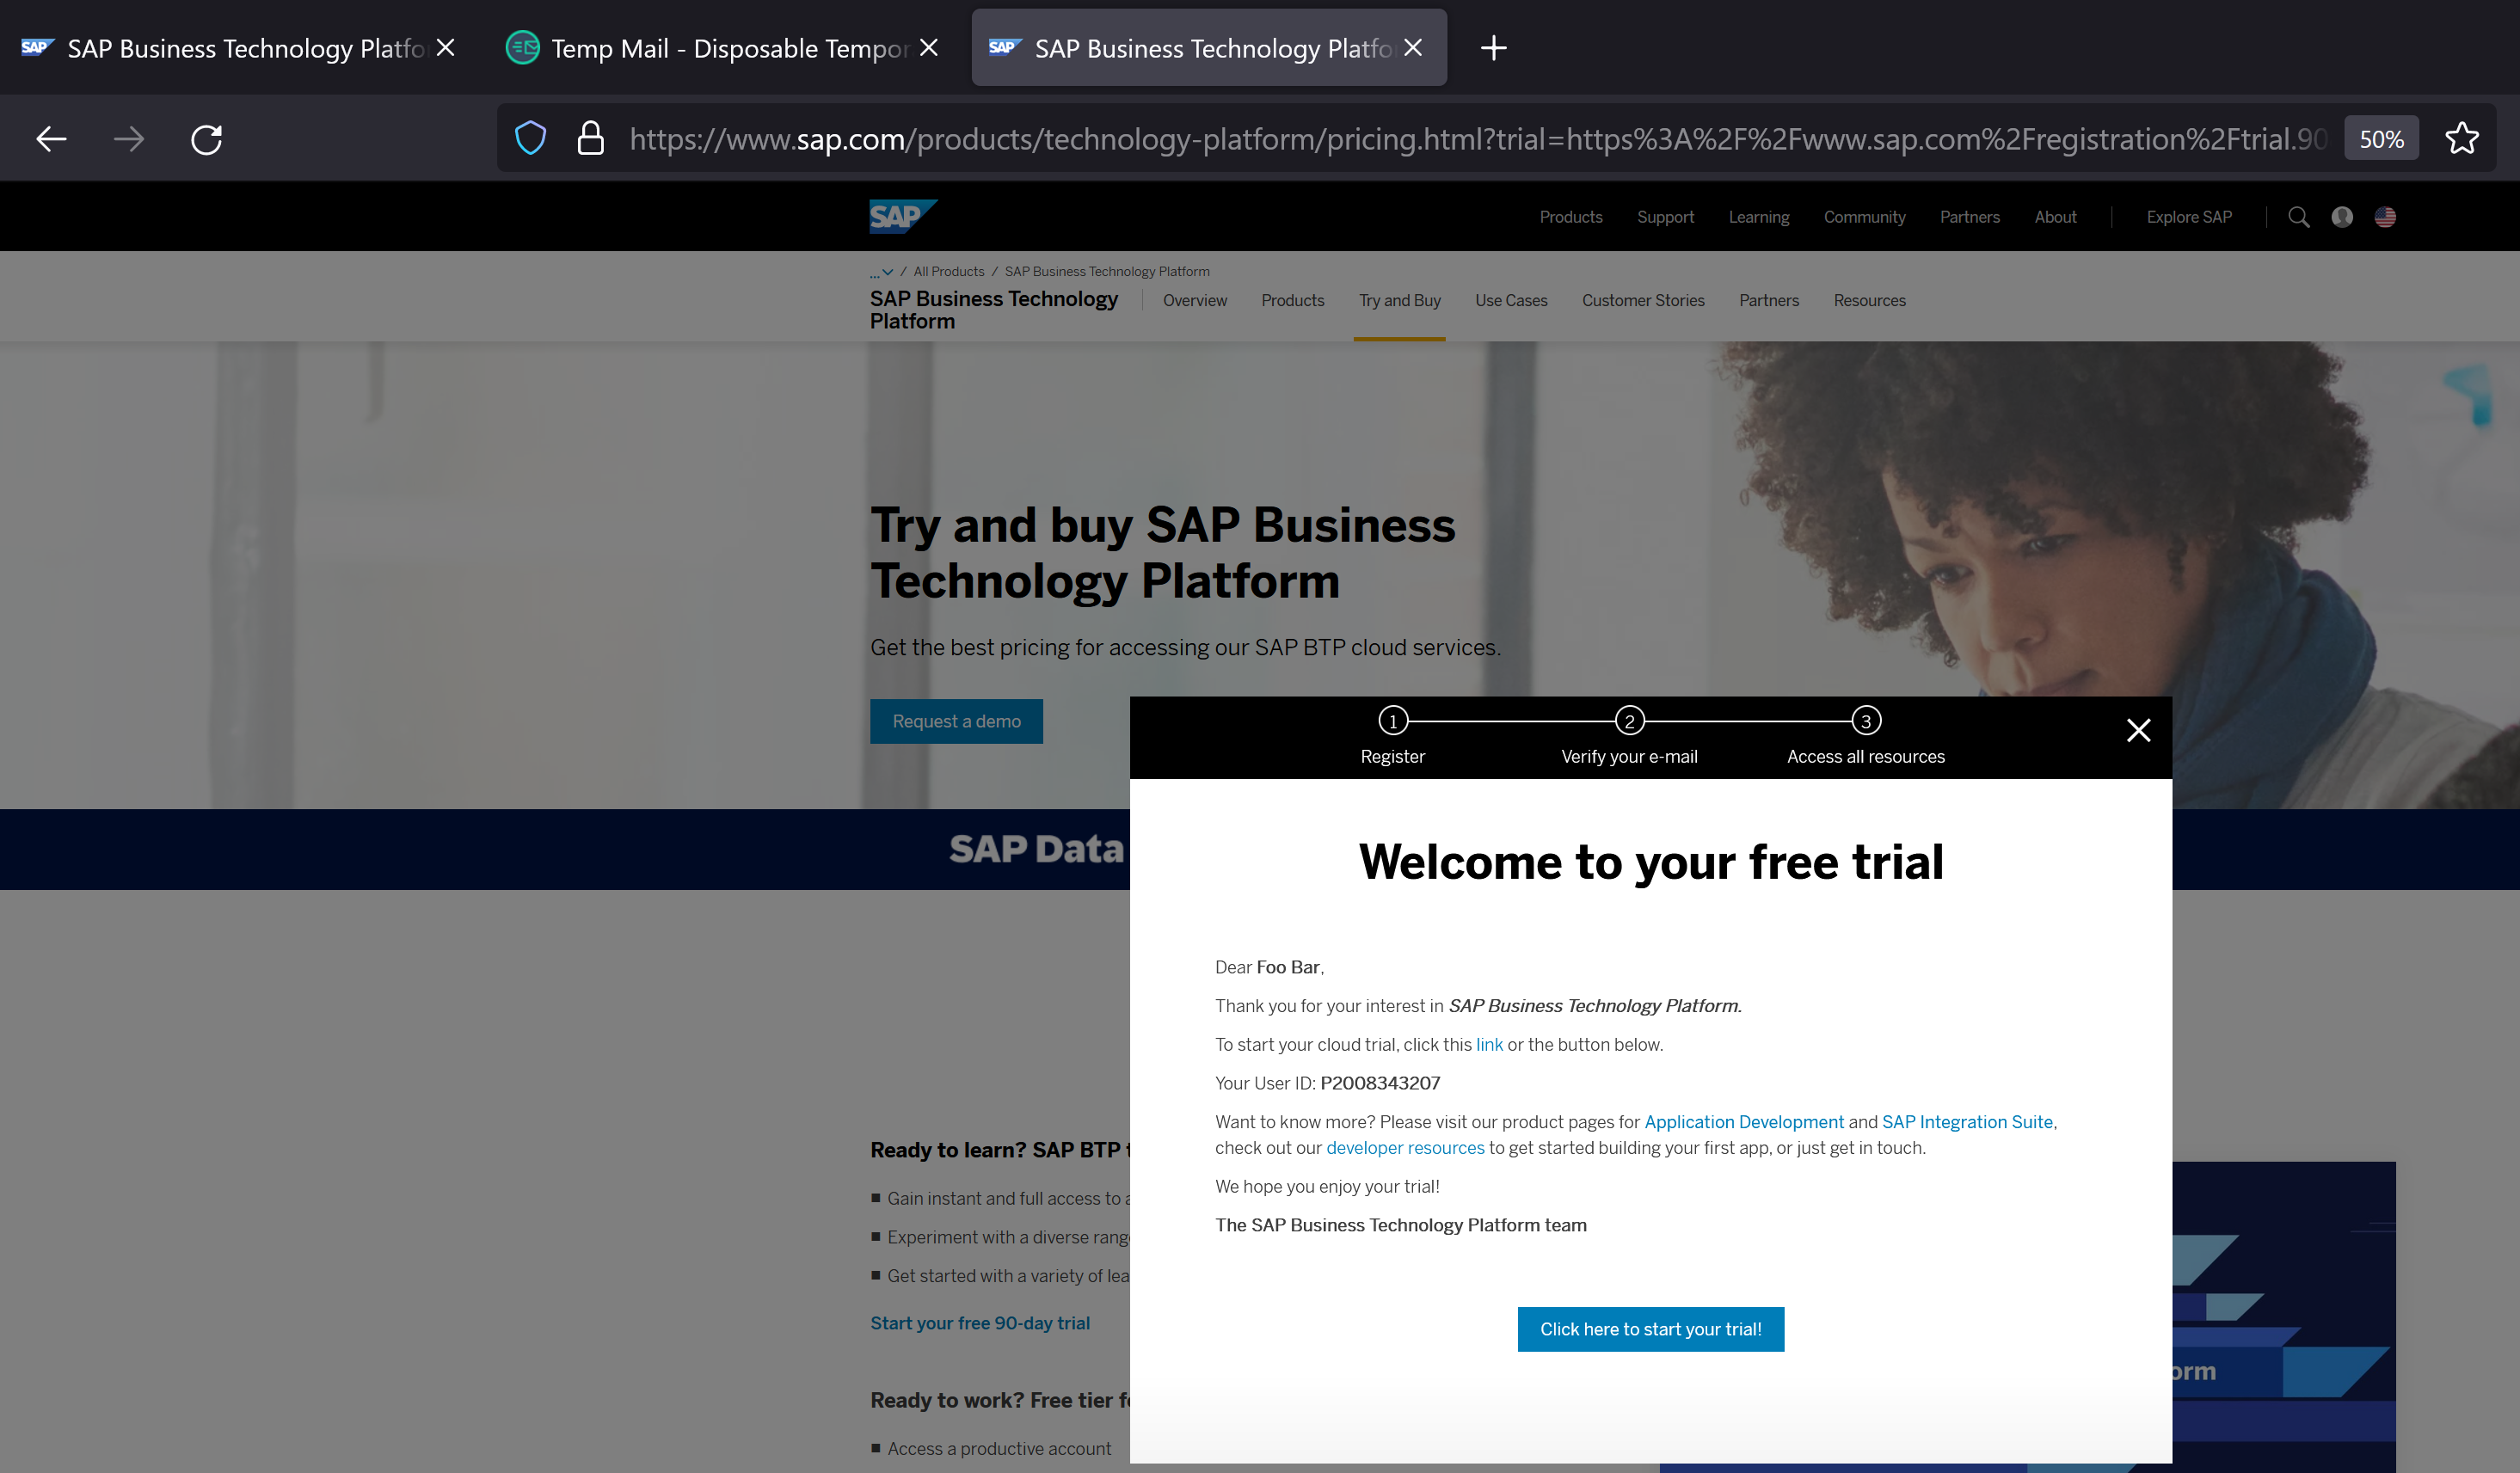
The trial account is now created. Click to start the trial
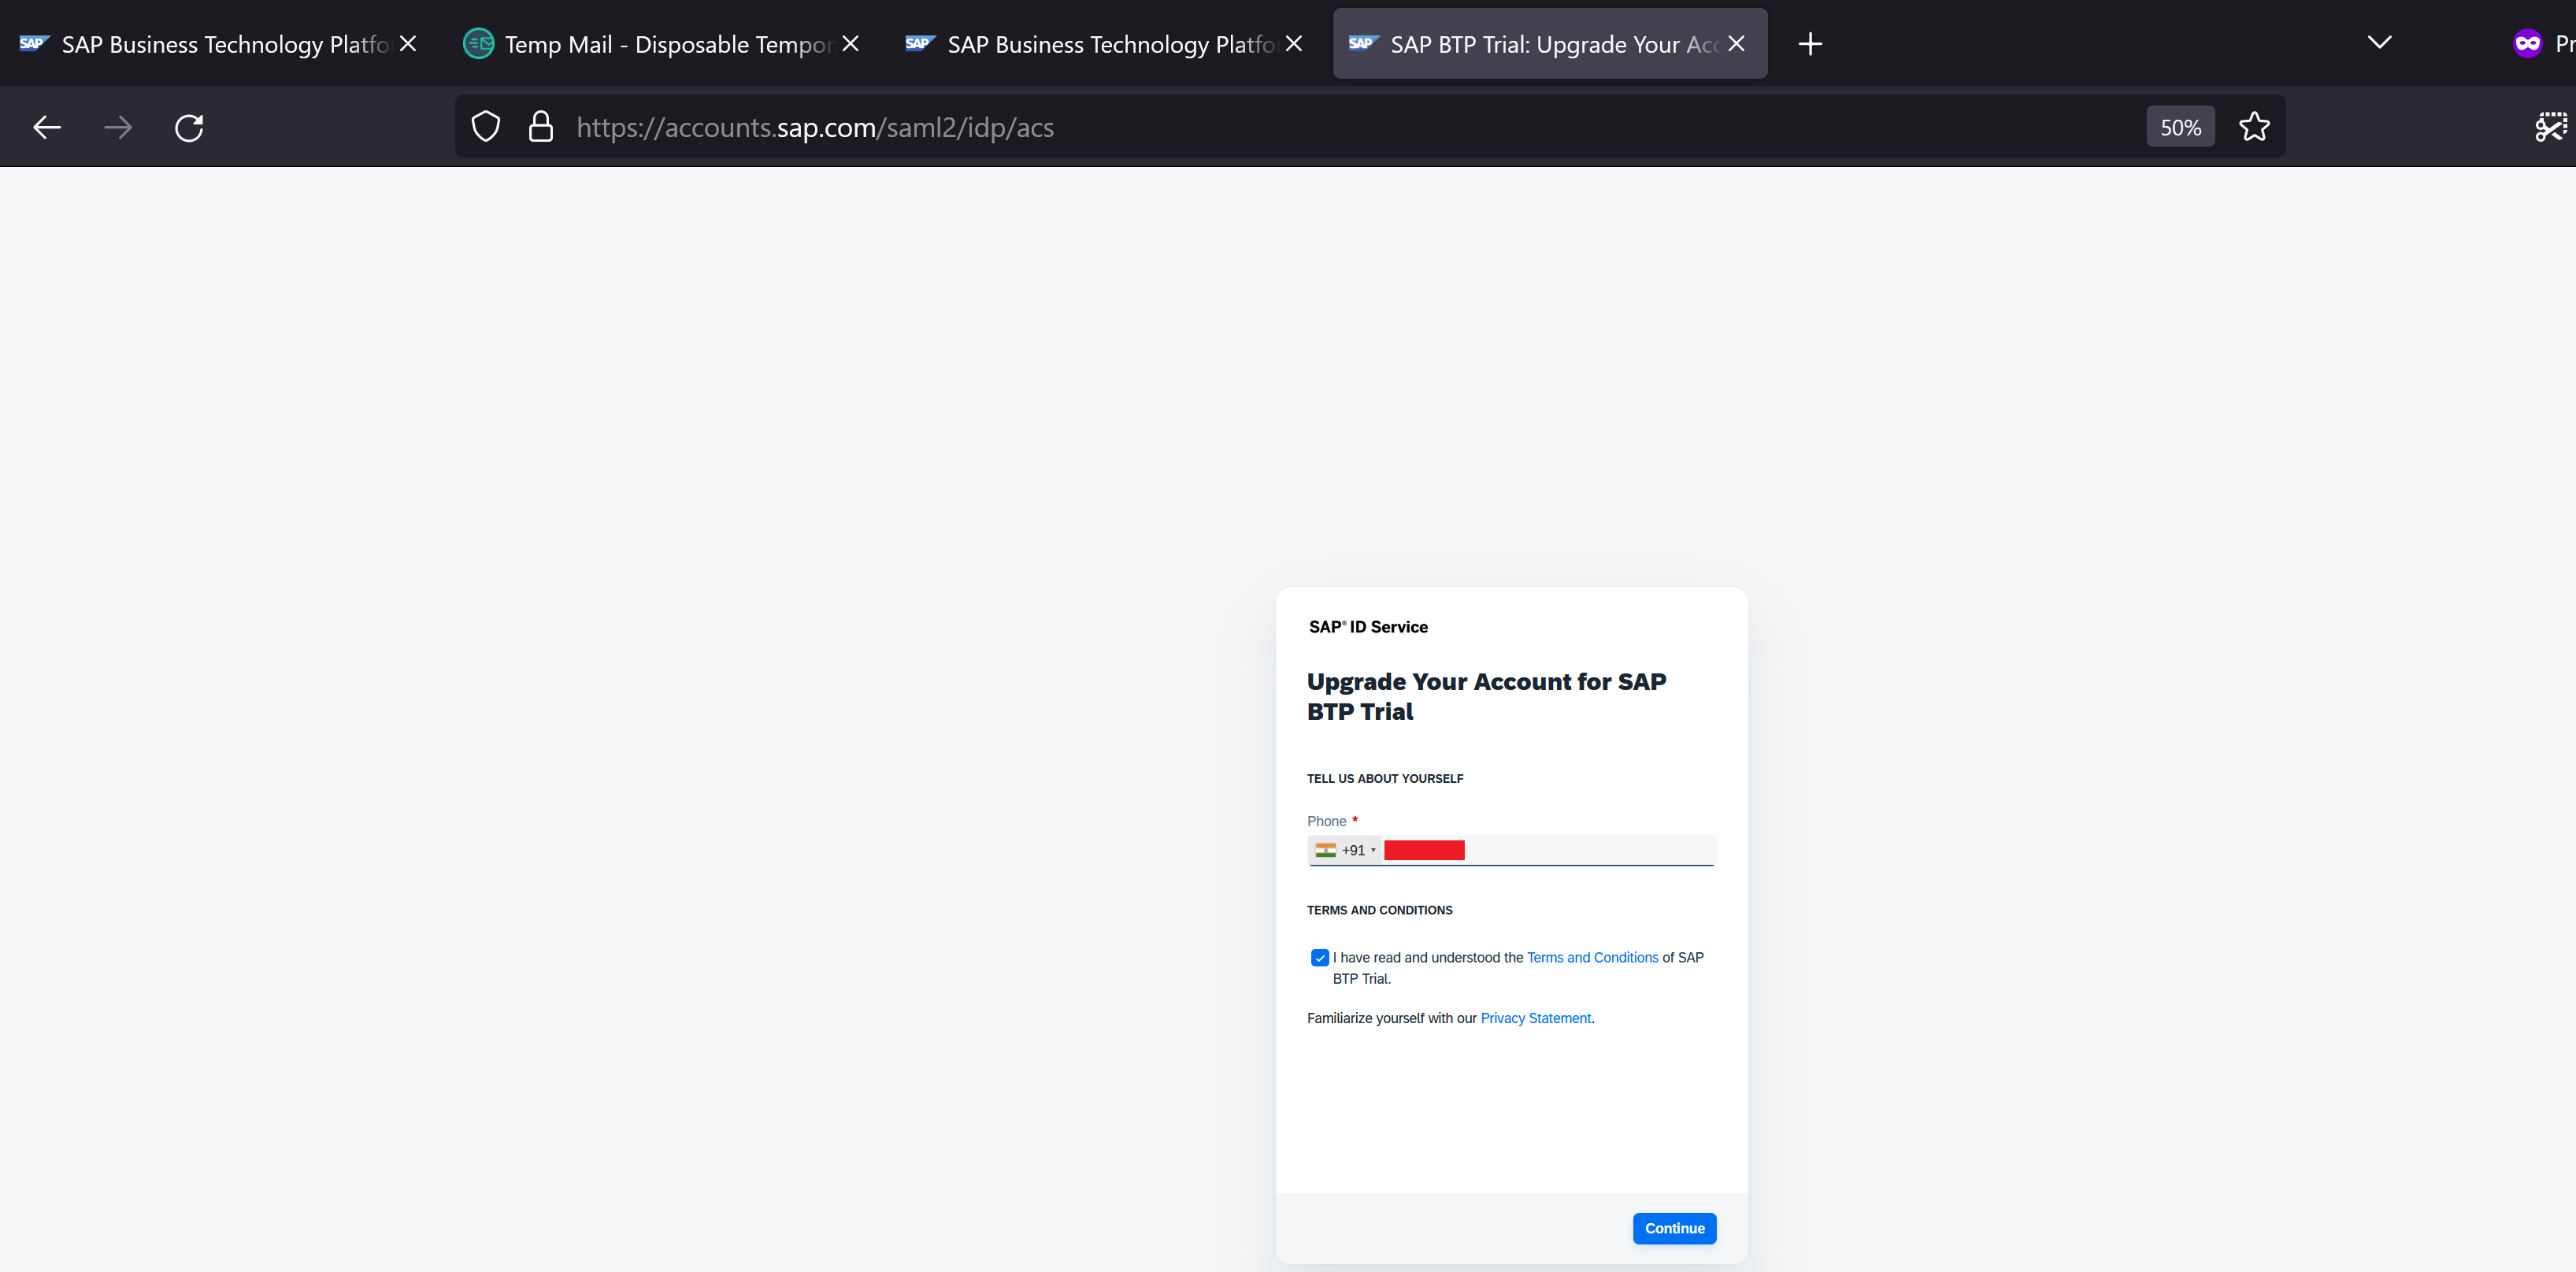
Provide your phone number and click Continue
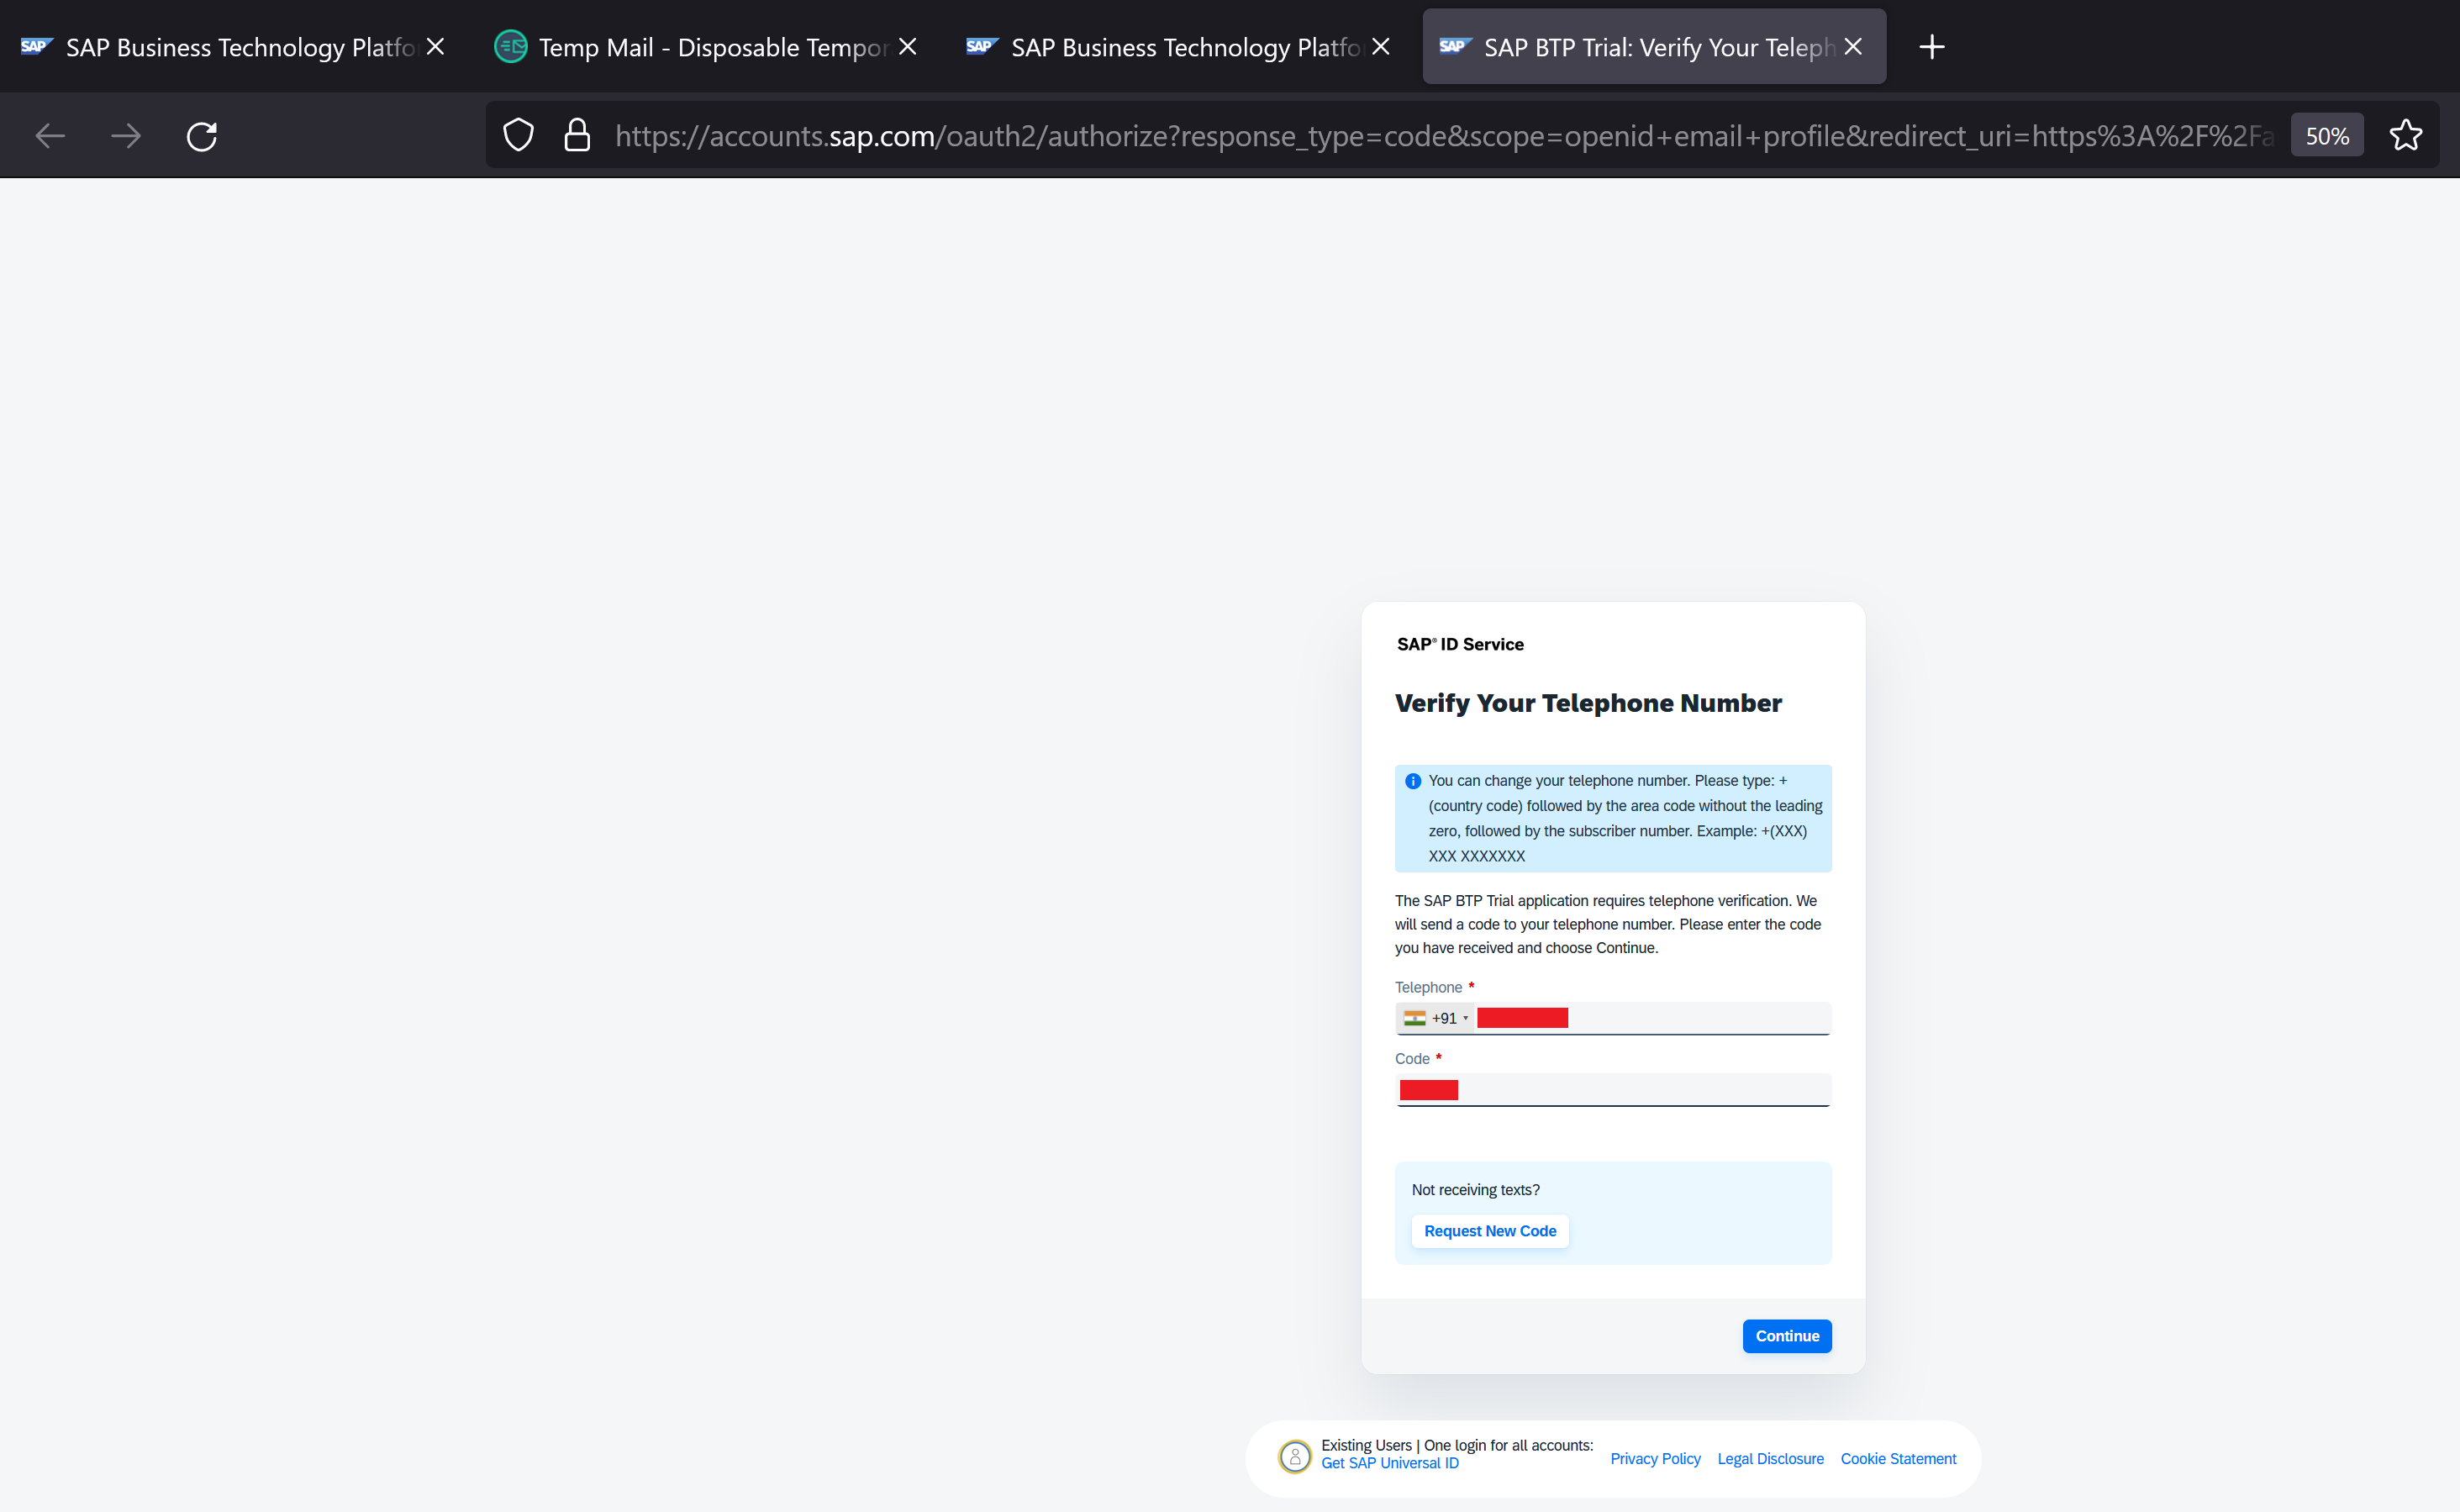
We receive an OTP on the phone number. Provide the code and click continue
Select the region as US East (VA) - AWS
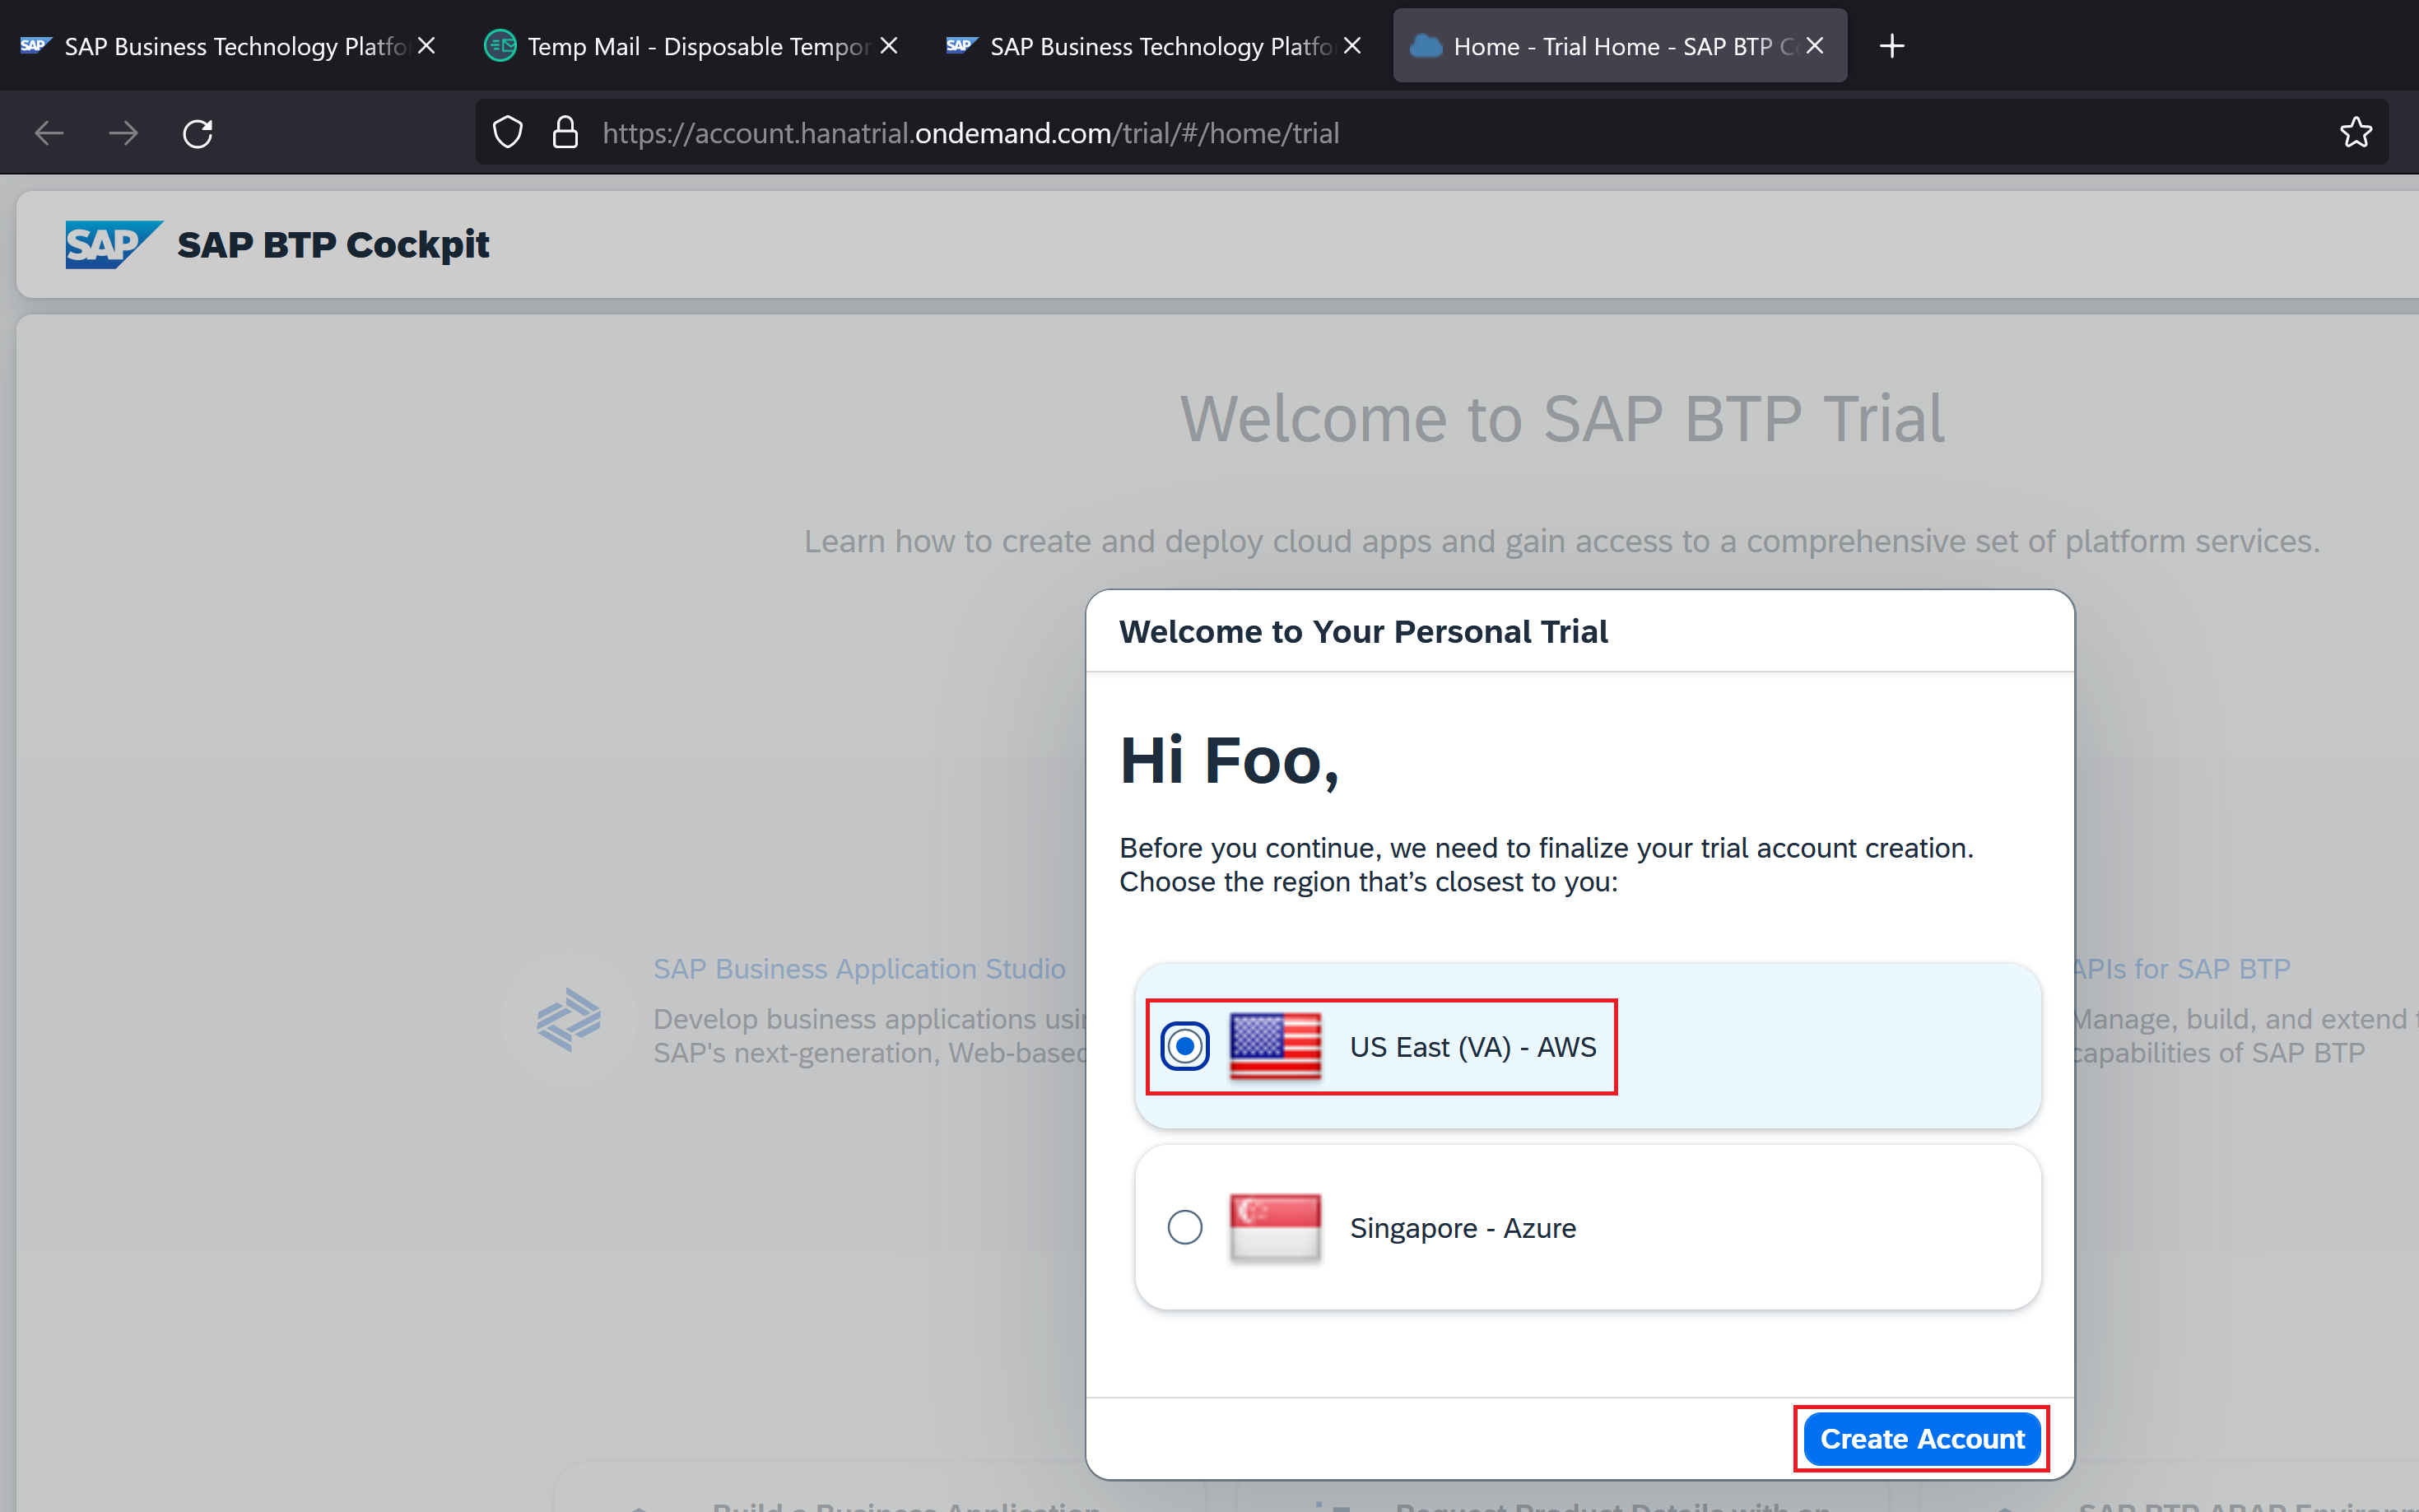
Click Continue
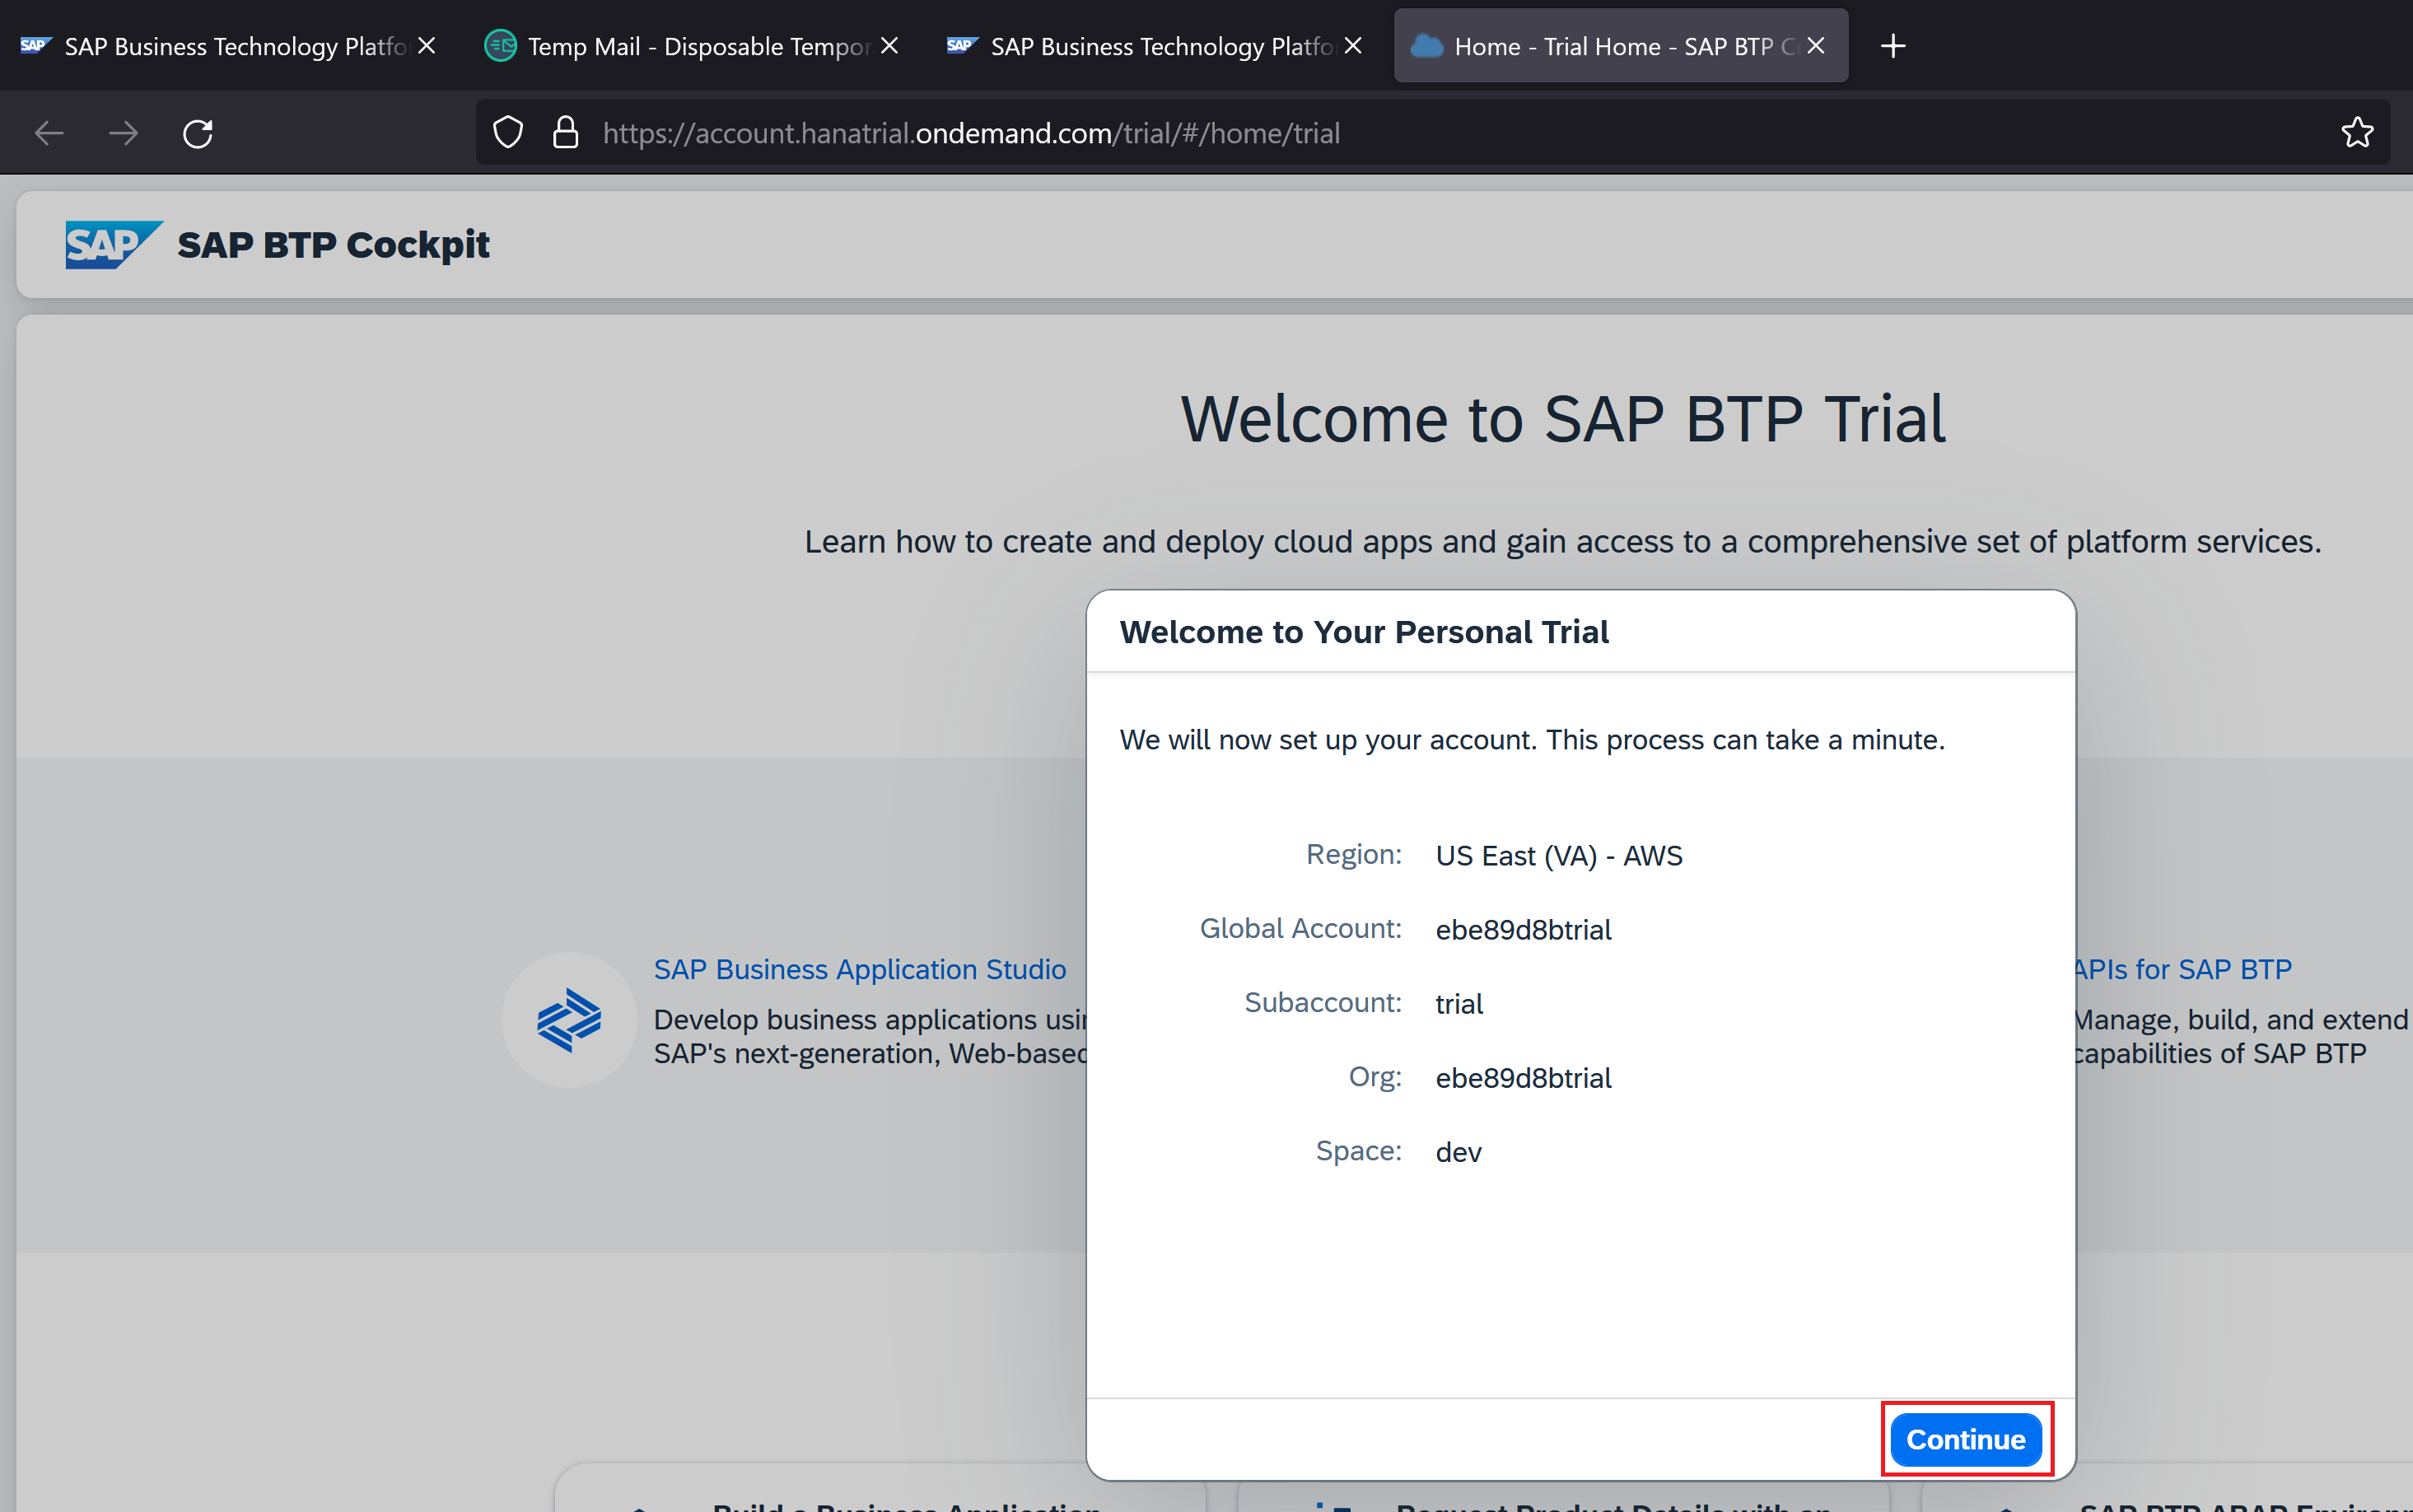
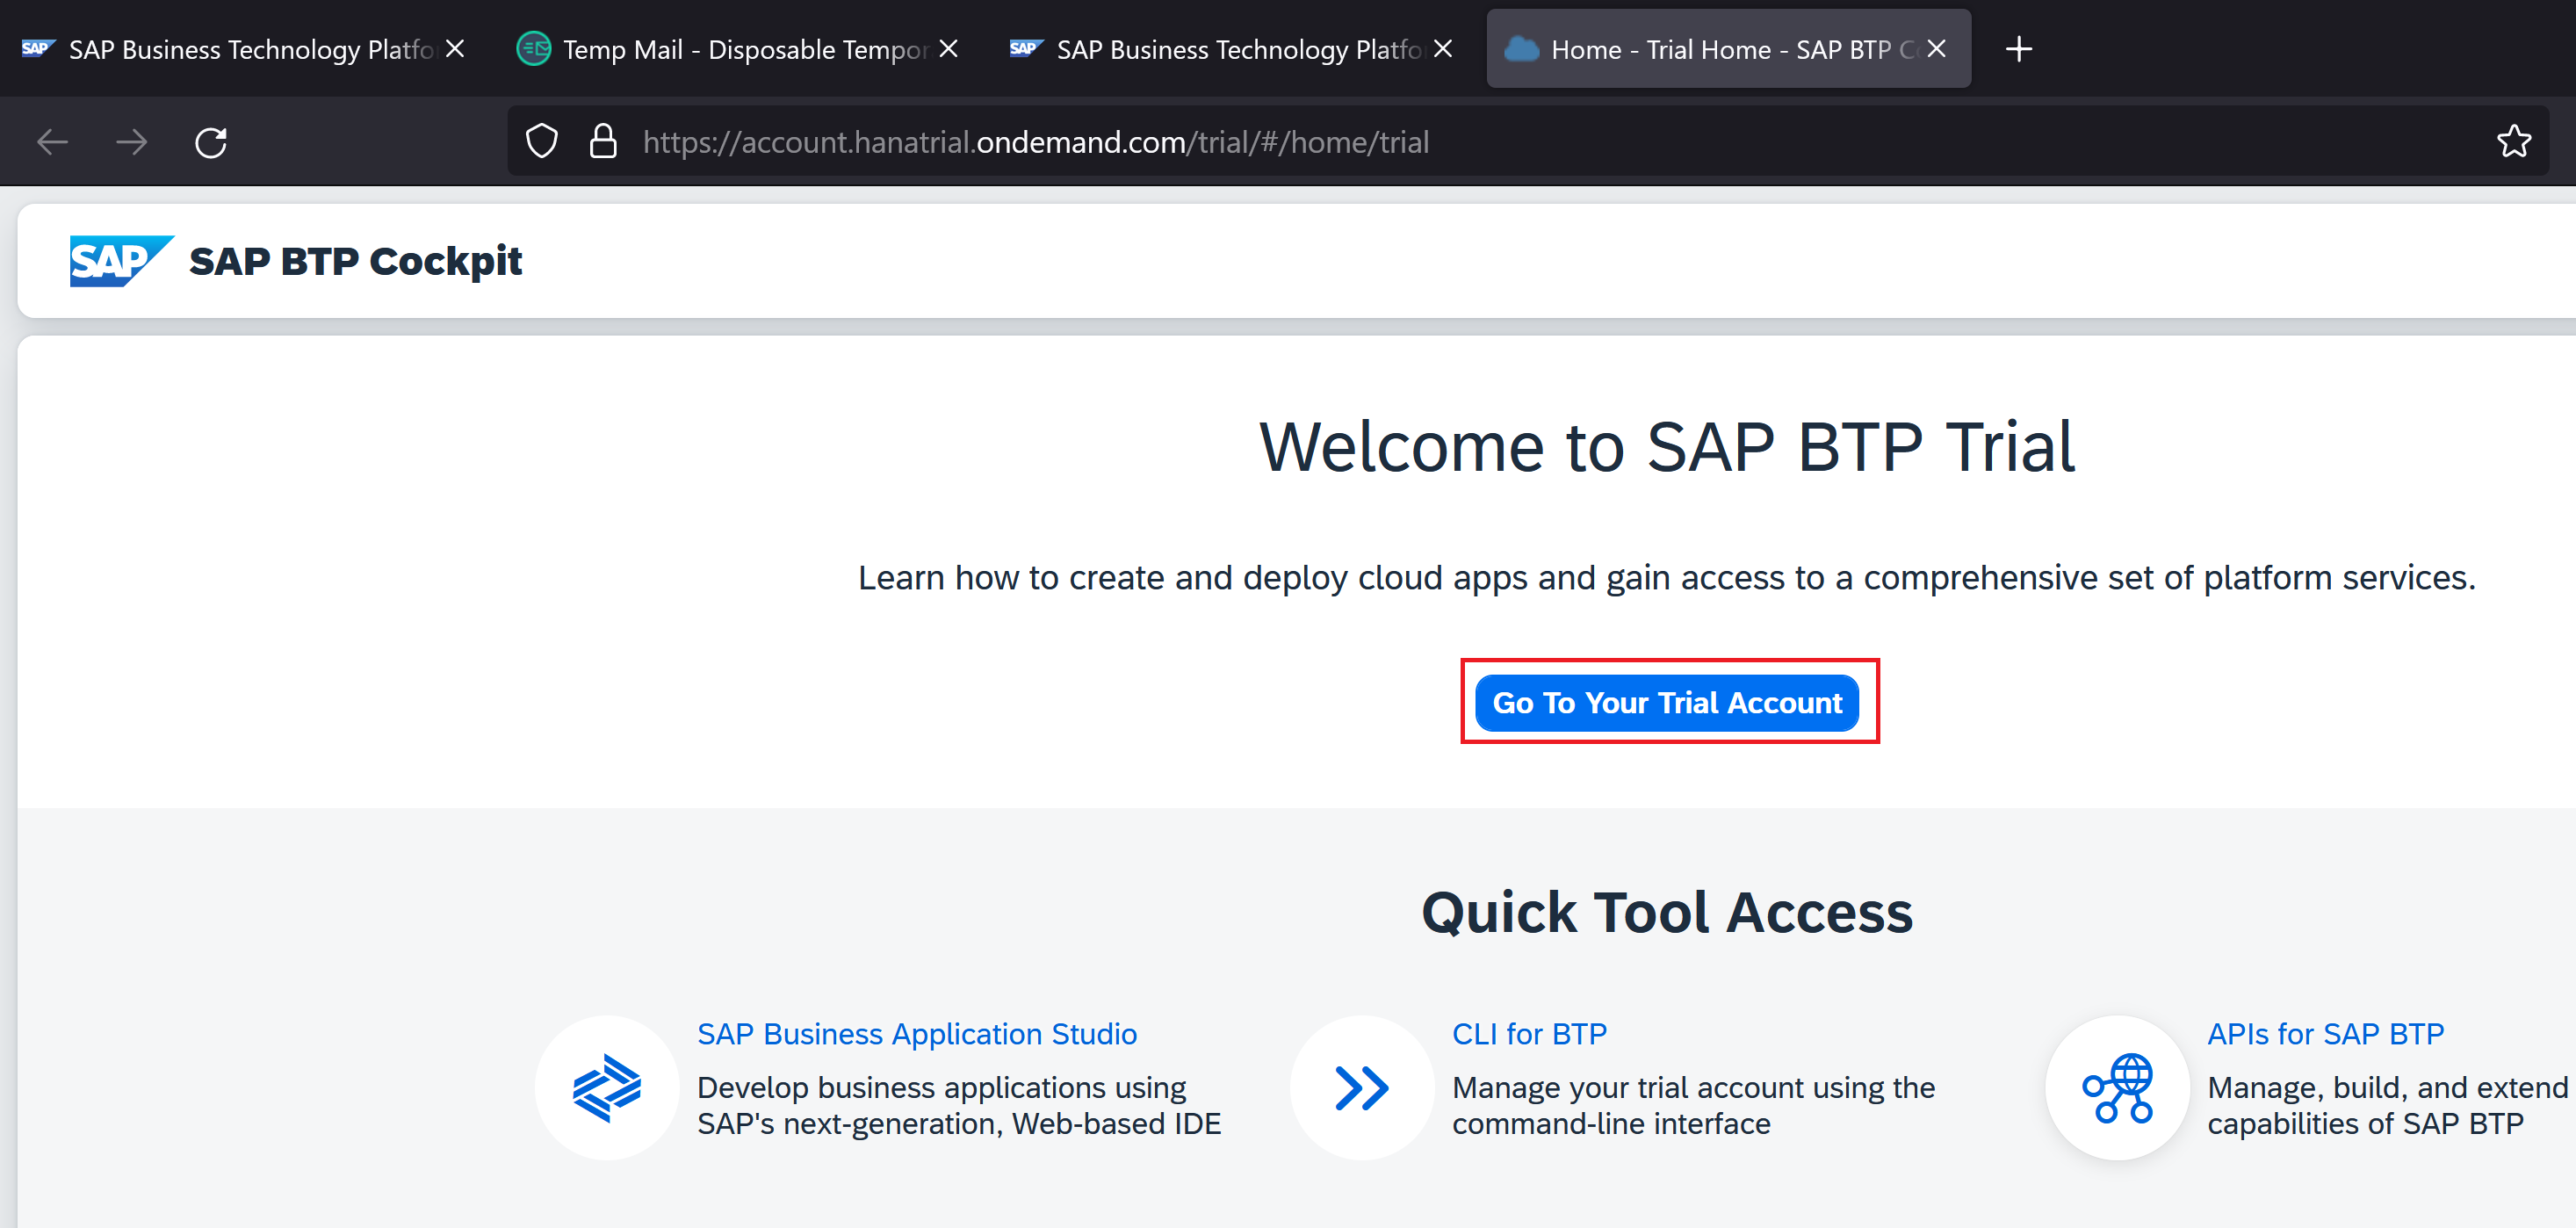
The SAP BTP trial account is ready. Click Go to your Trial account
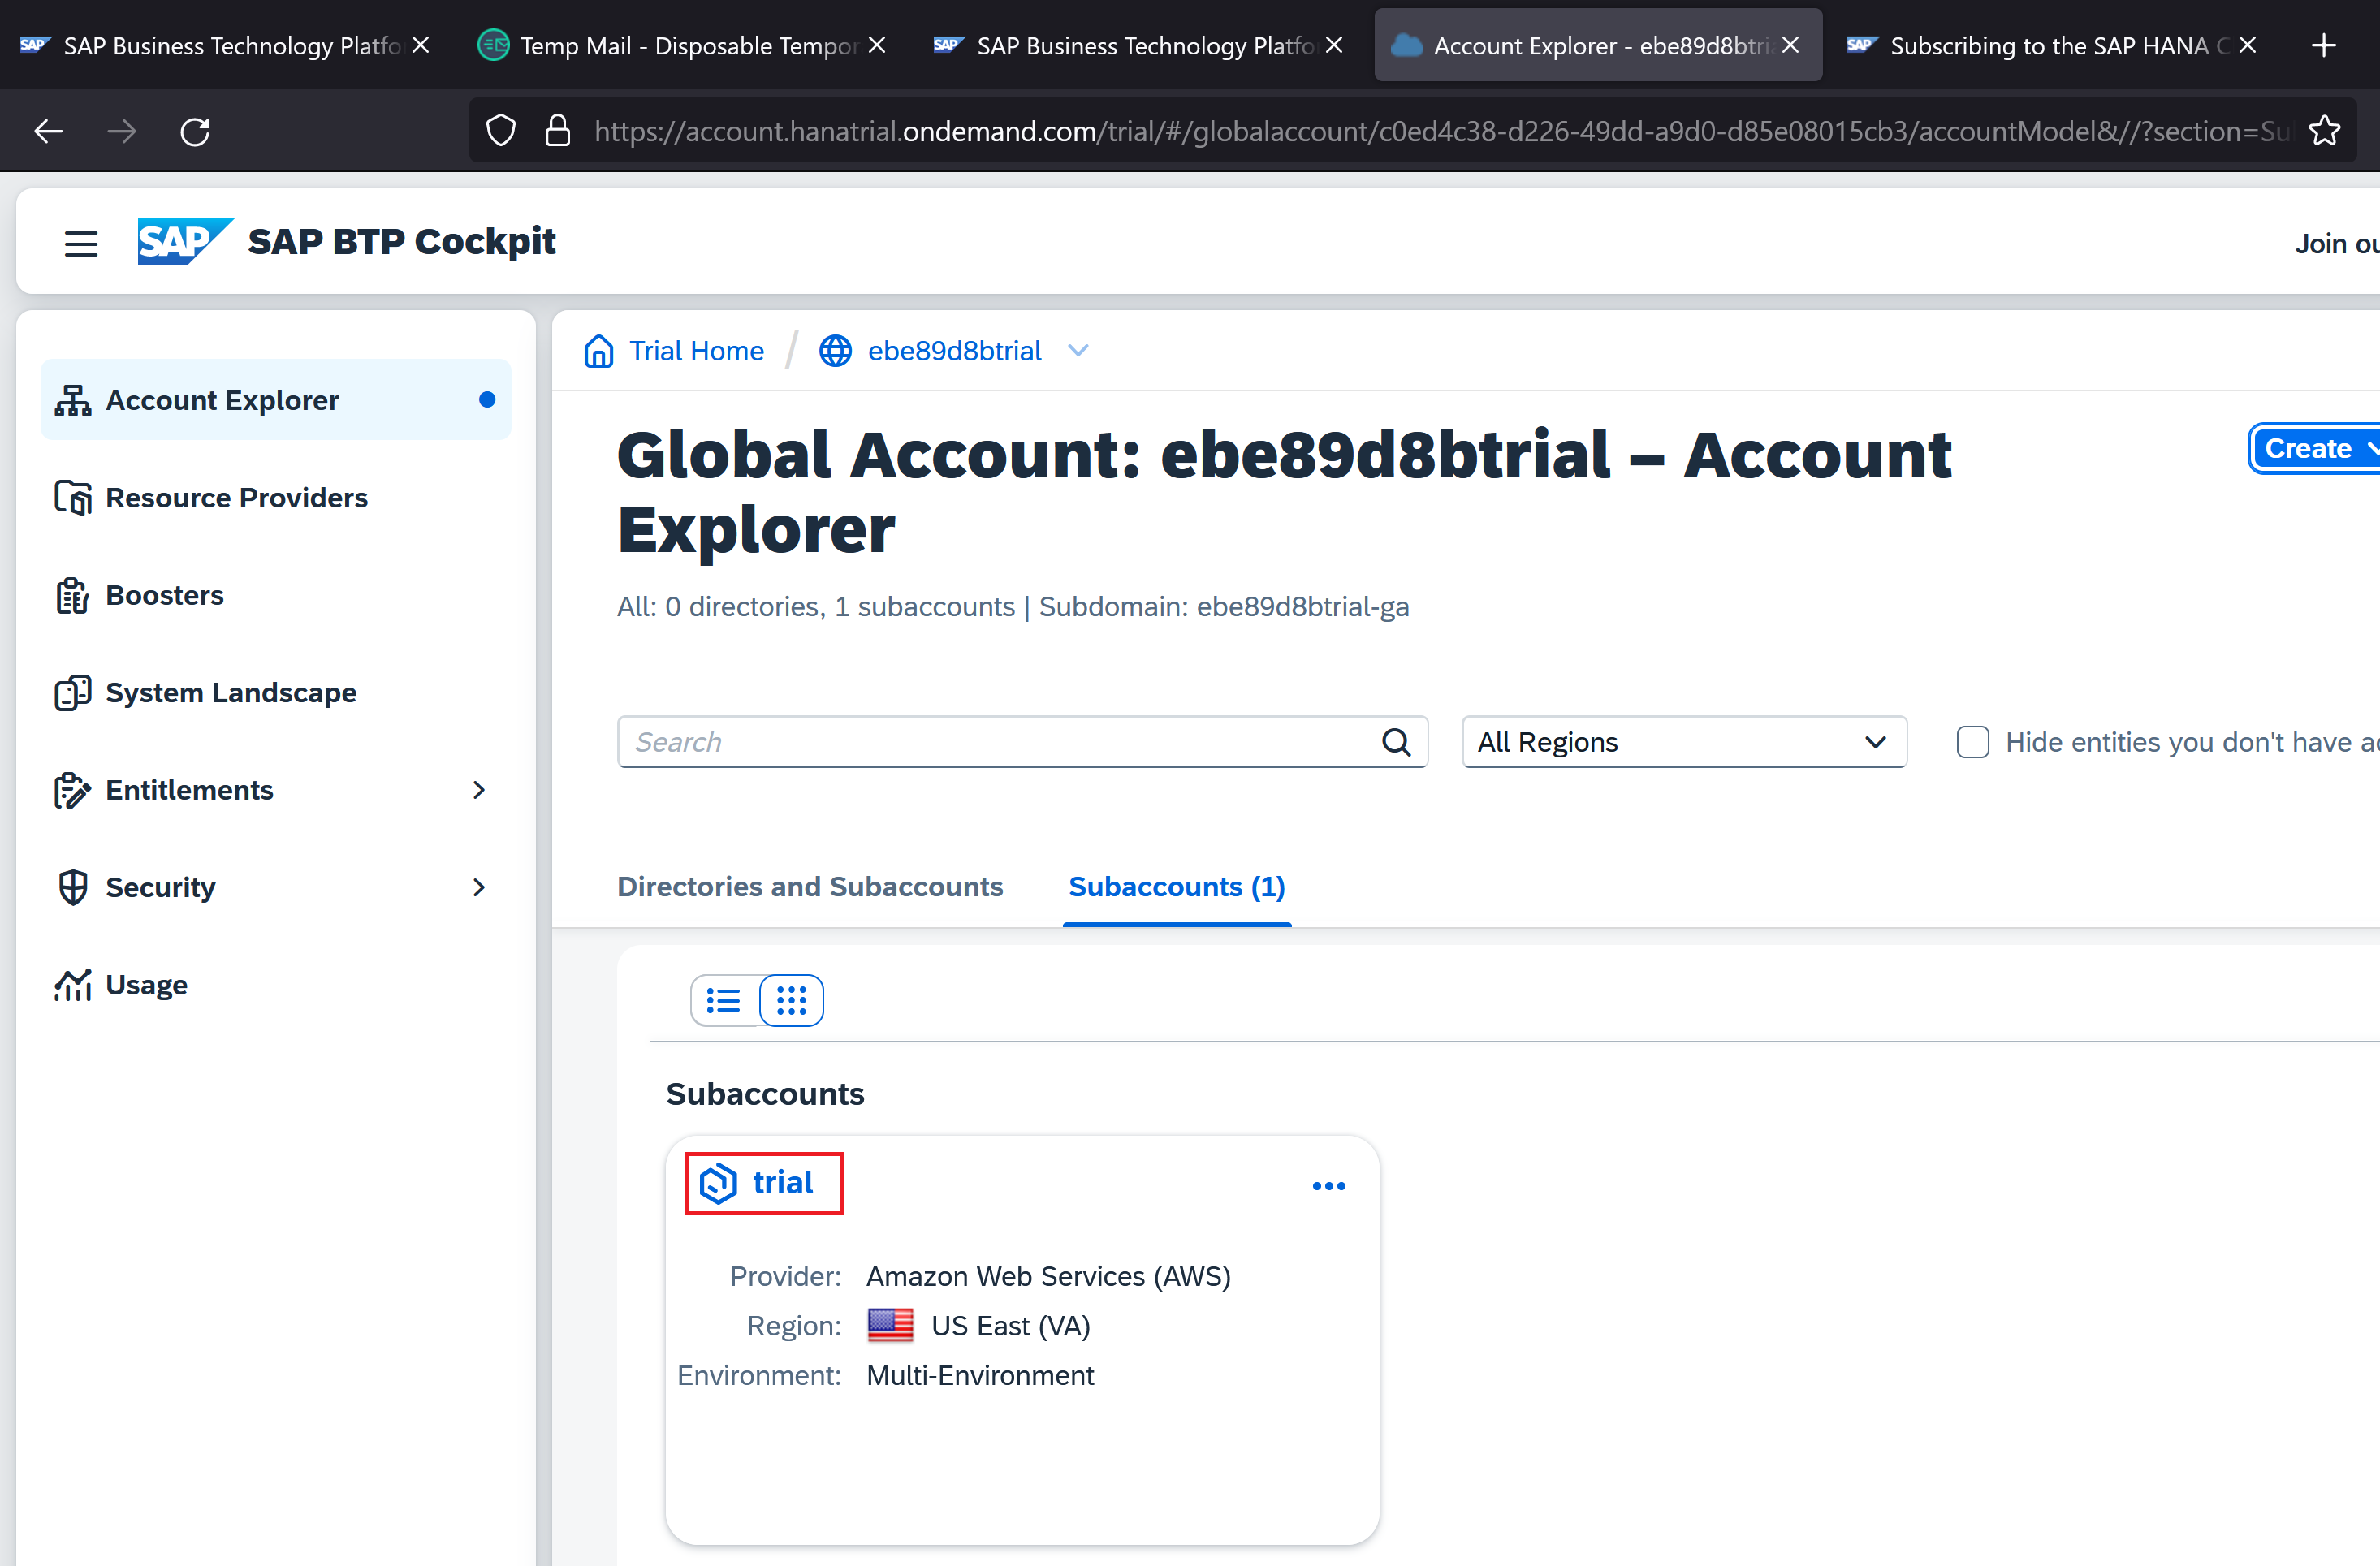
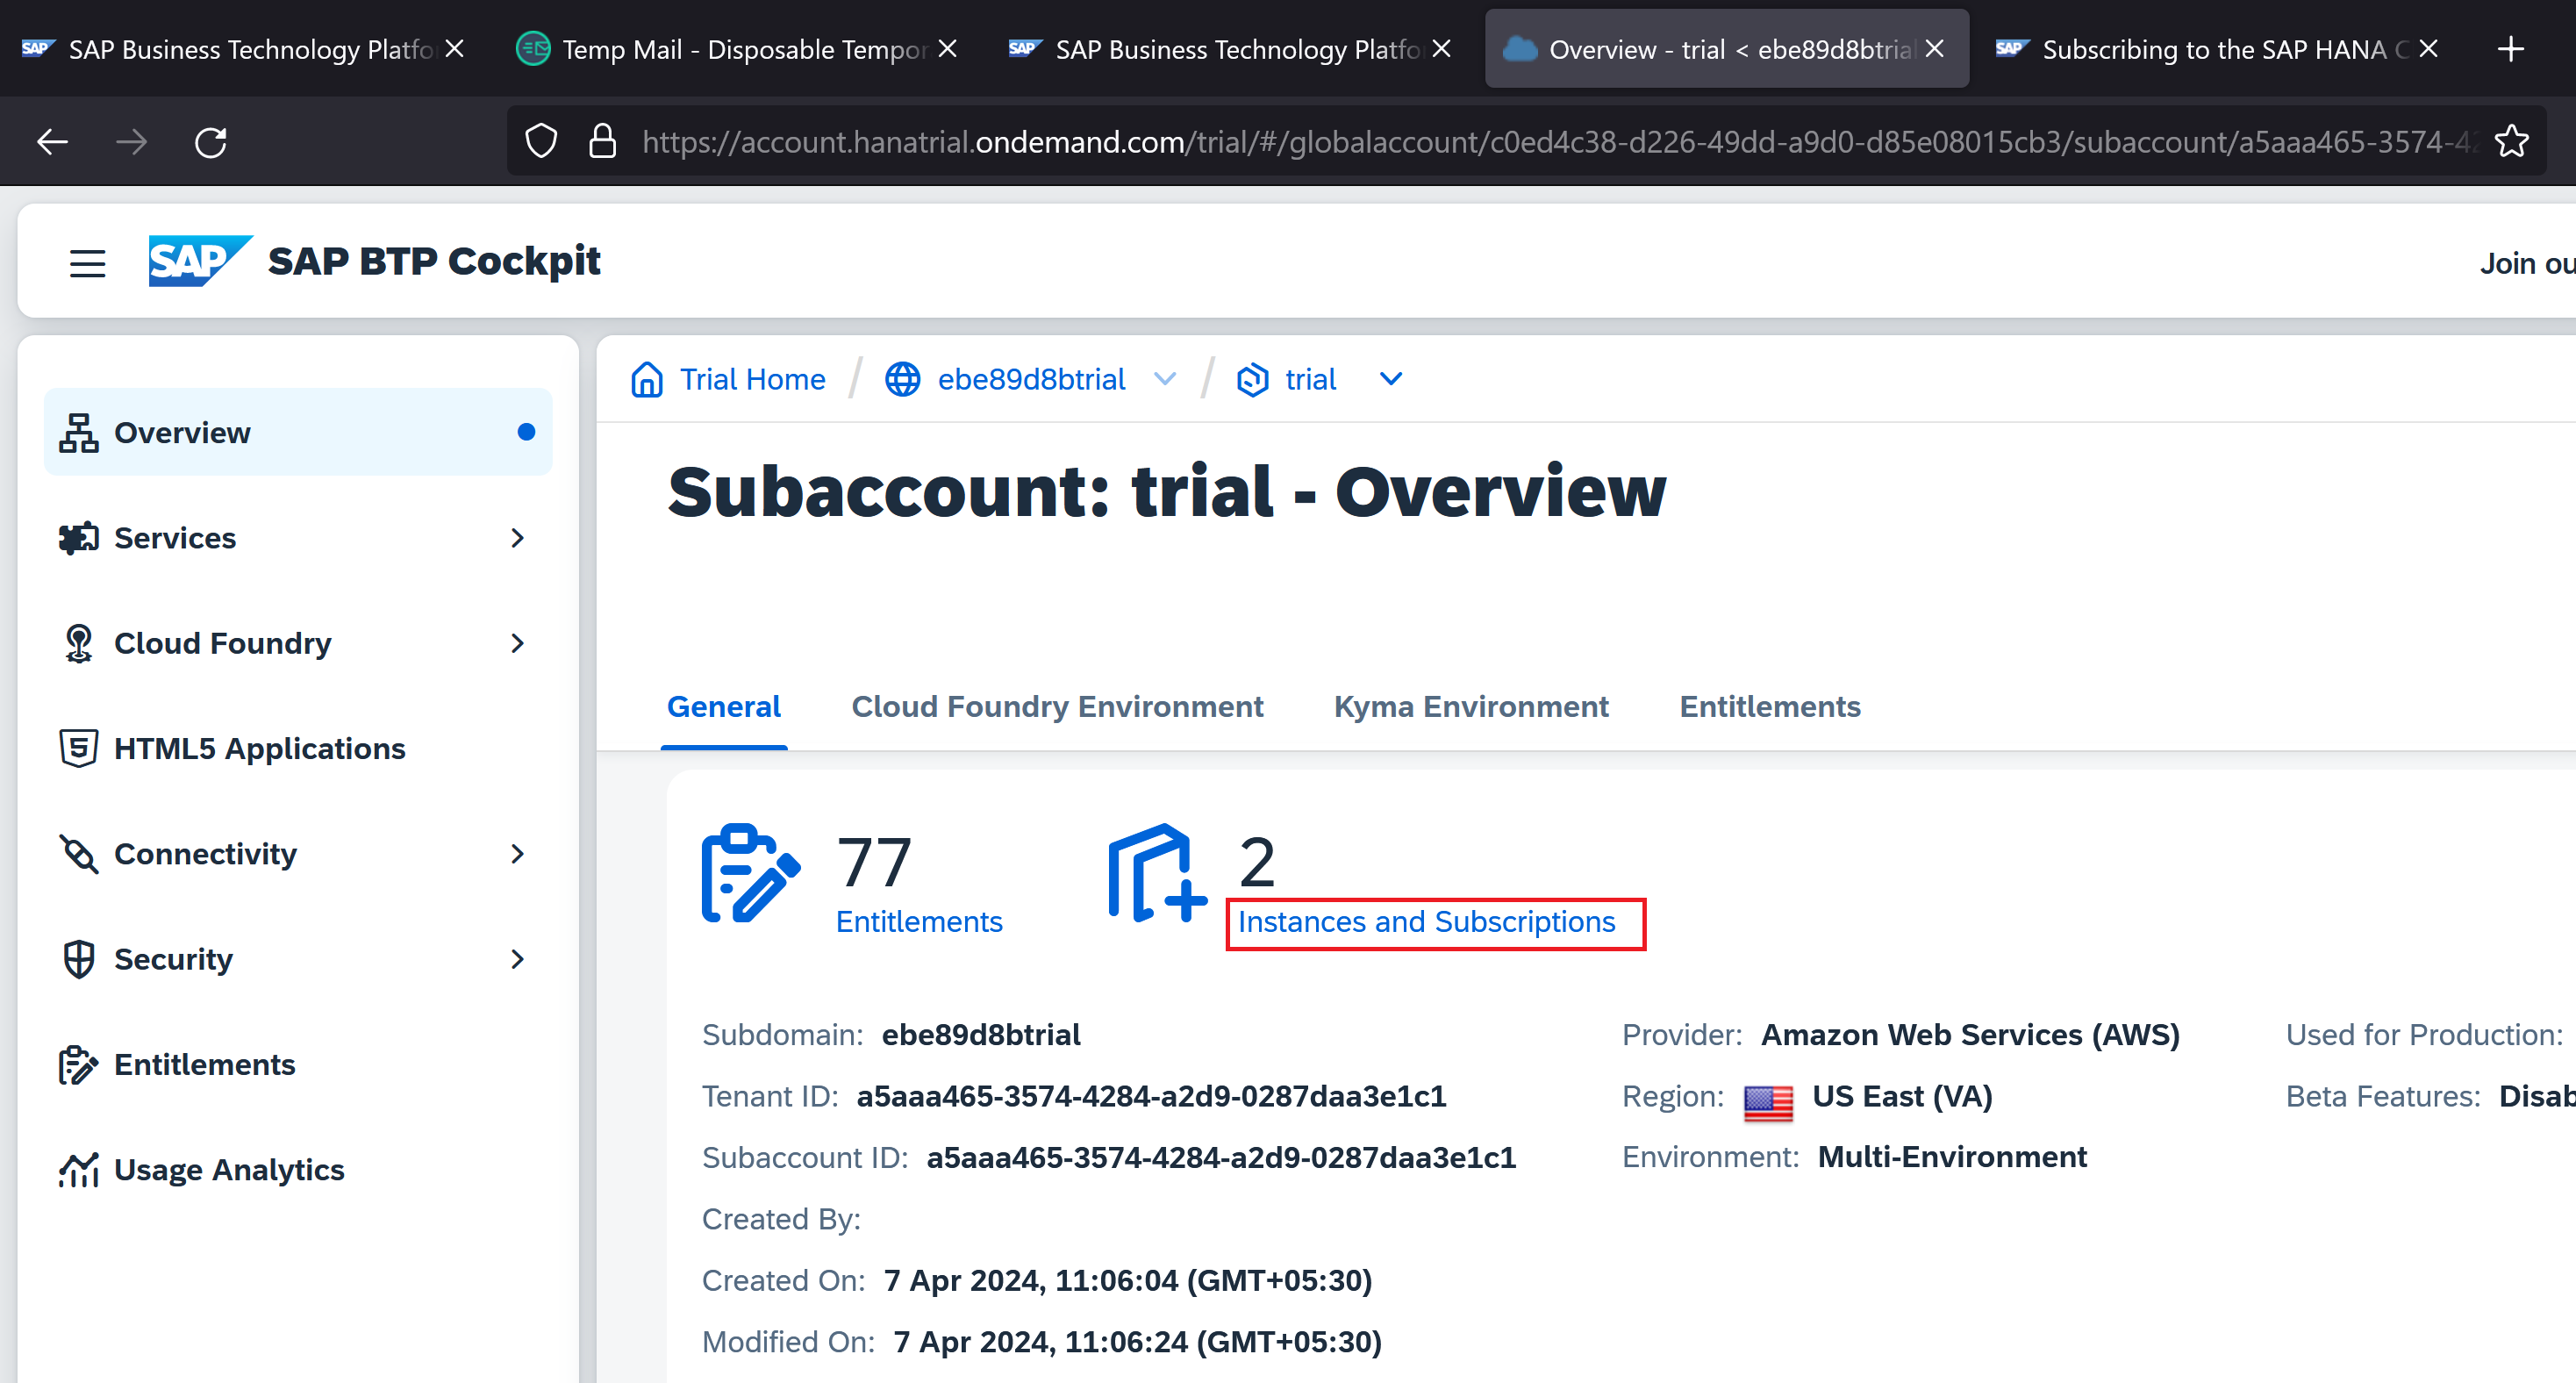
Click the Trial sub-account
Open Instances and Subscriptions
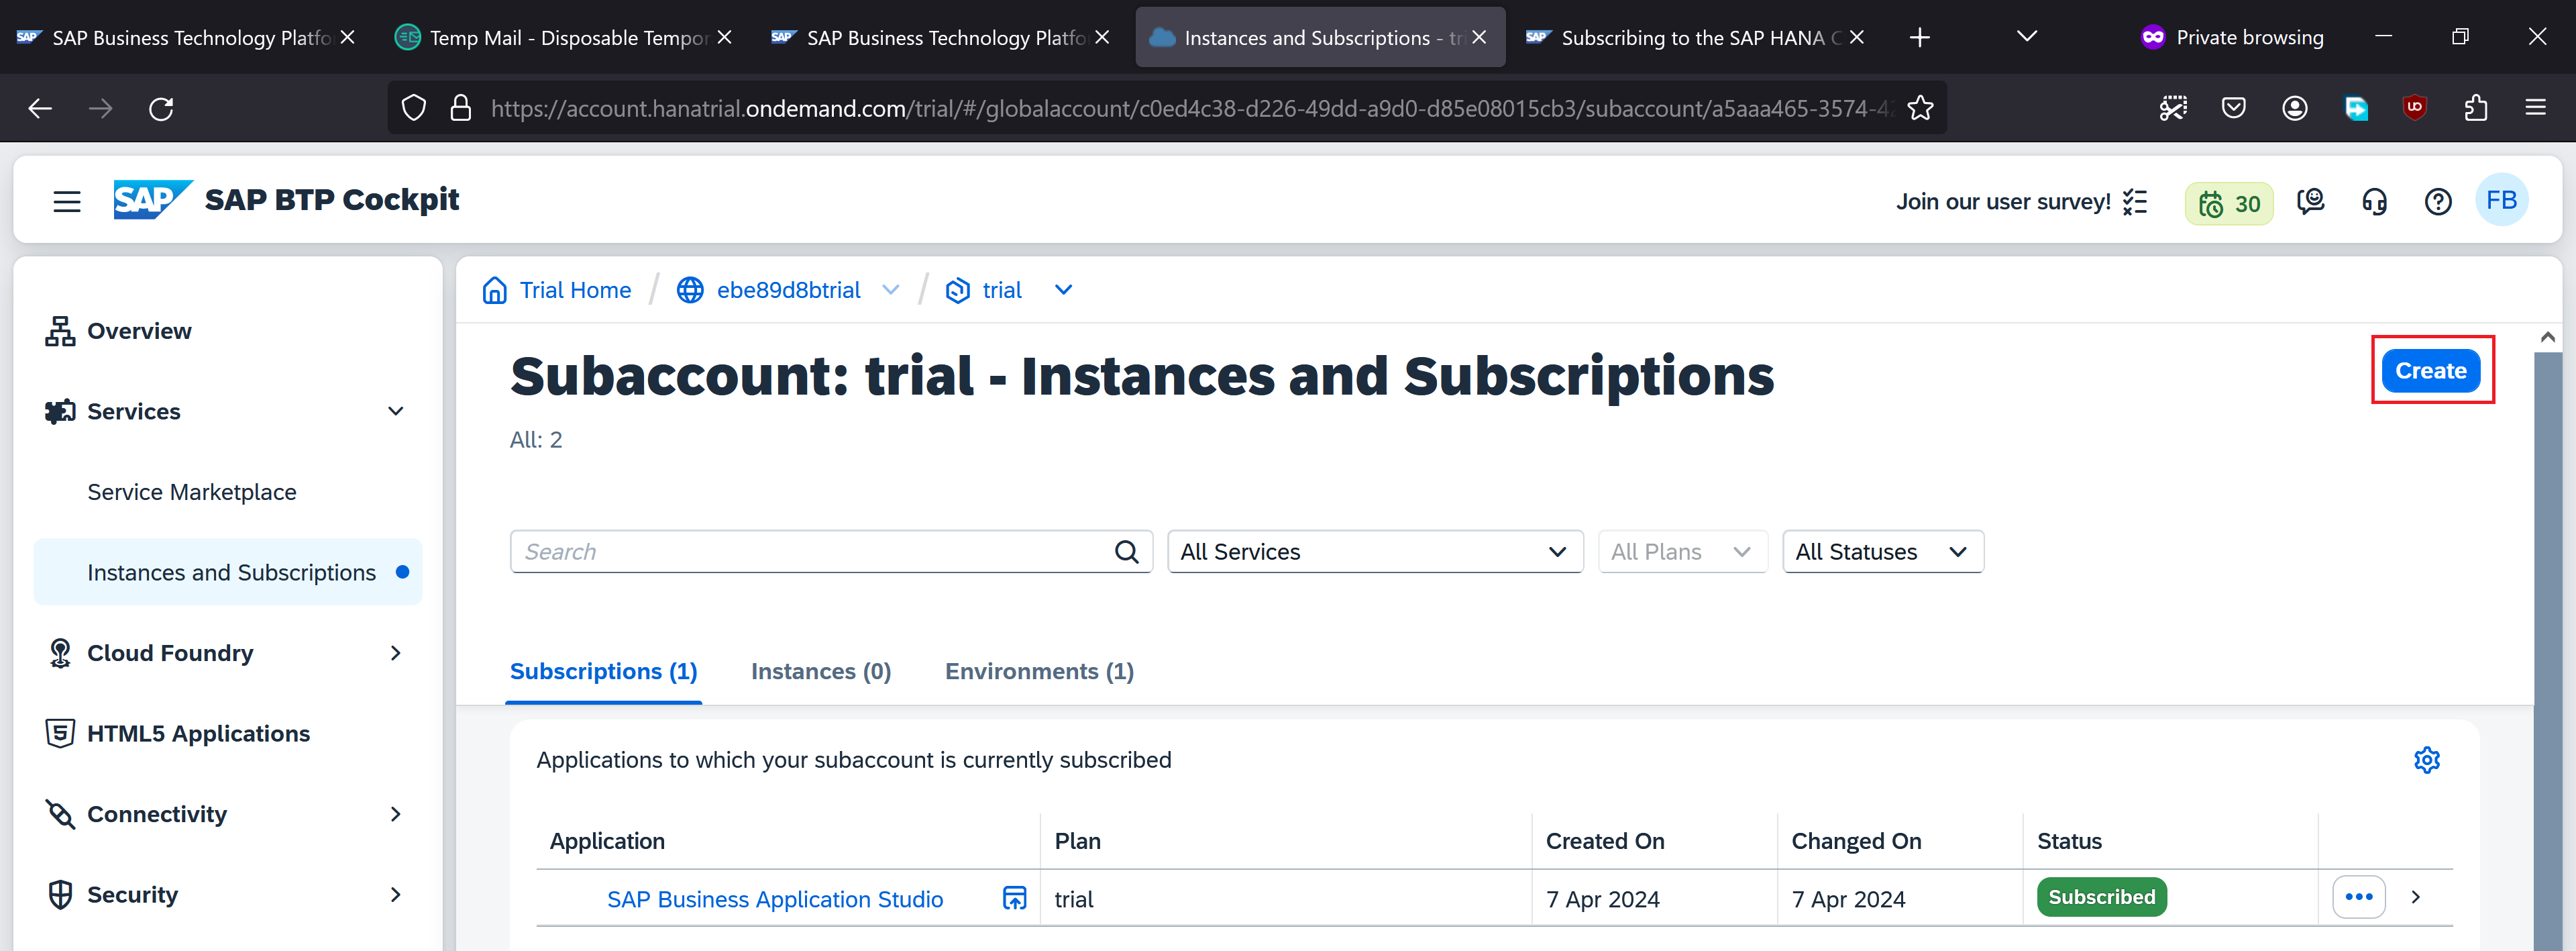
It’s time to create a subscription. Click the Create button
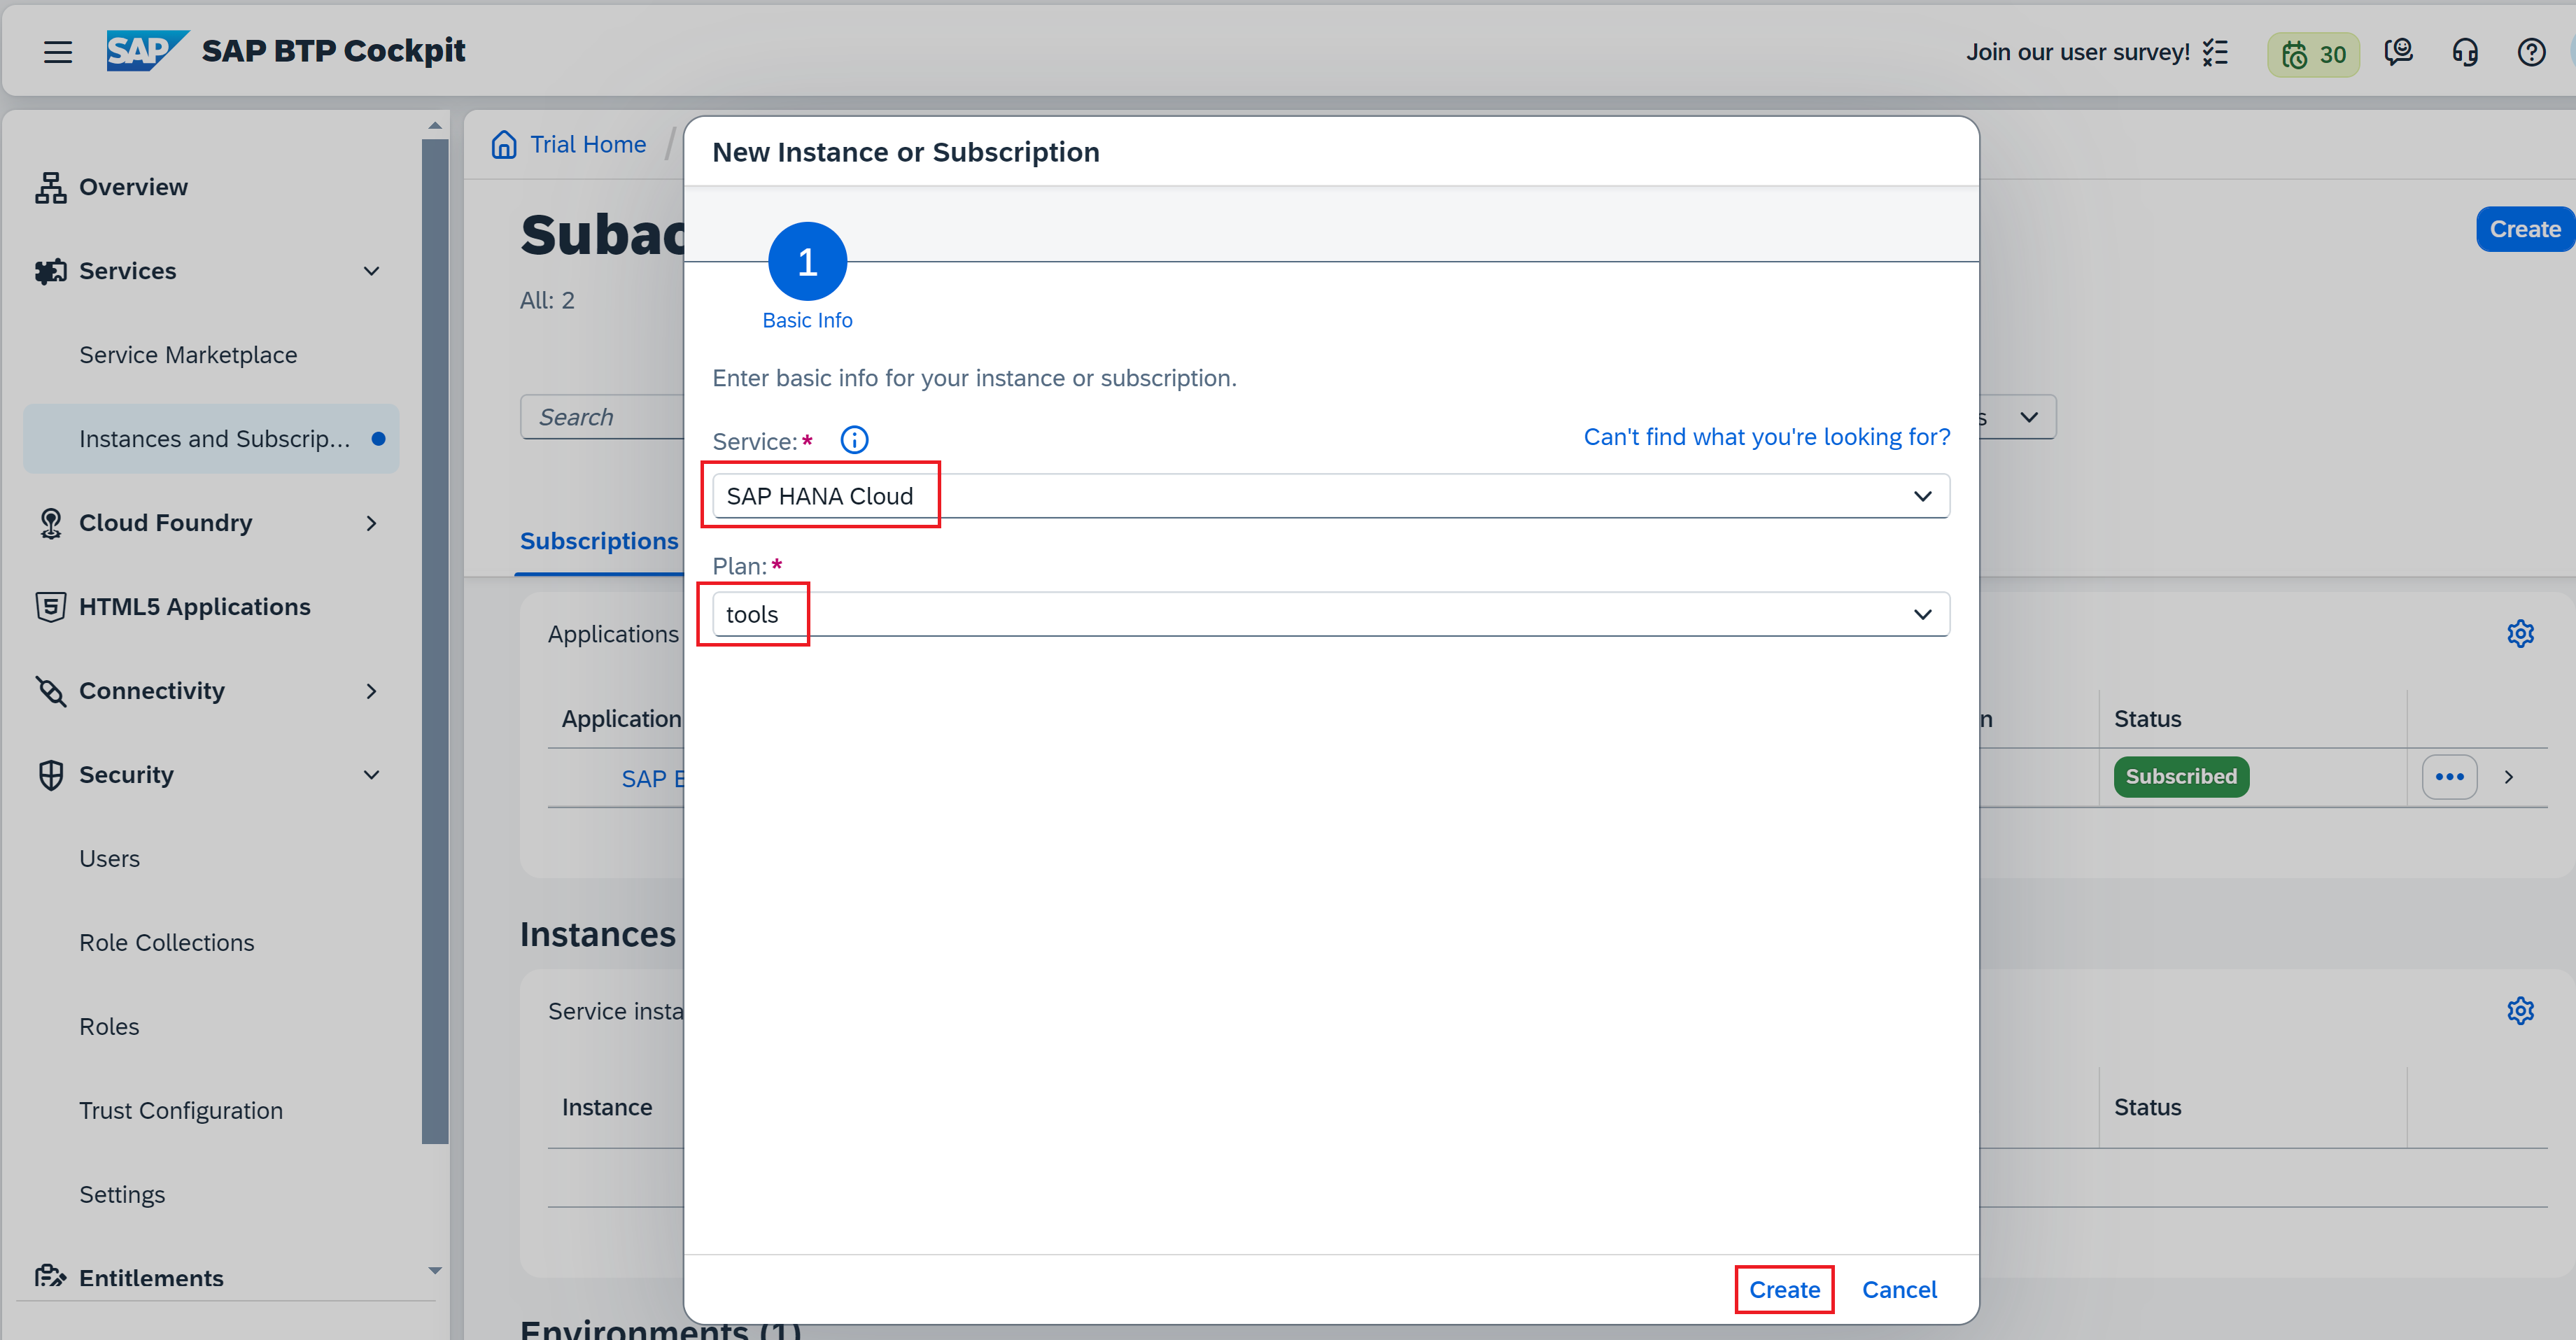
While creating a subscription, Select service as SAP Hana Cloud and Plan as tools and click Create
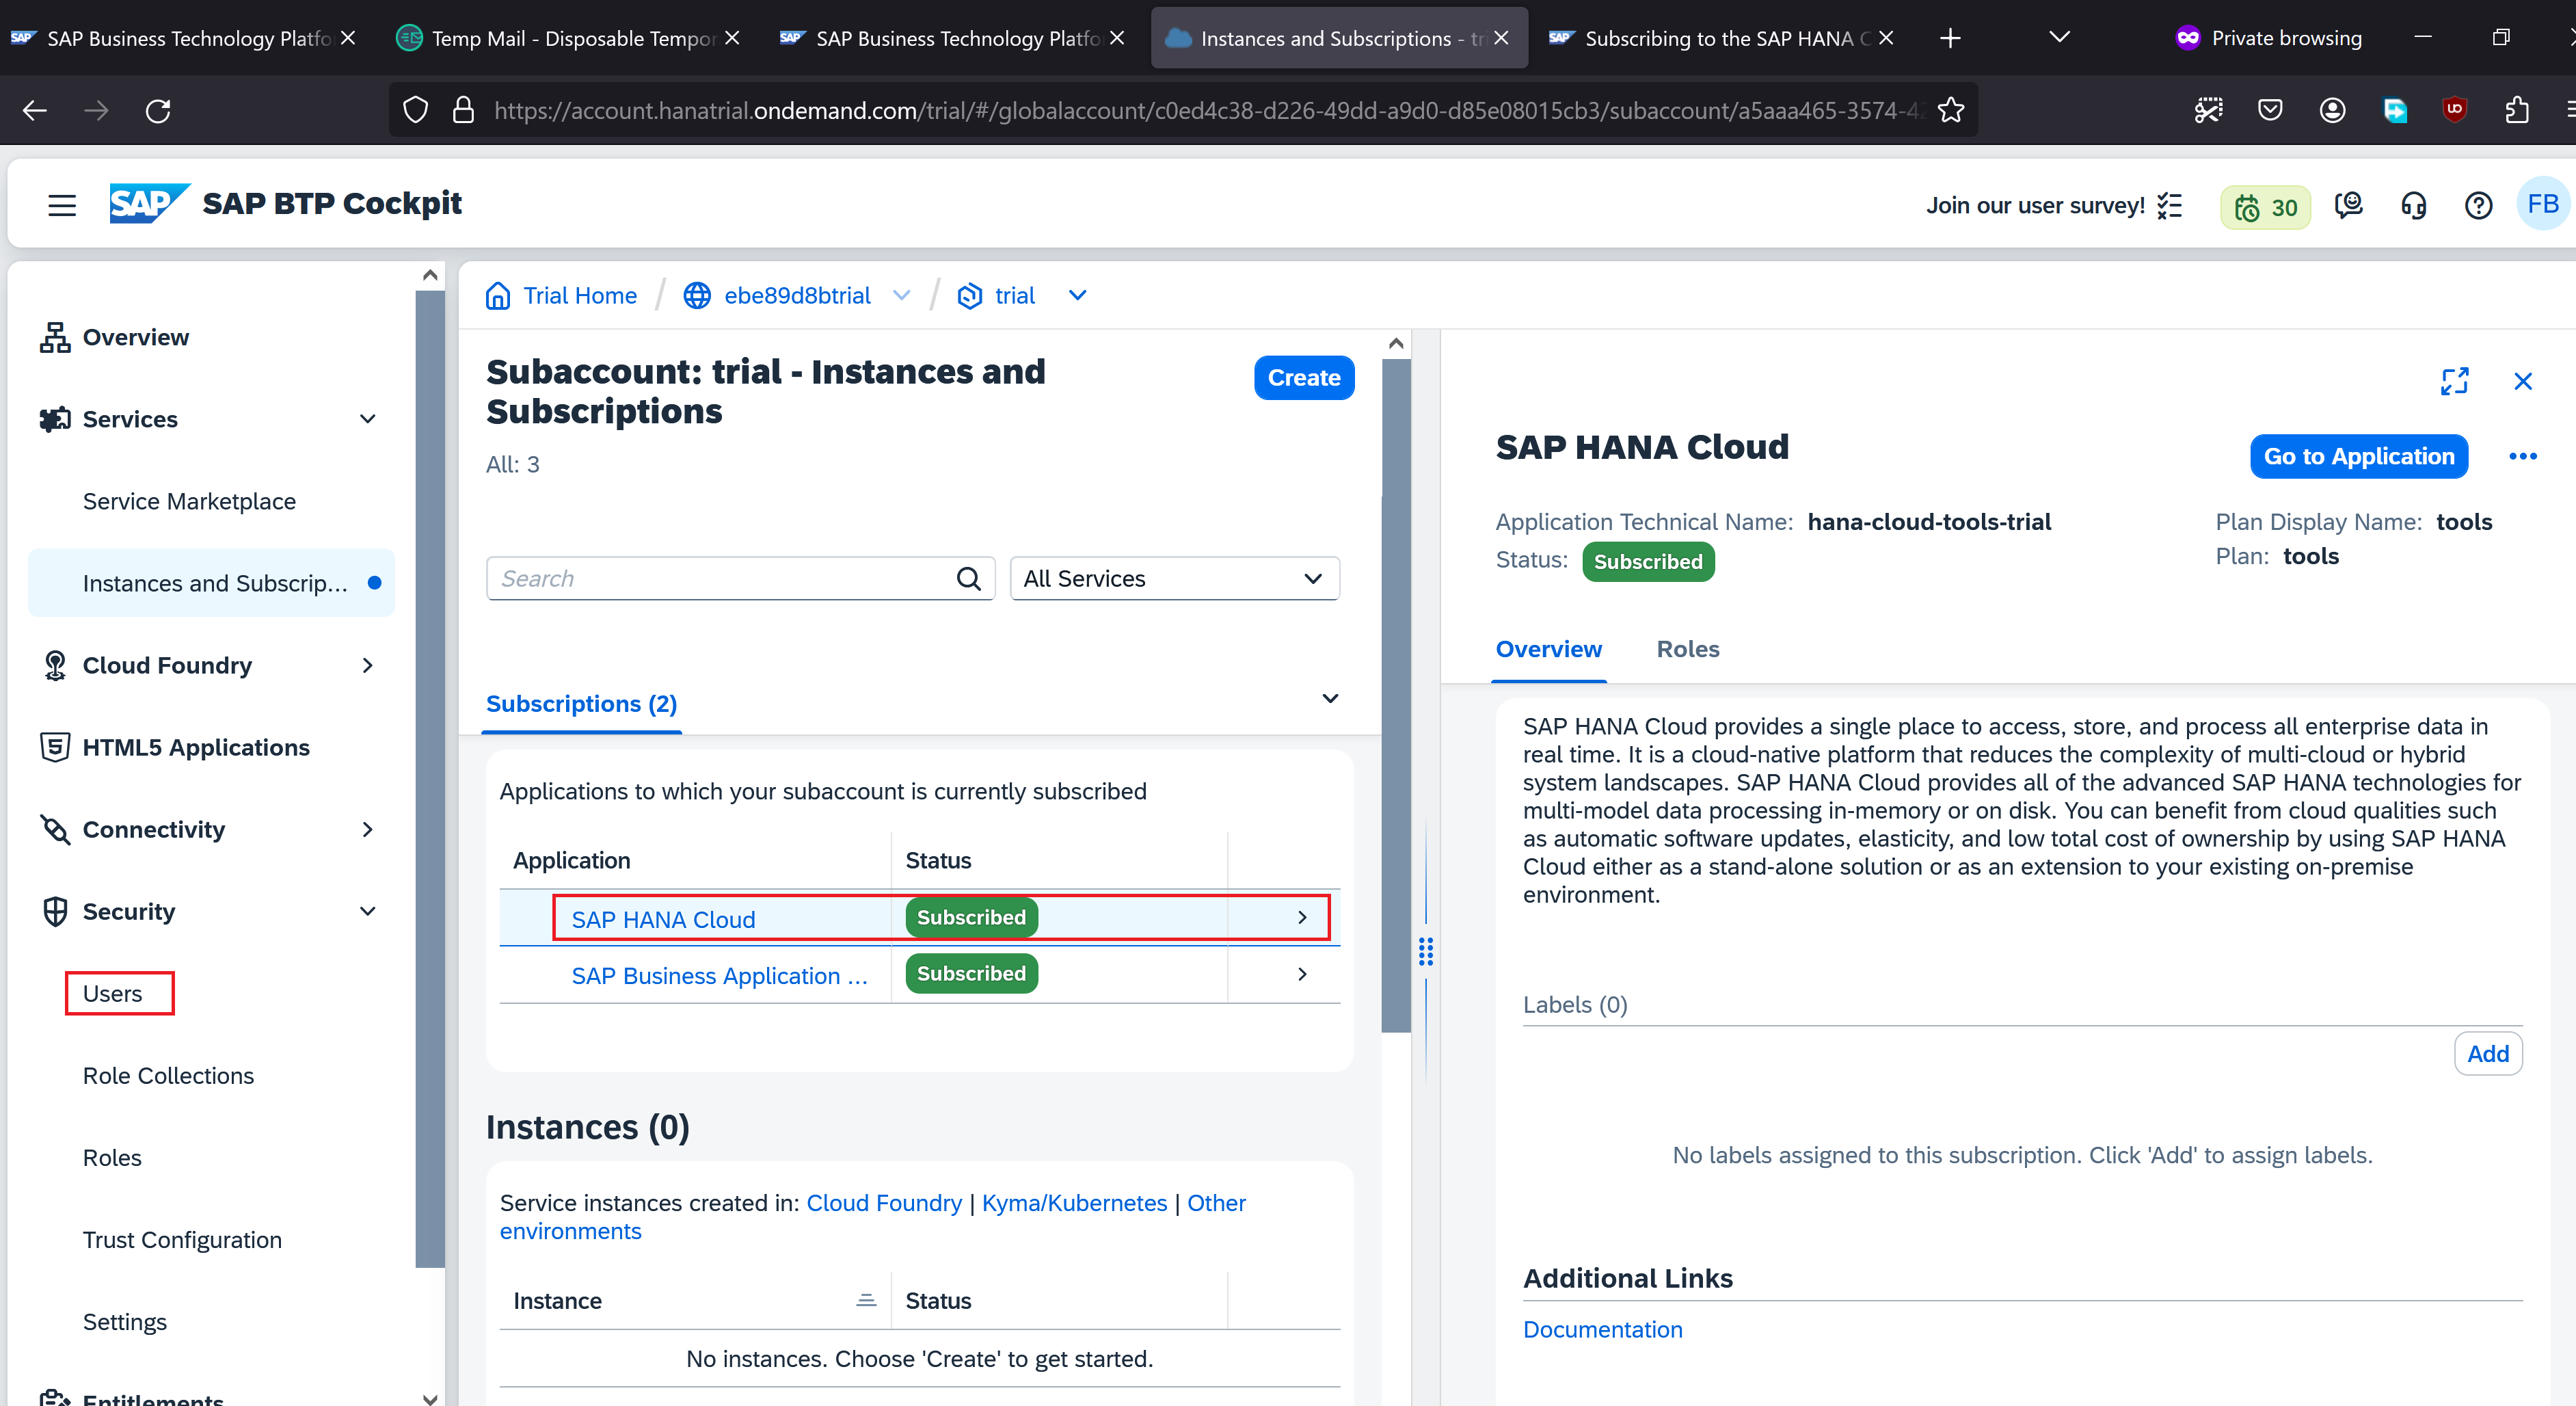
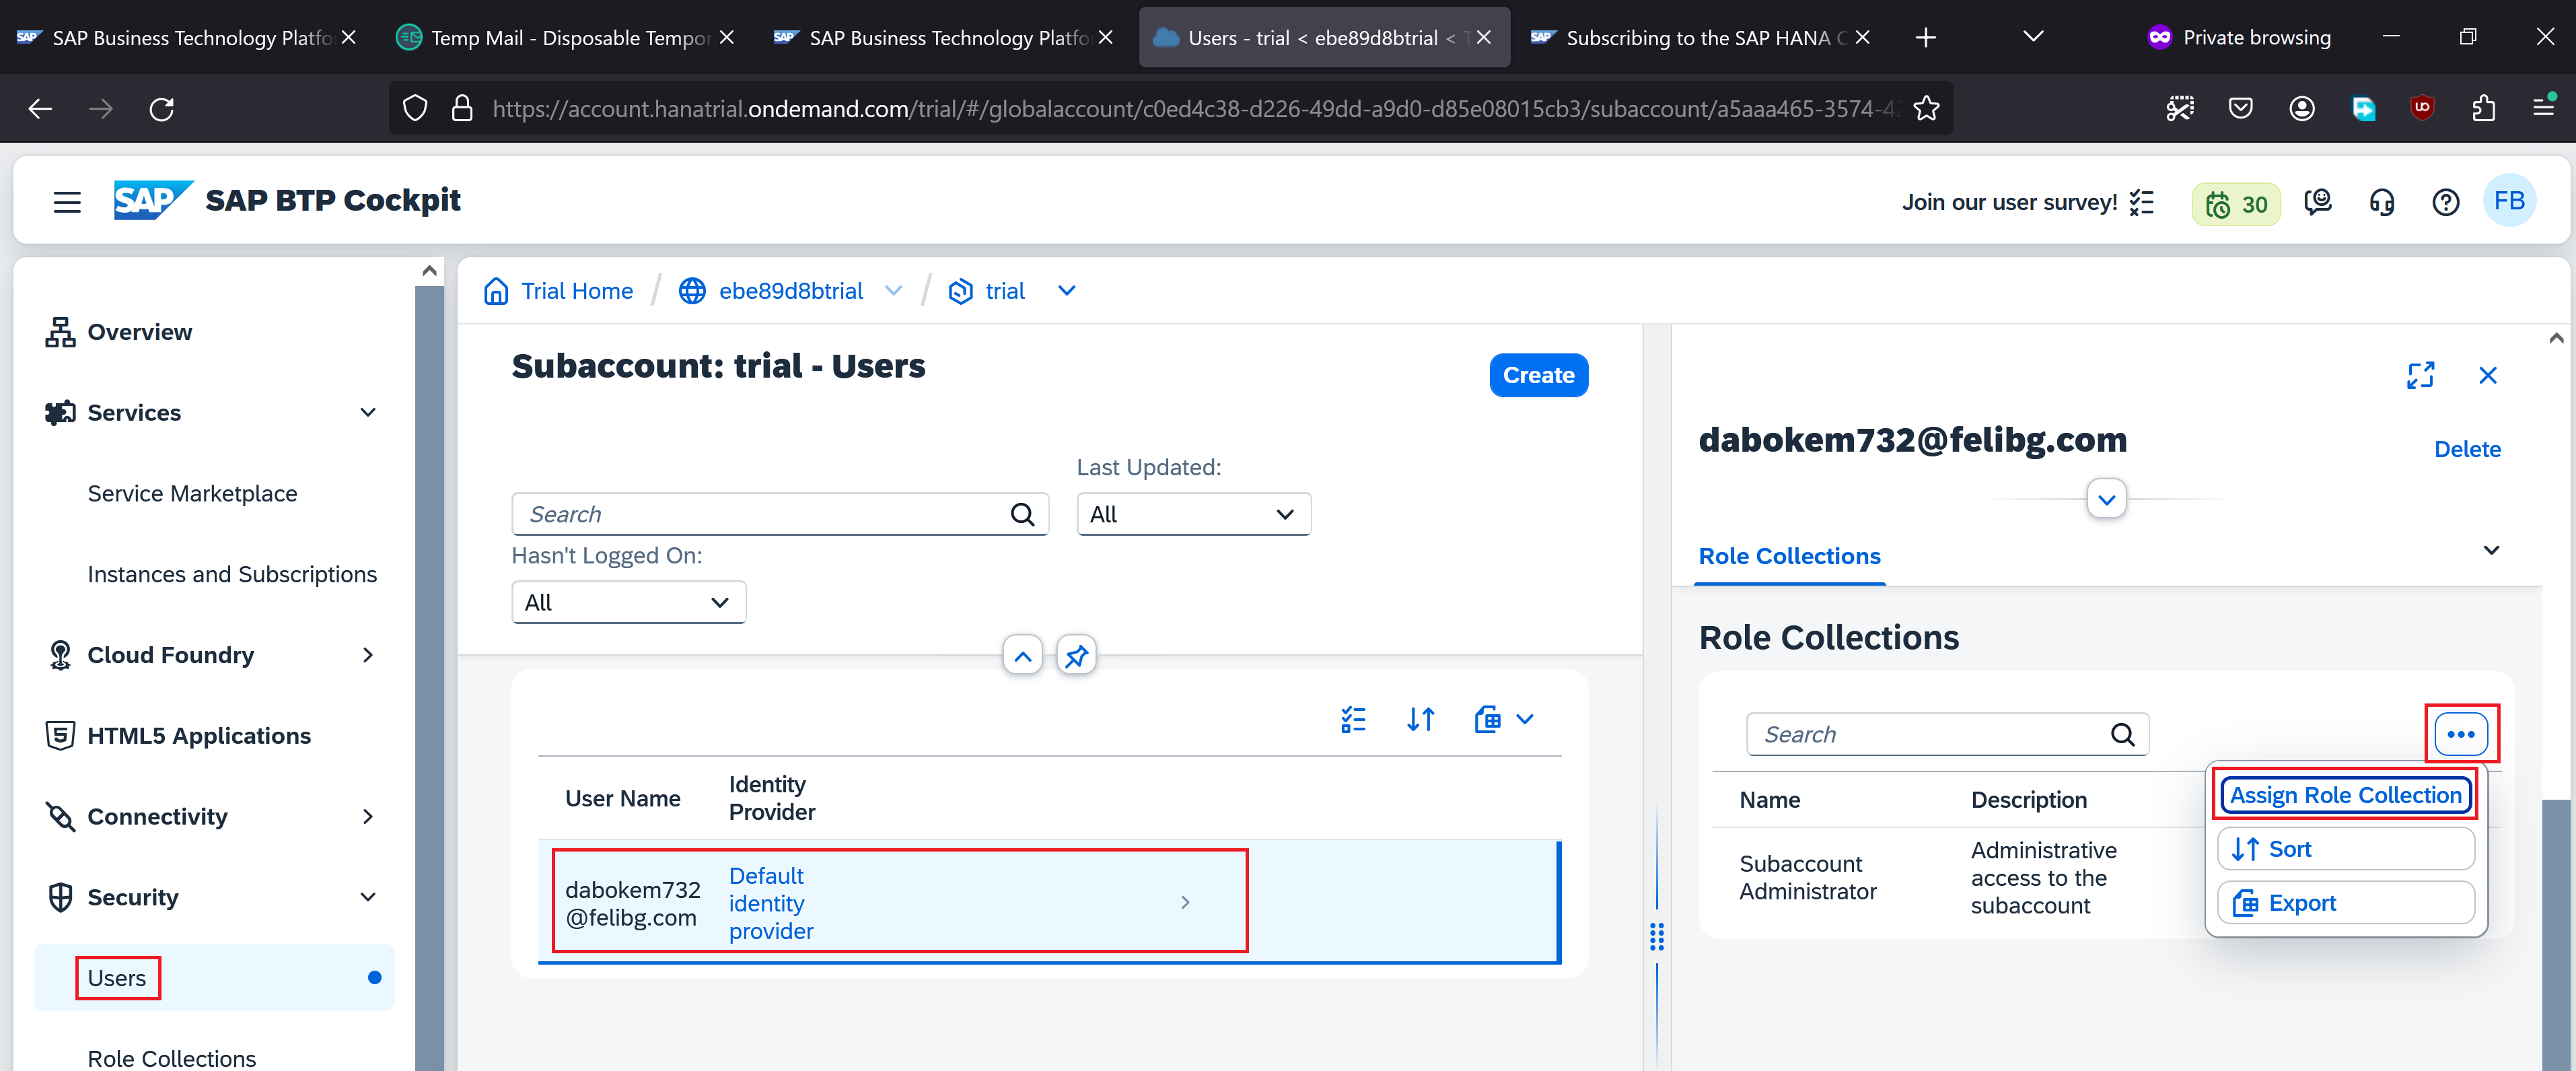
Notice that SAP Hana Cloud subscription is now created. Click Users on the left panel
Select the username (temporary email that we supplied earlier) and click Assign Role Collection
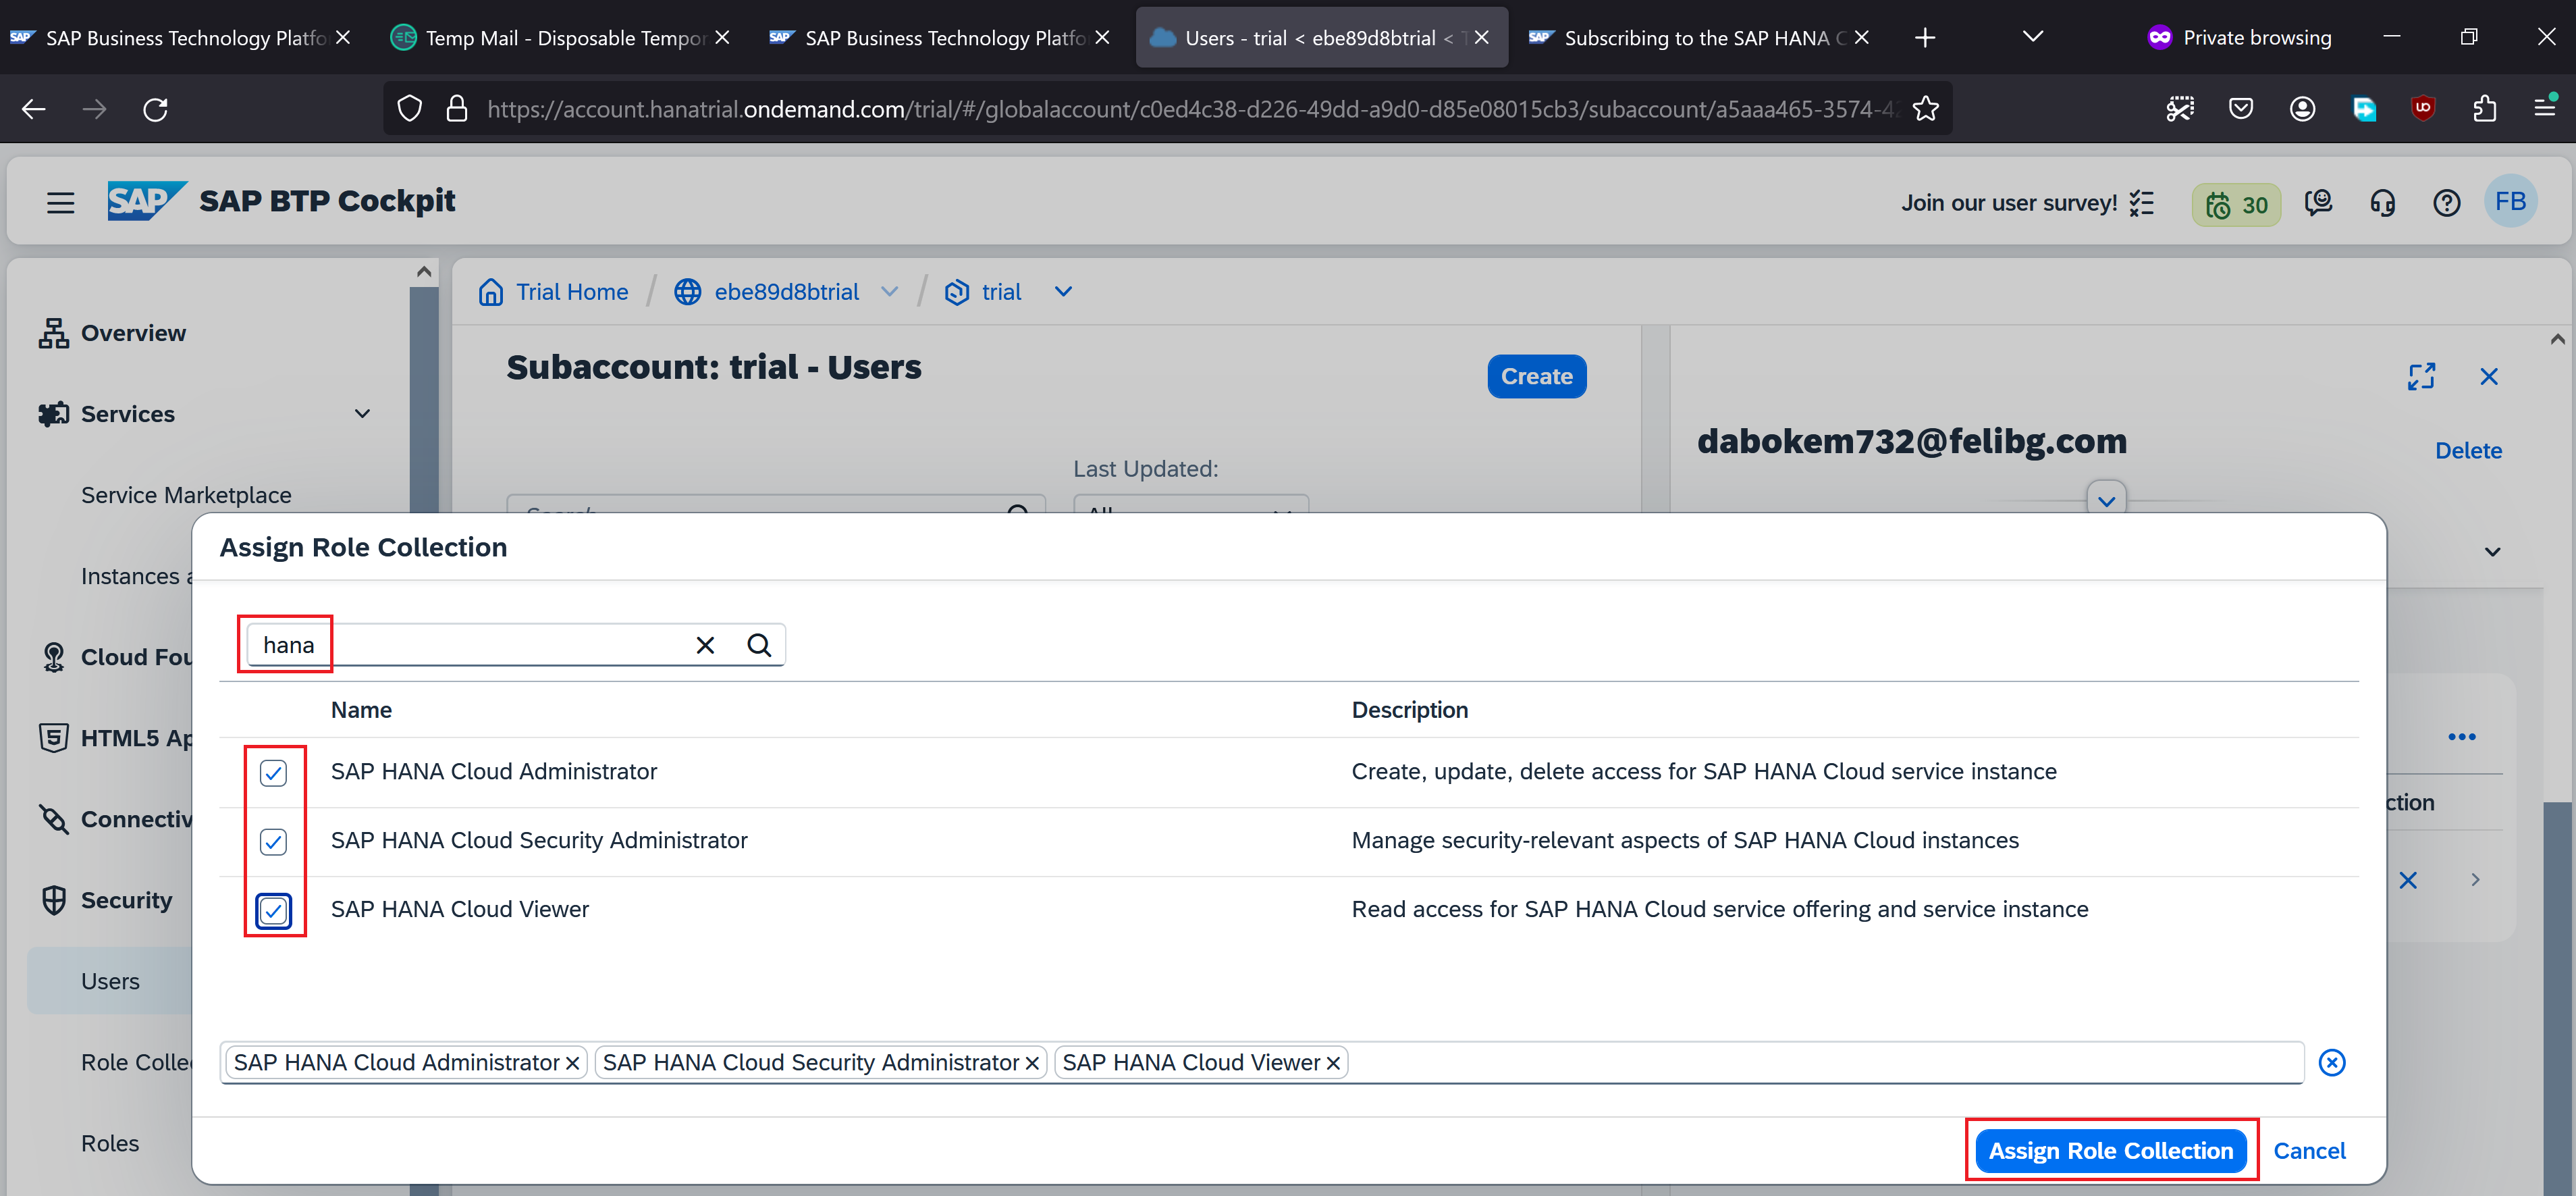
Search hana and select all the 3 role collections that gets displayed. Click Assign Role Collection
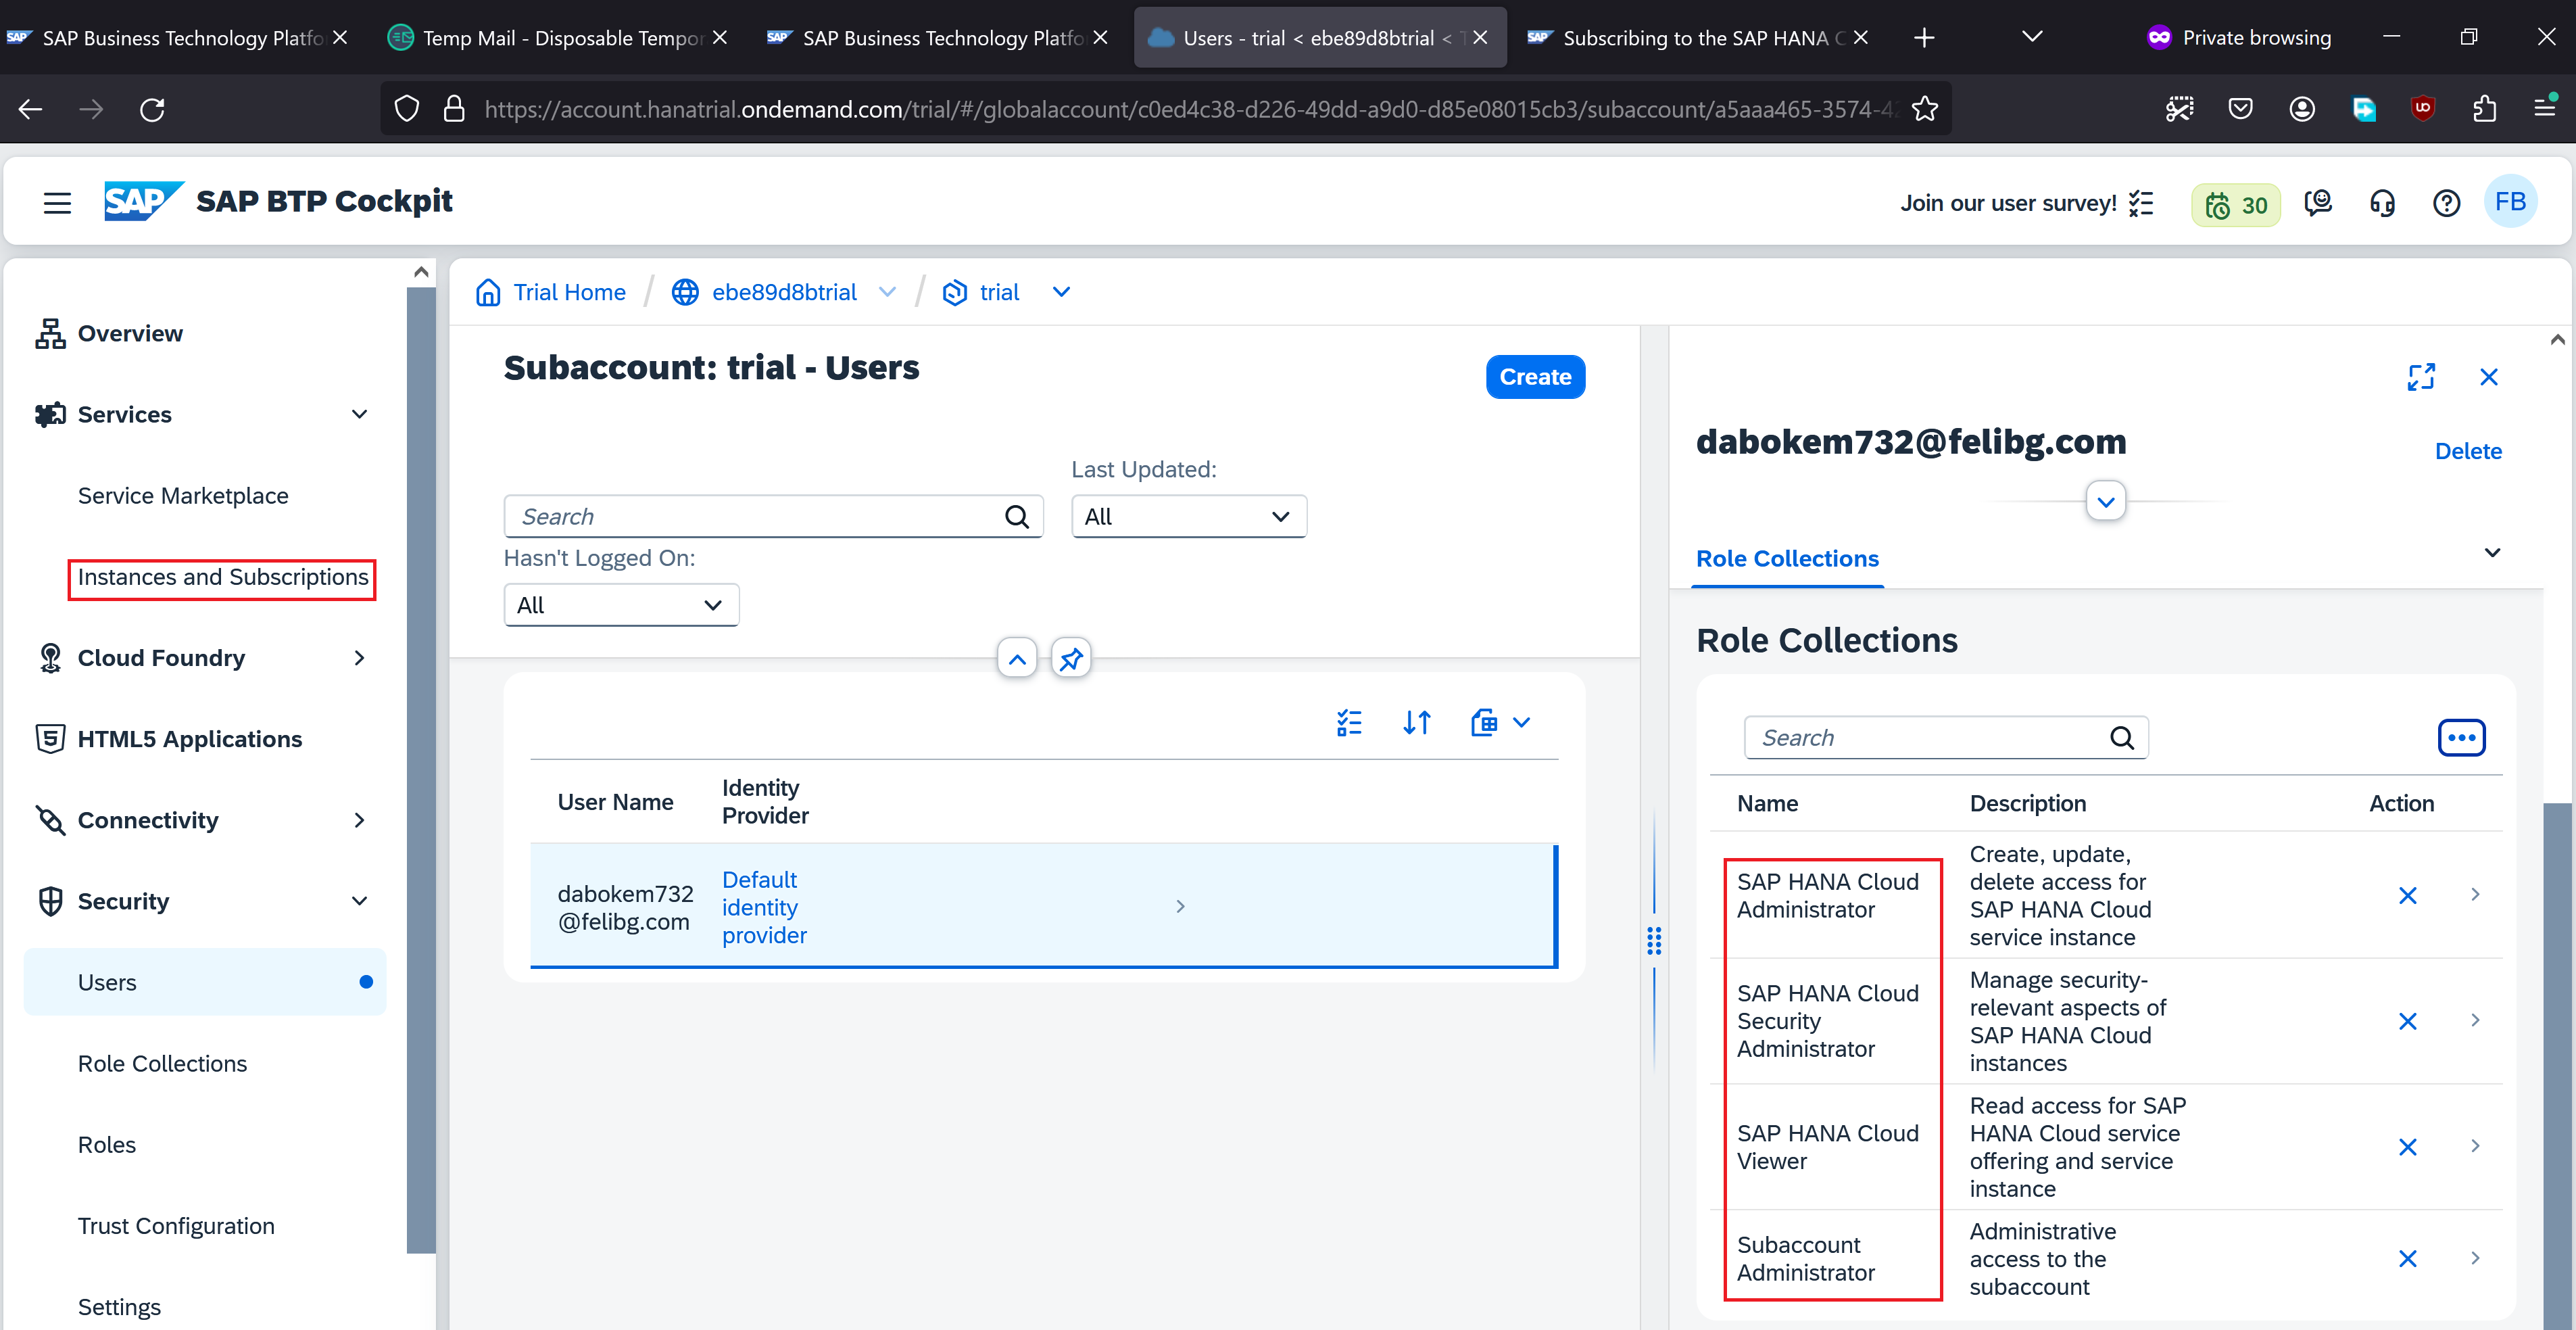
Our user now has all the 3 role collections. Click Instances and Subscriptions
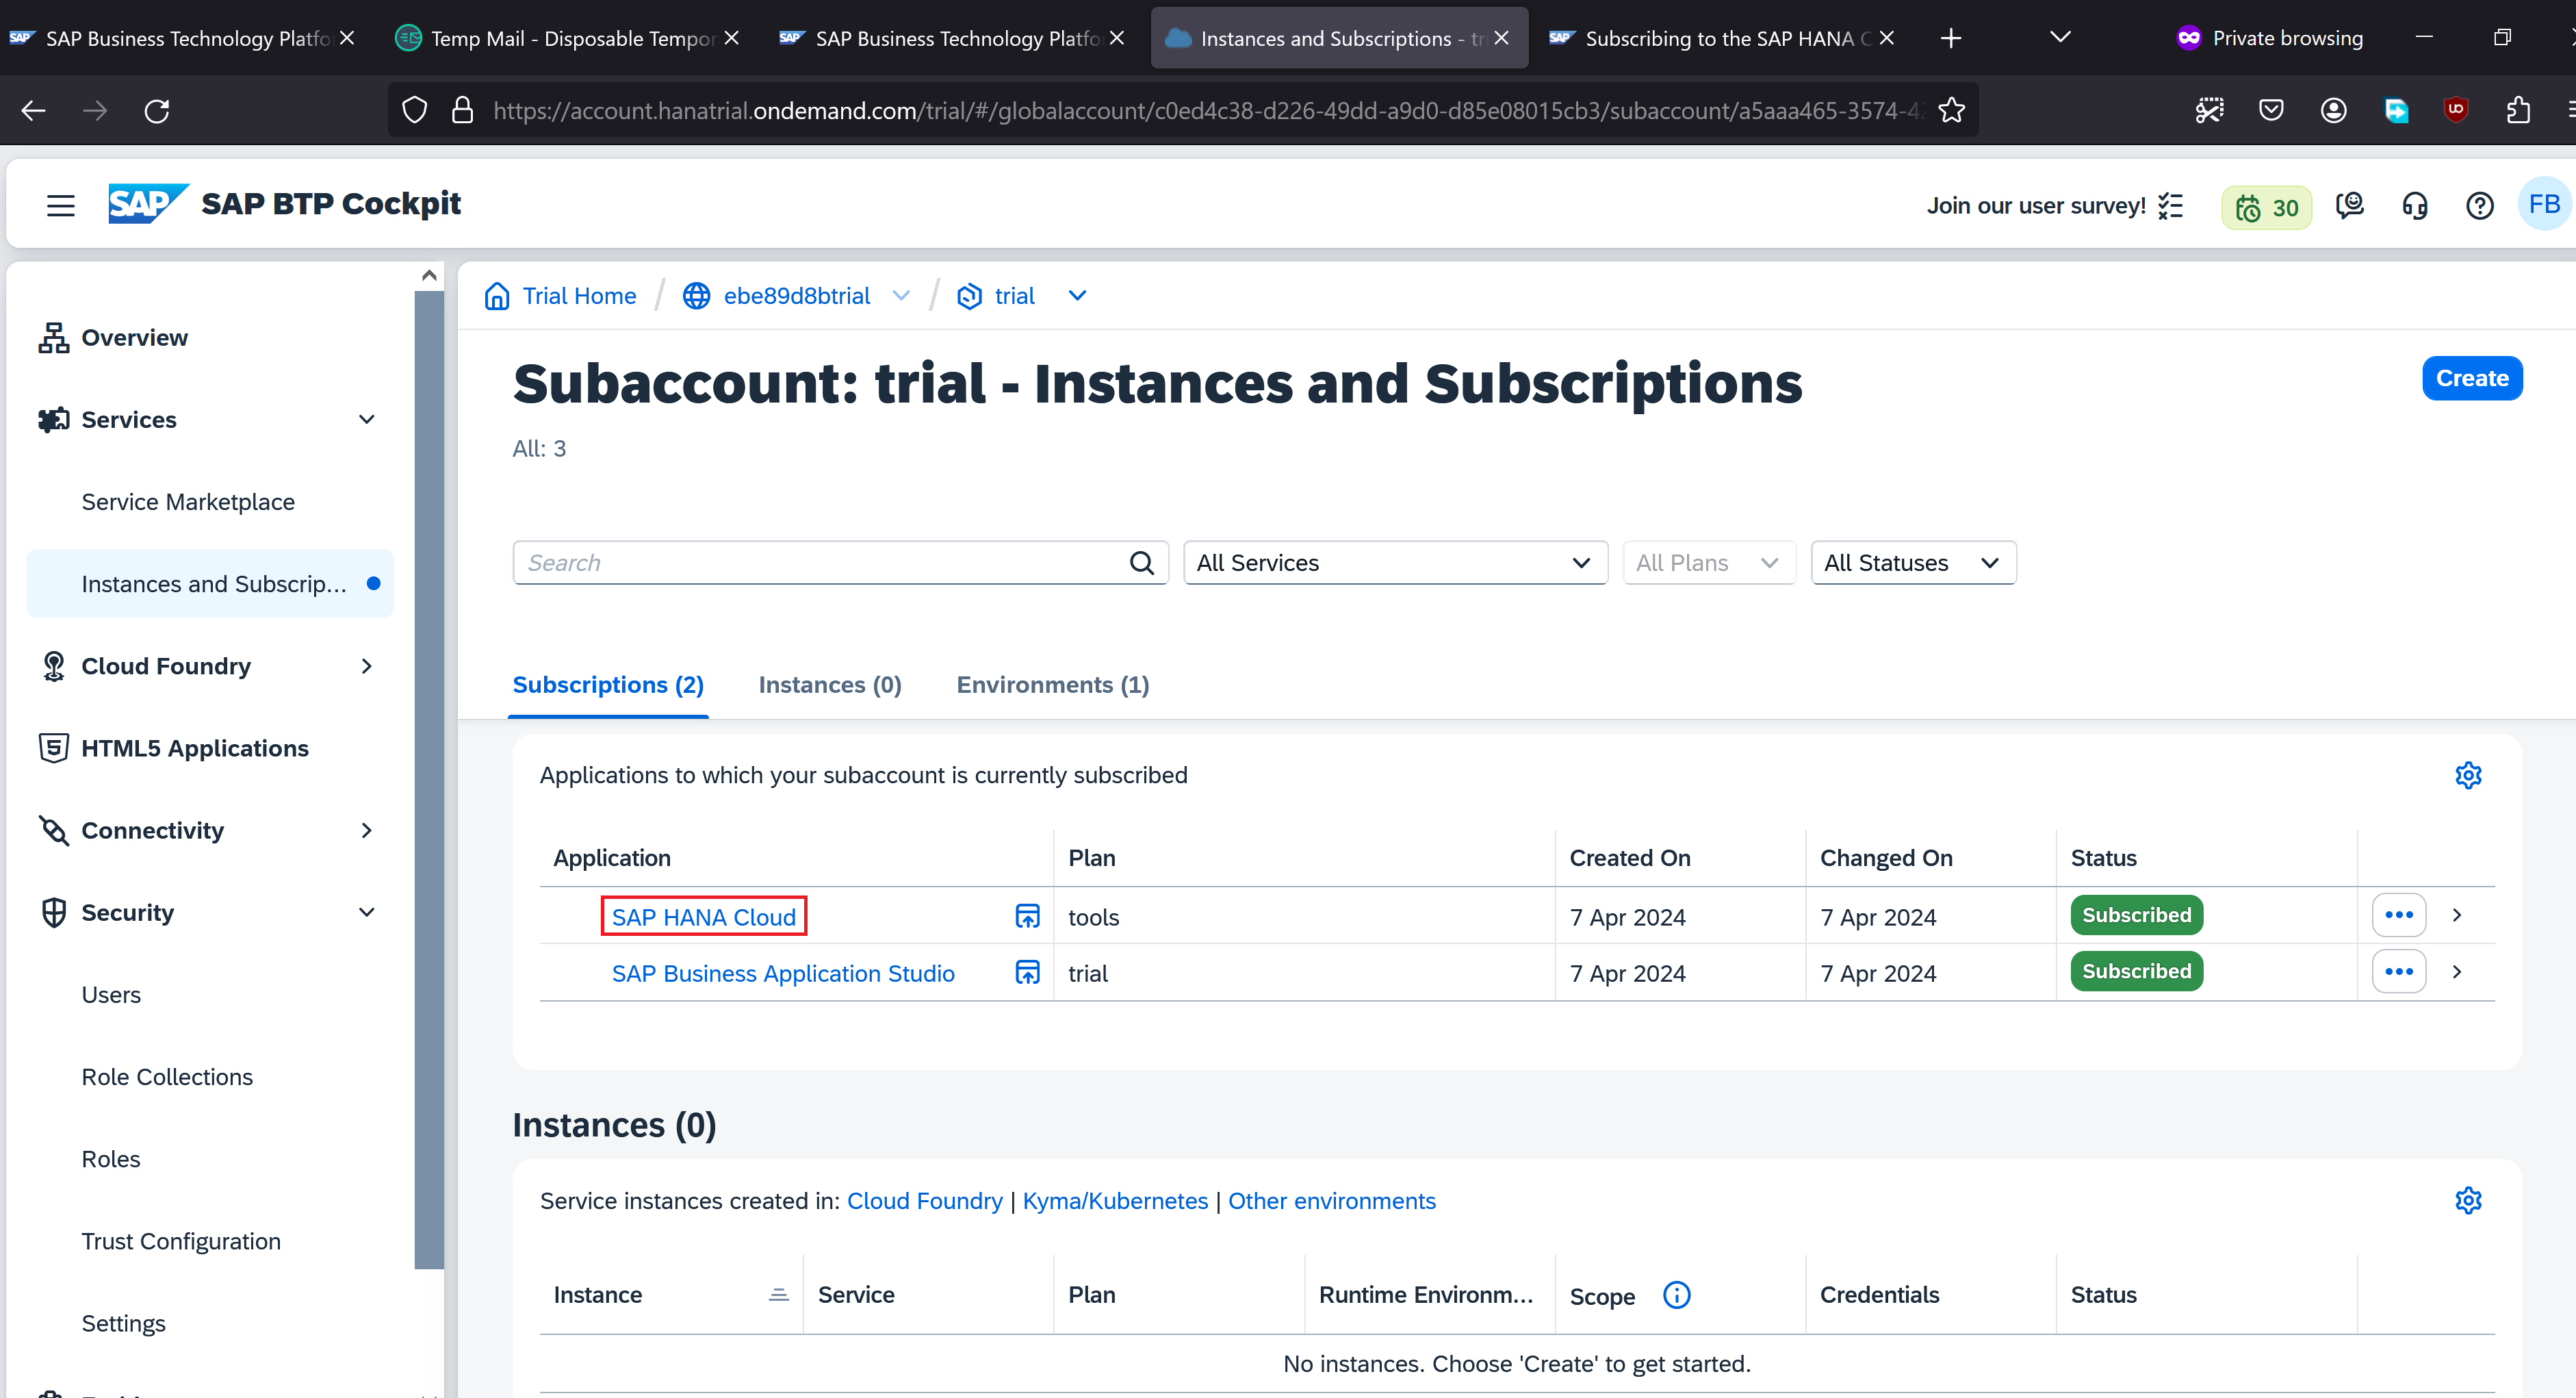
Now, click SAP Hana Cloud application under subscriptions
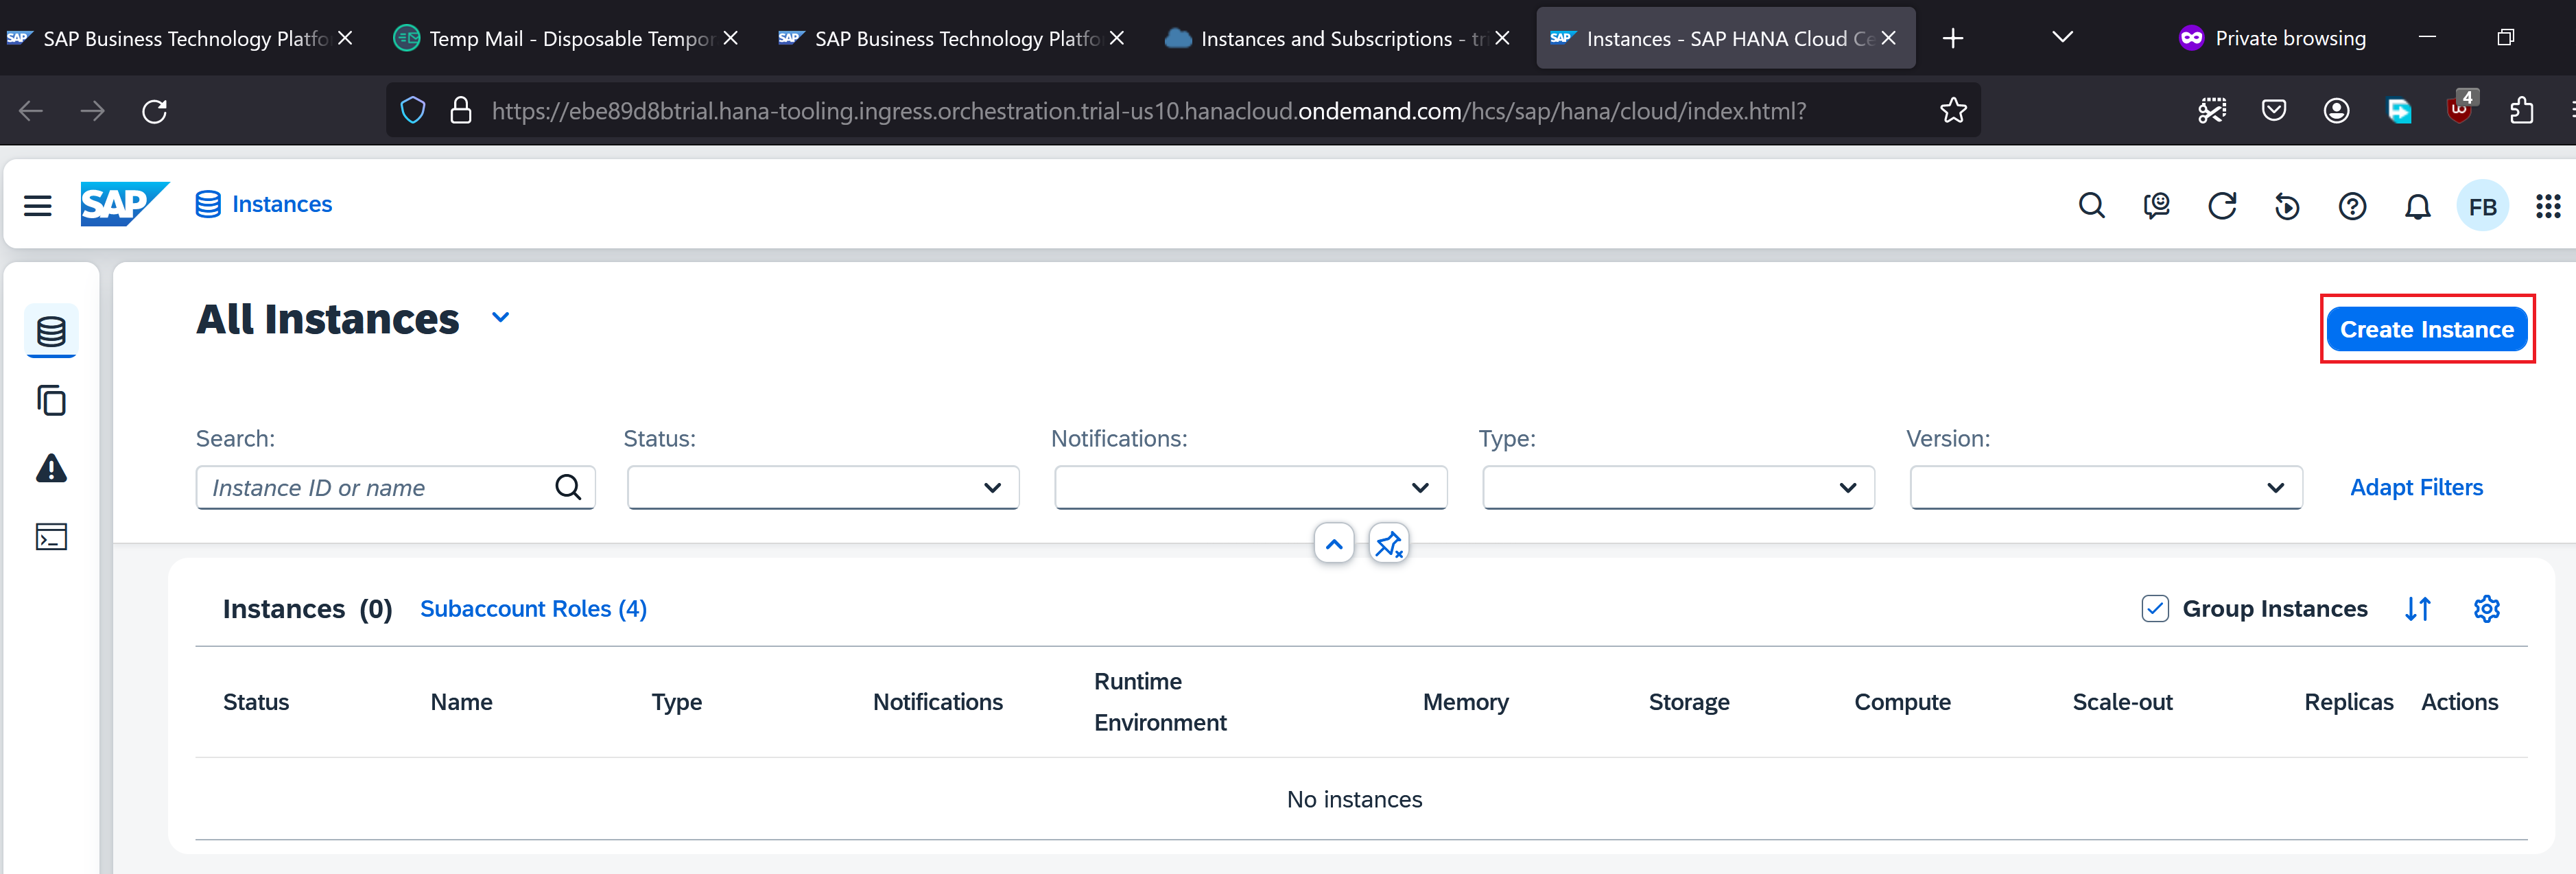
There are no instances yet. Let’s click Create Instance
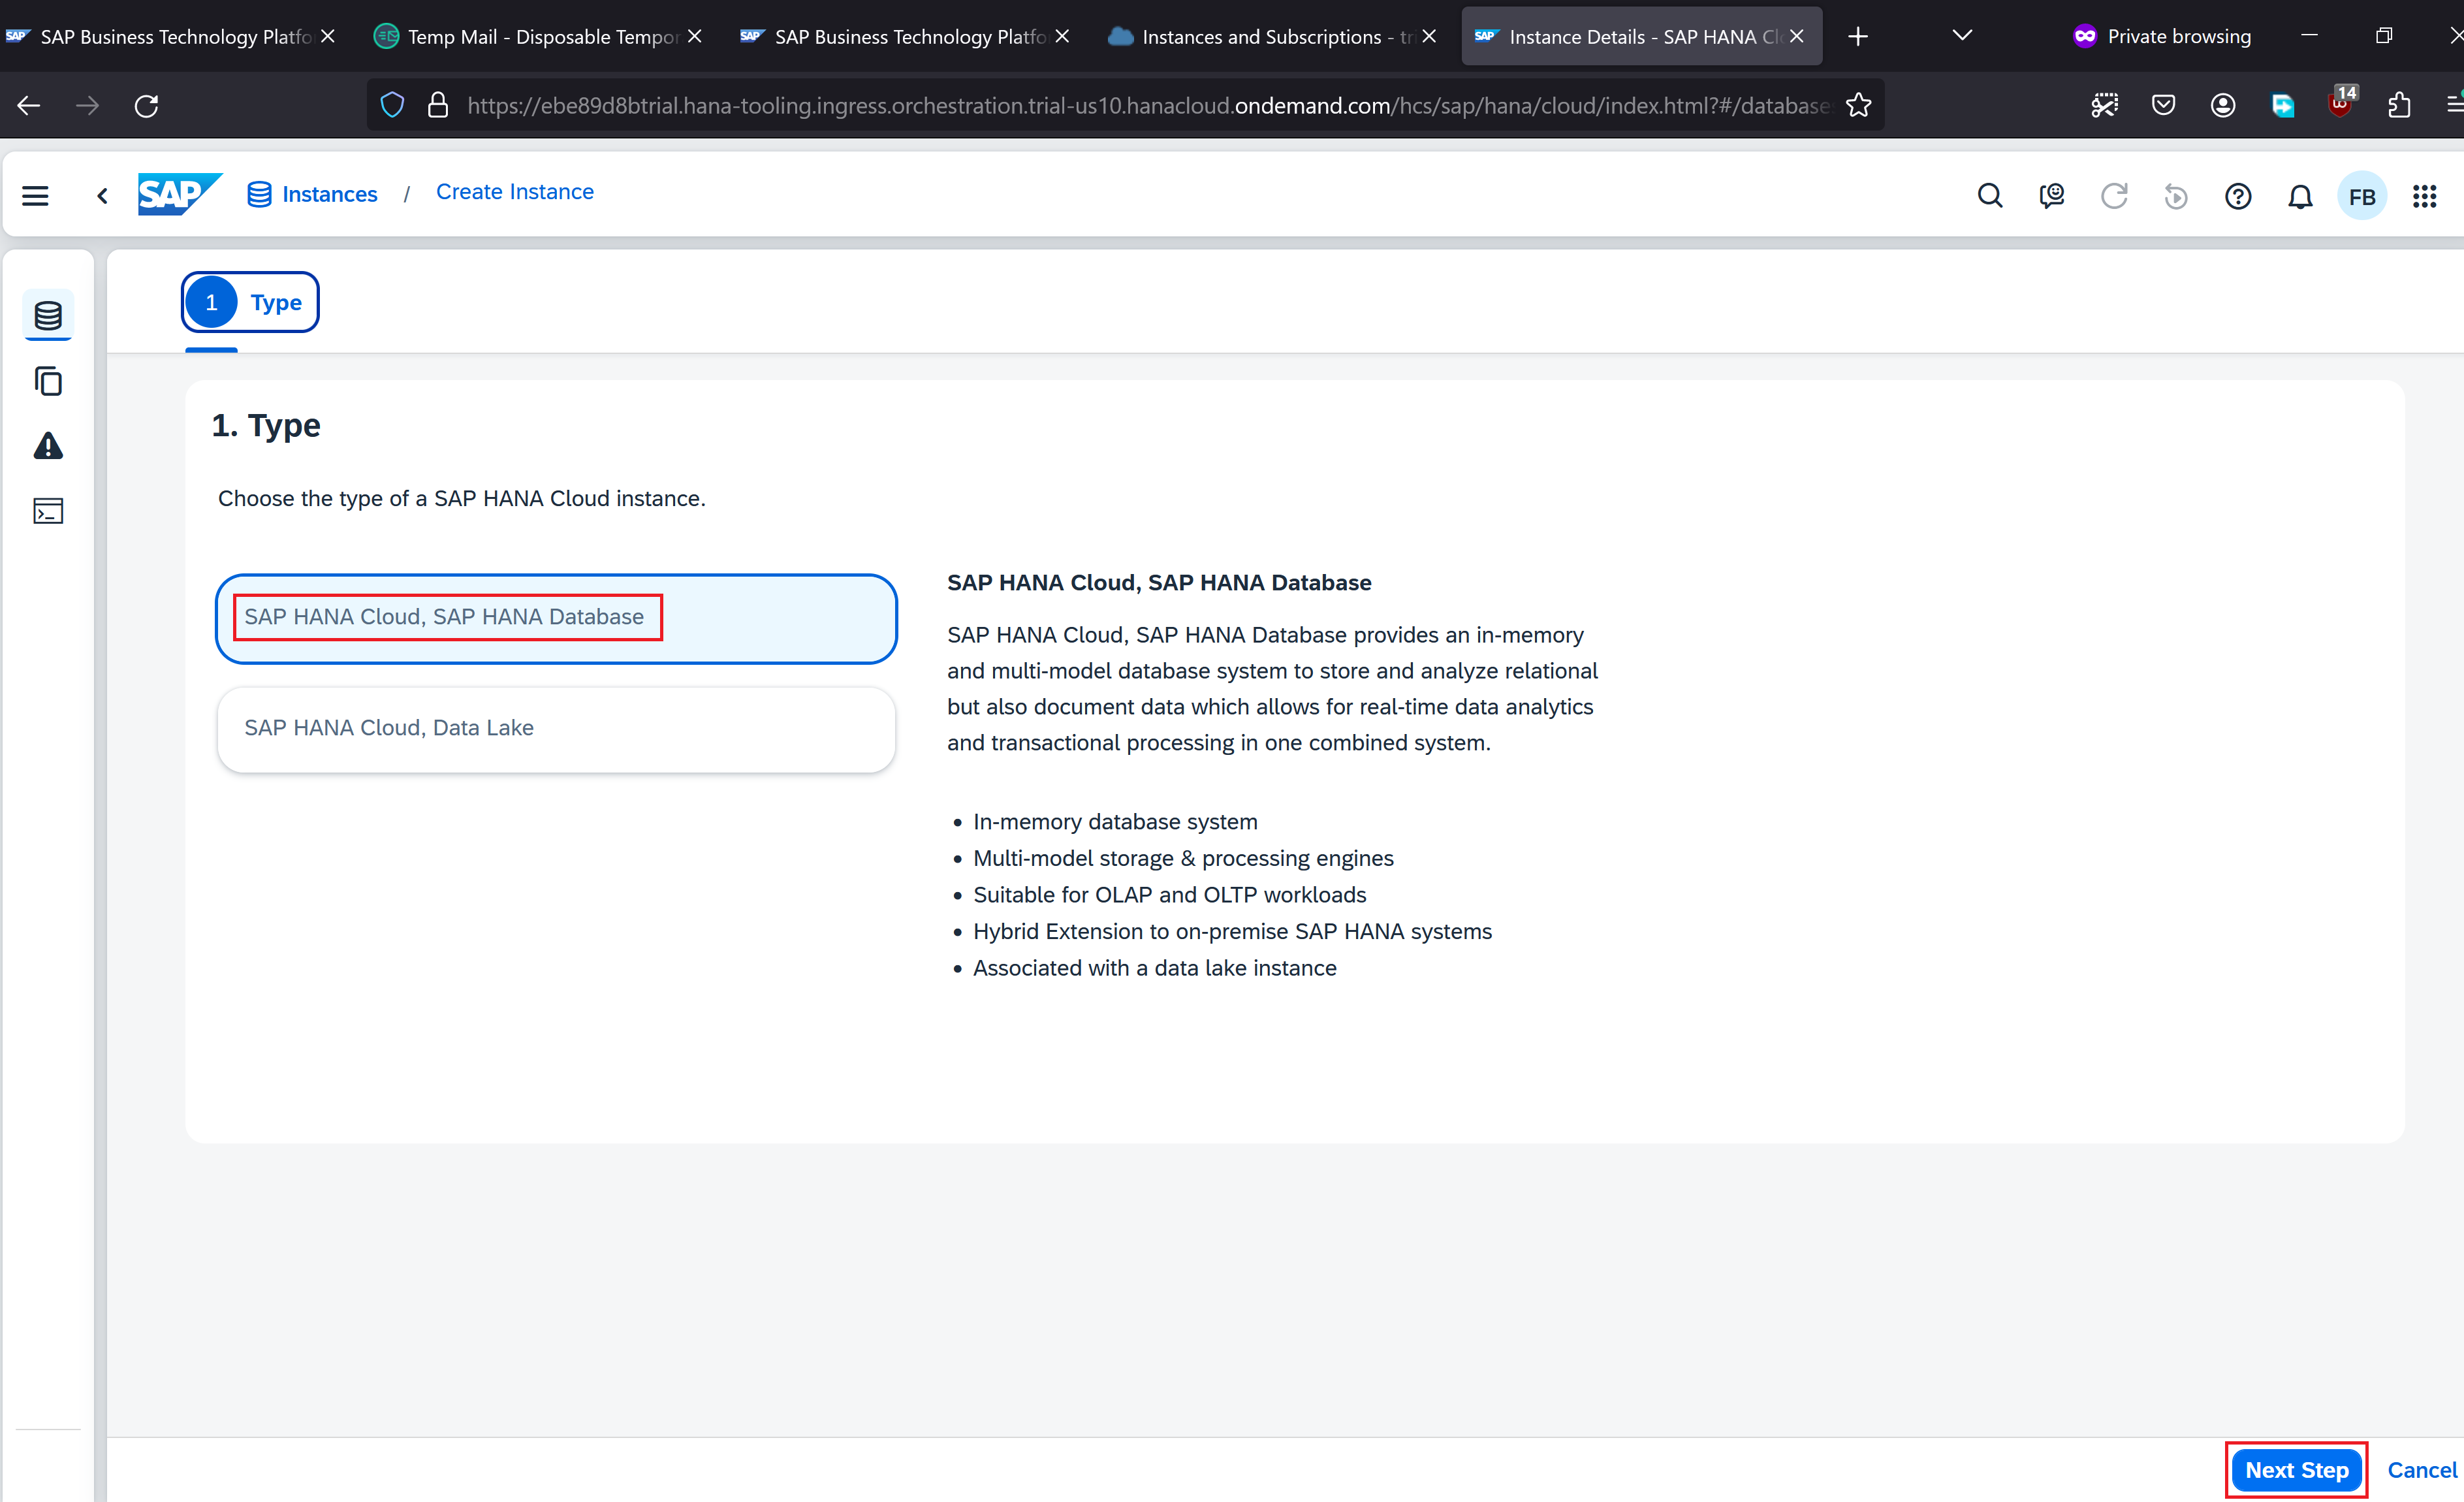
Select Type as SAP HANA Cloud, SAP HANA Database. Click Next Step
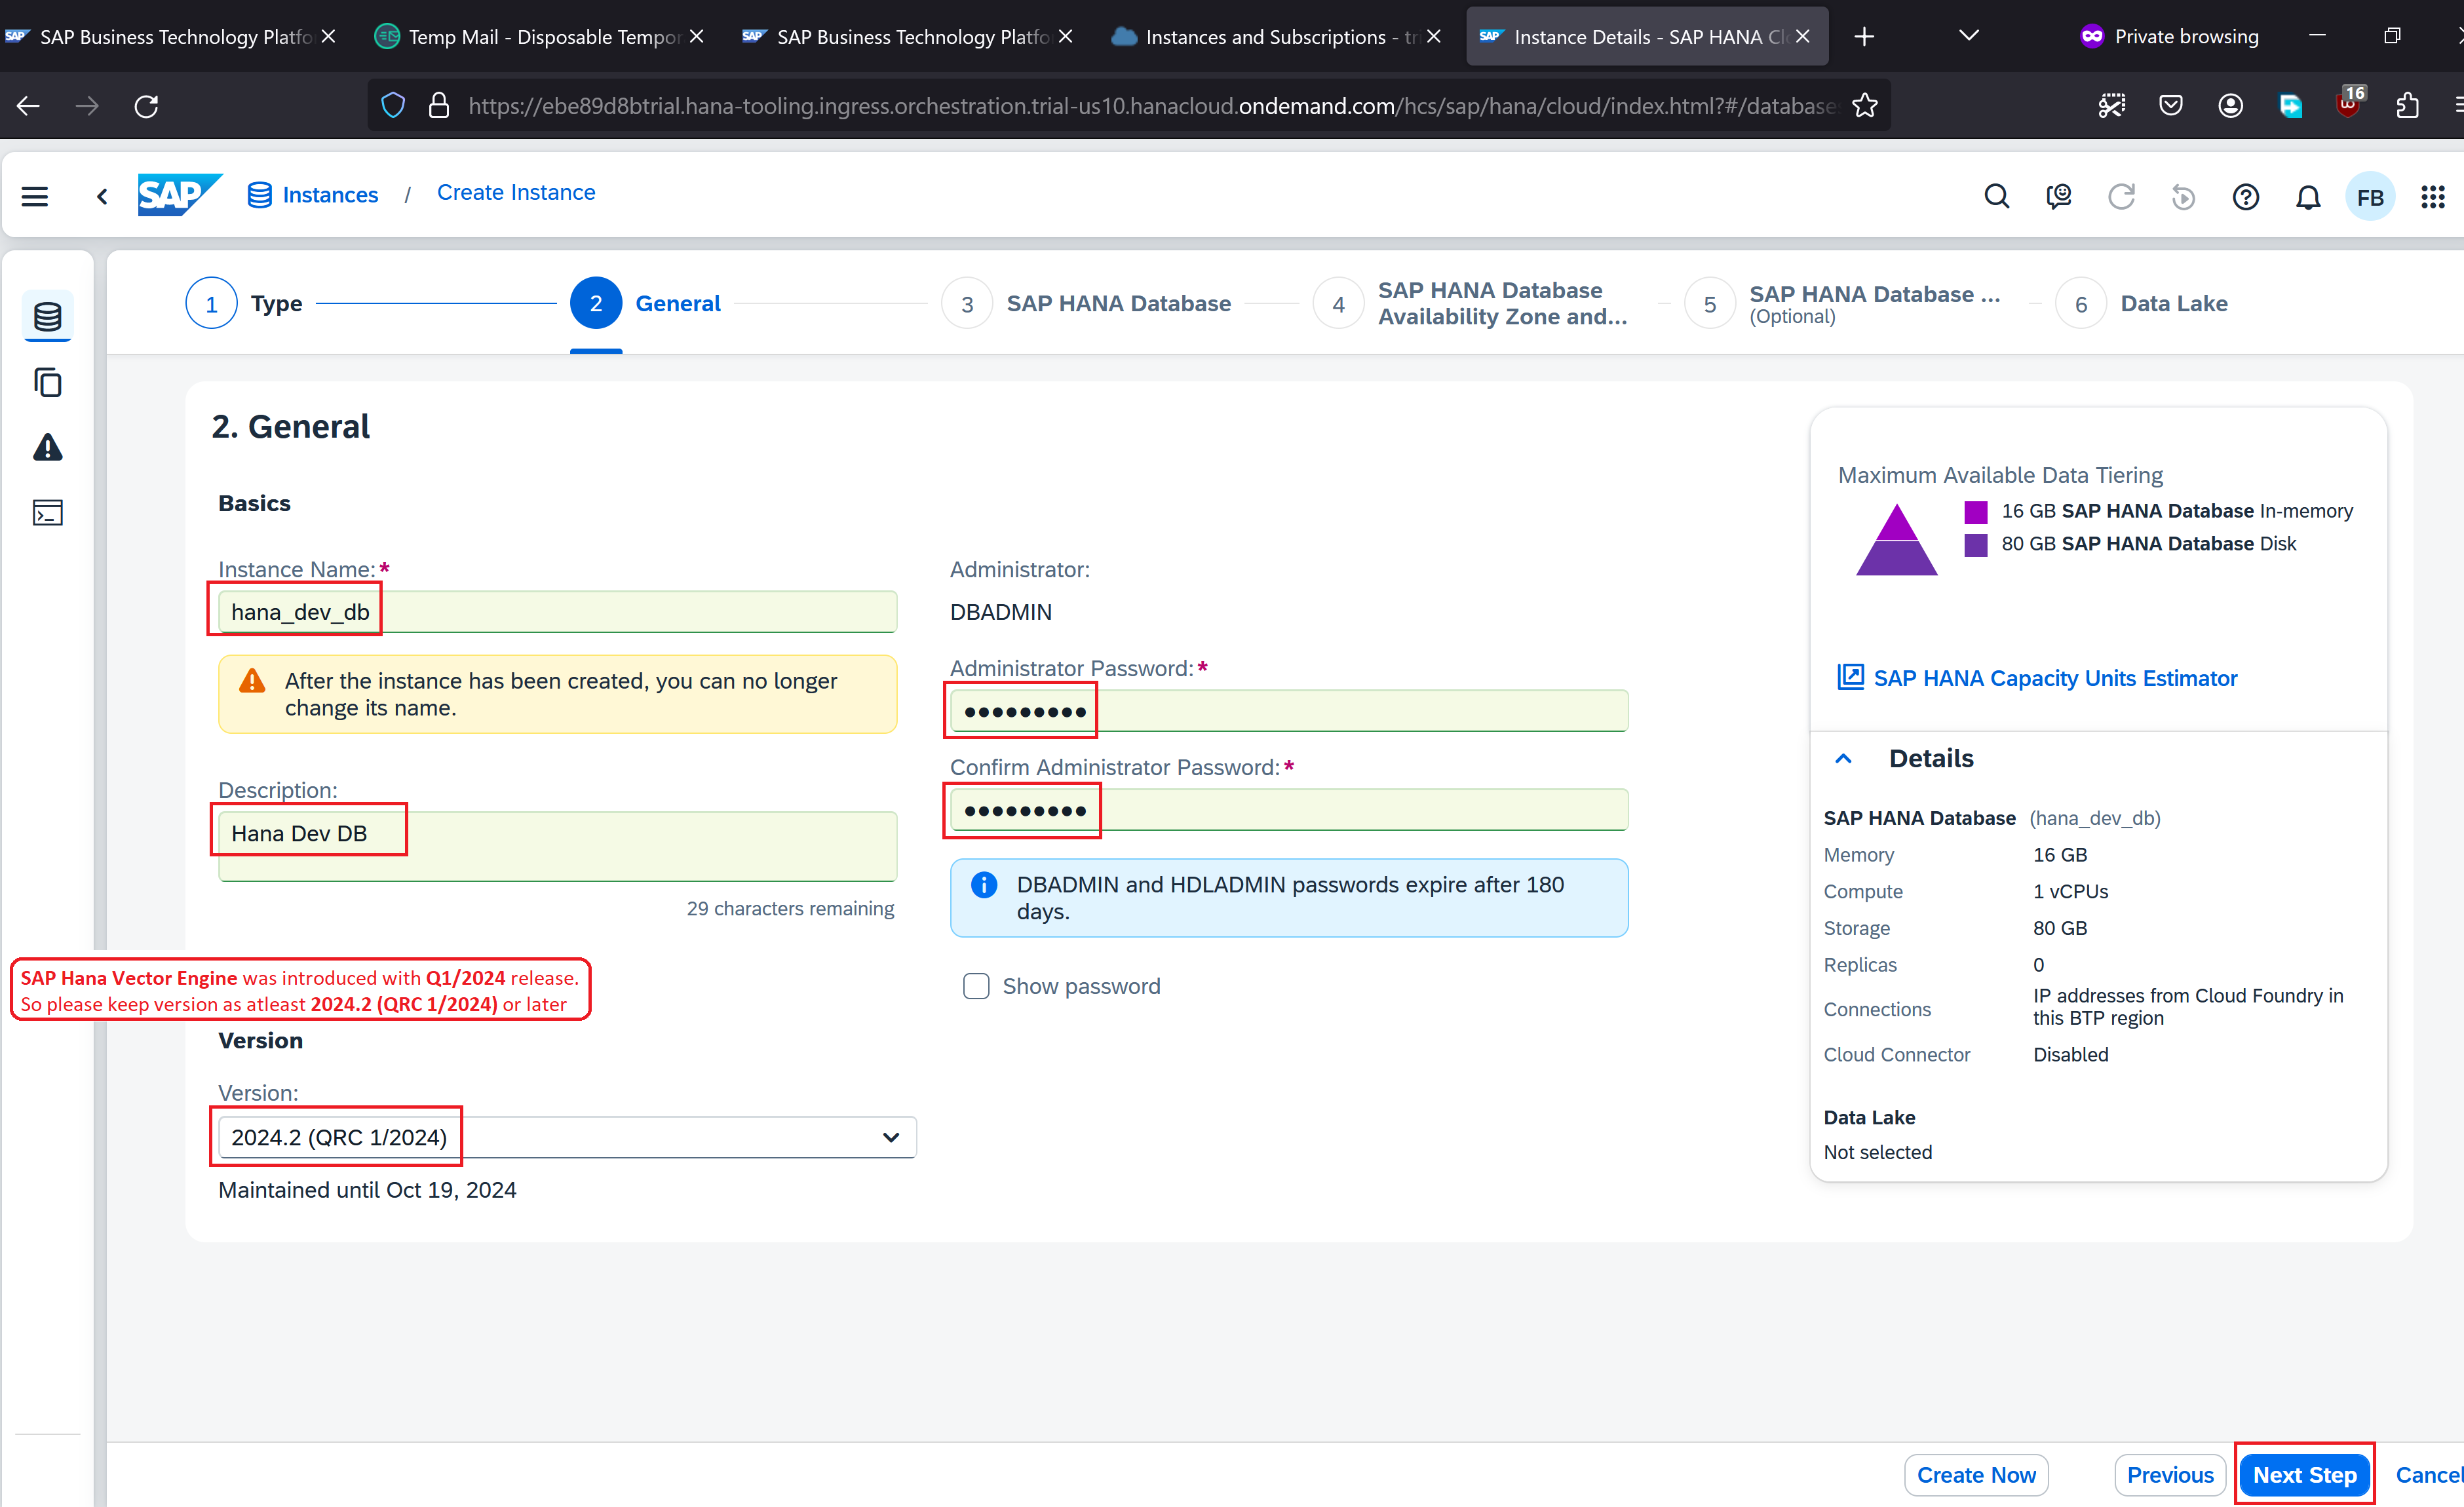
Provide Instance Name, Description, password for DBADMIN administrator.
Select the latest version 2024.2 (QRC 1/2024). Click Next Step
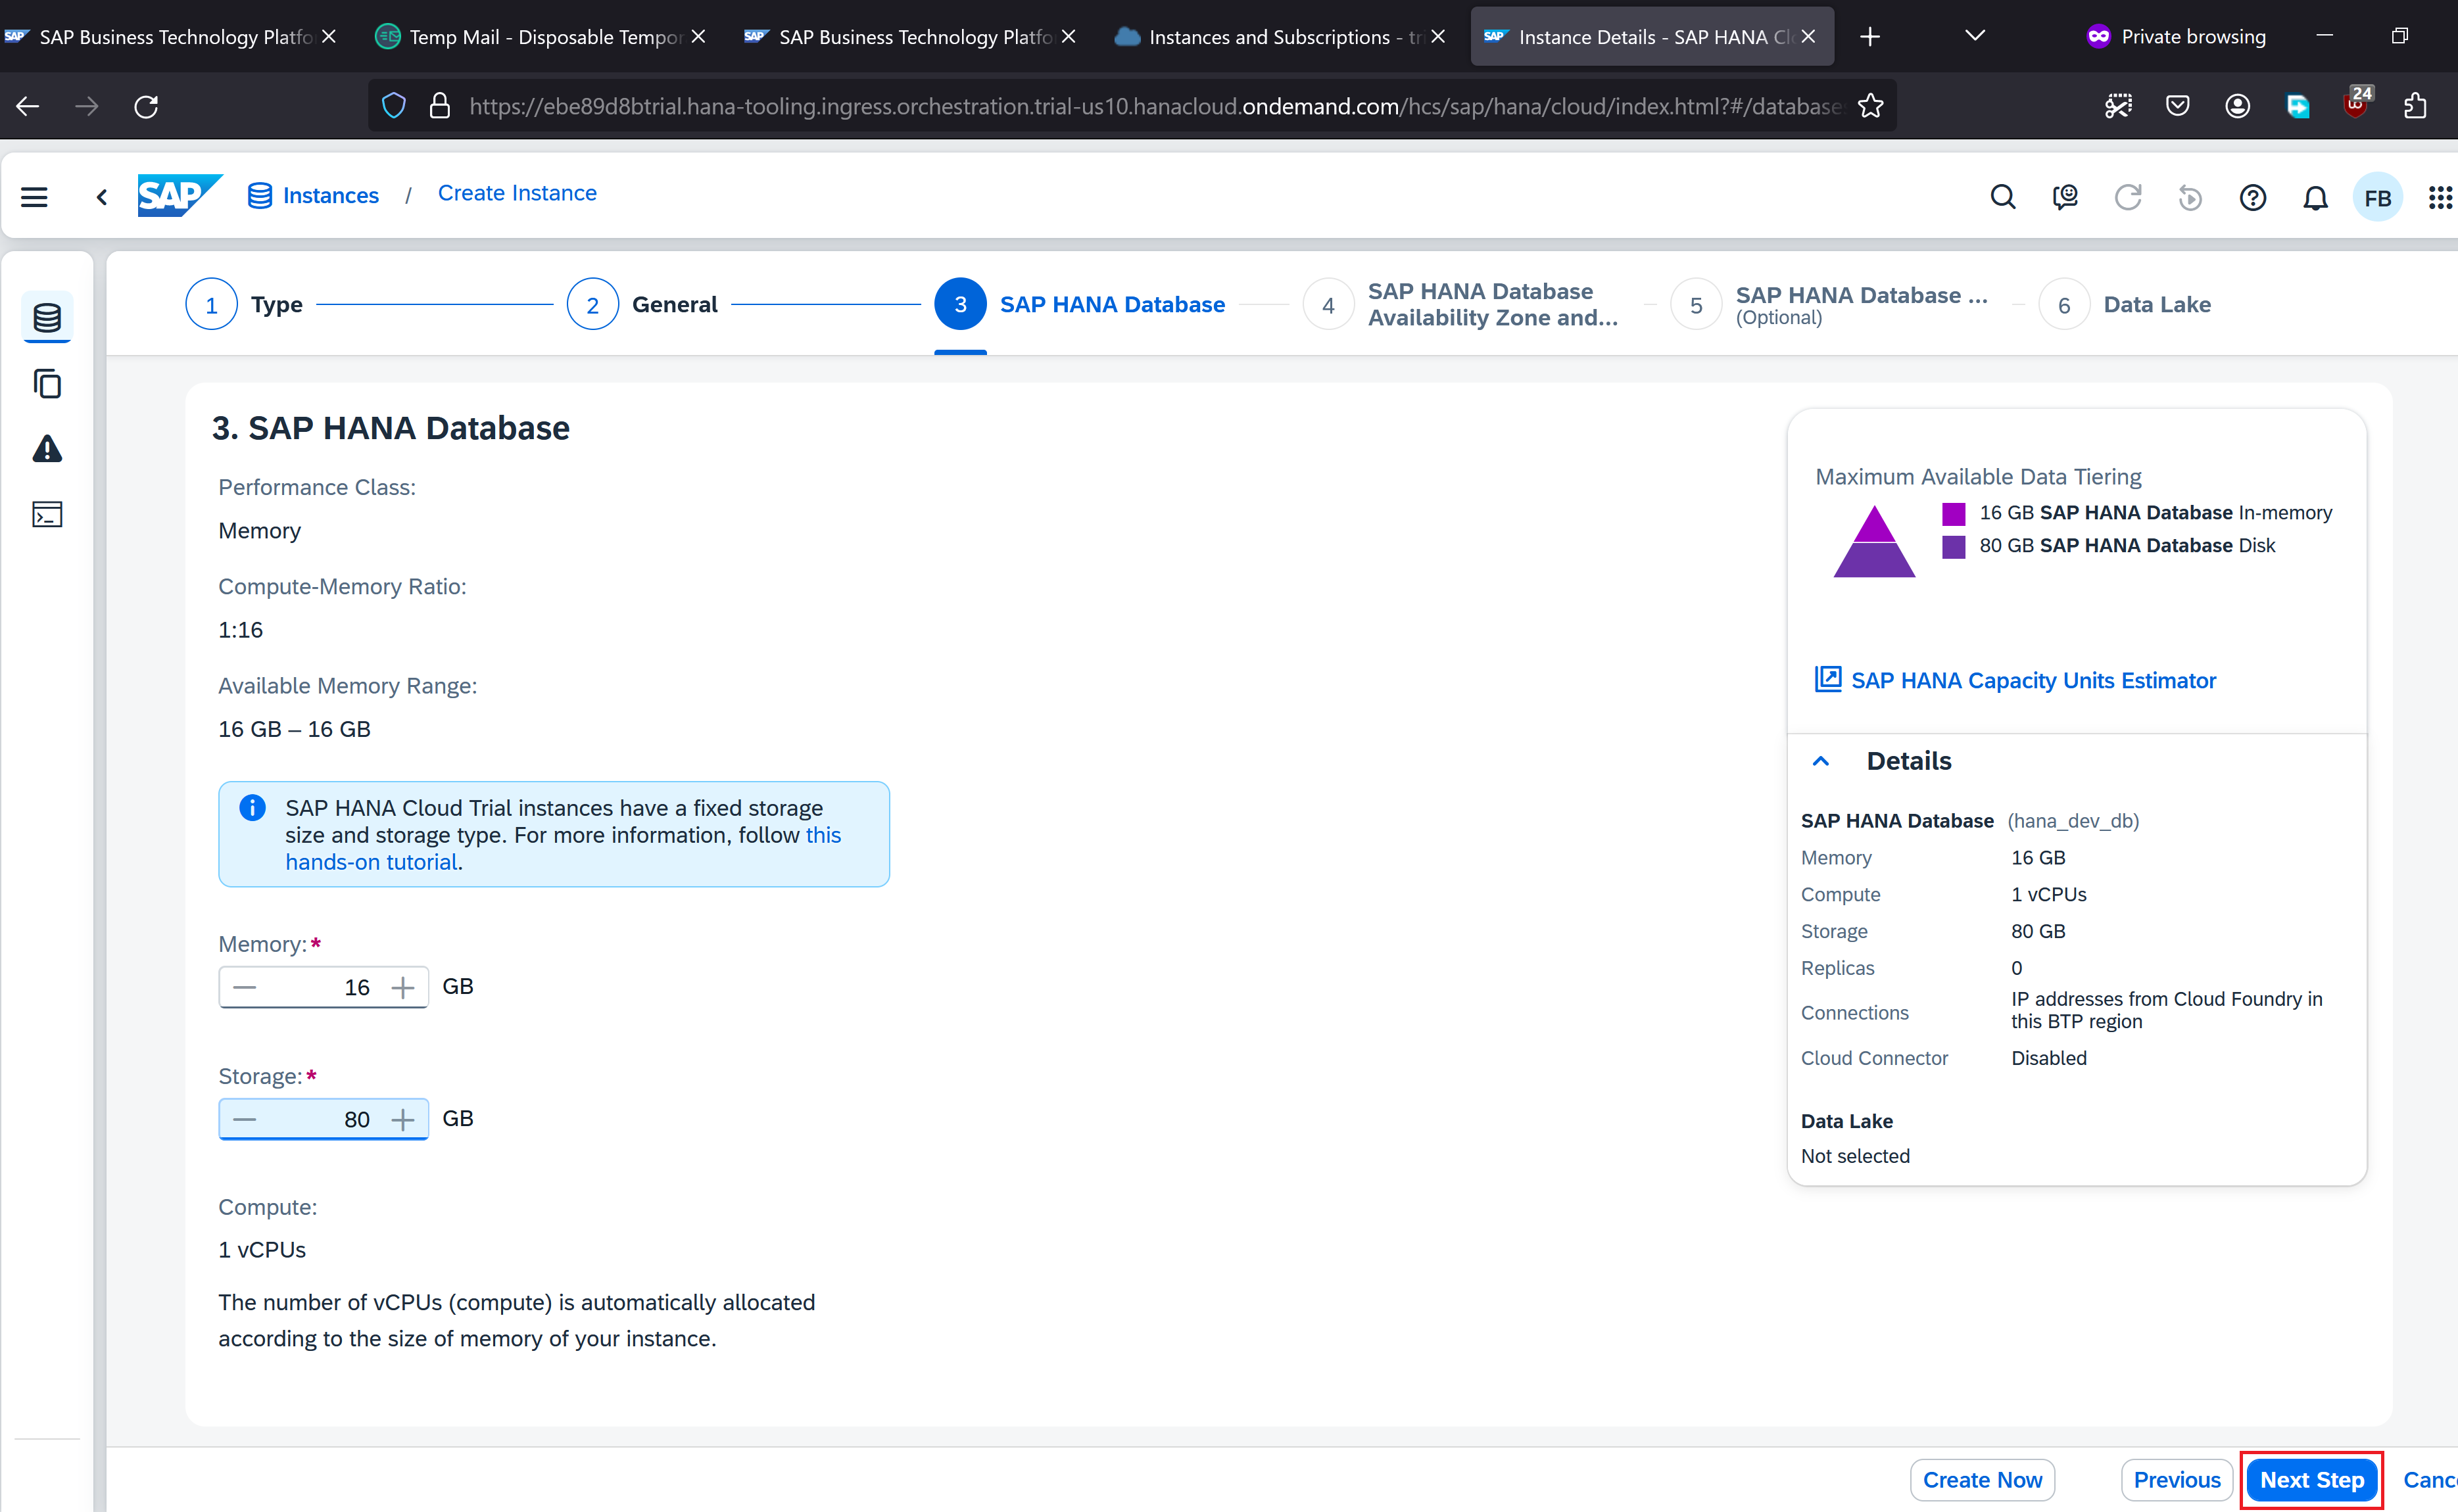
Keep everything as default. Click Next Step
Click Next Step

Select Allow all IP addresses and click Next Step
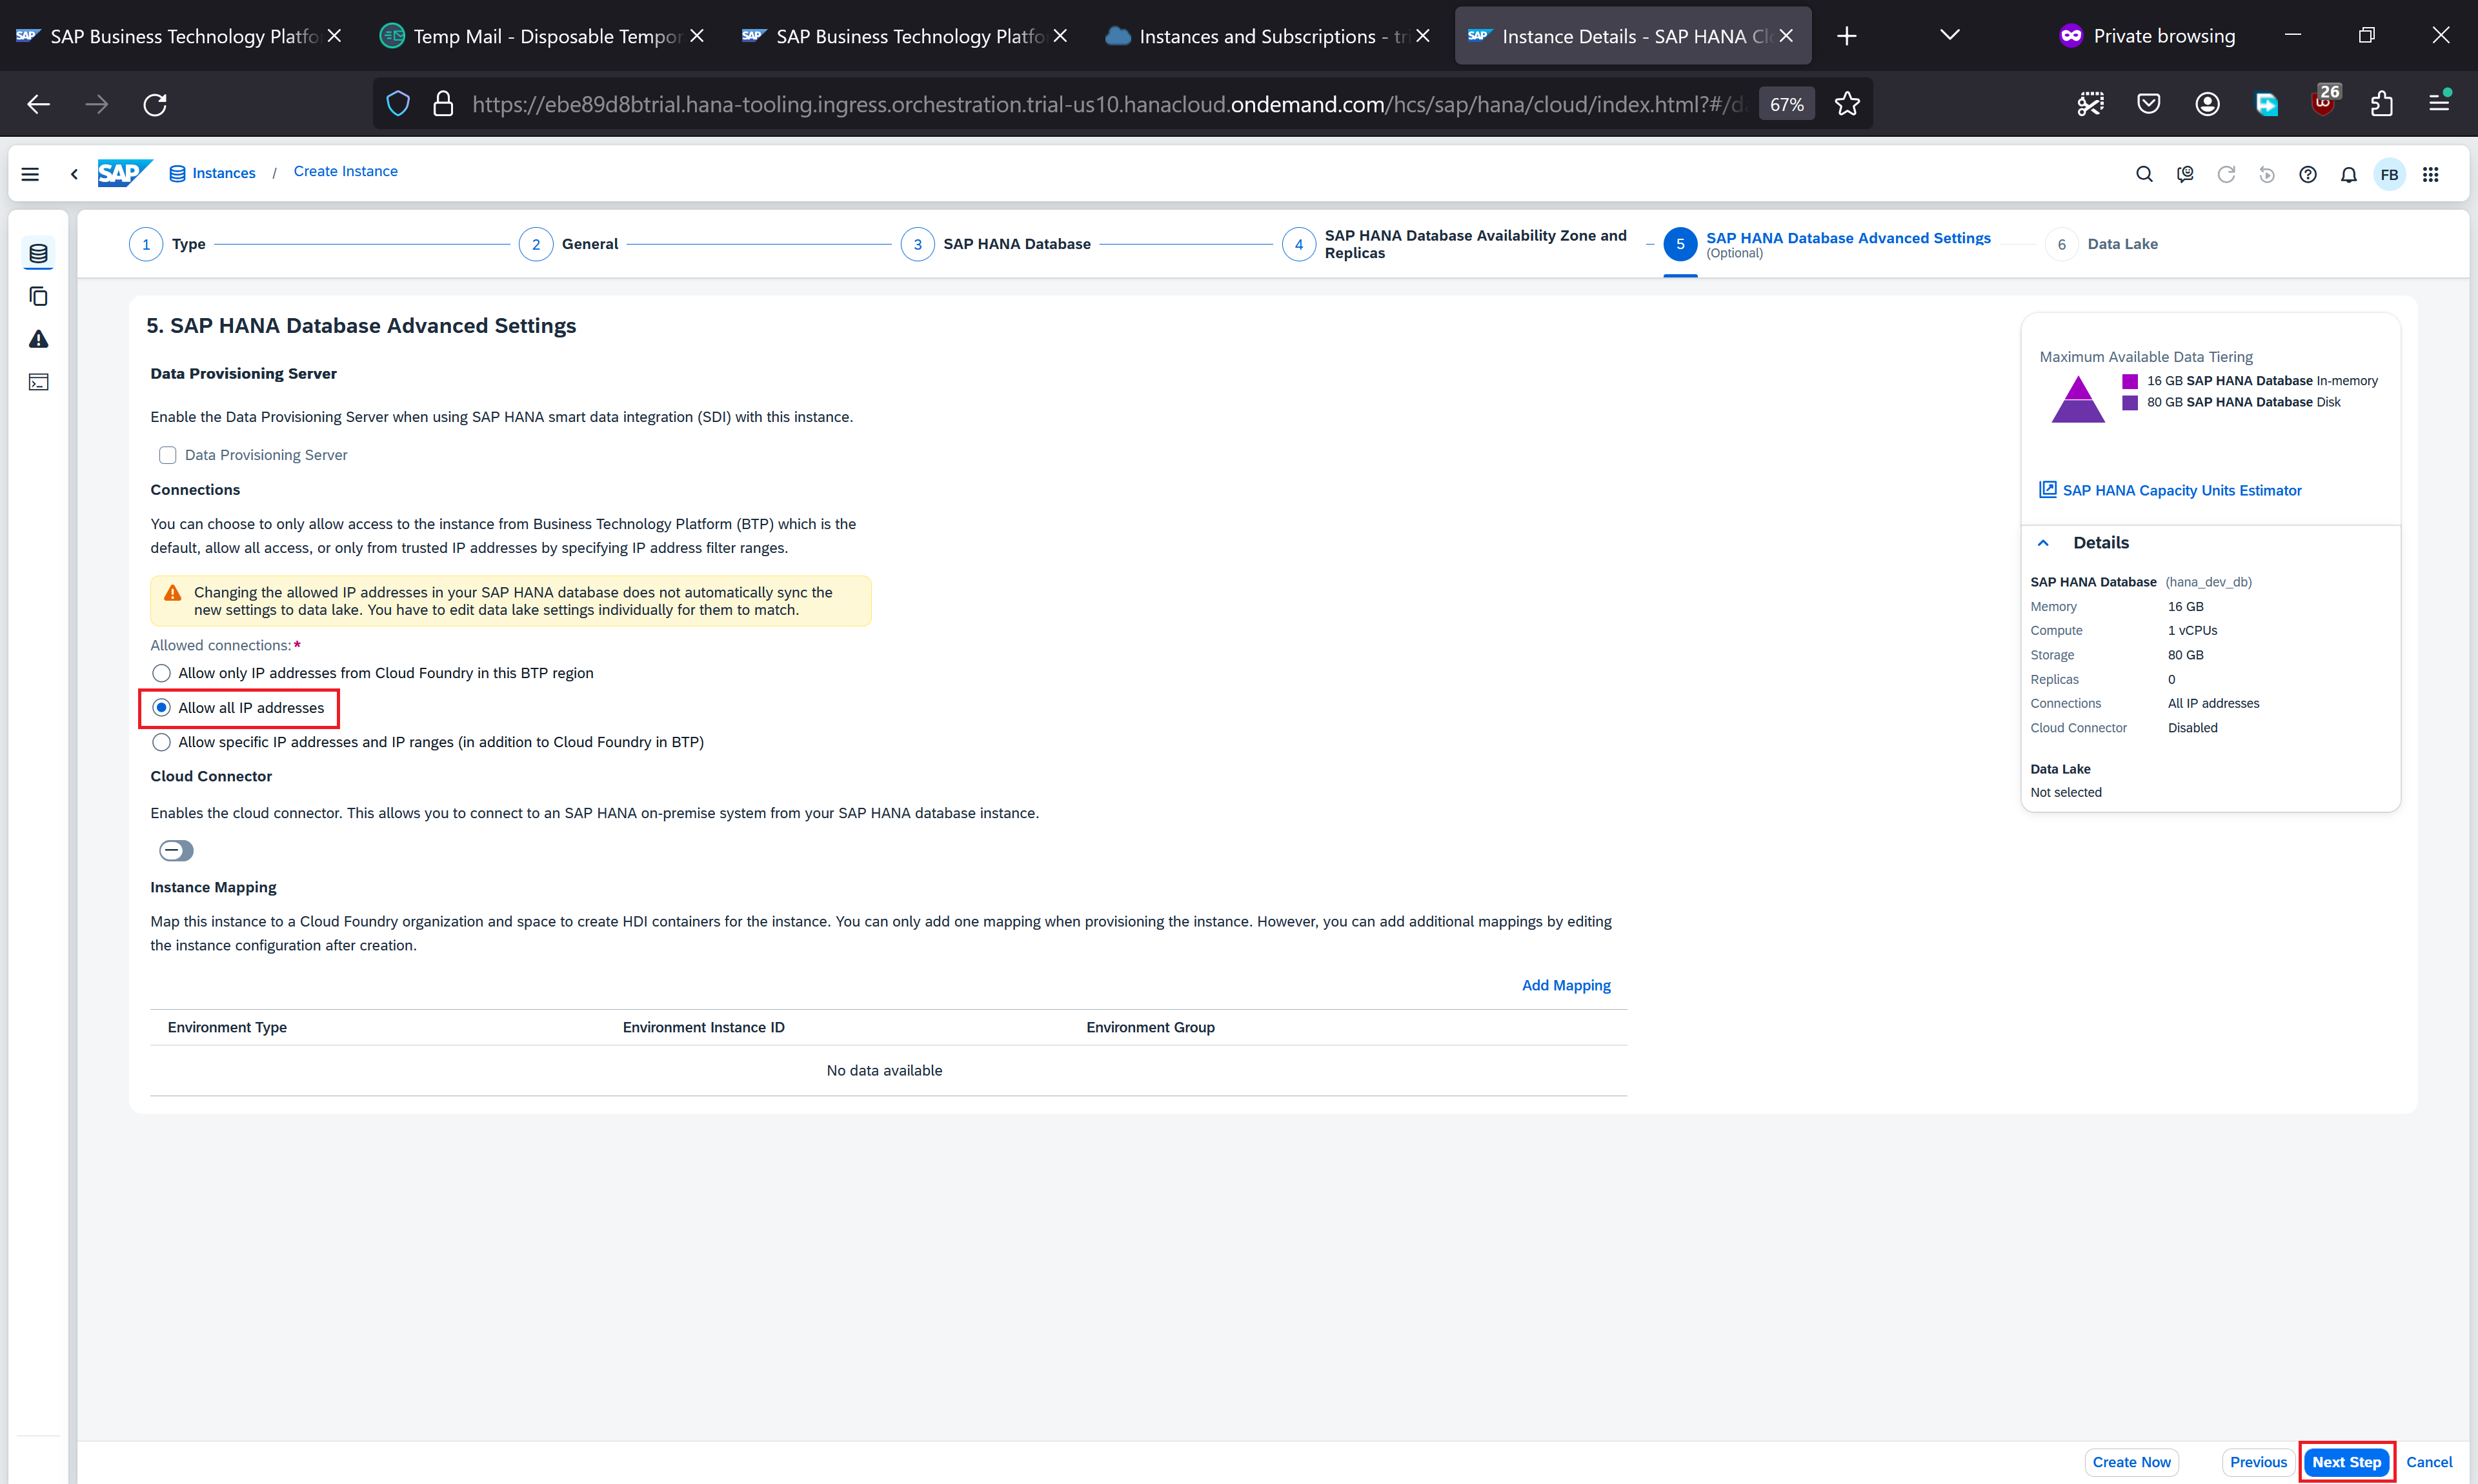
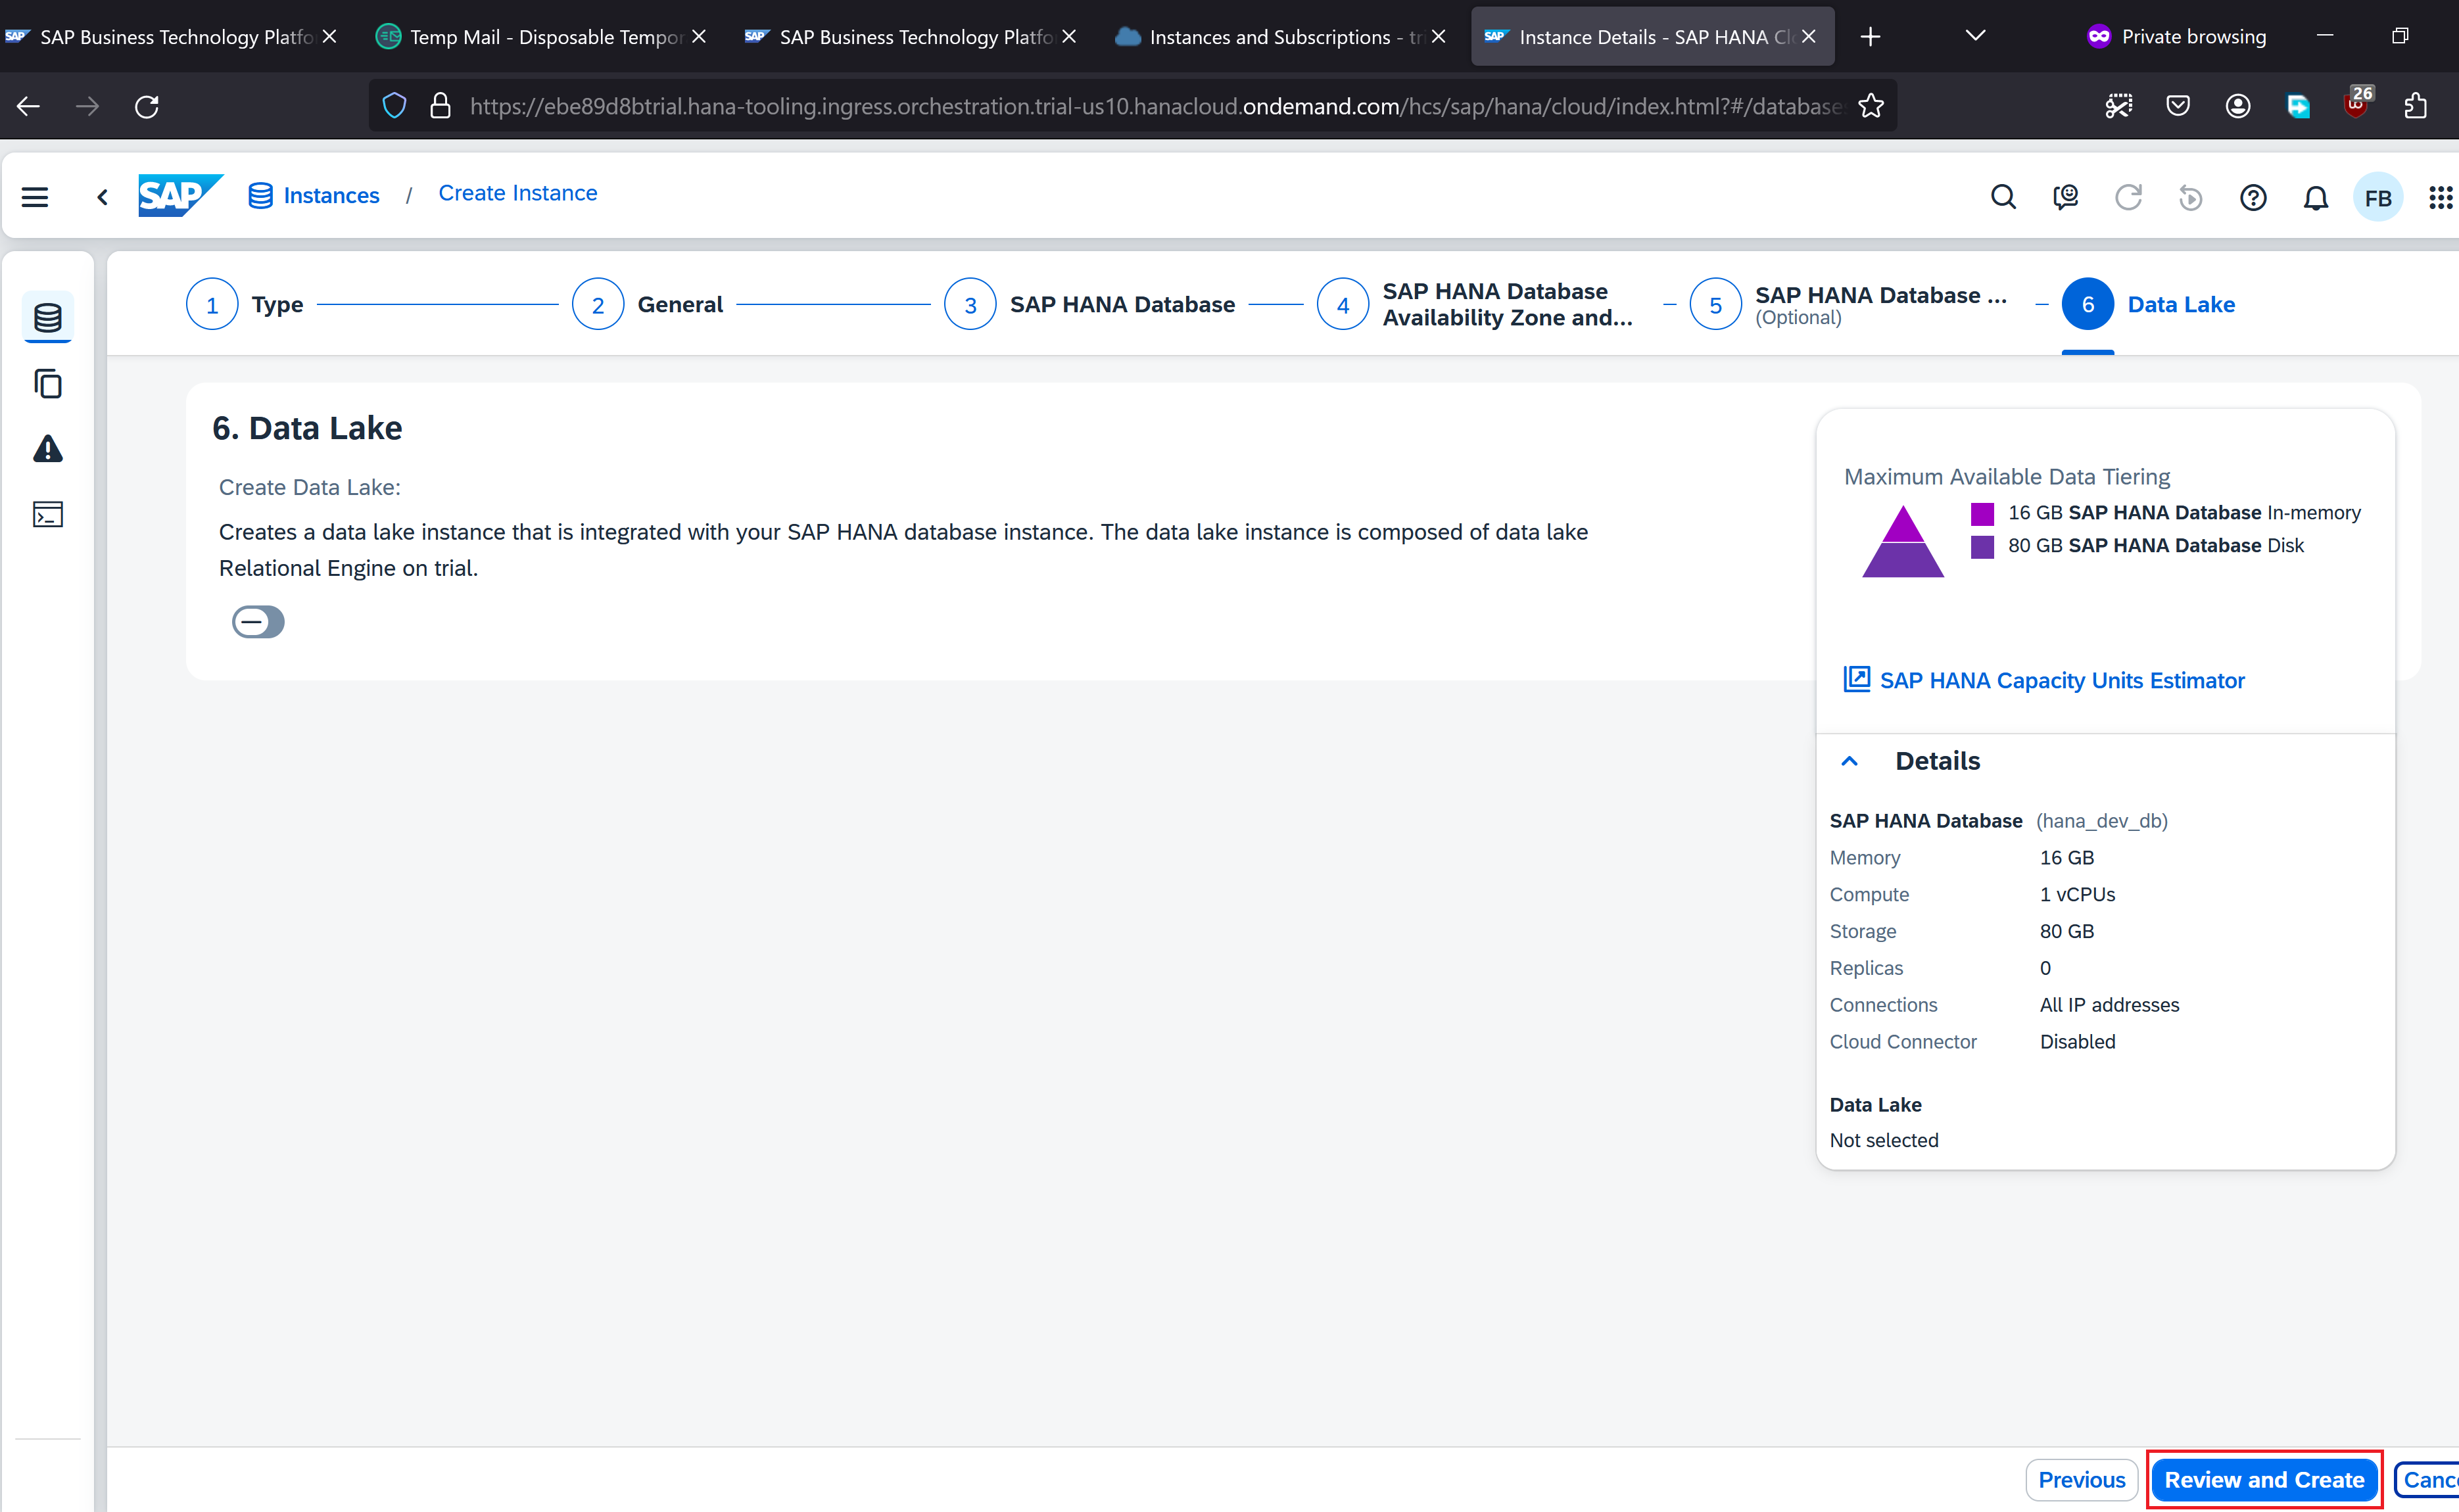
Click Review and Create
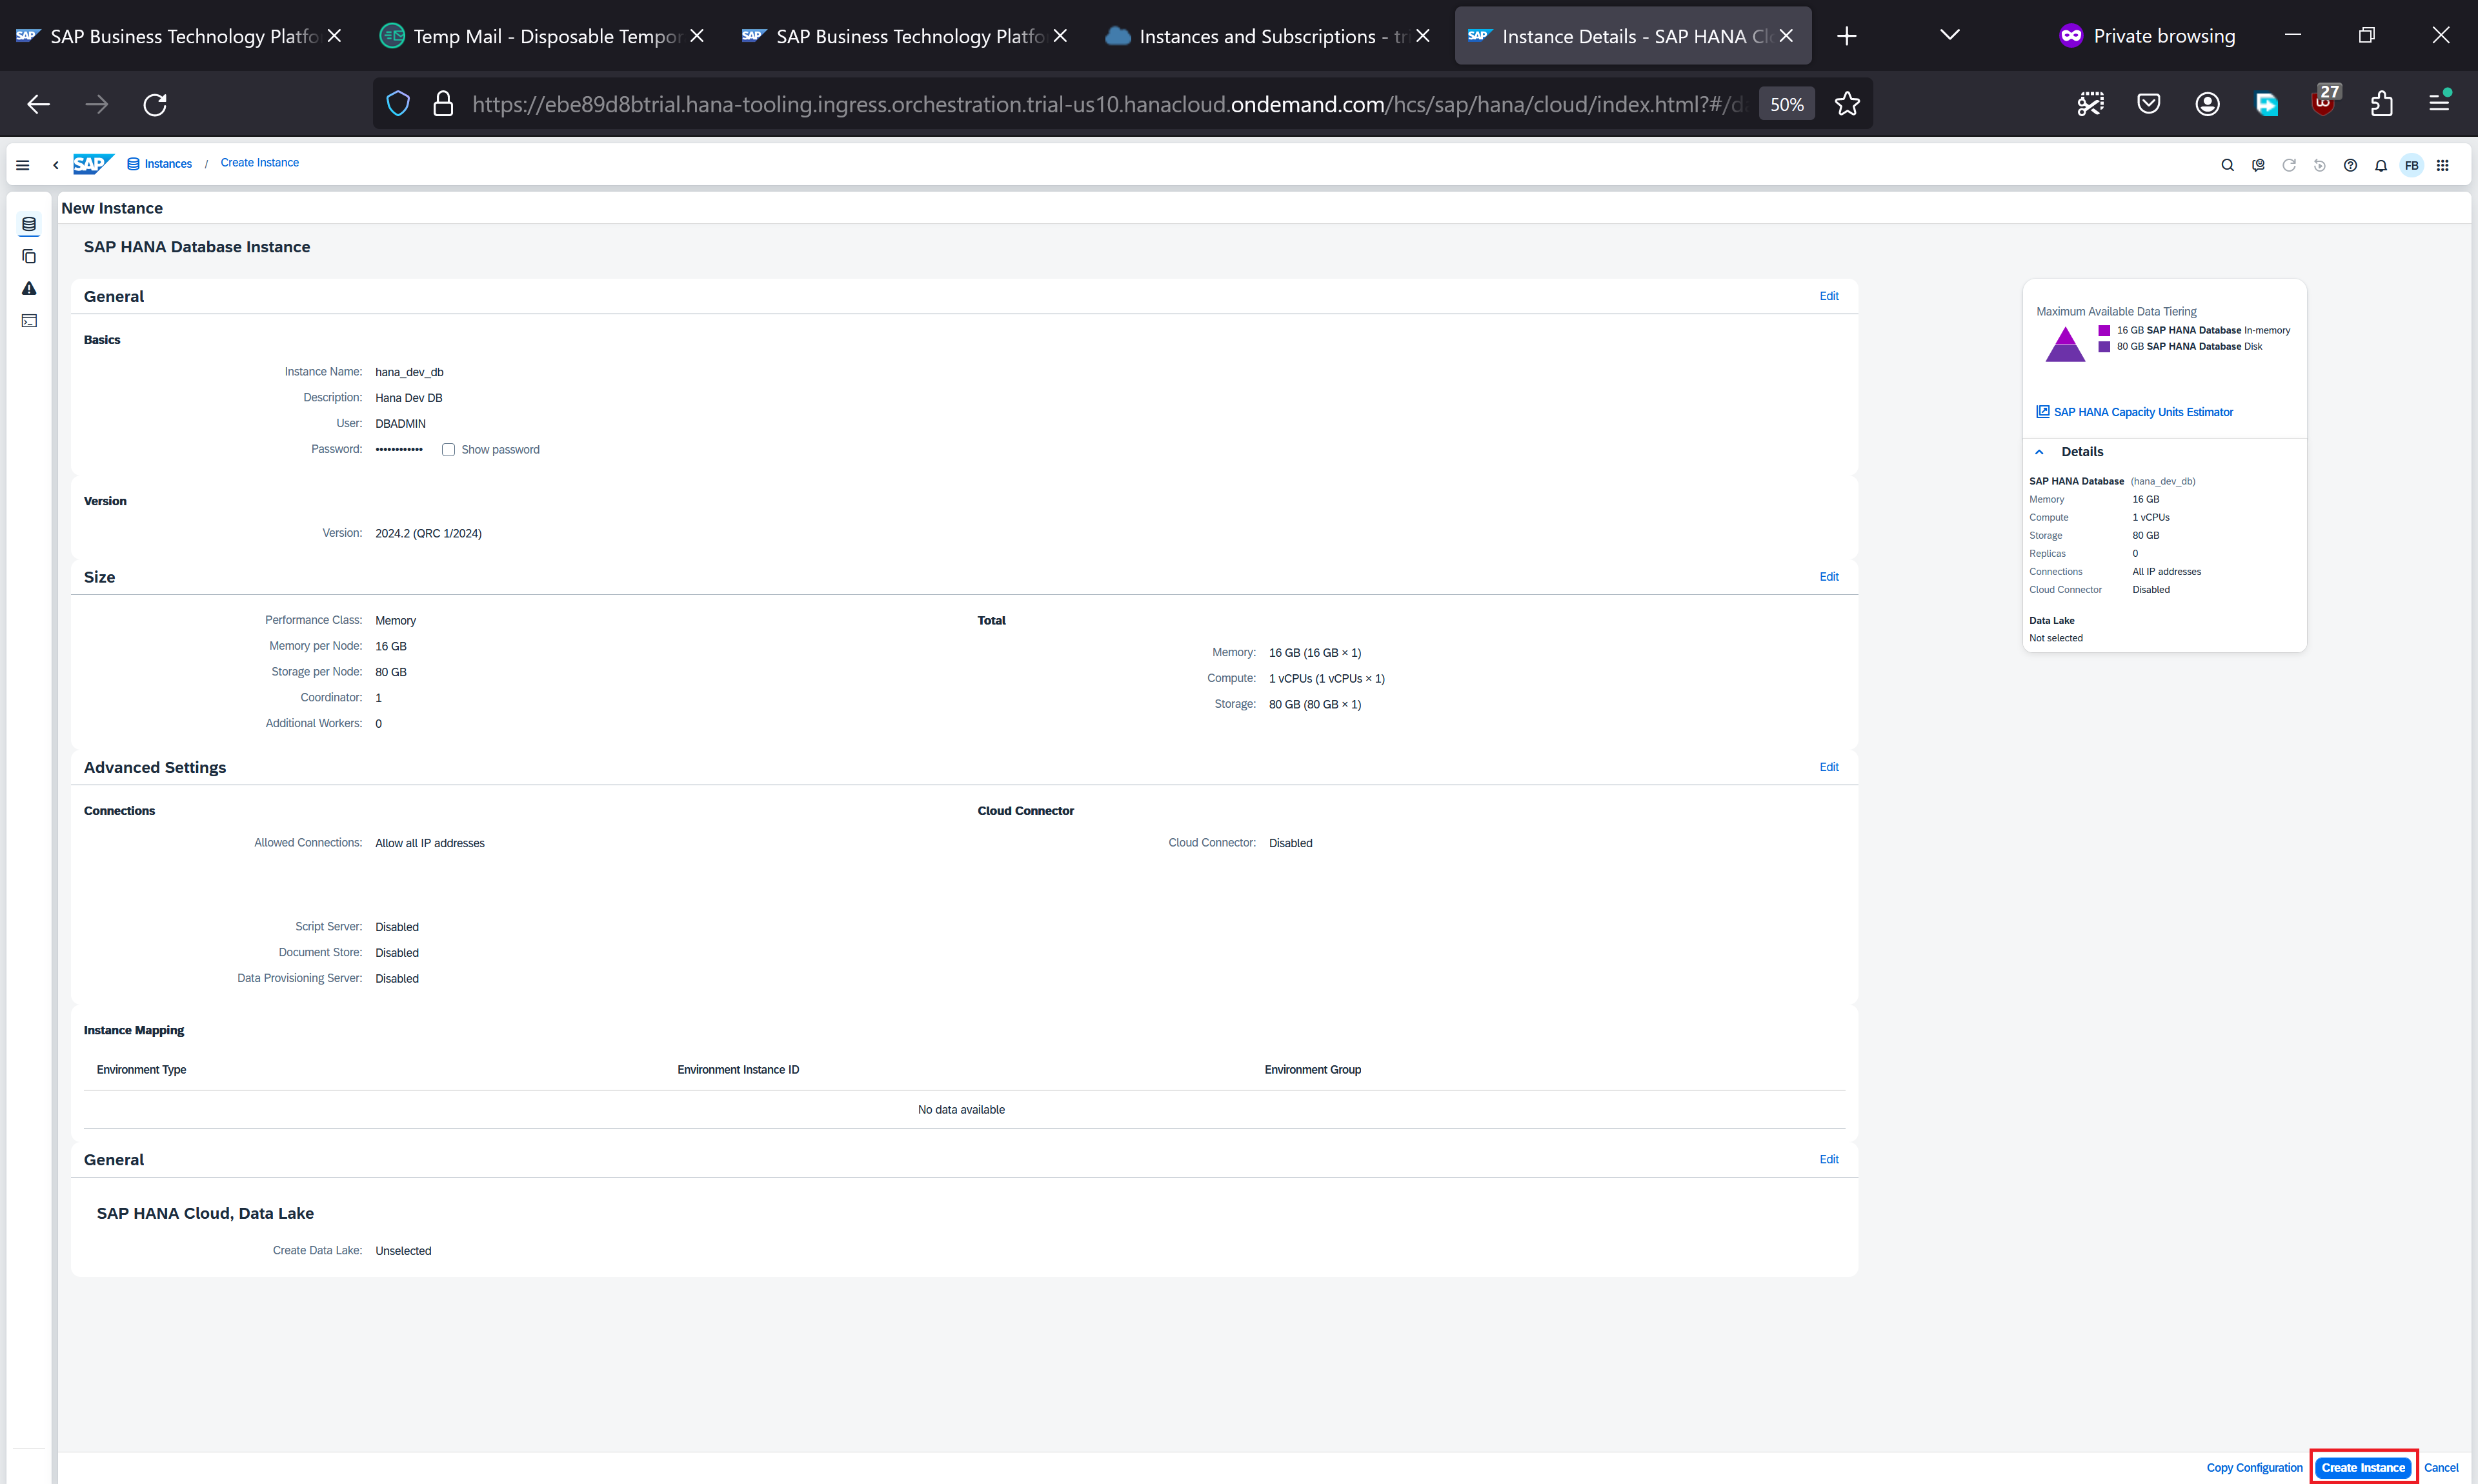
Click Create Instance
Notice that the provisioning of SAP Hana Database instance has started. It takes some time to provision - please be patient.
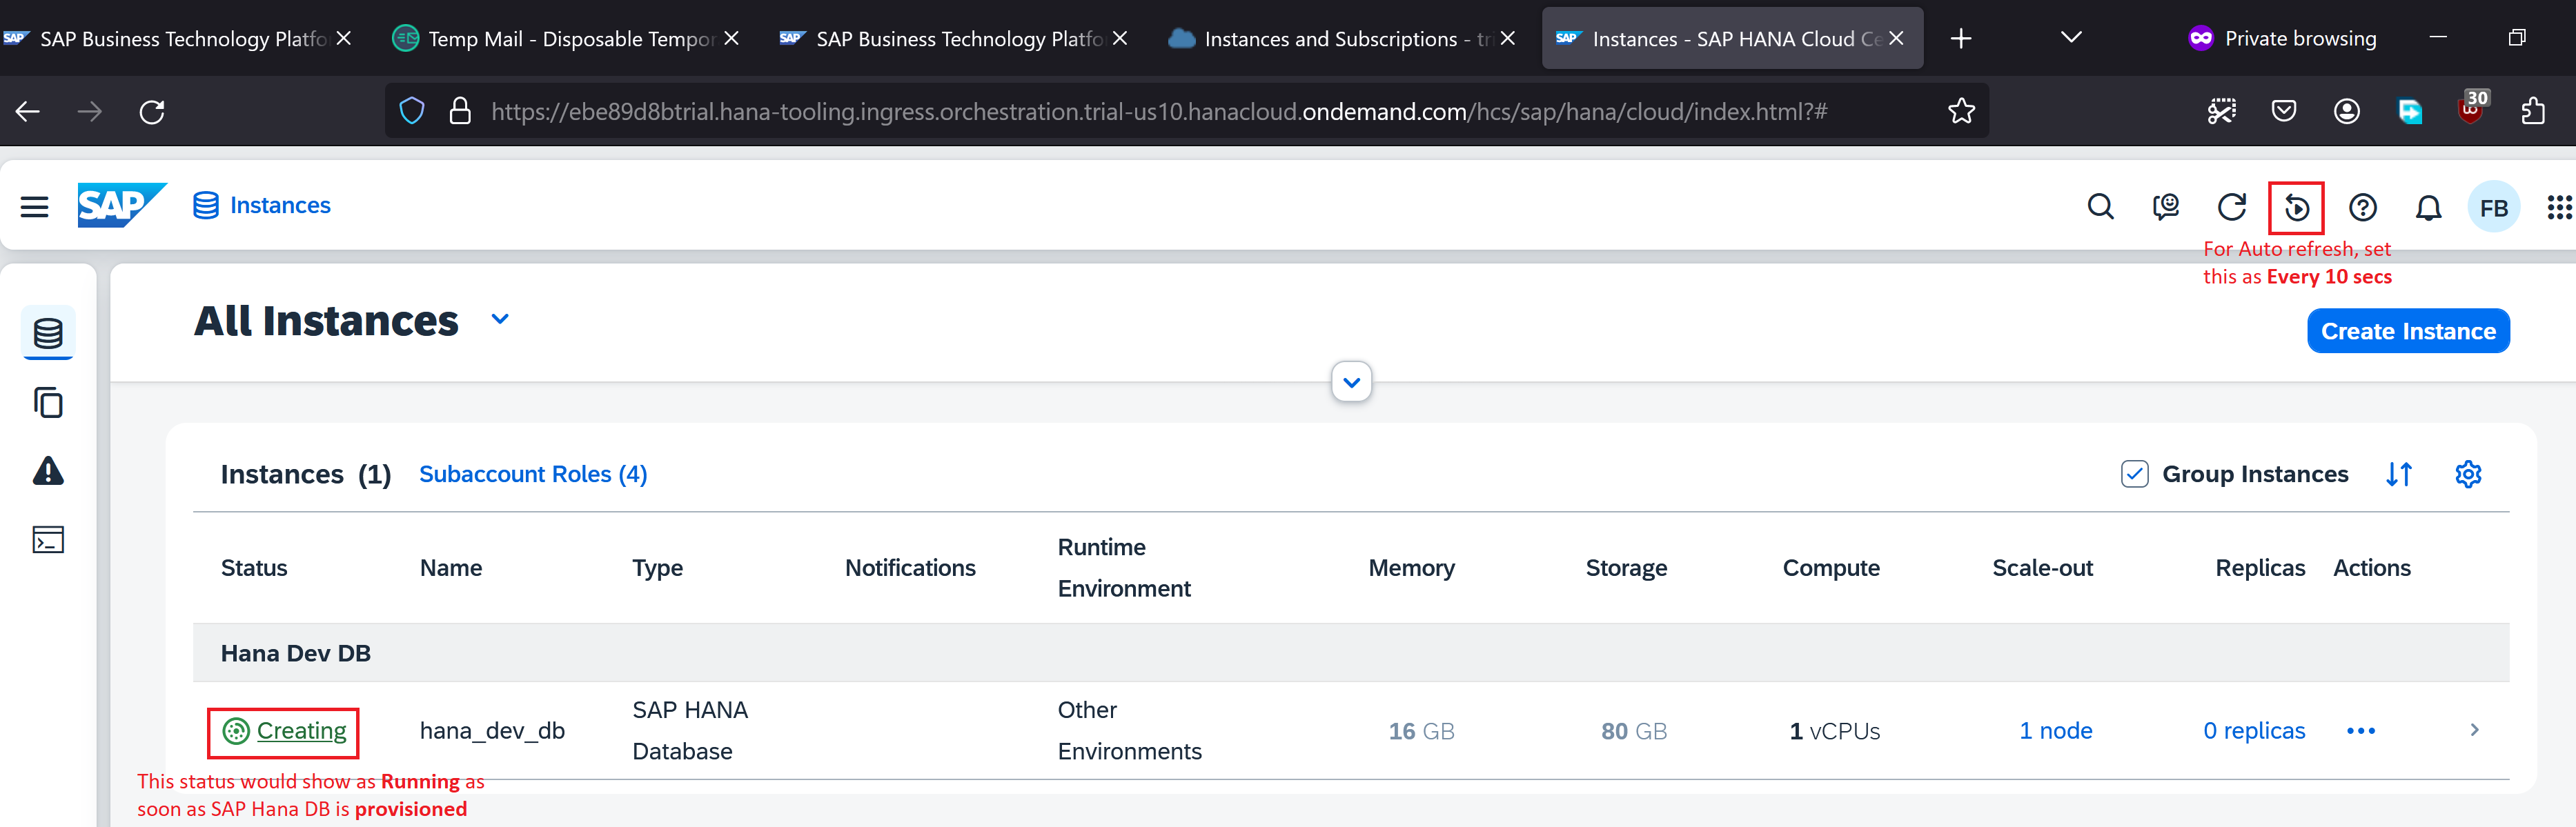
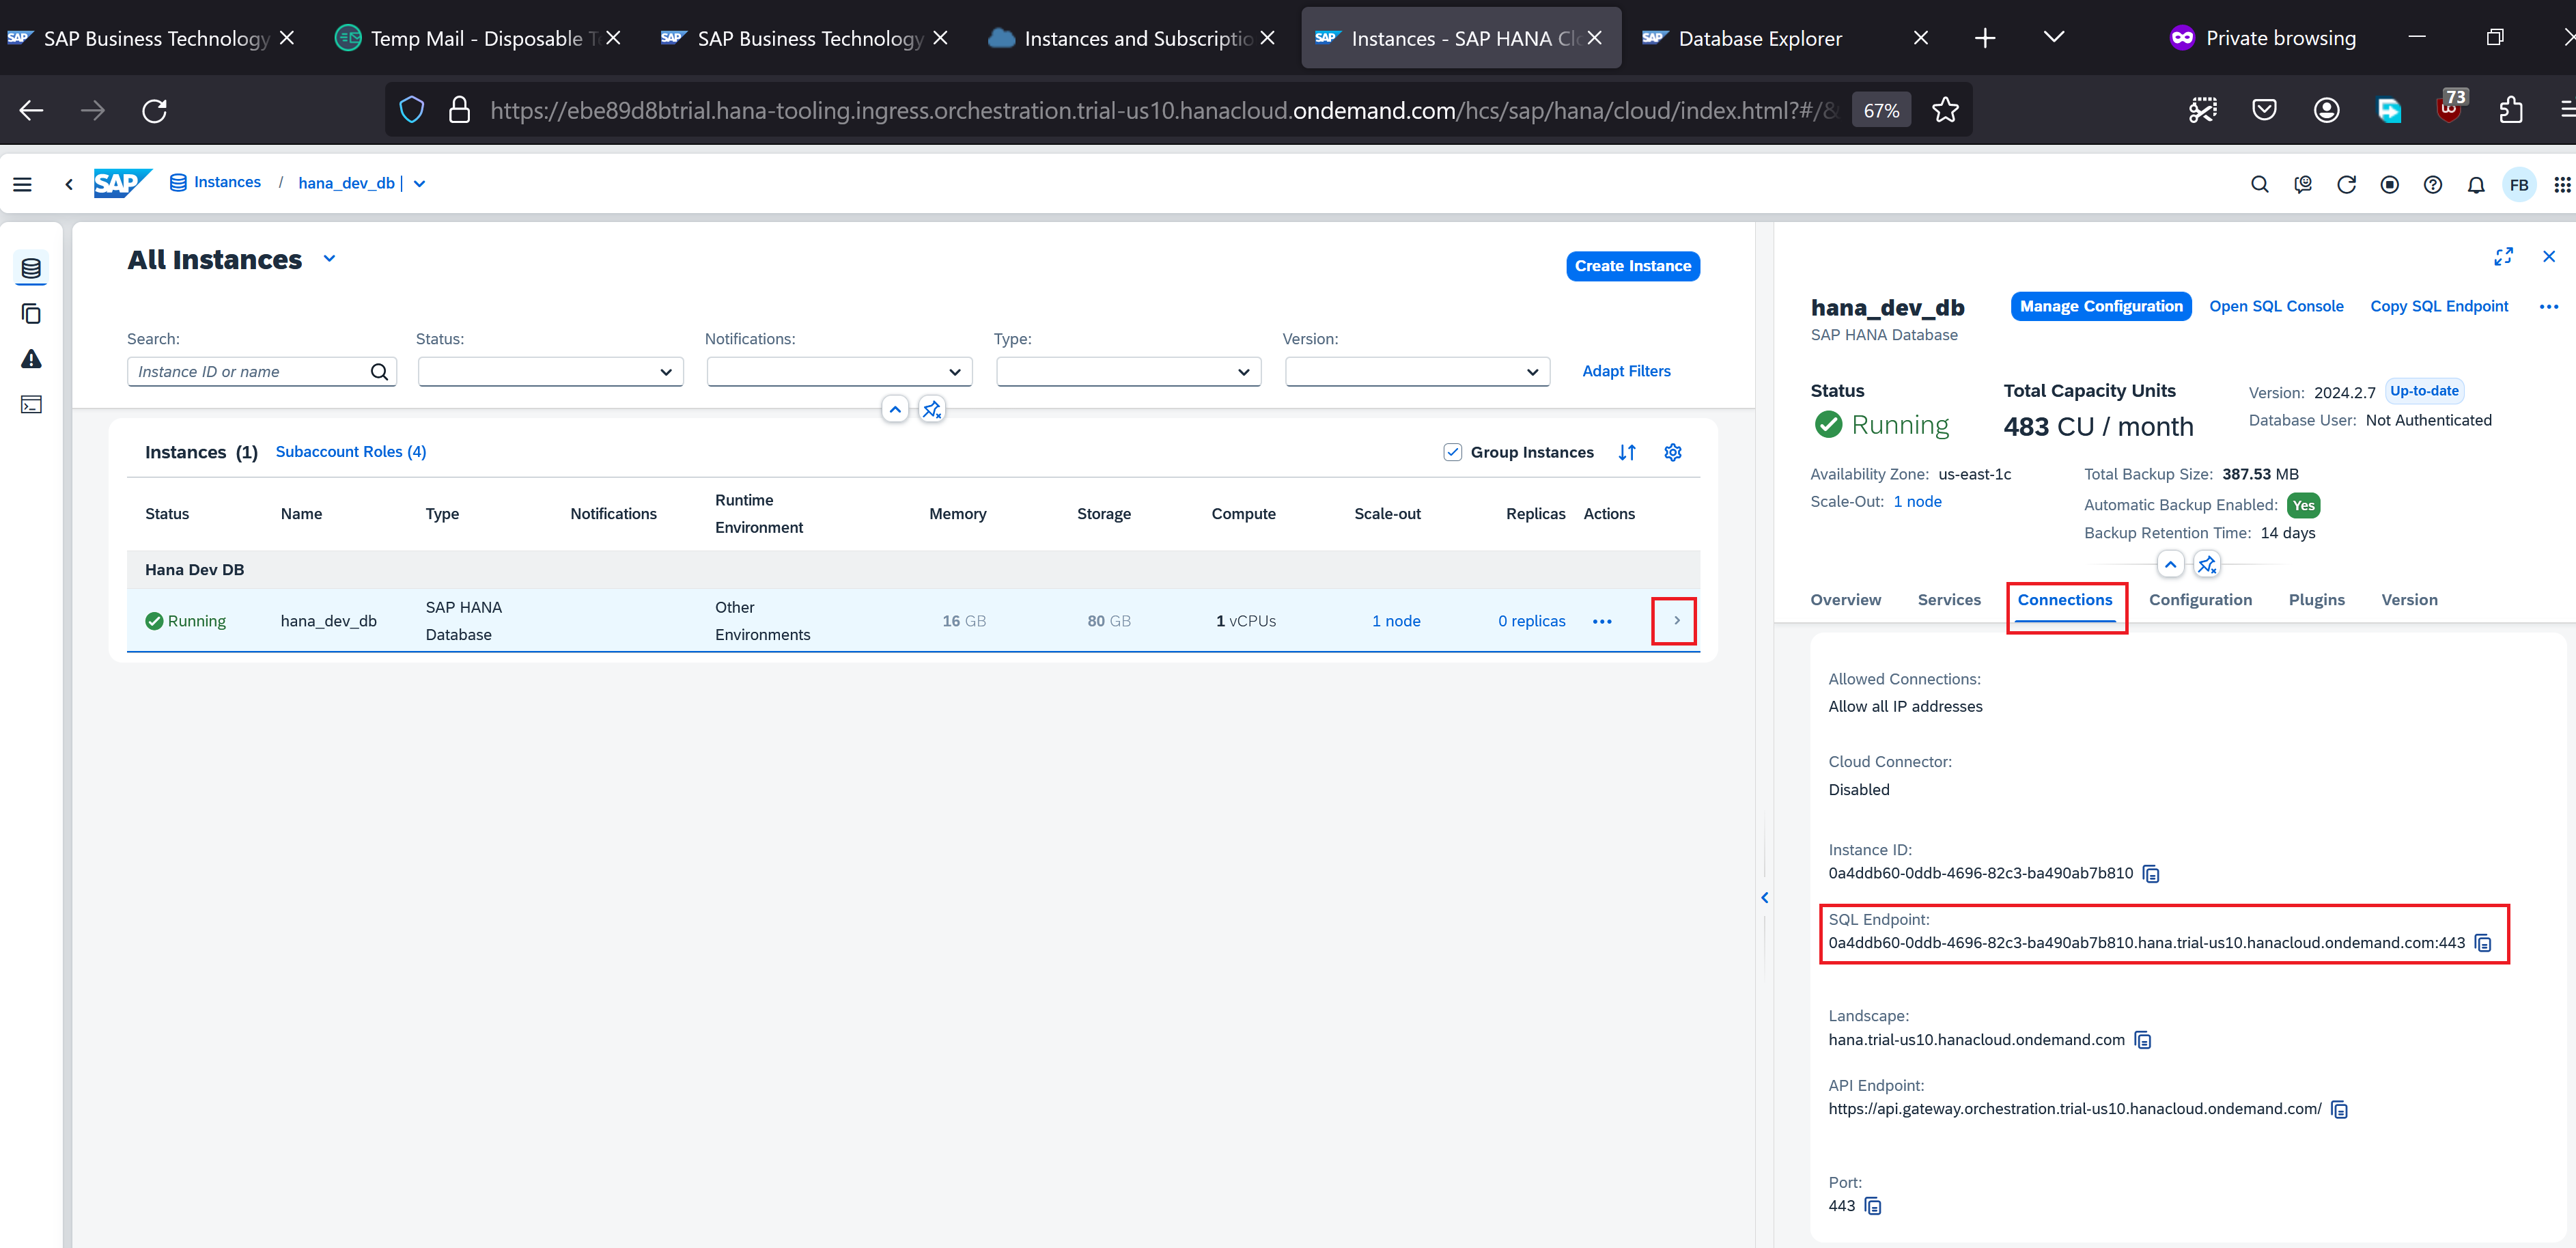
Once the instance is provisioned (status is displayed as Running) we can get the datasource url (SQL Endpoint) by clicking the instance and selecting Connections
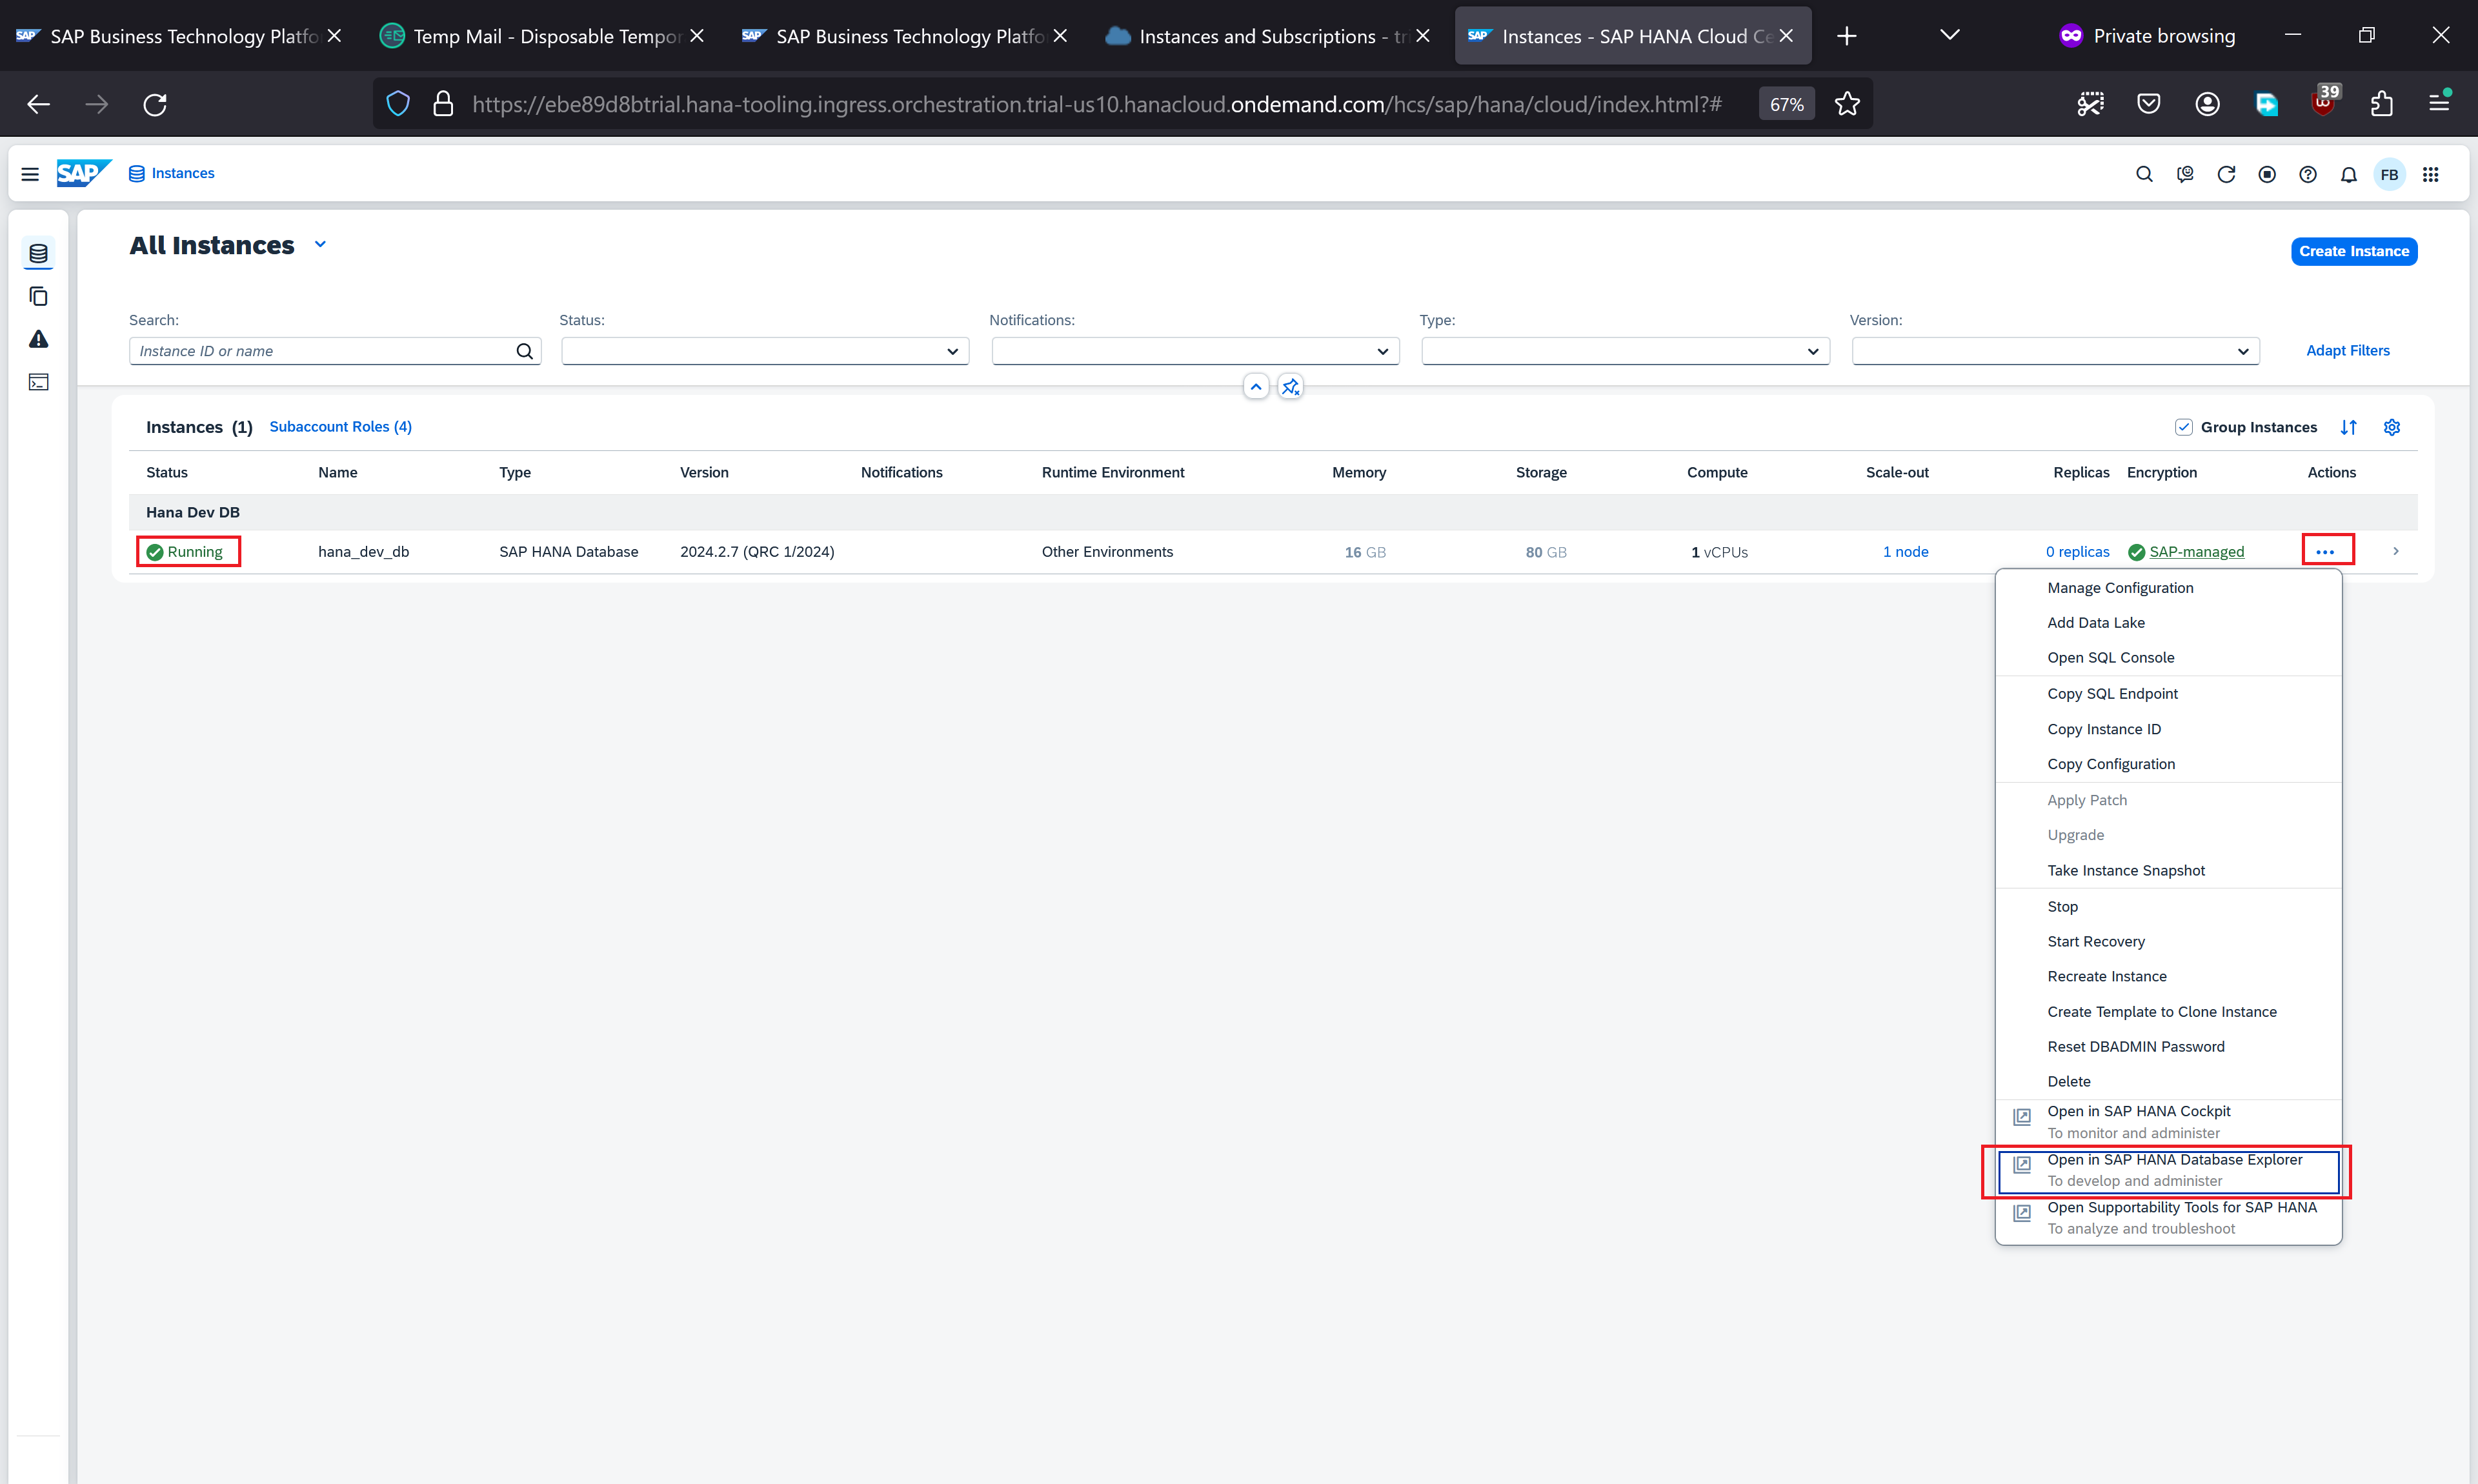
We navigate to SAP Hana Database Explorer by click the …
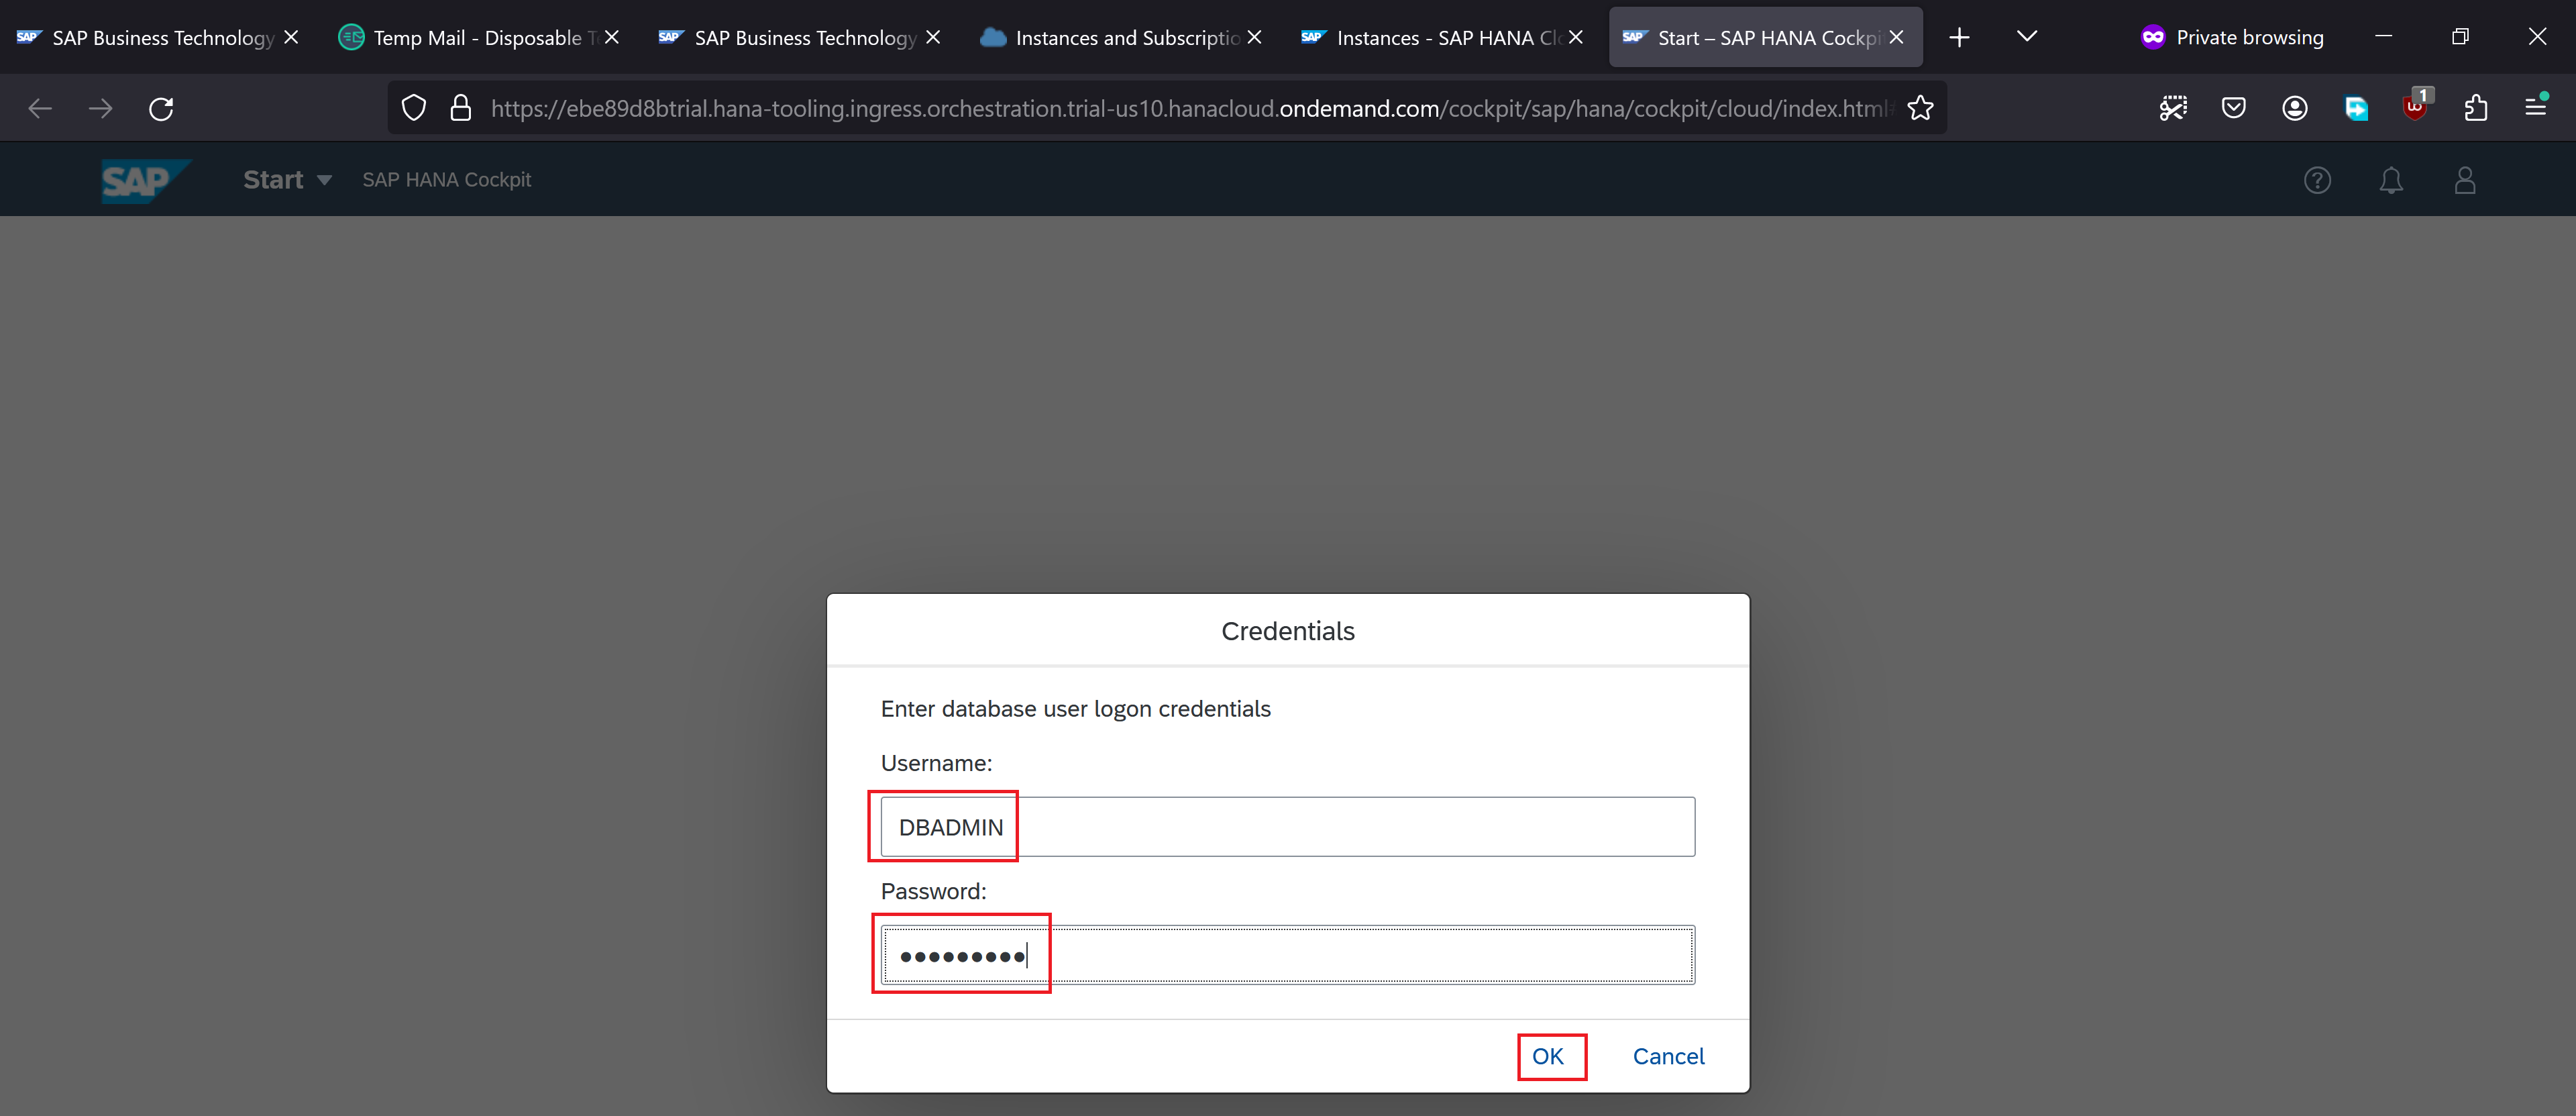
Provide the administrator credentials and click OK
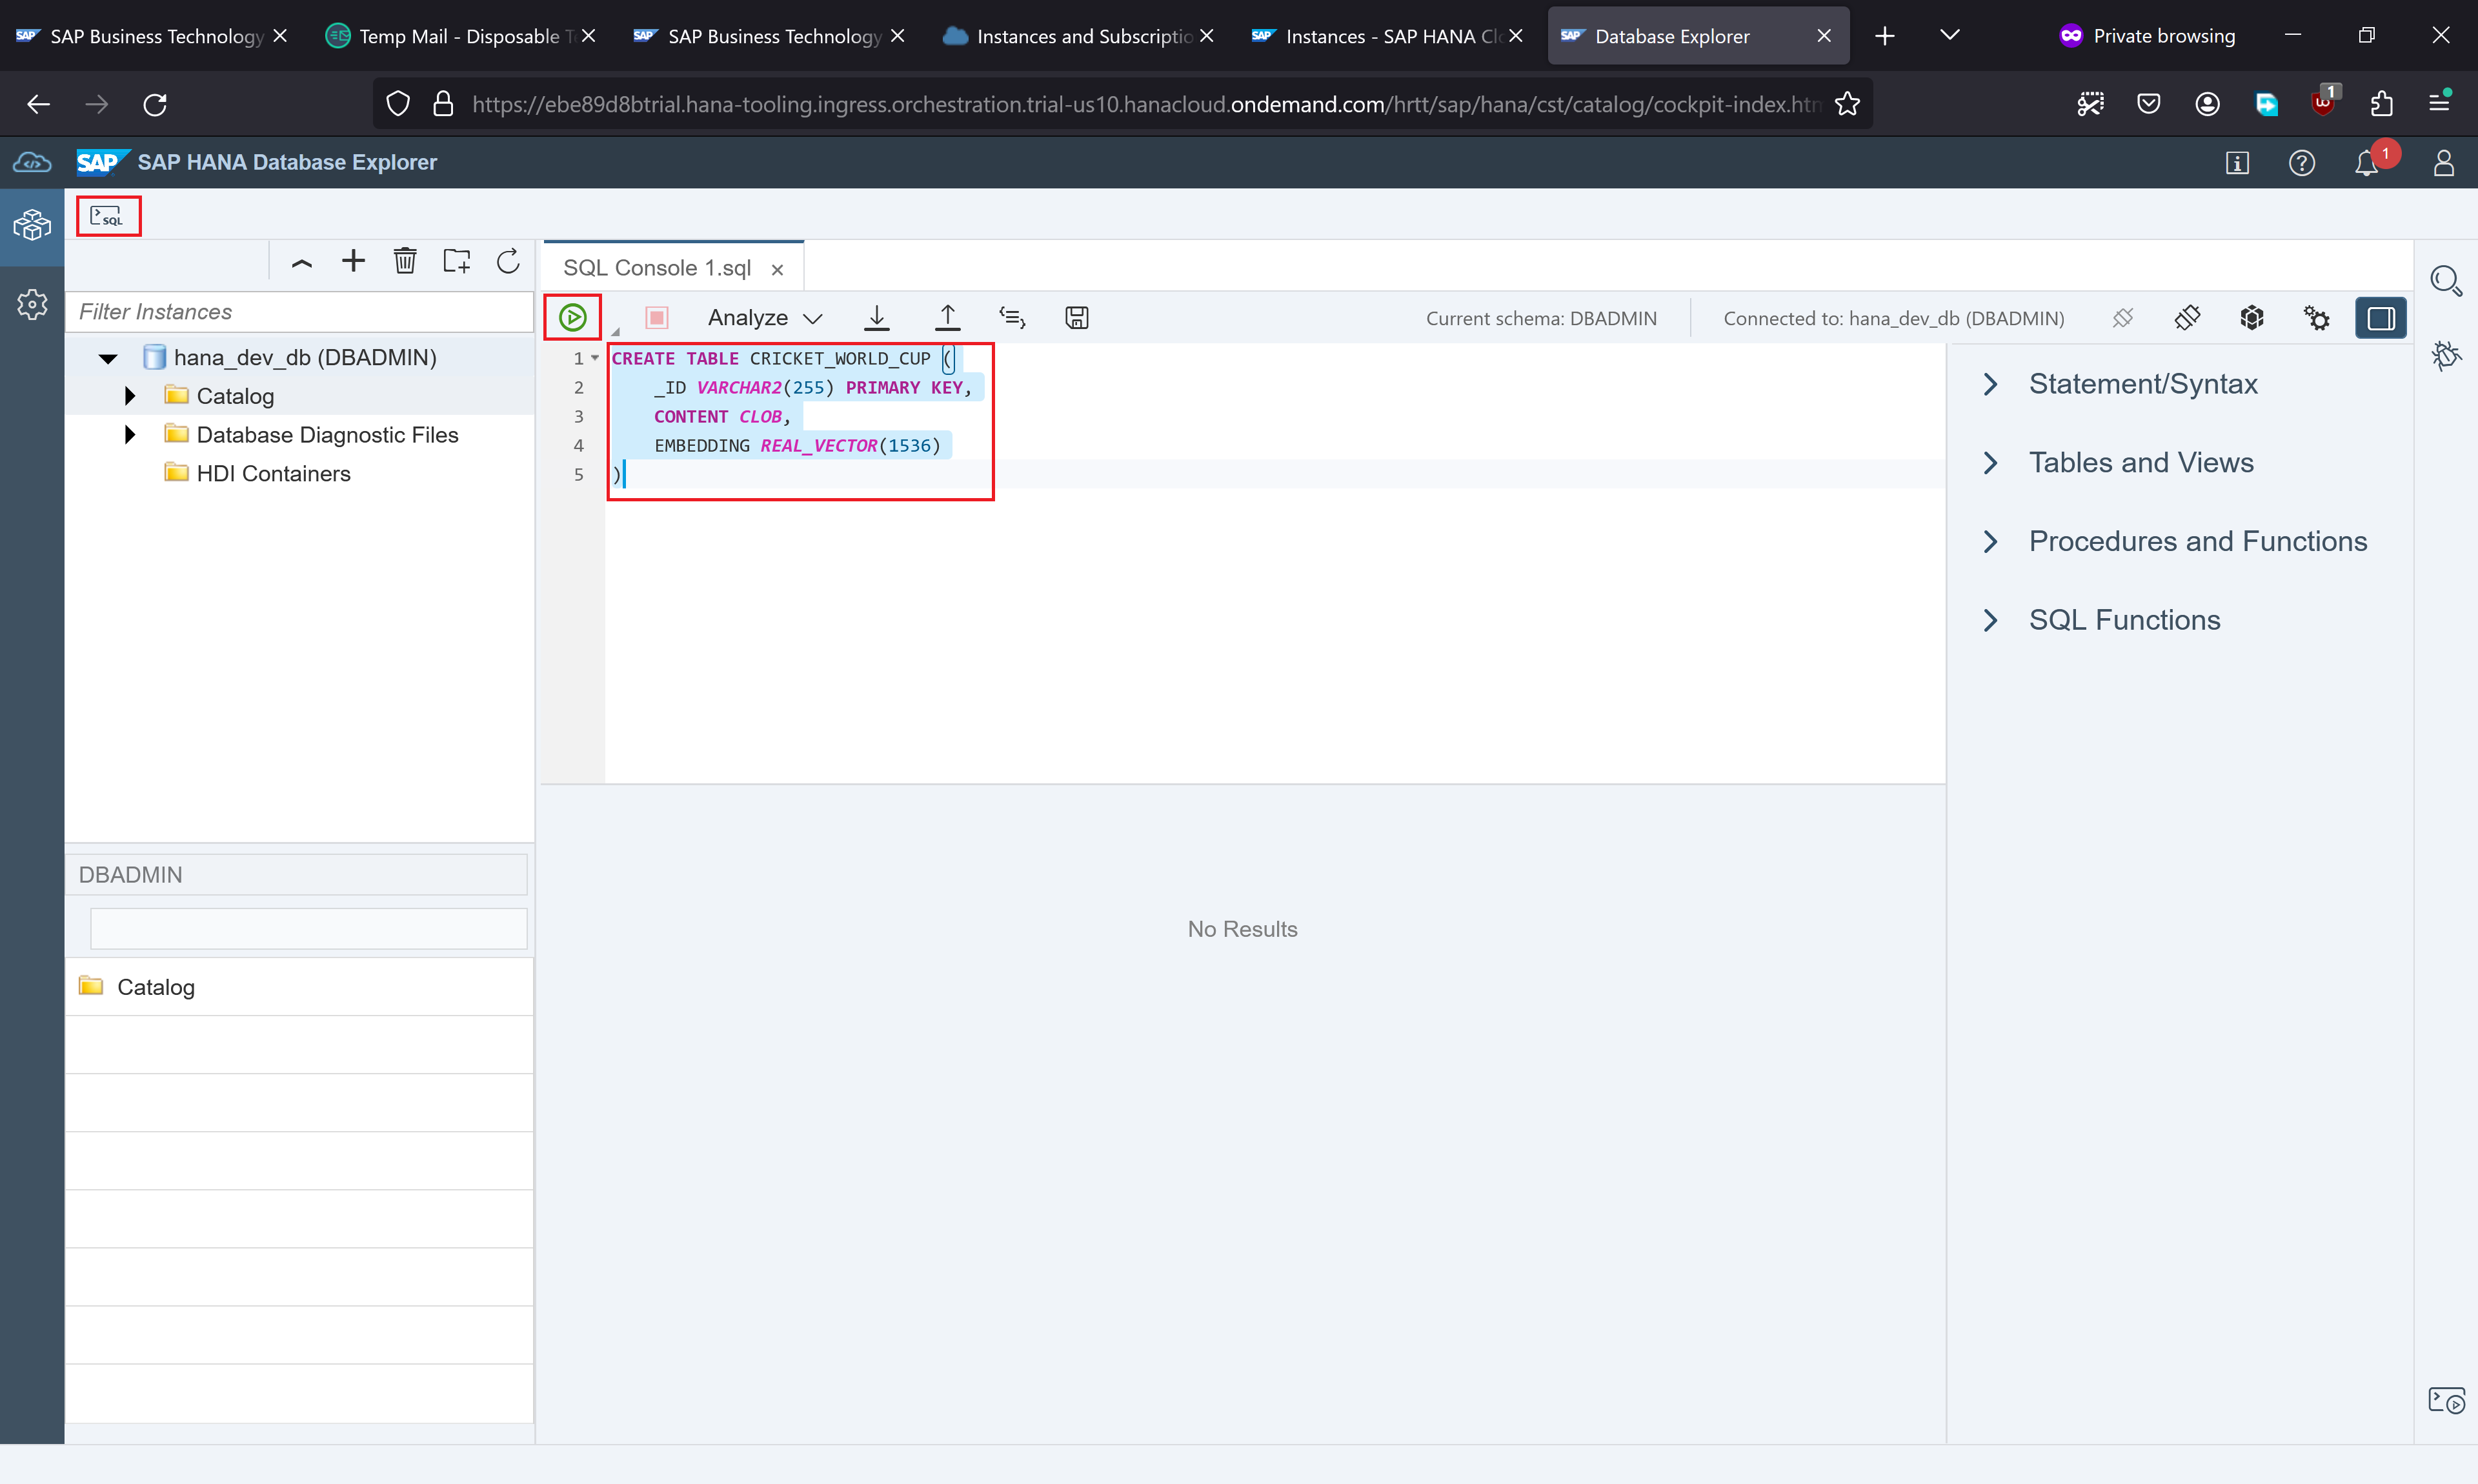
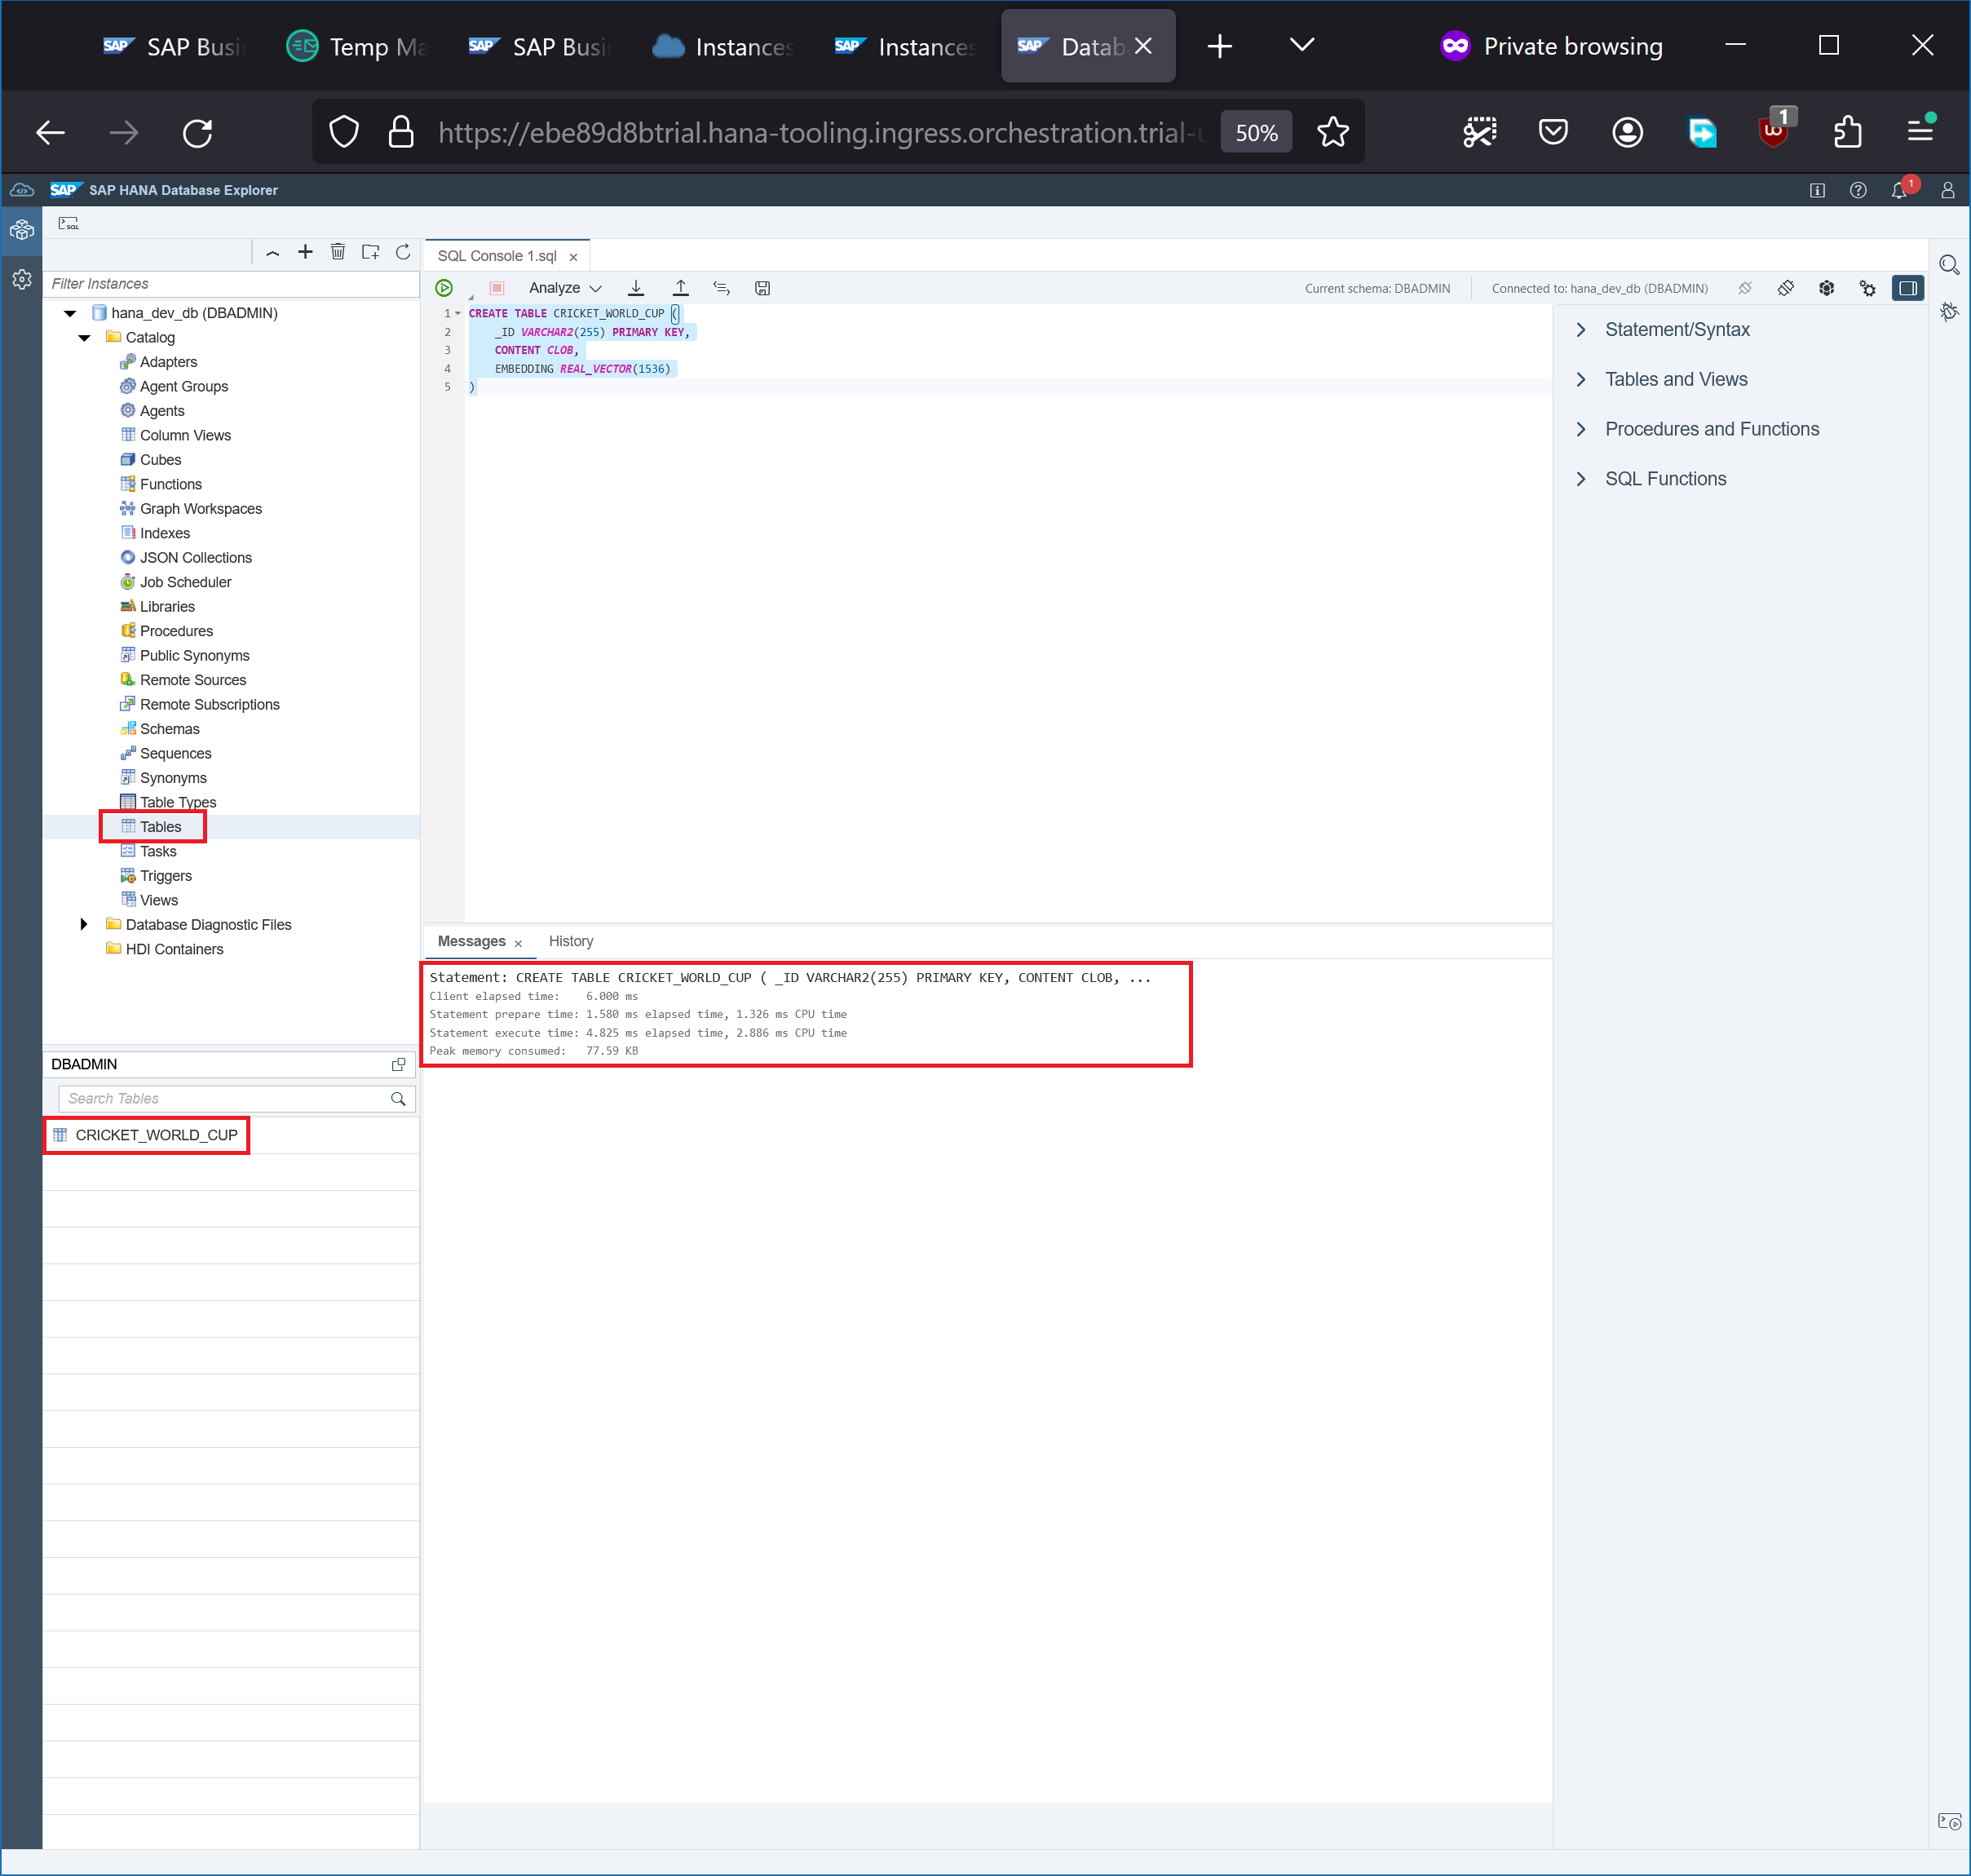
Open SQL console and create the table CRICKET_WORLD_CUP using the following DDL statement:
CREATE TABLE CRICKET_WORLD_CUP (
    _ID VARCHAR2(255) PRIMARY KEY,
    CONTENT CLOB,
    EMBEDDING REAL_VECTOR(1536)
)
Navigate to hana_dev_db → Catalog → Tables to find our table CRICKET_WORLD_CUP
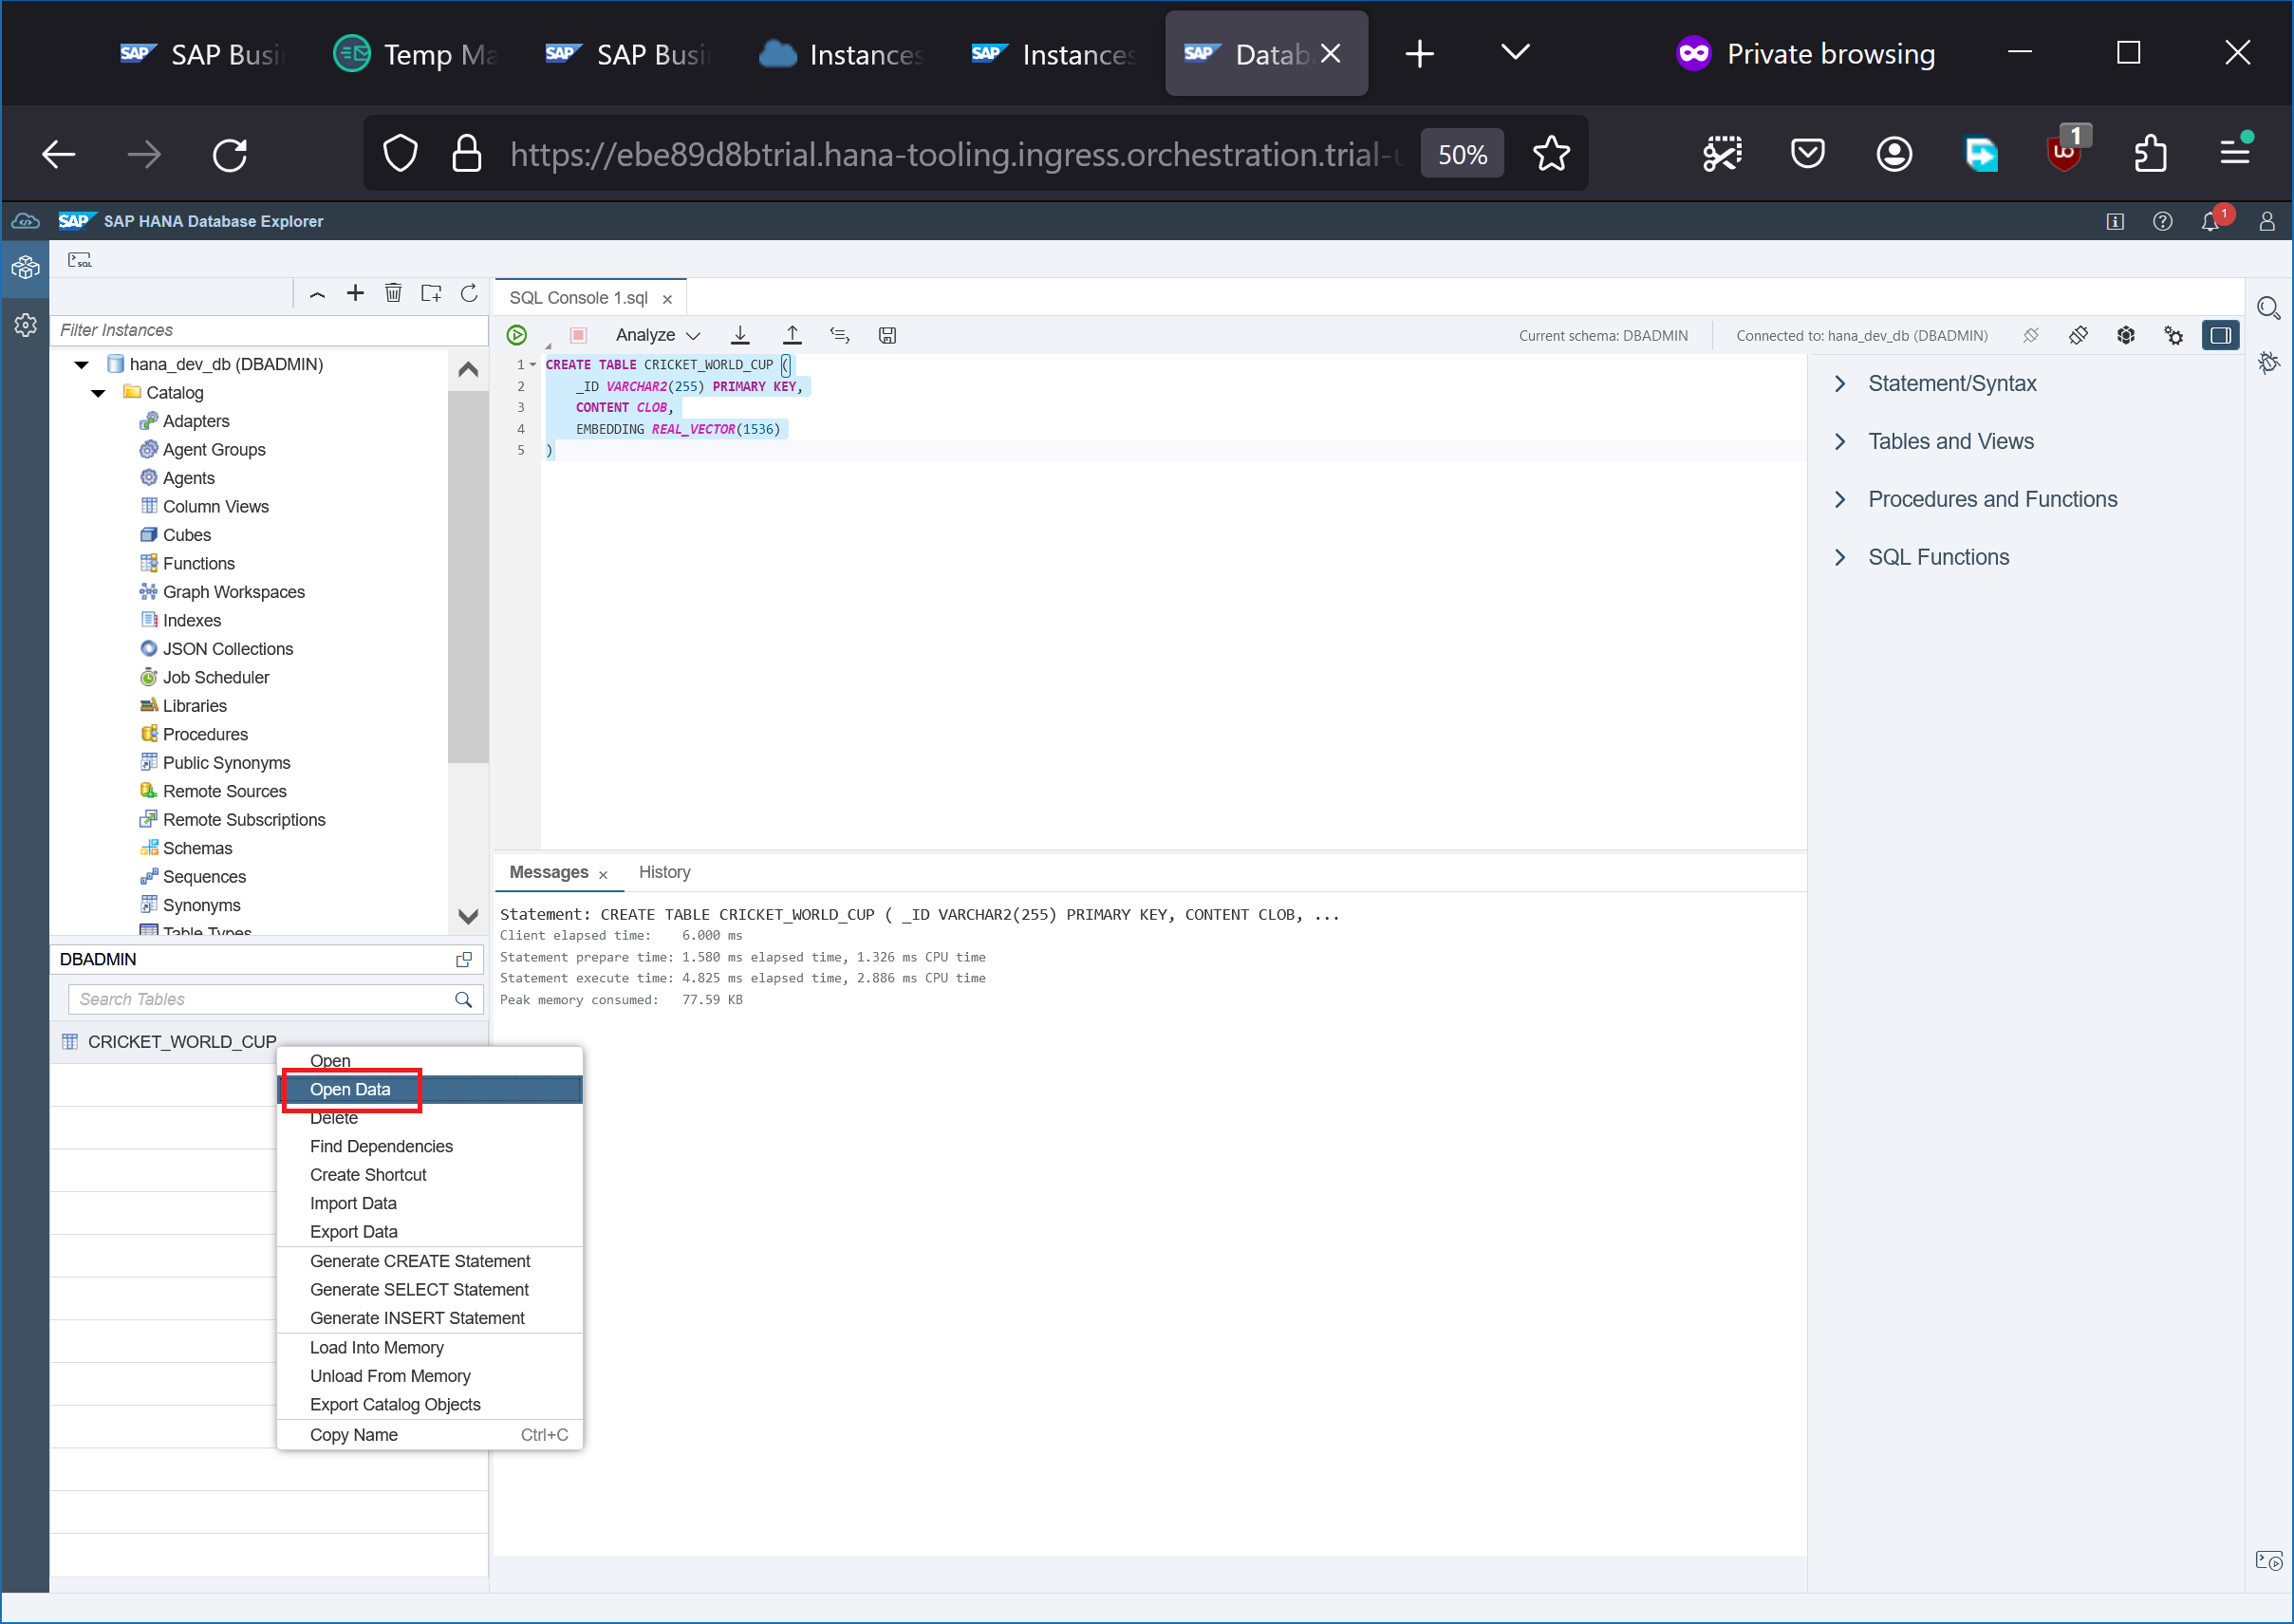
Right-click on the table and click Open Data
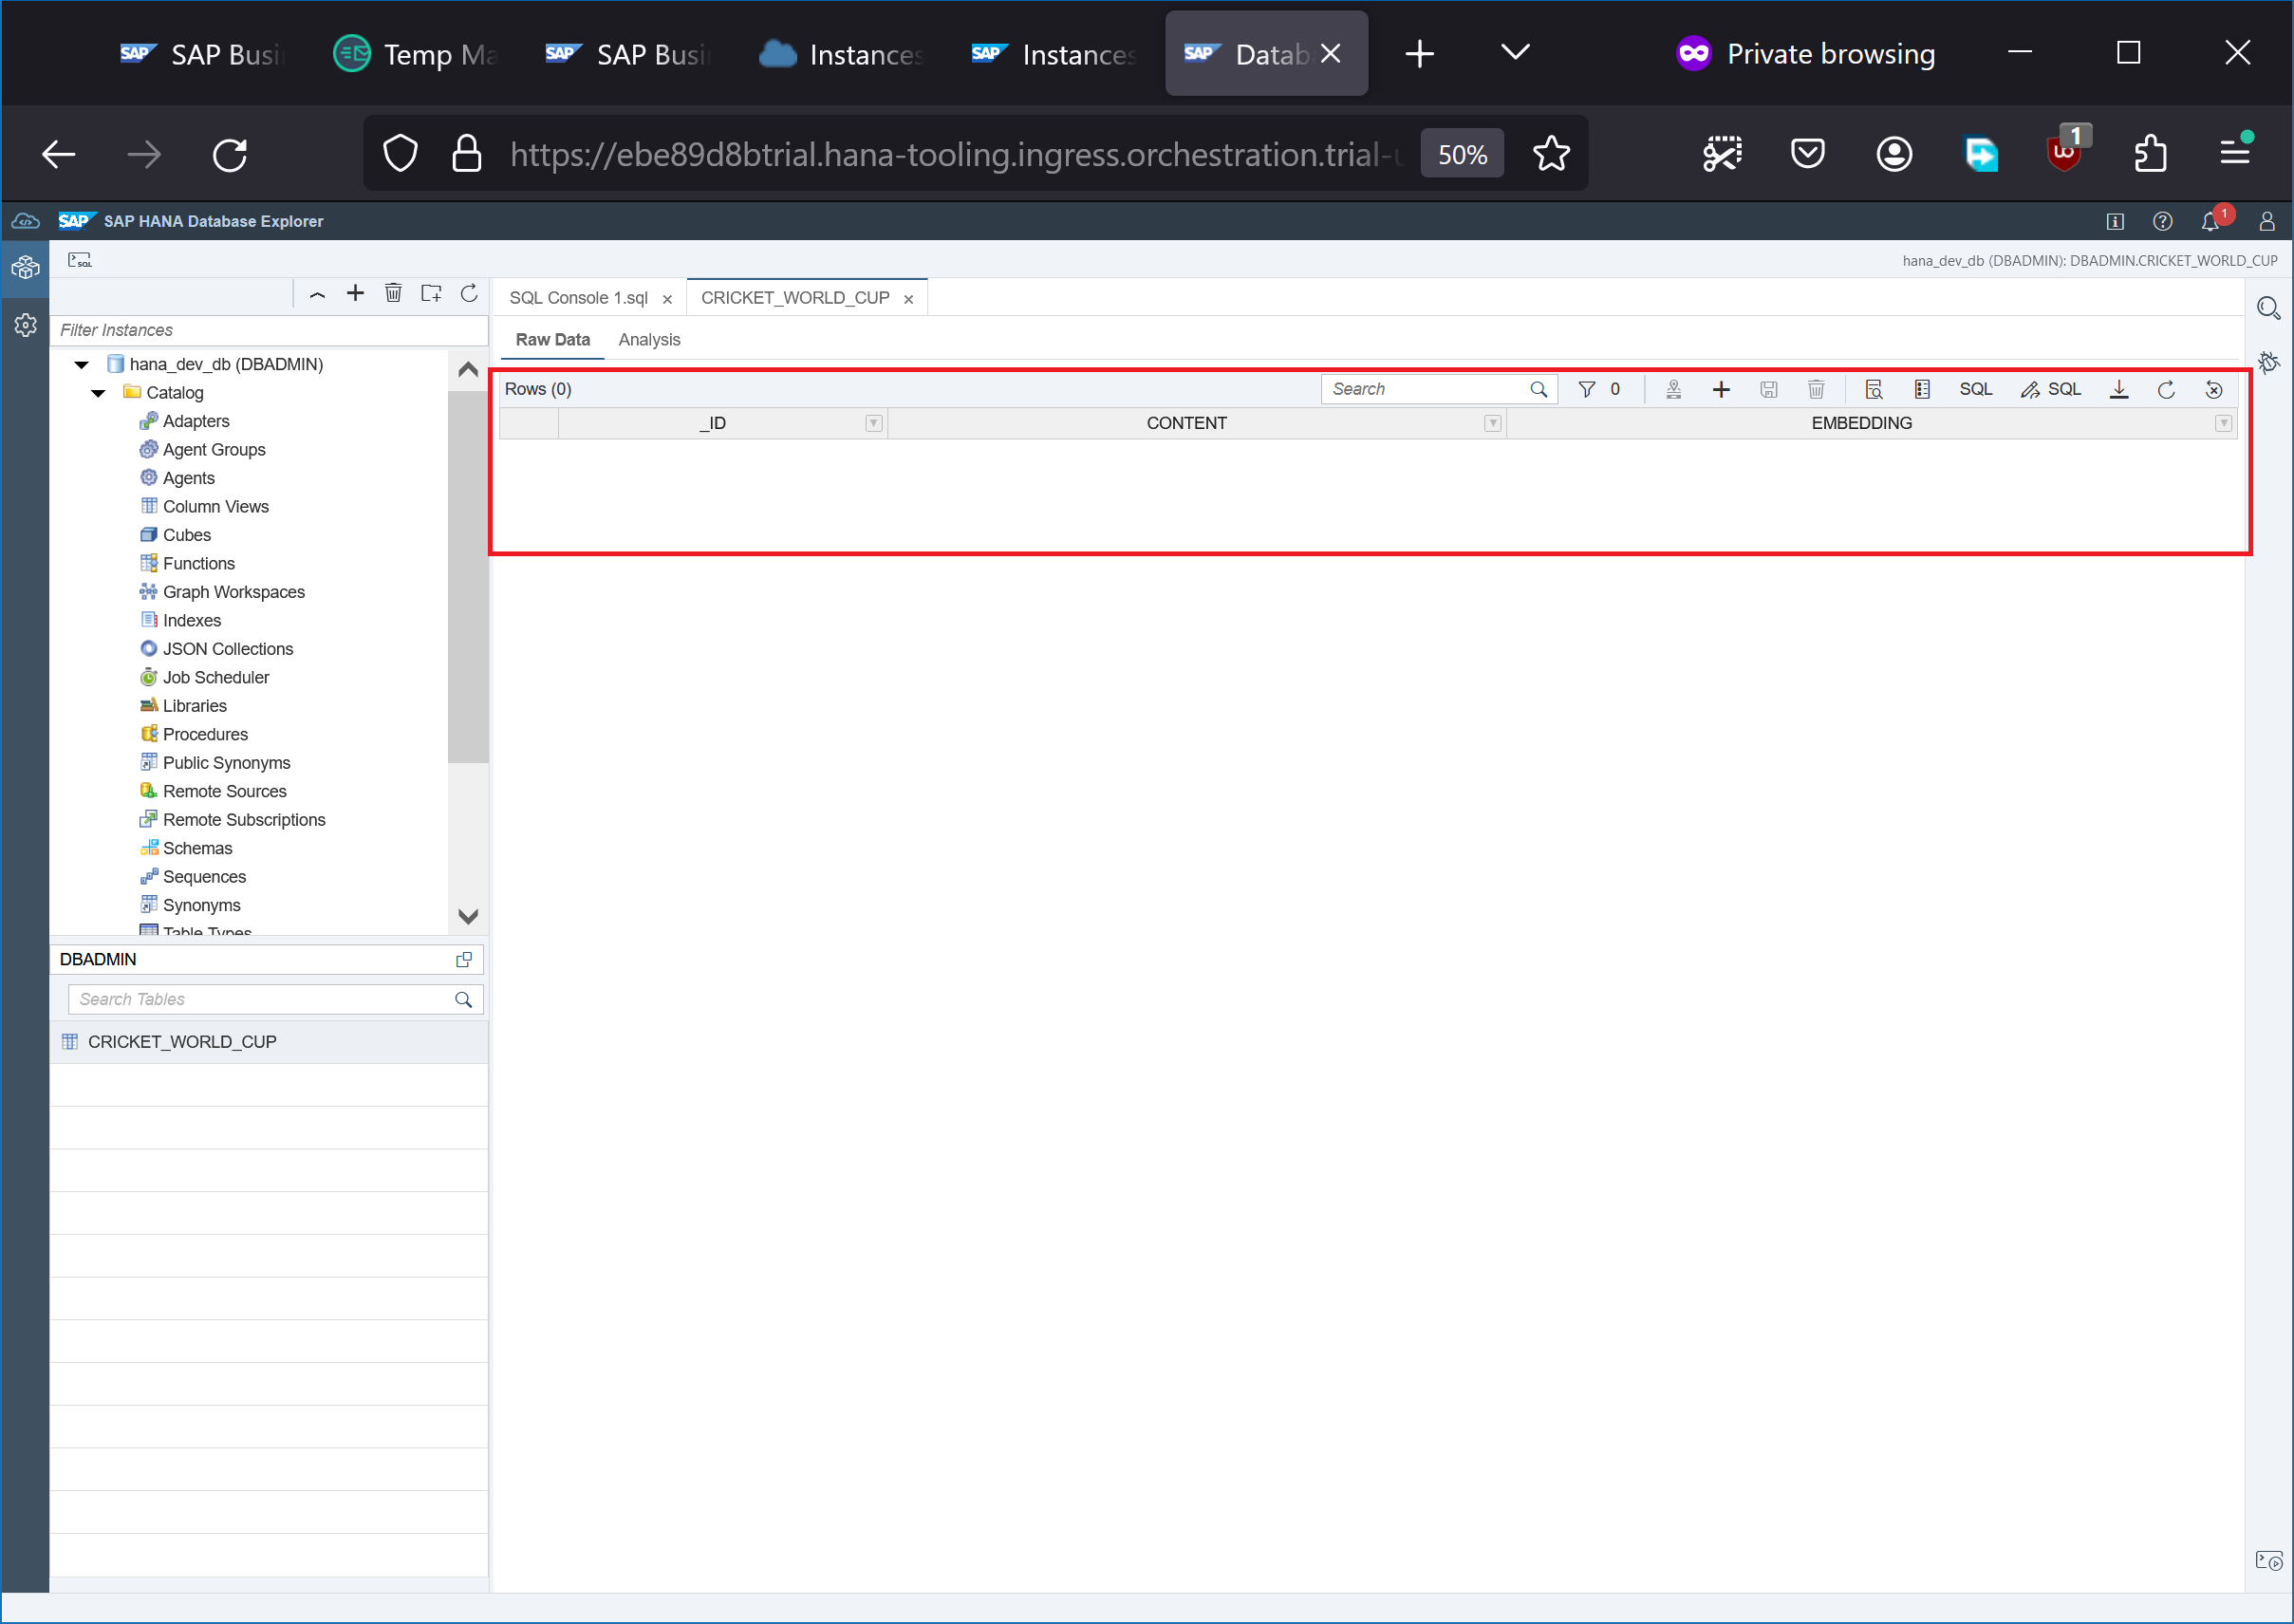
Notice that the table data is now displayed. There are now rows as we didn’t create any embeddings yet.
Next steps: SAP Hana Vector Engine

